
Having finally taken delivery of the base and case from my mate Paul I was now in a position to continue the base work.
A visit to my dwindling plasterboard stash (I need to start knocking someone’s house down or make a visit to the DIY store) provided me with what I needed to build up the left hand side and bring forward the front of the mine so that the base was suitably covered.

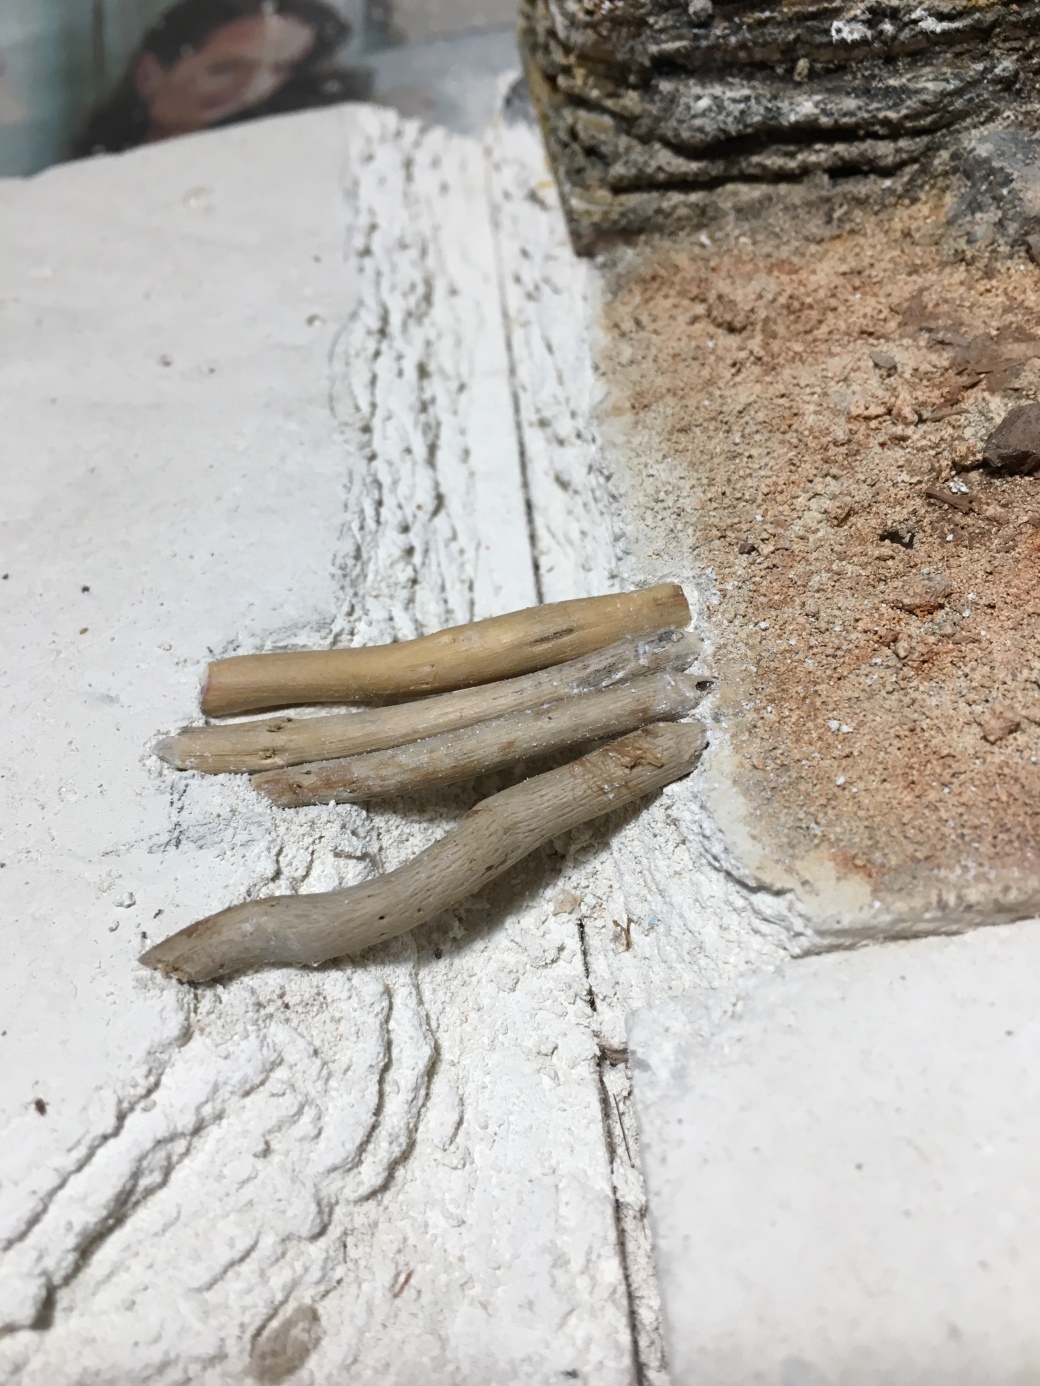
With the plasterboard in situ it was time to carve the plaster board and begin to shape the stream. I figured the miner would need to ford the stream each day and wouldn’t want to get wet so I found a few wooden twigs to create a basic rustic bridge.
Next up was getting a load on base debris stuck down. I mainly used the plaster bits which were removed from the carving process along with a little fine sand and dirt and small gravel swept up from the road outside our house. Oh, and a few stones from the front garden! A pencil outline was drawn around the house to make sure I didn’t stray into that area.


After being stuck down with watered down PVA and allowed to fully dry for 24 hours it was time to get some painting done.
I don’t own an airbrush and have no plans to get one, it is well beyond my patience level to learn how to use one. I’ve always stuck with brushes and oil paints thinned with white spirit to paint ground work and I wasn’t about to change method now.


Time to let things dry once again. Next week the aim is to get the water effects done on the, stream, put the log bridge in place, lay down a little grass and a few plants and begin work on a tree.
TIM

Looking great TIM, I’m really enjoying this series of posts your doing, its so intresting to see how you are putting things together. As when I looked at the 1st photo of this post I just did not get it, I could not see where the stream or cottage or anything would be, and yet the final it all makes sense to me. So thanks for sharing how you are doing this, I know you where not sure if that was best at the time ornot, but I for one am really finding these intresting.
LikeLiked by 3 people
Thank you, glad you are enjoying it. I find it hard to know where to strike the balance for this sort of post so appreciate the feedback. 🙂
LikeLiked by 1 person
That’s coming along really well, Dave! 🙂 I must admit, I hadn’t worked out where the cottage was going to be located! And seeing all you modelling materials in the background reminds me that, for the first time in 40 years, I’ve run out of milliput!
LikeLiked by 3 people
Thanks John. Fortunately my daughter bought me some Milliput for Christmas otherwise I would have run out too!
LikeLiked by 1 person
Excellent looking groundwork TIM, how long would you say the painting takes to do with the oils, and what’s it’s drying time like, as I am very tempted to give it a go ? Also do you vary the colours on the base or just add more thinners to get the different tones, and if it is different colours do you do it while the first shade is wet or let it completely dry ? Sorry for all the questions, but it helps the understanding of the process
LikeLiked by 4 people
Dave beat me to my own questions! Inquiring minds want to know these things!
LikeLiked by 4 people
Have just answered Dave’s questions Eric which will hopefully answer yours too but if not ask away.
LikeLiked by 2 people
Fire away with as many questions as you like Dave and I will do my best to answer them all. With hindsight I should have added more detail to the post!
OK, all the oil paints are Winsor & Newton, the Winton range (37ml tubes) and the 5 colours used were Raw Sienna, Burnt Sienna, Yellow Ochre, Burnt Umber and Titanium White. If the tubes are brand new and very oily then I would suggest putting some of the paint on a piece of paper first to let some of the oil soak in.
Using a small container (I keep the plastic packaging which comes with Reaper miniatures, typically they are about an inch by an inch and a half and about half an inch or so deep), put a about half the amount you would put on a tooth brush or less in the container and then add white spirit. Mix and then thin down until it is heavily diluted. Do this for each colour except the white so you now have four seperate diluted oils. You can always buil up the colour in layers or add more paint if the result is not working for you.
For this model I added white to the Raw Sienna to get a little more of a cream colour and this I used as my base colour. After laying down the base colour it is then about the spotting technique and simply dabbing randomly. The diluted oil will dry quickly on plaster board. Firstly it will soak in but also the white spirit will evaporate too. The white spirit also matts the oil. Don’t wait for anything to dry, including the base coat just keep adding and allow the colours to mix and soak in. I tend to find it is best to work in smaller areas and just move across as you go. If you have got rocks and areas of deep shadow I tend to add more of the Burnt Umber and/or Burnt Sienna depending what look I am after. This diorama has minimal rocks but if I had more I would also make up a solution of black to get into the rock cracks as well.
When dry, and it wont take long, I dry brushed with a little of the base colour (but not diluted), Yellow Ochre and then with the White. Some people don’t like white for dry brushing but I am not one of them. I think done sparingly it make things pop.
All in all the colour choices and mixes are personal to what you want to achieve but the earth colours and the most likely to be used.
Hope all this makes sense but if not ask away.
LikeLiked by 6 people
Thank’s Tim, answers my questions perfectly
LikeLiked by 3 people
That is coming along nicely, it’s going to be a fair old size once it’s finished, as stated above I’d like the answers to those questions too.
Oh and I’ve now listened to your Podcast interview with IRO (well a few days back, but I was still behind), Great stuff, really enjoyed it, and thanks for the mention too.
Cheers Roger.
LikeLiked by 4 people
Thanks Roger. Glad you enjoyed the podcast as well. Have just replied to Dave’s questions so hopefully that will answer yours too but if not feel free to ask away. 🙂
LikeLiked by 3 people
Looking great and really like the way this is coming together. Very impressive landscaping and I don’t think that using an airbrush could beat what you are accomplishing with your tried and true methods. And you’re using/recycling so many disparate elements that makes this so cool too. A thought on your sheet rock shortage. My guess is that your local hardware/home improvement or whatever it’s called over there has materials that get damaged in the normal course of work. Here we call it the “scratch and dent” type stuff that can’t be sold at full price but would serve you perfectly. Really enjoying the WIP posts on this and I look forward to many more Dio-Bolical Monday posts.
LikeLiked by 4 people
Thanks Mark, glad you are enjoying it and that’s a good shout on the DIY front, certainly worth an ask once we are out of lockdown. 🙂
LikeLiked by 2 people
Yeah, lockdowns do suck.
LikeLiked by 3 people
That looks bloody amazing, mate. And after I looked more carefully, I saw the pencil outline. And there I was thinking it was your sarcastic sense of humour writing about putting a pencil outline around your property so you don’t accidently stray outside and break lockdown…
LikeLiked by 1 person
Haha, not this time but let’s not rule out the sarcasm for another post!
LikeLike
That looks great. I really like the groundwork you did. I’d not considered using my oils like that to paint terrain but after seeing this I will give it a try when the oppertunity presents itself.
Cheers,
Pete.
LikeLiked by 1 person
Thanks Pete. Like everything else it’s just another technique to try and continue using if you like it.
LikeLiked by 2 people
I’m in the surprised and impressed by this update camp as well. I wasn’t expecting a whole other base to be added to this one! The mine was already quite impressive on its own but now this is going to be a really ambitious diorama I’d say. The groundwork looks great and natural (which is no surprise!) and I’m anxiously awaiting to see what is added to the diorama from next 🙂
LikeLiked by 1 person
Thank you. Still a reasonable amount to do but so far so good.
LikeLiked by 1 person
Really enjoying these posts mate, even though I’m going backwards hehe
LikeLiked by 1 person
Nice to hear. Back in the real up to date world I reckon I just have a couple to go before it is done. 🙂
LikeLiked by 1 person
I’m excited to see it
LikeLiked by 1 person
I’m still struggling to get a certain Disney, ‘Hi-hoooooo’, song out of my head every time I see the mine 😂. As always love seeing the wip shots on your work 👍
LikeLiked by 1 person
Haha, believe it or not I was much the same when I was building it! 😂
LikeLiked by 1 person