I thought I would do a quick post on freehand painting, specifically straight lines, with the aim of sharing what I have learnt so far. The first thing I must clear up is I am not an expert freehand painter. This is not false modesty just a statement of fact. If you don’t believe me just do some Pinterest or Google searches and you’ll see just how expert some figure painters are. That said I am pleased with the progress I have made, albeit that advancement has been slow. One reason for this is I have found very little in my searching, either on YouTube or Google, which deals with the subject from a beginners point of view. Hopefully this post will provide some very basic assistance to anyone thinking about giving freehand a go.
So why do freehand painting in the first place?
Well I can only answer that question from a personal perspective. For me it is simply down to the fact that I like the idea of making a figure truly unique where I can. Freehand doesn’t suit everything but where it does it can make a figure stand out from the rest. Decals are of course an option but they aren’t suitable for everything, stripes being a example, and the purist in me prefers the idea of avoiding them if I can.
—000—
Getting started with the basics there are a few things you will need.
- Liquitex Flow Aid
- A good brush with a nice point
- A steady hand and/or something to rest on like a small been bag
- A good eye or some form of magnification visor
- Patience
- An eye for detail
A bottle of Liquitex Flow Aid will set you back about £10.00 but the bottle will last you a life time even if you are buying it in your teens! Used with acrylic paints (I mostly use Vallejo Model Color paints) it does what it says and improves the flow of the paint but without diluting the pigment. Used with a good pointed brush it is possible to paint very fine lines and detail. As a medium it is also ideal for colour blending too because it keeps the paint wetter for a little longer.
When it comes to brushes it’s very much each to their own. Along time ago now I invested in Winsor and Newton series 7 brushes and have never looked back. More expensive yes, but cared for they last much longer so they are cost effective. Typically I only ever use two size brushes when painting figures, size 1 and size 000.
When it comes to a steady hand I guess you either have one or you don’t. If your hand waves around a fair bit then freehand is going to be much tougher. You can however do things which help. My hand is pretty steady (for a 64 year old!) but whenever I can I don’t hold what I’m painting (when painting a 28mm shield for example I just keep it flat on a piece of sponge) and I always keep my elbows (and wrists where possible) firmly placed on the desk I work on. This was a tip I picked up watching how signwriters work, they always keep their elbow and wrists supported whenever they can.
These days I work almost exclusively in 28mm/32mm scale and my eyesight isn’t what it used to be. As a consequence I use a magnifying visor. It’s not the solution to everything, the figure might appear bigger but so does the brush! The main thing is the detail stands out. Furthermore, if the end result looks good wearing the visor it will look perfect to the naked eye.
Patience you’re most likely going to need in abundance. Either you have it or you don’t. For figure painting I do, for everything else in my life I don’t! Weird I know but it is what it is!
An eye for detail. This is all about your satisfaction level and when you decide things are good enough. As a general rule I’m rarely if ever satisfied but I have to stop somewhere.
—000—
Now let’s move on to painting stripes.
Painting stripes or straight lines is about as simple as it gets for freehand by my reckoning. By simple I mean it’s easy to comprehend but practice is still required. Before I started on a figure I just spent some time getting the paint and medium balance right (you don’t need very much of the medium) and settled eventually on 50:50 or there abouts, I don’t tend to measure things out, and then just painted line after line on a piece of paper for practice. After about 10 minutes it was time to try things out on a figure.
My logic told me to paint light coloured stripes over a darker background colour. That way any touching up and evening up of stripes would be more easily addressed. These days I don’t think it really makes much difference. Another thing I learnt, particulalry when painting stripes on trousers/legs was to start on the outside of the leg first and work right to left and left to right but always leave the inside of the leg until last. With some figures it’s not always easy to get a stripe on the inside of the leg and if there is one place where inaccuracy will notice less its here.
I always paint stripped trousers/legs first and then do feet/shoes and shirt/jacket (or whateaver constitutes the two end areas abutting the stripes) afterwards. This Way you can start and end the stripe outside of the area you are aiming to paint to get the flow started and simply paint over afterwards. It does take practice but once that has been achieved the door is open to do so much more. If you can paint stripes you can paint hoops and if you can paint stripes and hoops then you can then paint checks. Stripes can also be painted diagonally and thick and thin, all of which can produce much variation.
I don’t tend to worry too much about shading, applying a wash can generally deal with that to my satisfaction. Highlights I tend to limit to the original colour and do sparingly as the last thing I want to do is mess up the freehand work I’ve just done! Looking ahead shading and highlighting is something I might look at improving but for now I’m happy with the results I’m achieving.
—000—
Below are various images of stripes and straight lines and how I have used them.
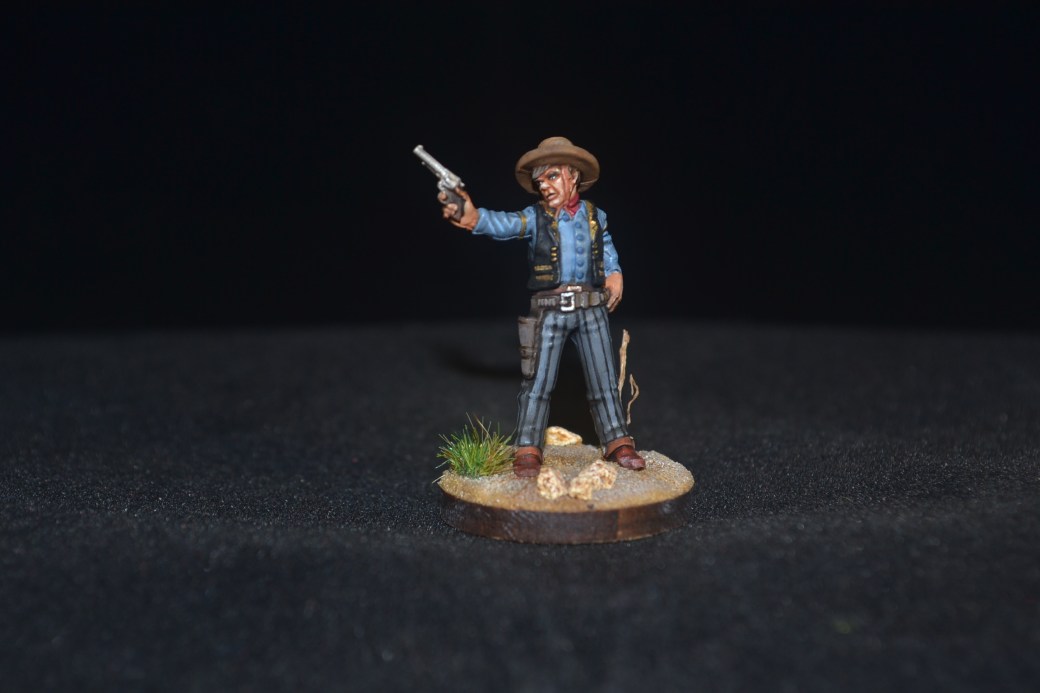
This Knuckleduster figure didn’t need stripped trousers but adding some just makes it stand out more.

if you can paint stripes you can paint hoops.

If you can paint stripes and hoops you can paint checks.

If you can paint vertical and horizontal lines then you can paint diagonal lines too.

Stripes and hoops don’t have to be thin lines, they can be thicker ones too.

If you don’t fancy stripes straight away then why not start with getting the lines straight and working in larger blocks?
—000—
A with so much of this hobby there are few short cuts. When all is said and done it comes down to practice, patience, persistence and simply being prepared to give something a go.
TIM