TIM’s Memory Monday (No: 44)

I have finally arrived at the last Memory Monday post, well for now at least at any rate.  This post seemed an ideal place to bring things to a halt, if only because when the time comes to resurrect Memory Monday my memory will be good enough to remember that this is where I need to pick up from!

Unfortunately I wasn’t able to get the timing of this post to sync with Armistice Day but that doesn’t mean we can’t still remember them.

—000—

28mm WW1 Timeline

Those of you kind enough to follow my blog will be aware of my WW1 Timeline project. After a good few months of work and several periods where I hit the wall in terms of inspiration the project is now complete.  I say complete, to be fair this historical period has been one which I have really enjoyed and as such I cannot see myself not adding to it in the future.  For now though, and in particular for the Armed Forces Day event to celebrate 100 years of the ending of the Great War which inspired this work, the job is done.

I thought I would share with you the sequence of these 28mm figures, vignettes and dioramas as they accord with the timeline.  Full details and better photos on each model can be found under the menu header “WW1” if your interest extends beyond this post.  For now I’ve just been lazy with regard to the photos I’ve pulled together. I didn’t have my Light Box when I started the project but when I get a moment I’ll retake all the photos and update this post.

Looking ahead I’m very much open to suggestions for expanding this project with further figures/vignettes/dioramas and any ideas you might have will be gratefully received.

TIM

—000—

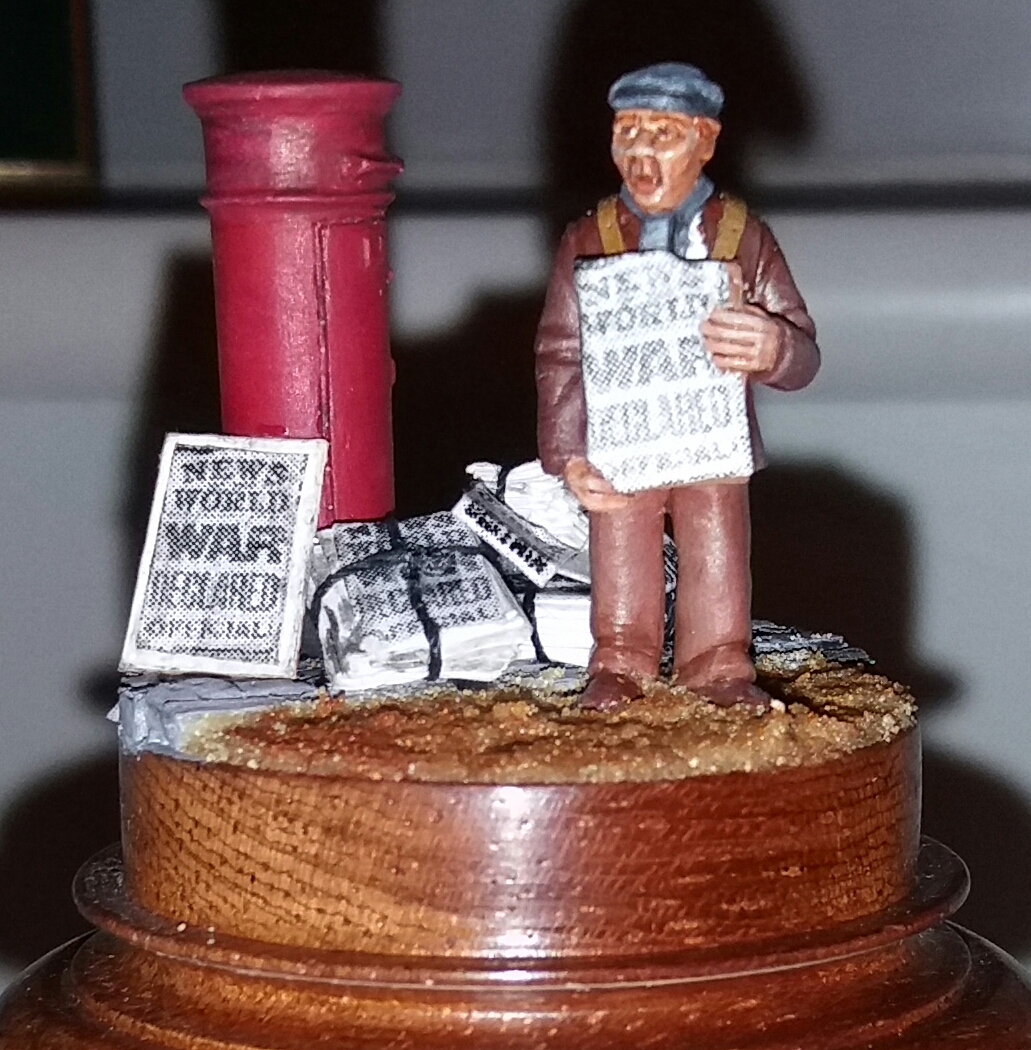
Model 1 – “Read All About It” – Britain declares war on Germany – 4th August 1914

Believe it or not this little guy was key to my project.  I wanted to kick the thing off with the announcement of war but couldn’t work out how to do it until I found this little chap.

20171118_200855-1

Model 2 – “It’ll Be Over By Christmas” – Enlisting 1914

Enlistment was a major event and took place all over the country with lengthy queues of young men signing up.  Little did they know what was in store for them.

20171023_155300

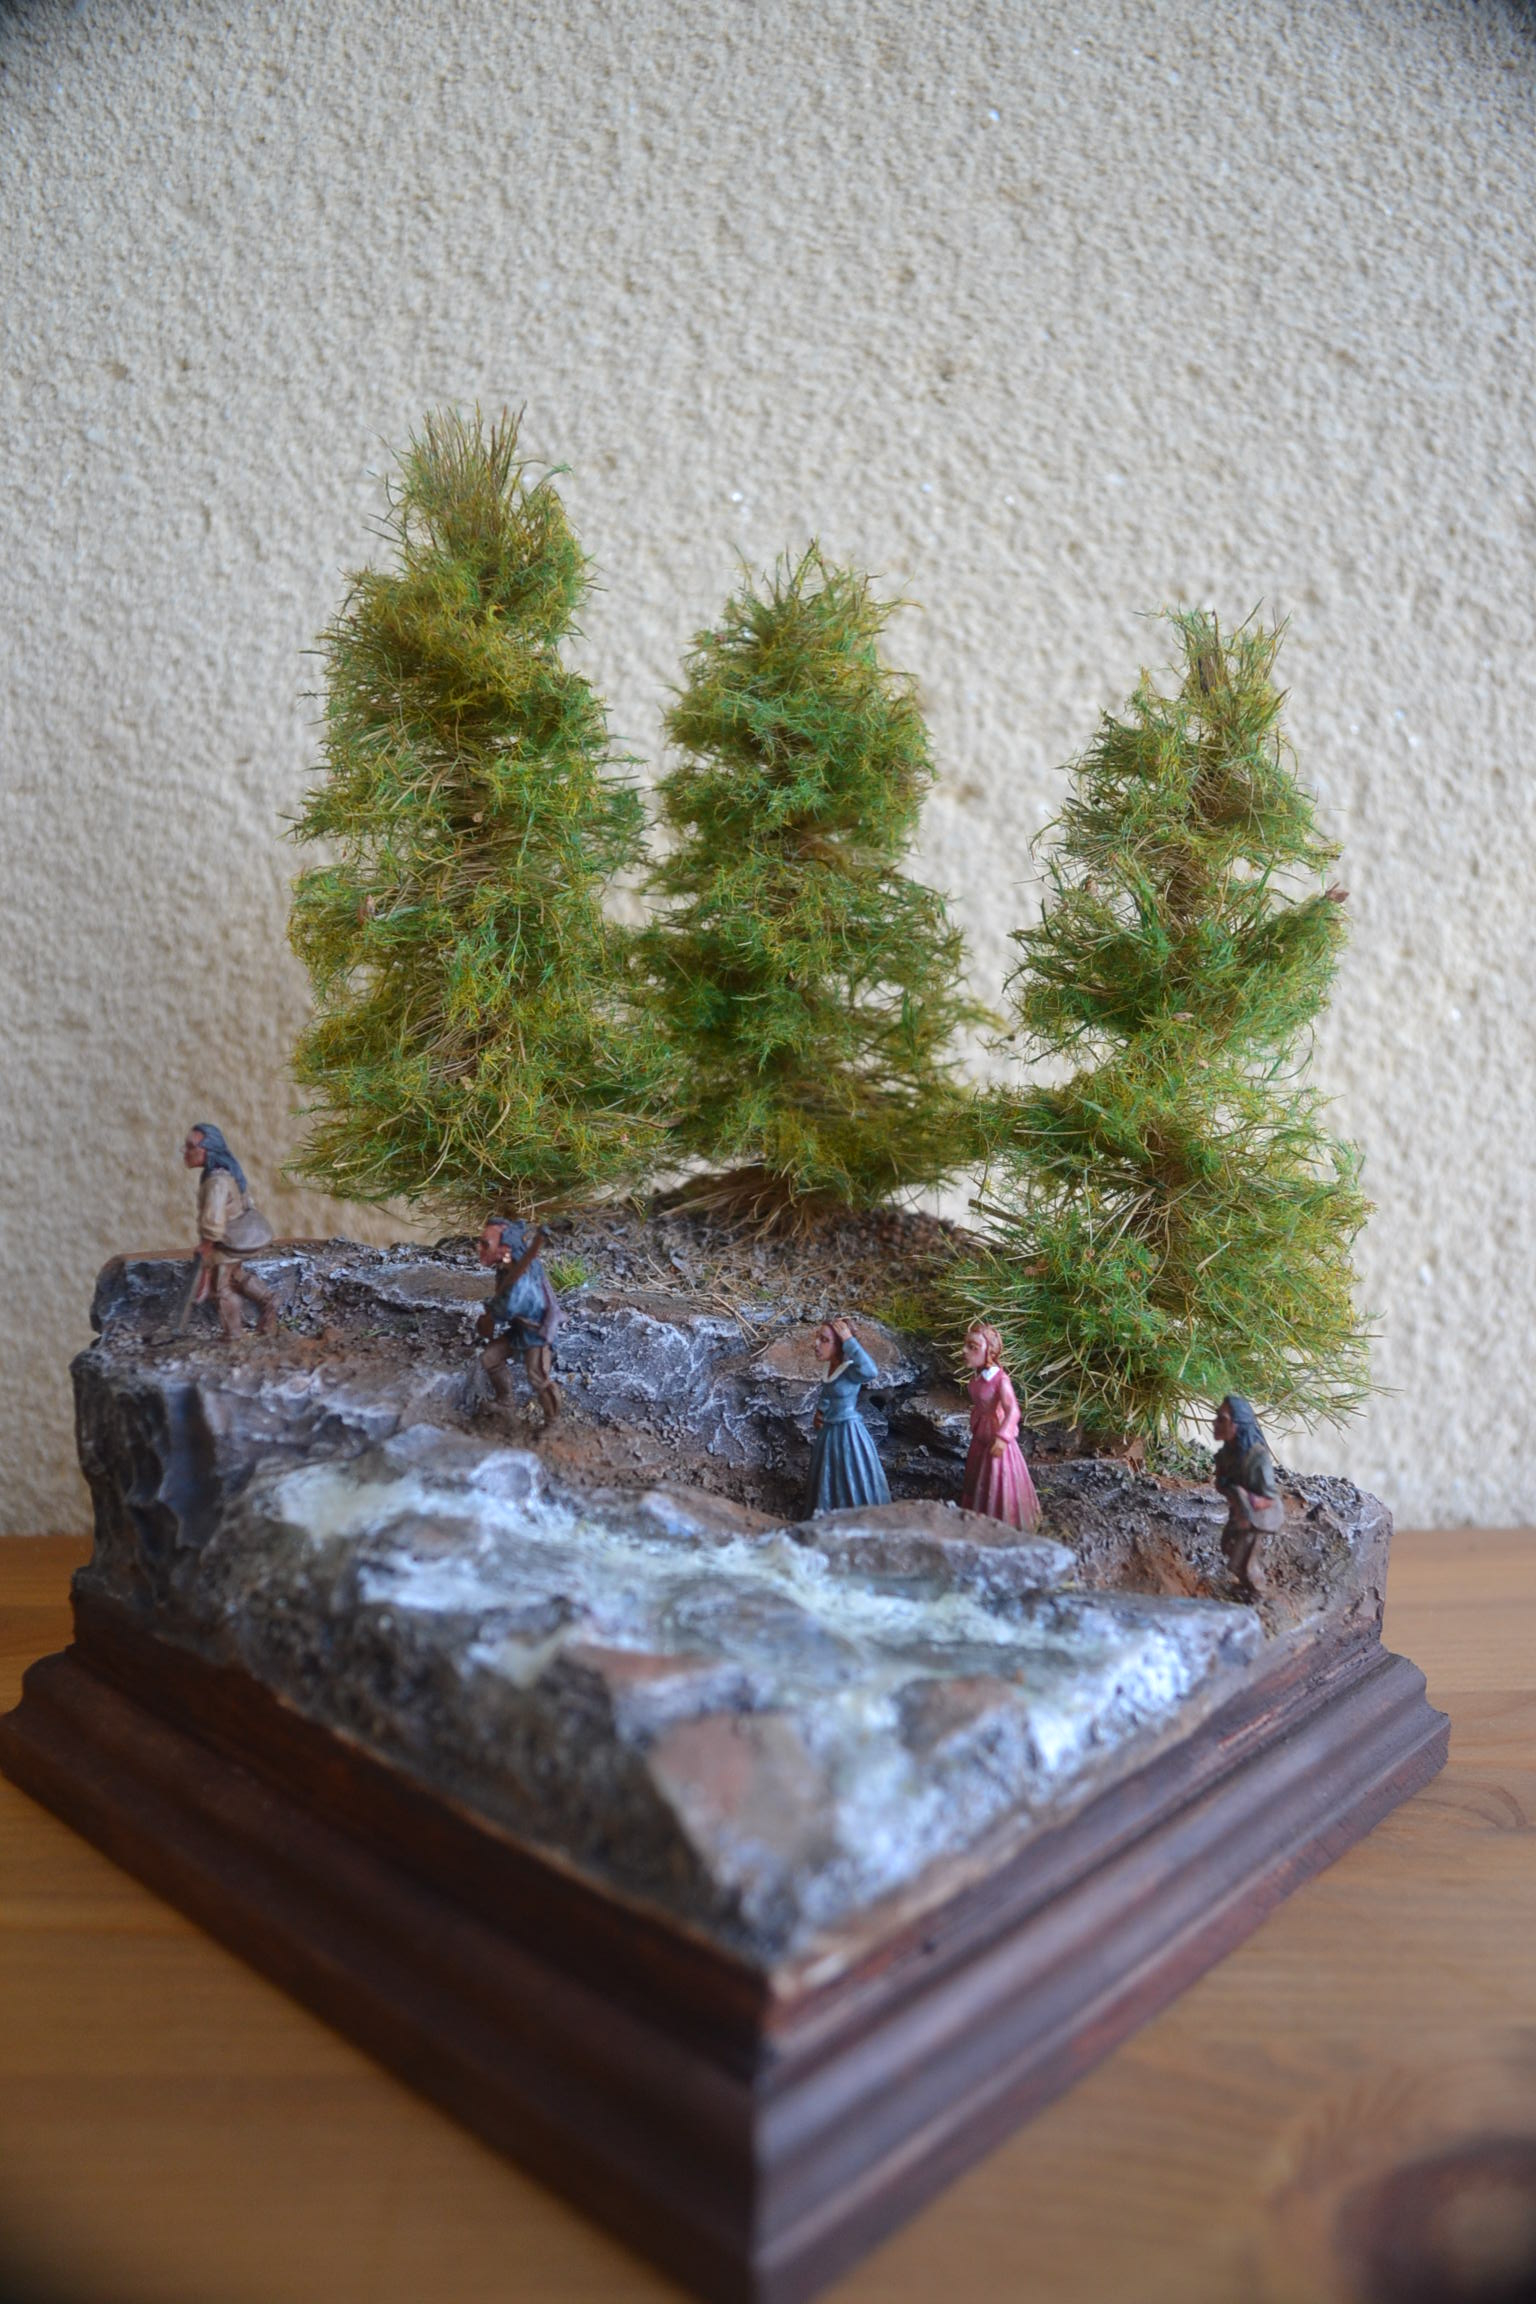
Model 3 – “Passchendale” – July 1917

One of the major conflicts.  Nothing like a slow walk towards machine guns!

20170929_134155

Model 4 – “James Newton Langley” – Middlesex Regiment, June 1915 to November 1918

This is my Great Grandfather.  He went through the war unscathed.  When I found this figure which had an uncanny resemblance to his photograph I just had to do it and include it in the project.

20171014_171223

Model 5 – “Scottish Highlander” – 1914 – 1918

This started life as a spare figure. I didn’t want to do a big thing on the Scots but neither did I want to leave them out.  I then had the idea of turning the figure into a bust.

20171209_195255-1

Model 6 – “Field Marshall Douglas Haig” – Commander British Expeditionary Force, Western Front 1915 – 1918

Love him or hate him a key figure who divided opinion. Impossible to leave out.

20171209_194106-1

Model 7 – “Ypes” – April 1915

This was the first model I completed before it grew into a project.  Painted entirely with oils.  There were several battles at Ypes, all bloody conflicts.

20170729_144826-1_resized

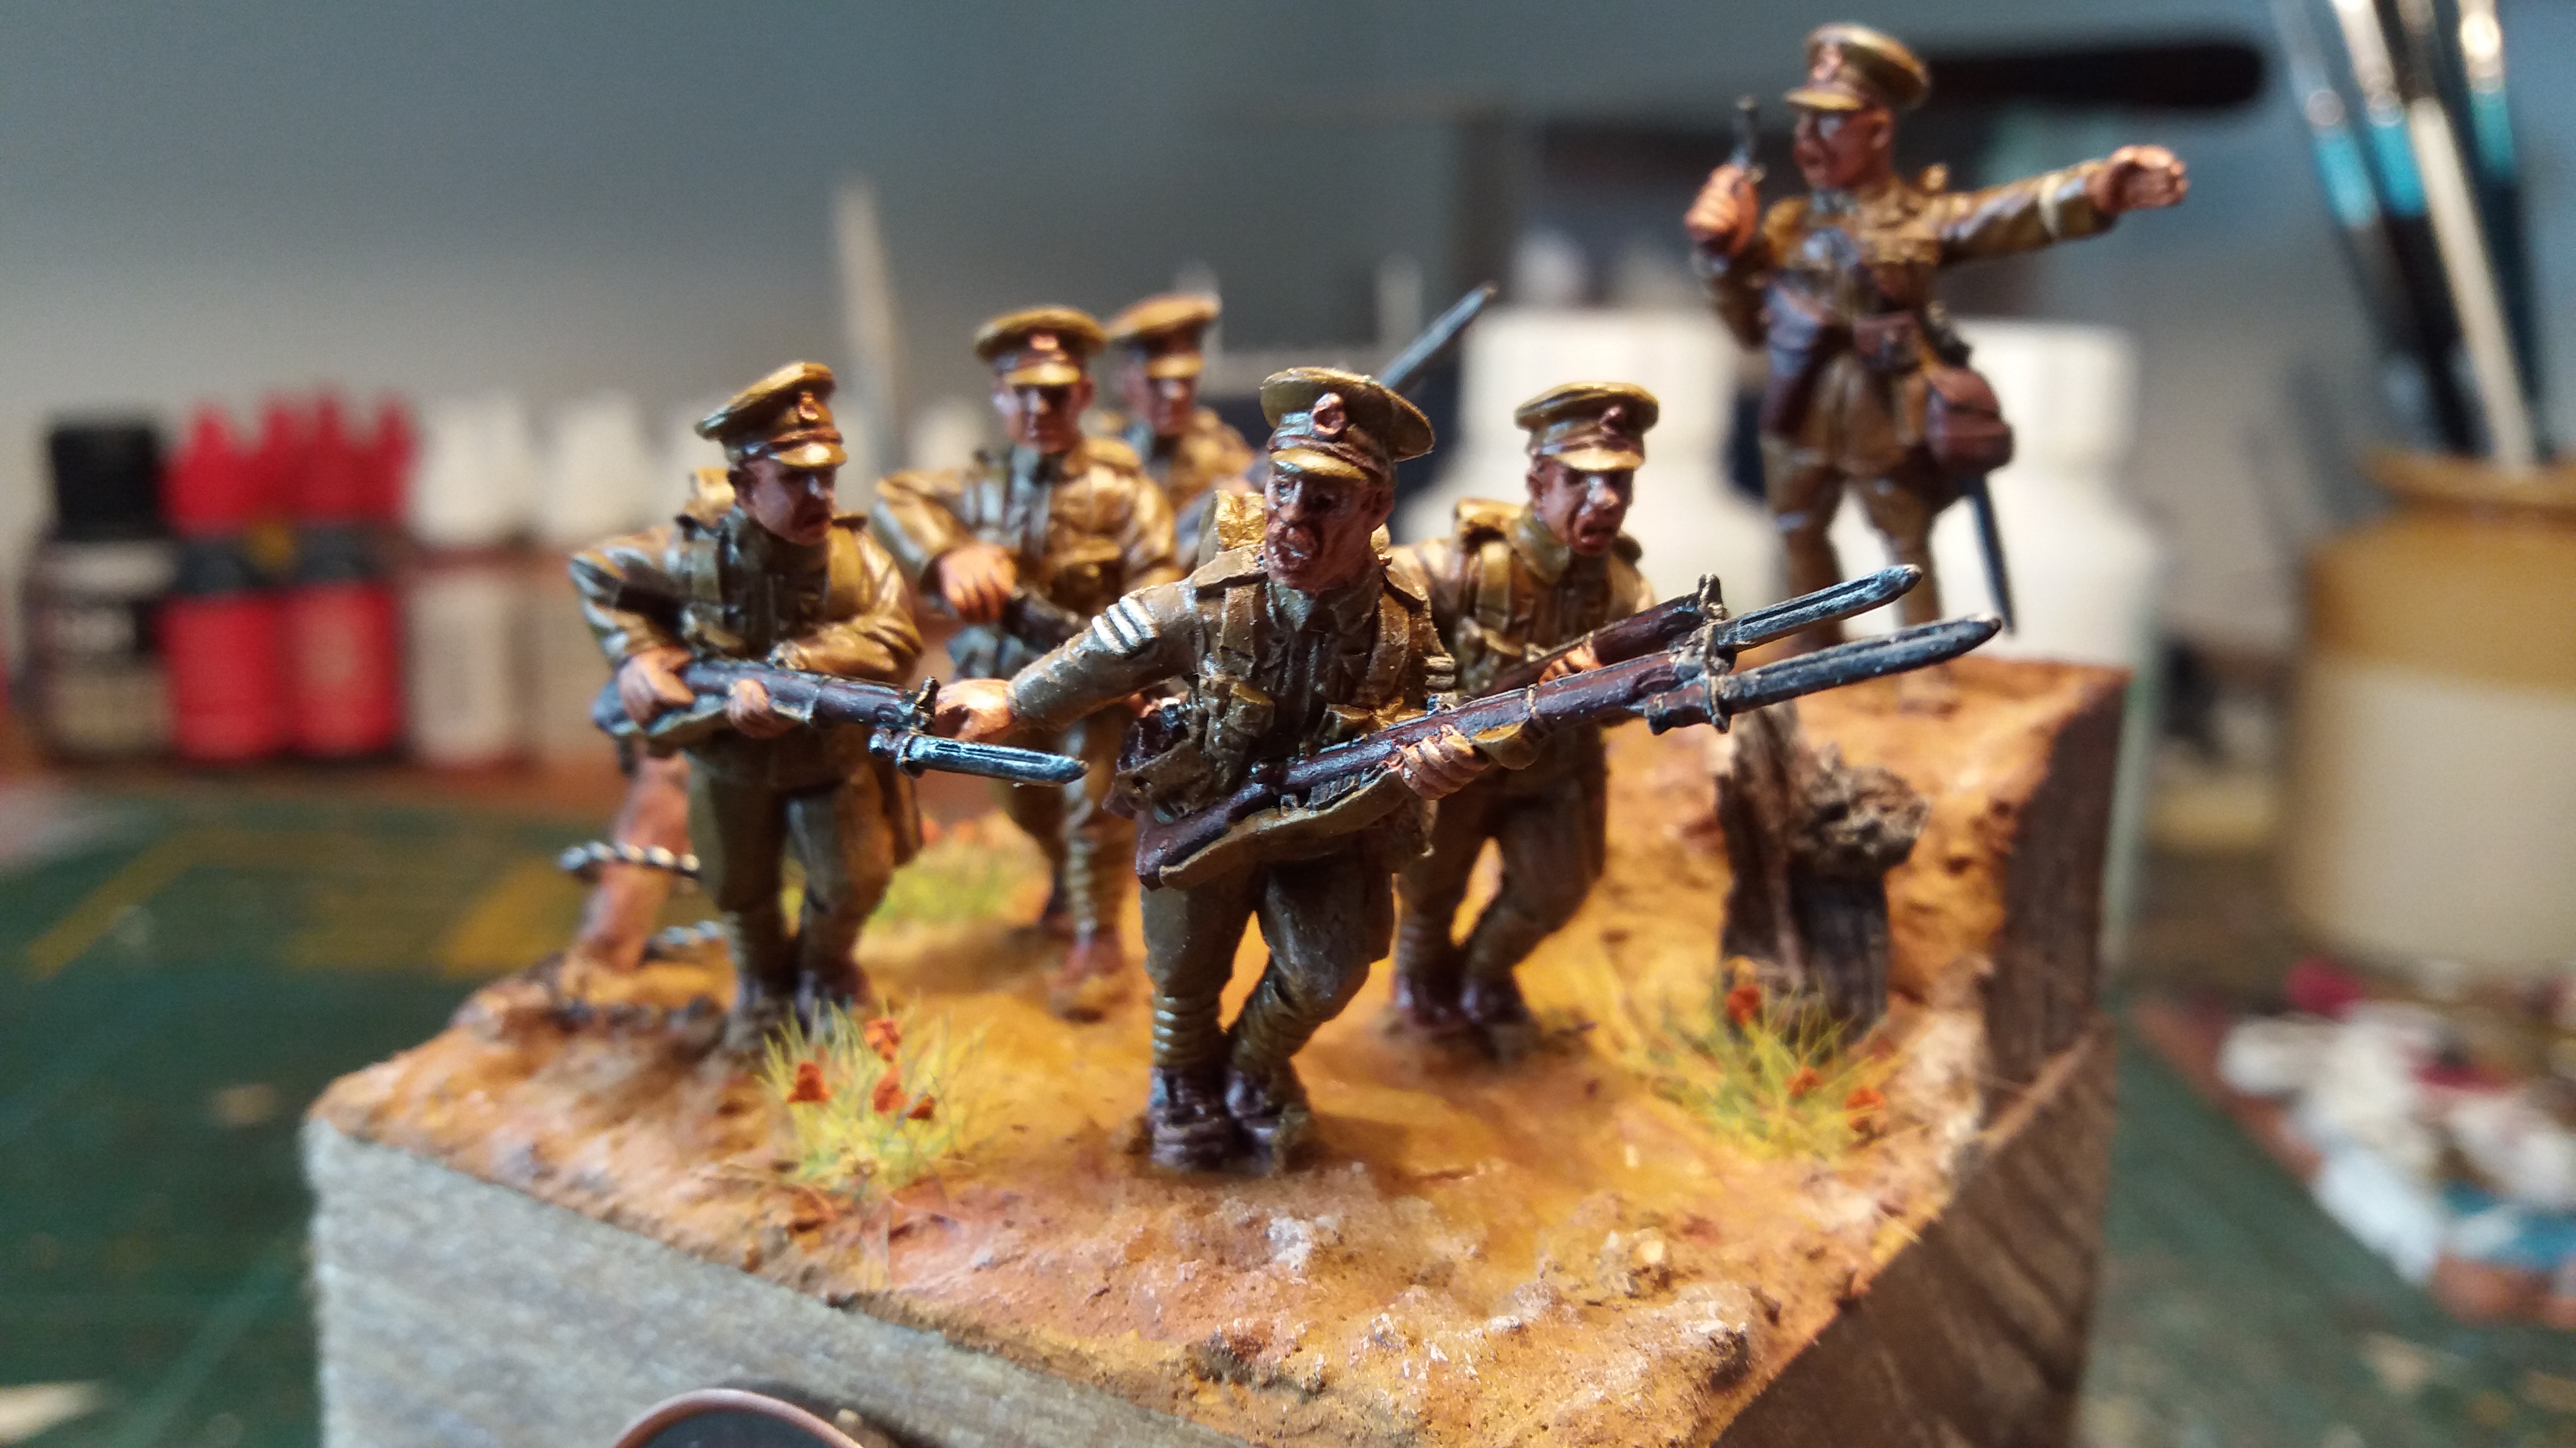
Model 8 – “The Somme” – July 1916

Possibly the most famous incident of the war with an incredible loss of life on day one.  Hard to associate it with anything other than death.

20180127_082649

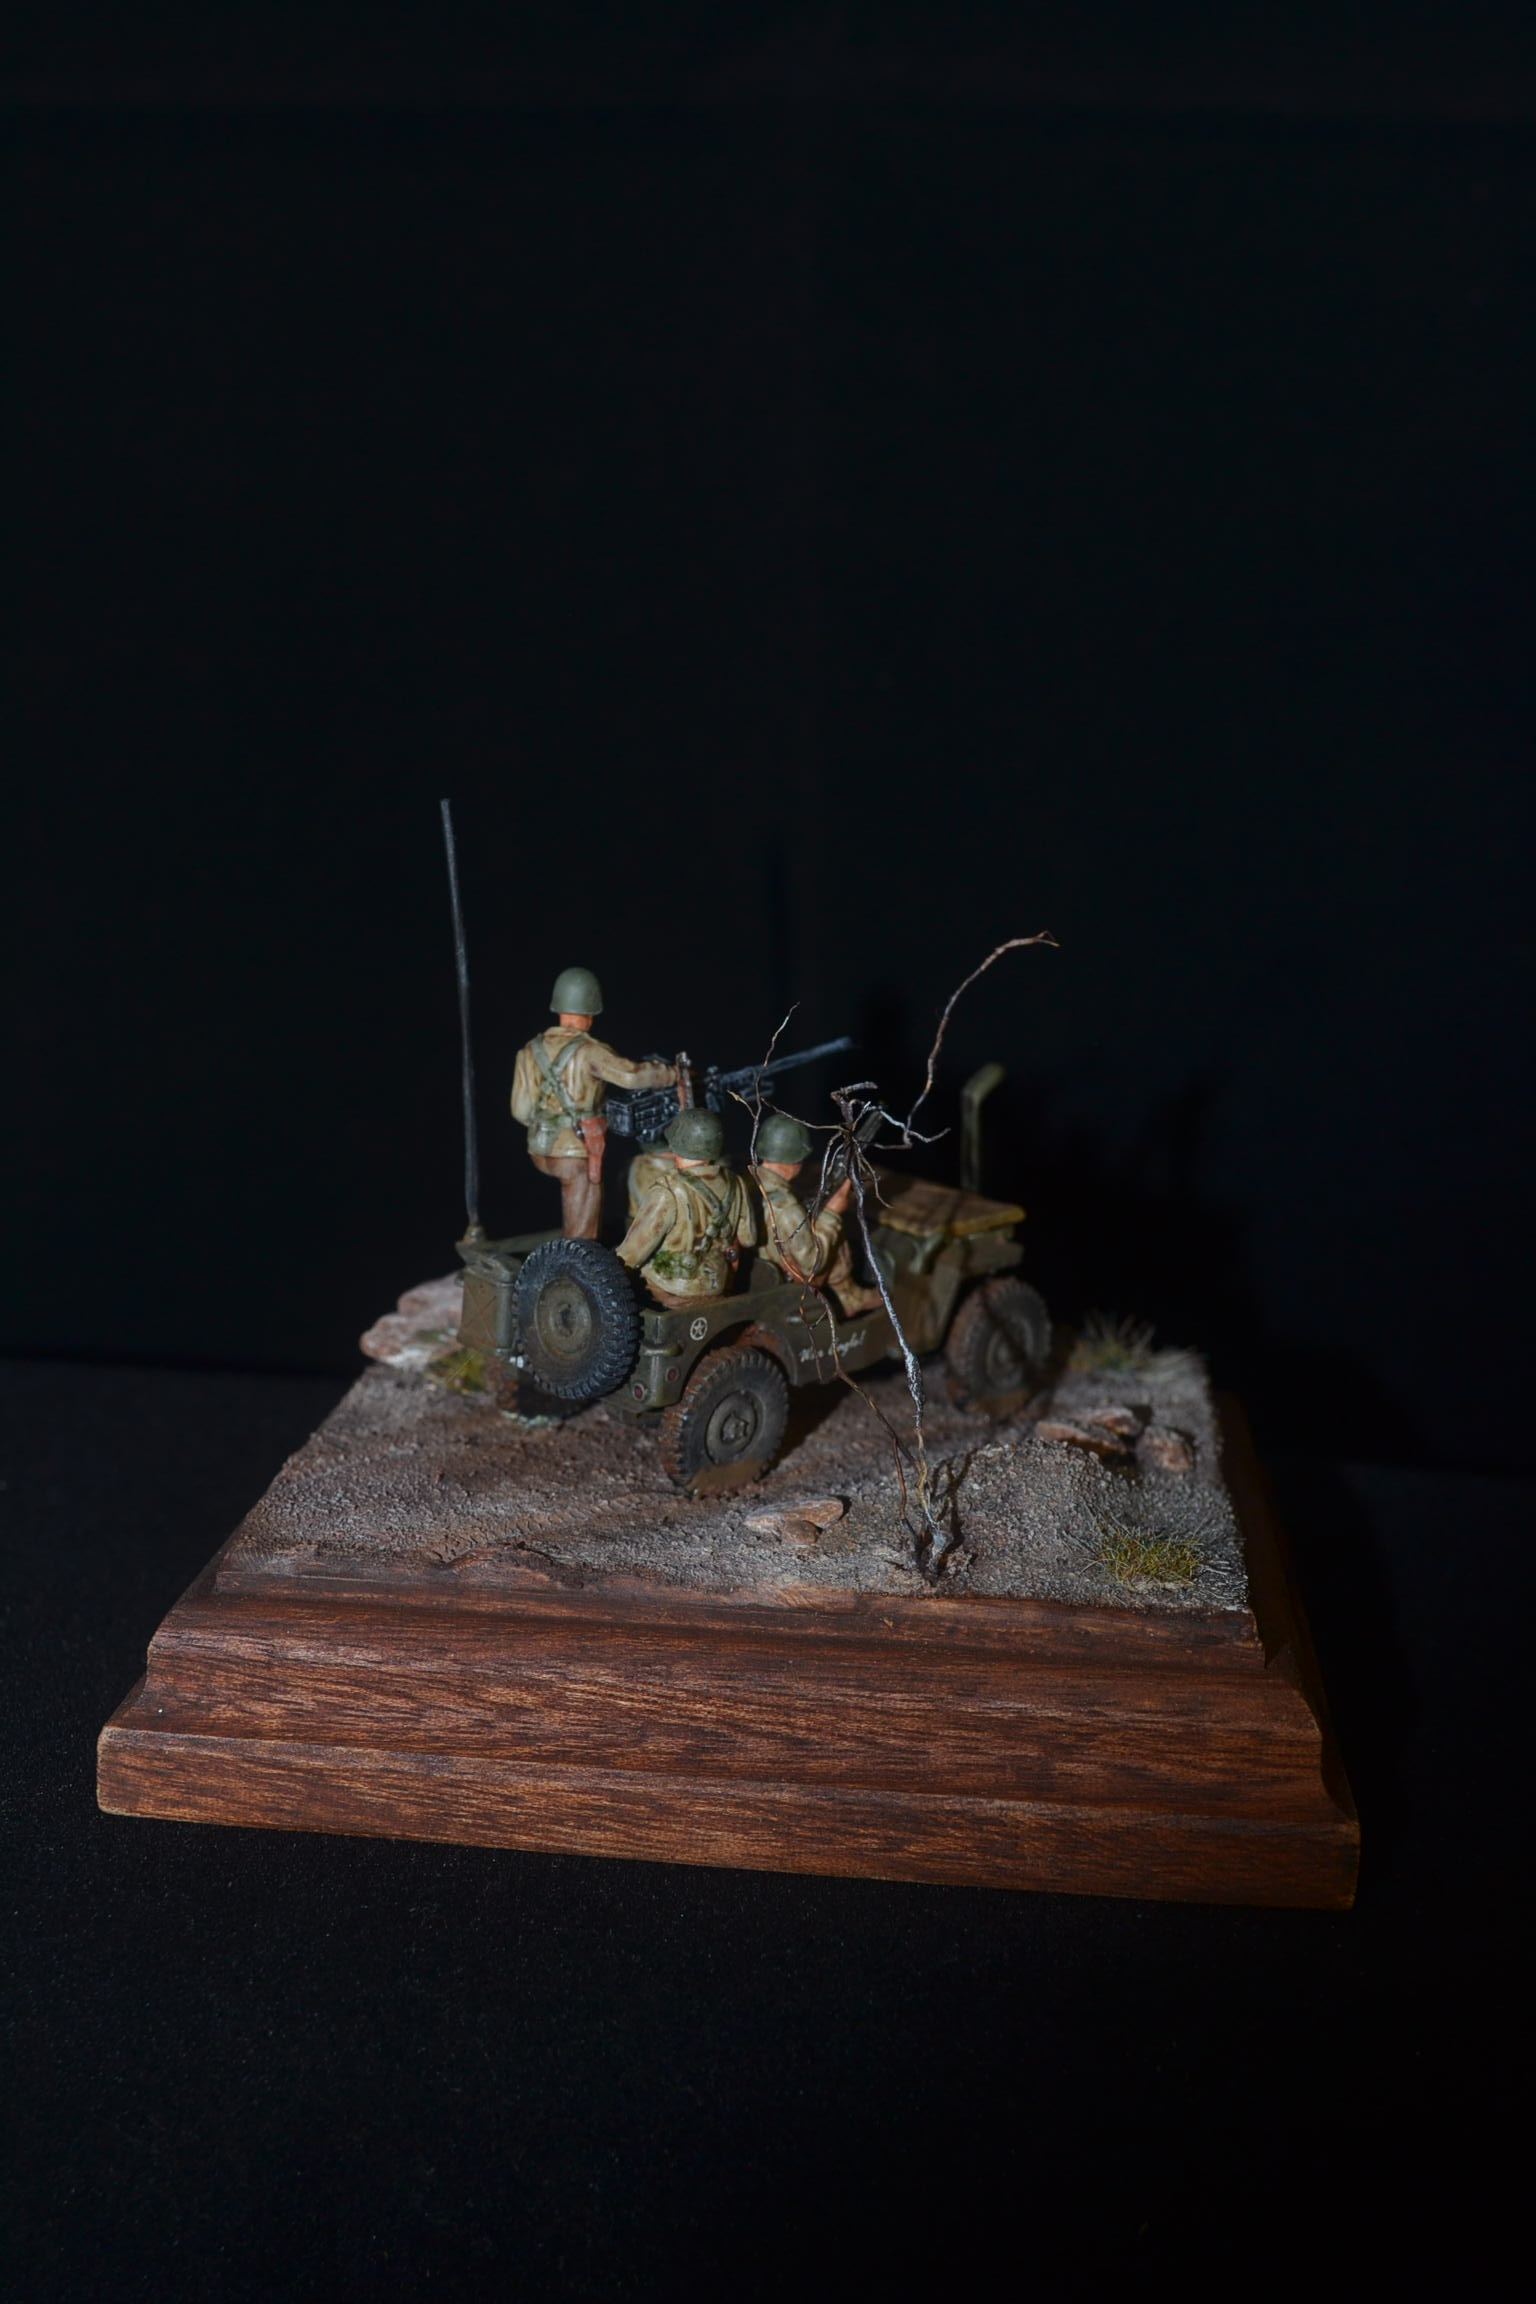
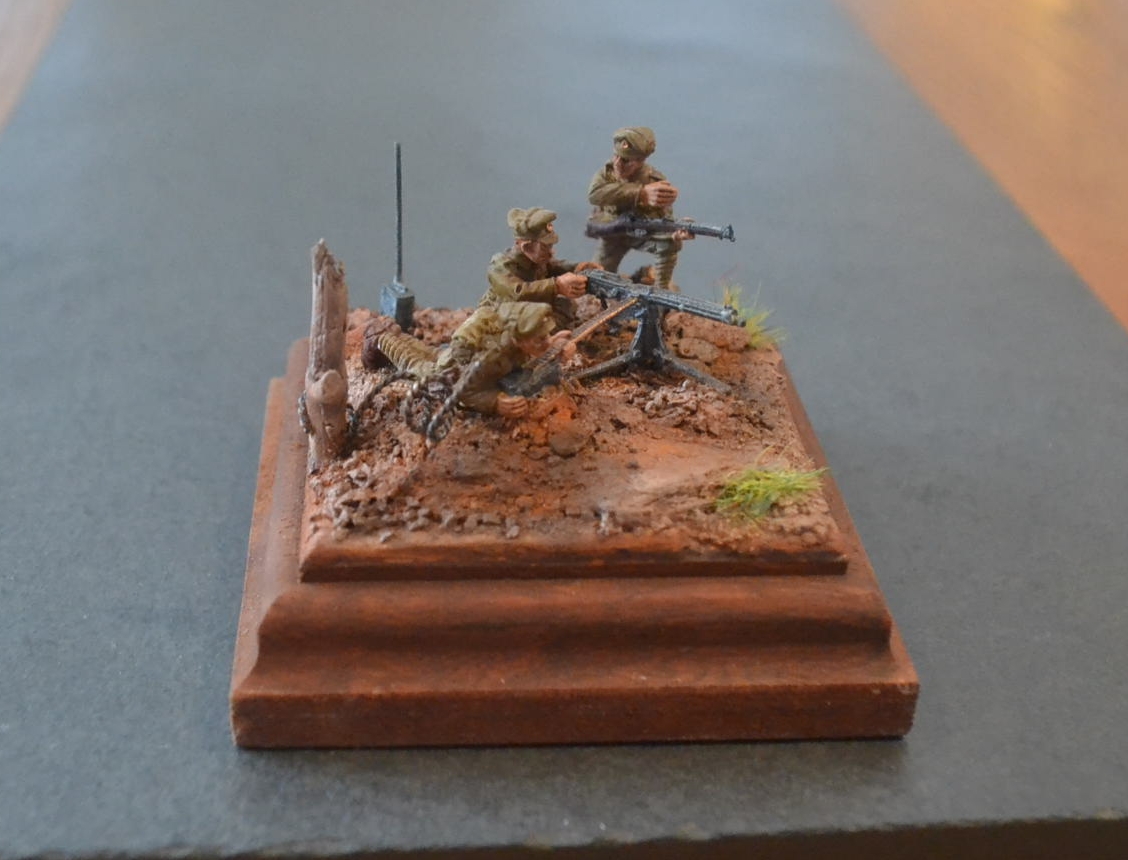
Model 9 – “Vickers Gun Crew” – Amiens August 1918

The machine gun of its day and a must for inclusion.

20180307_155950

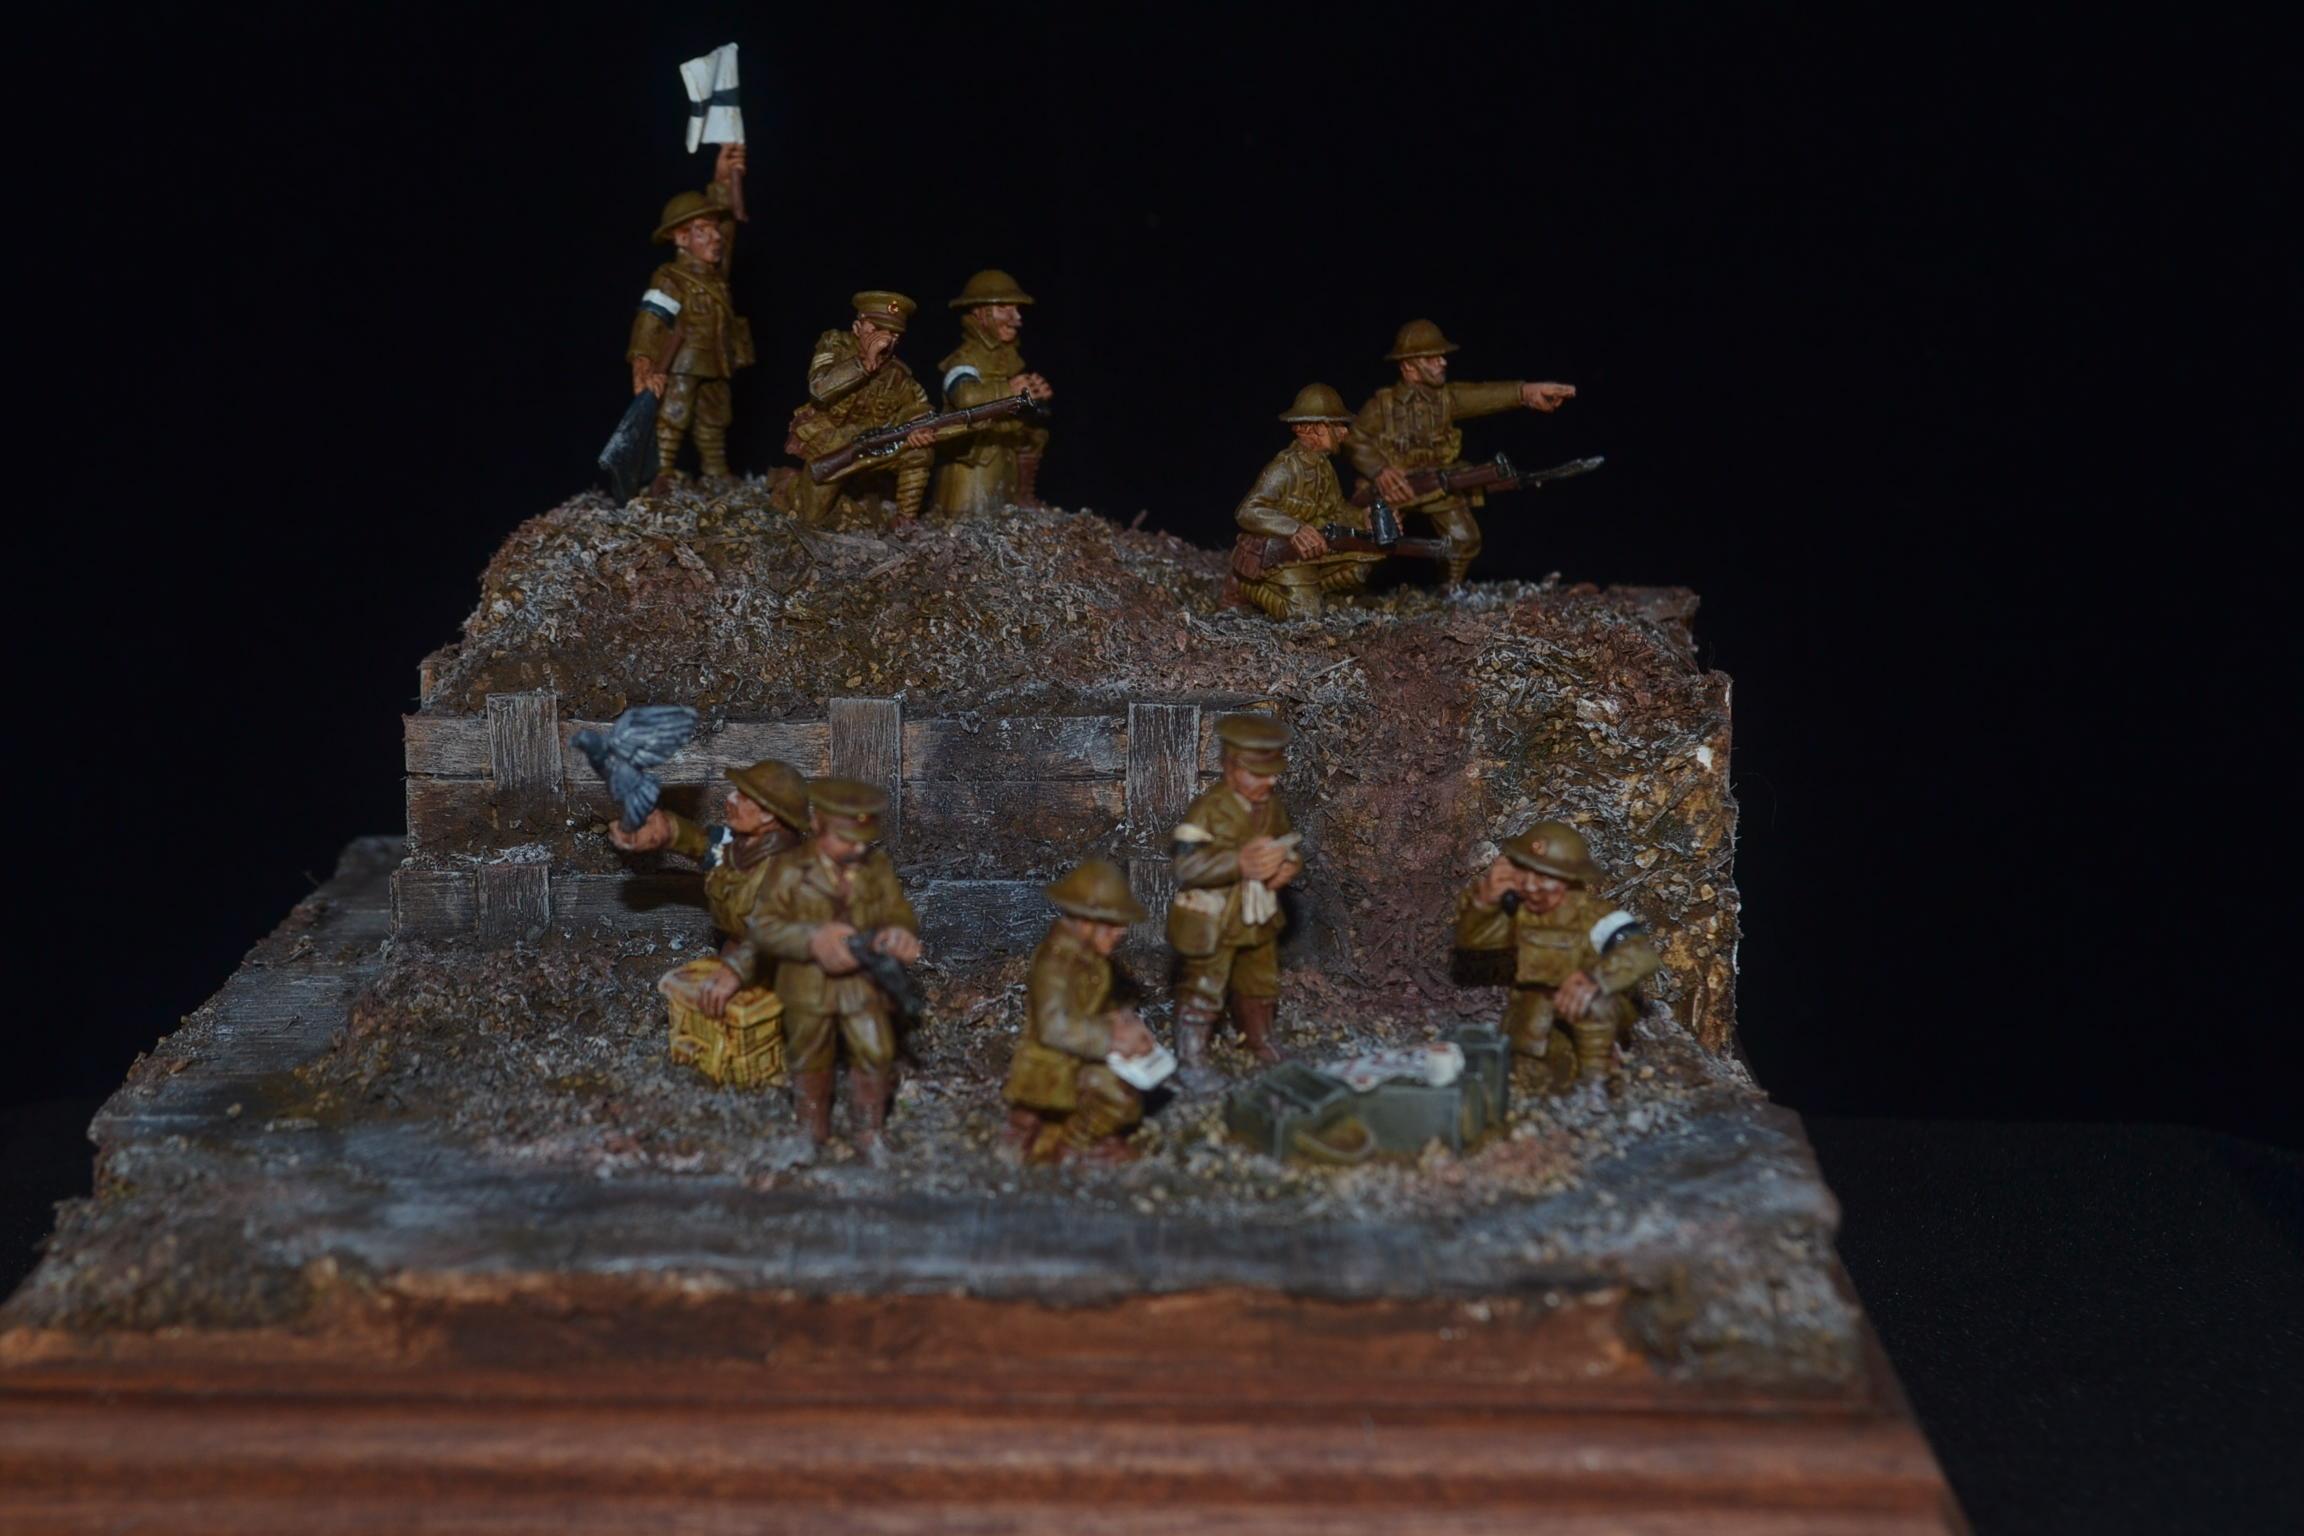
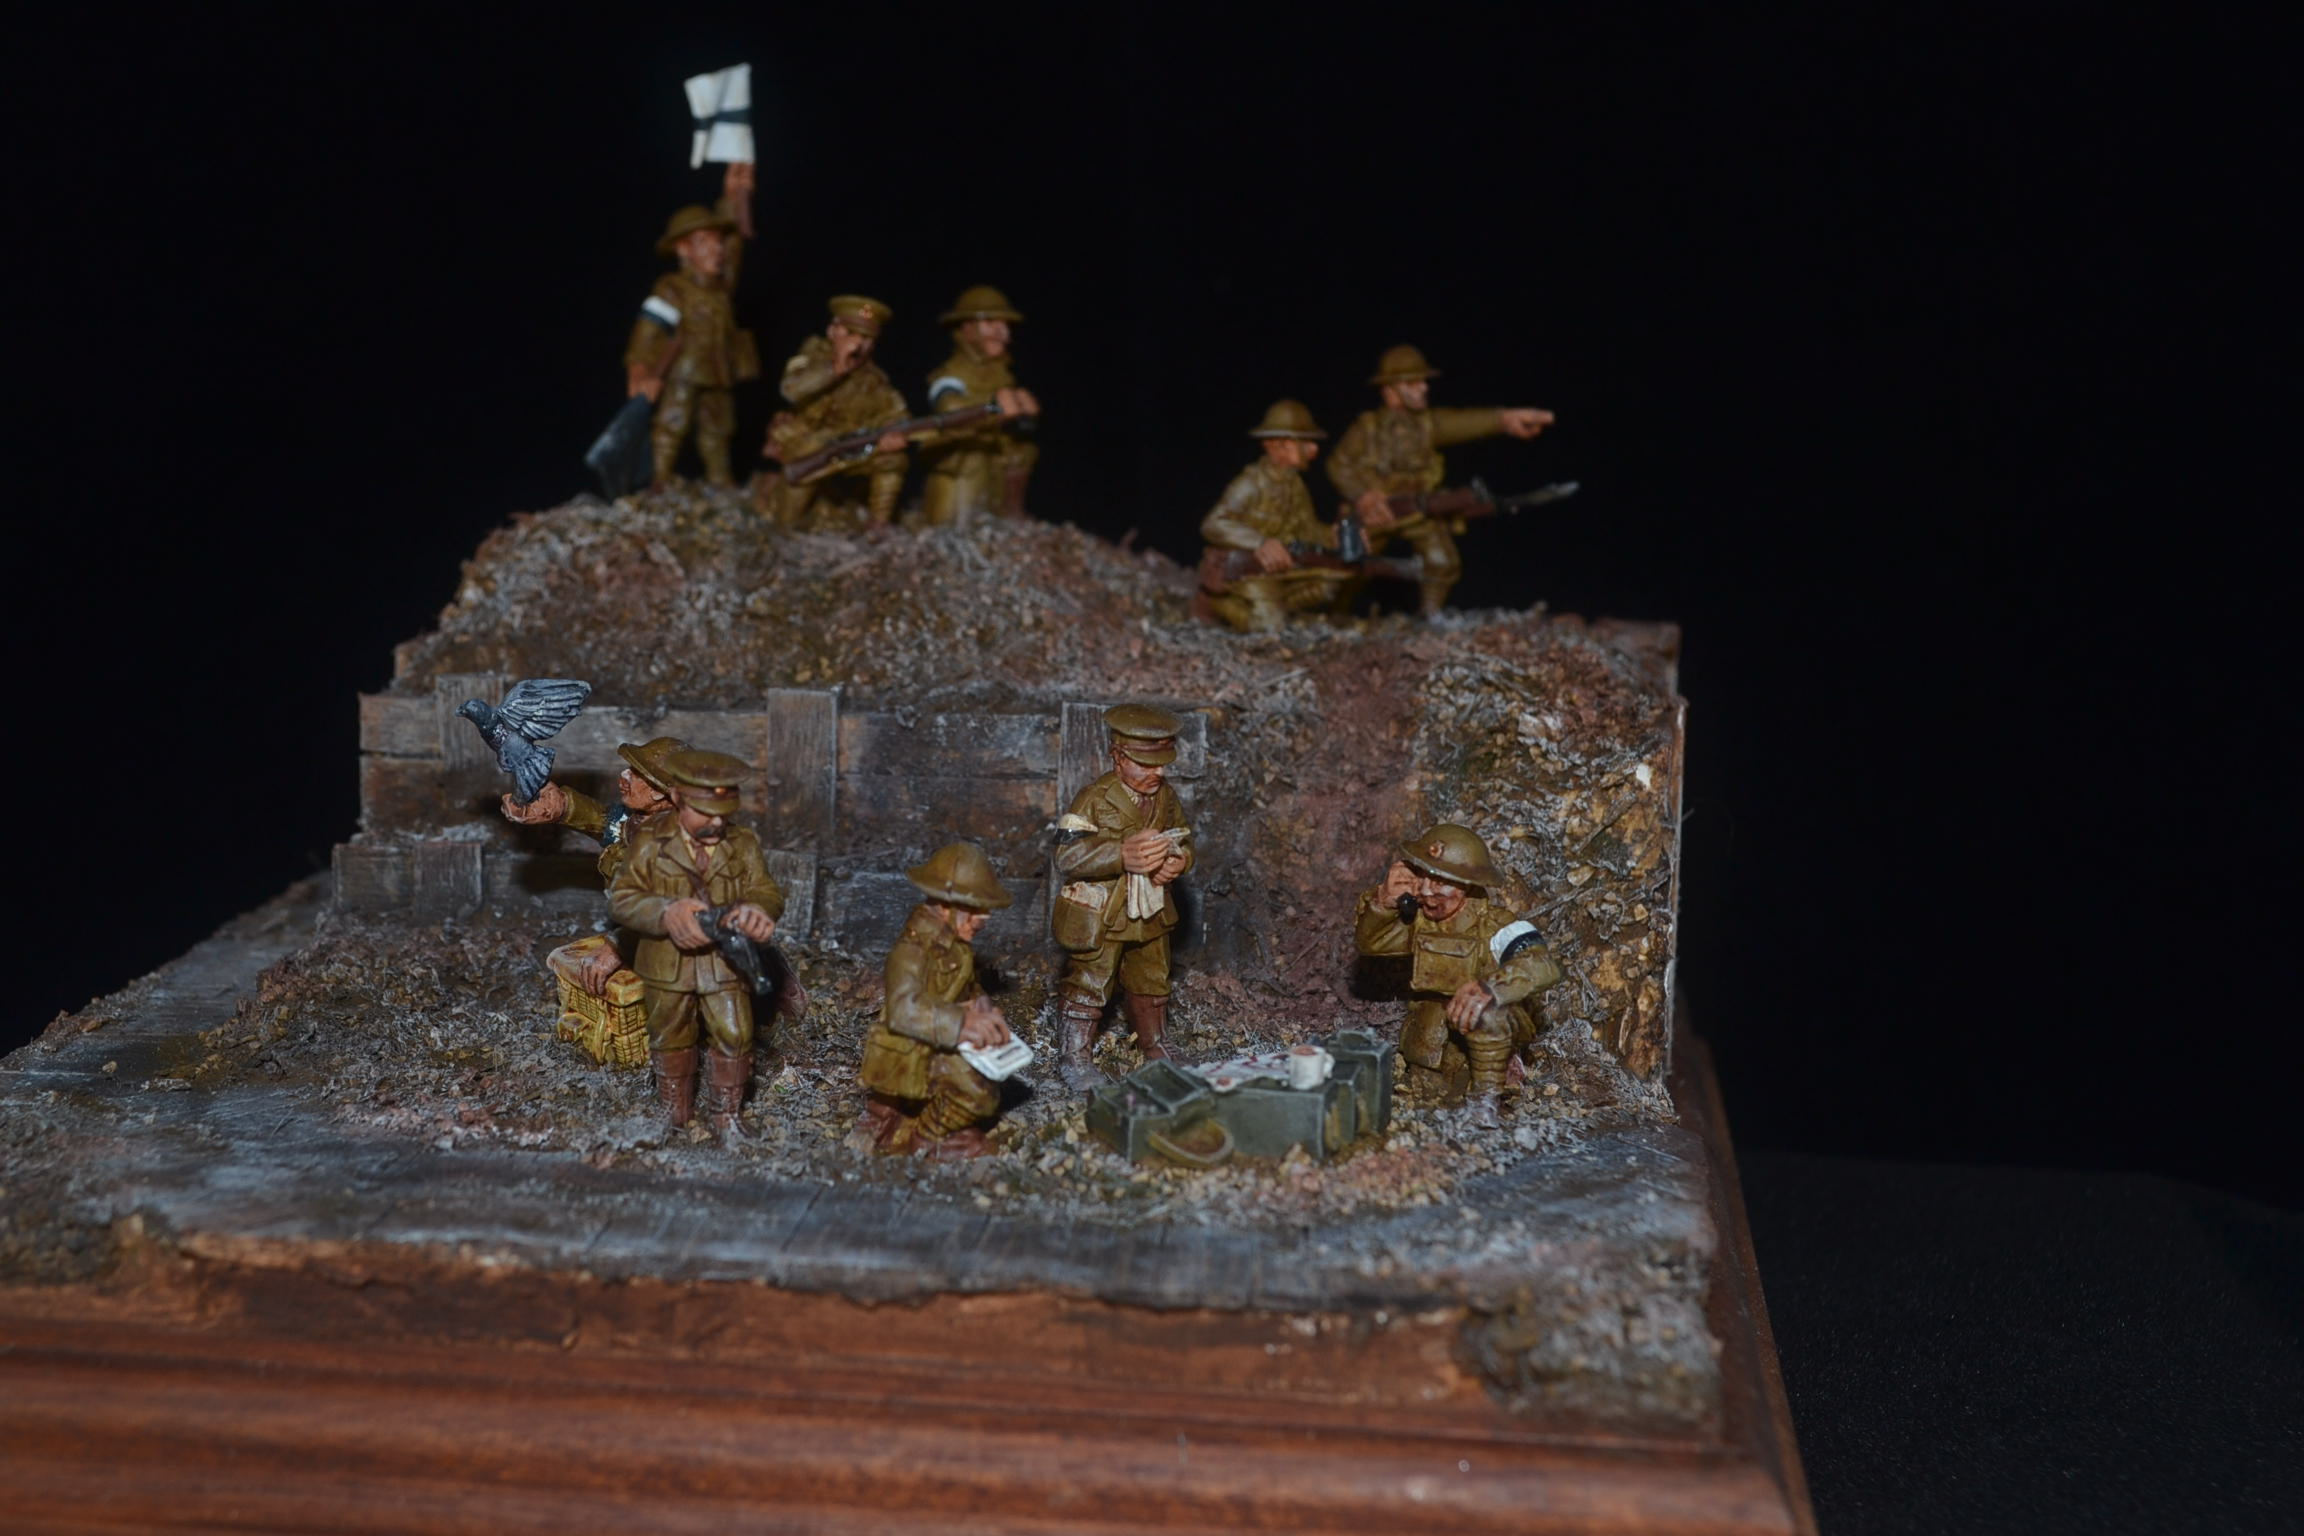
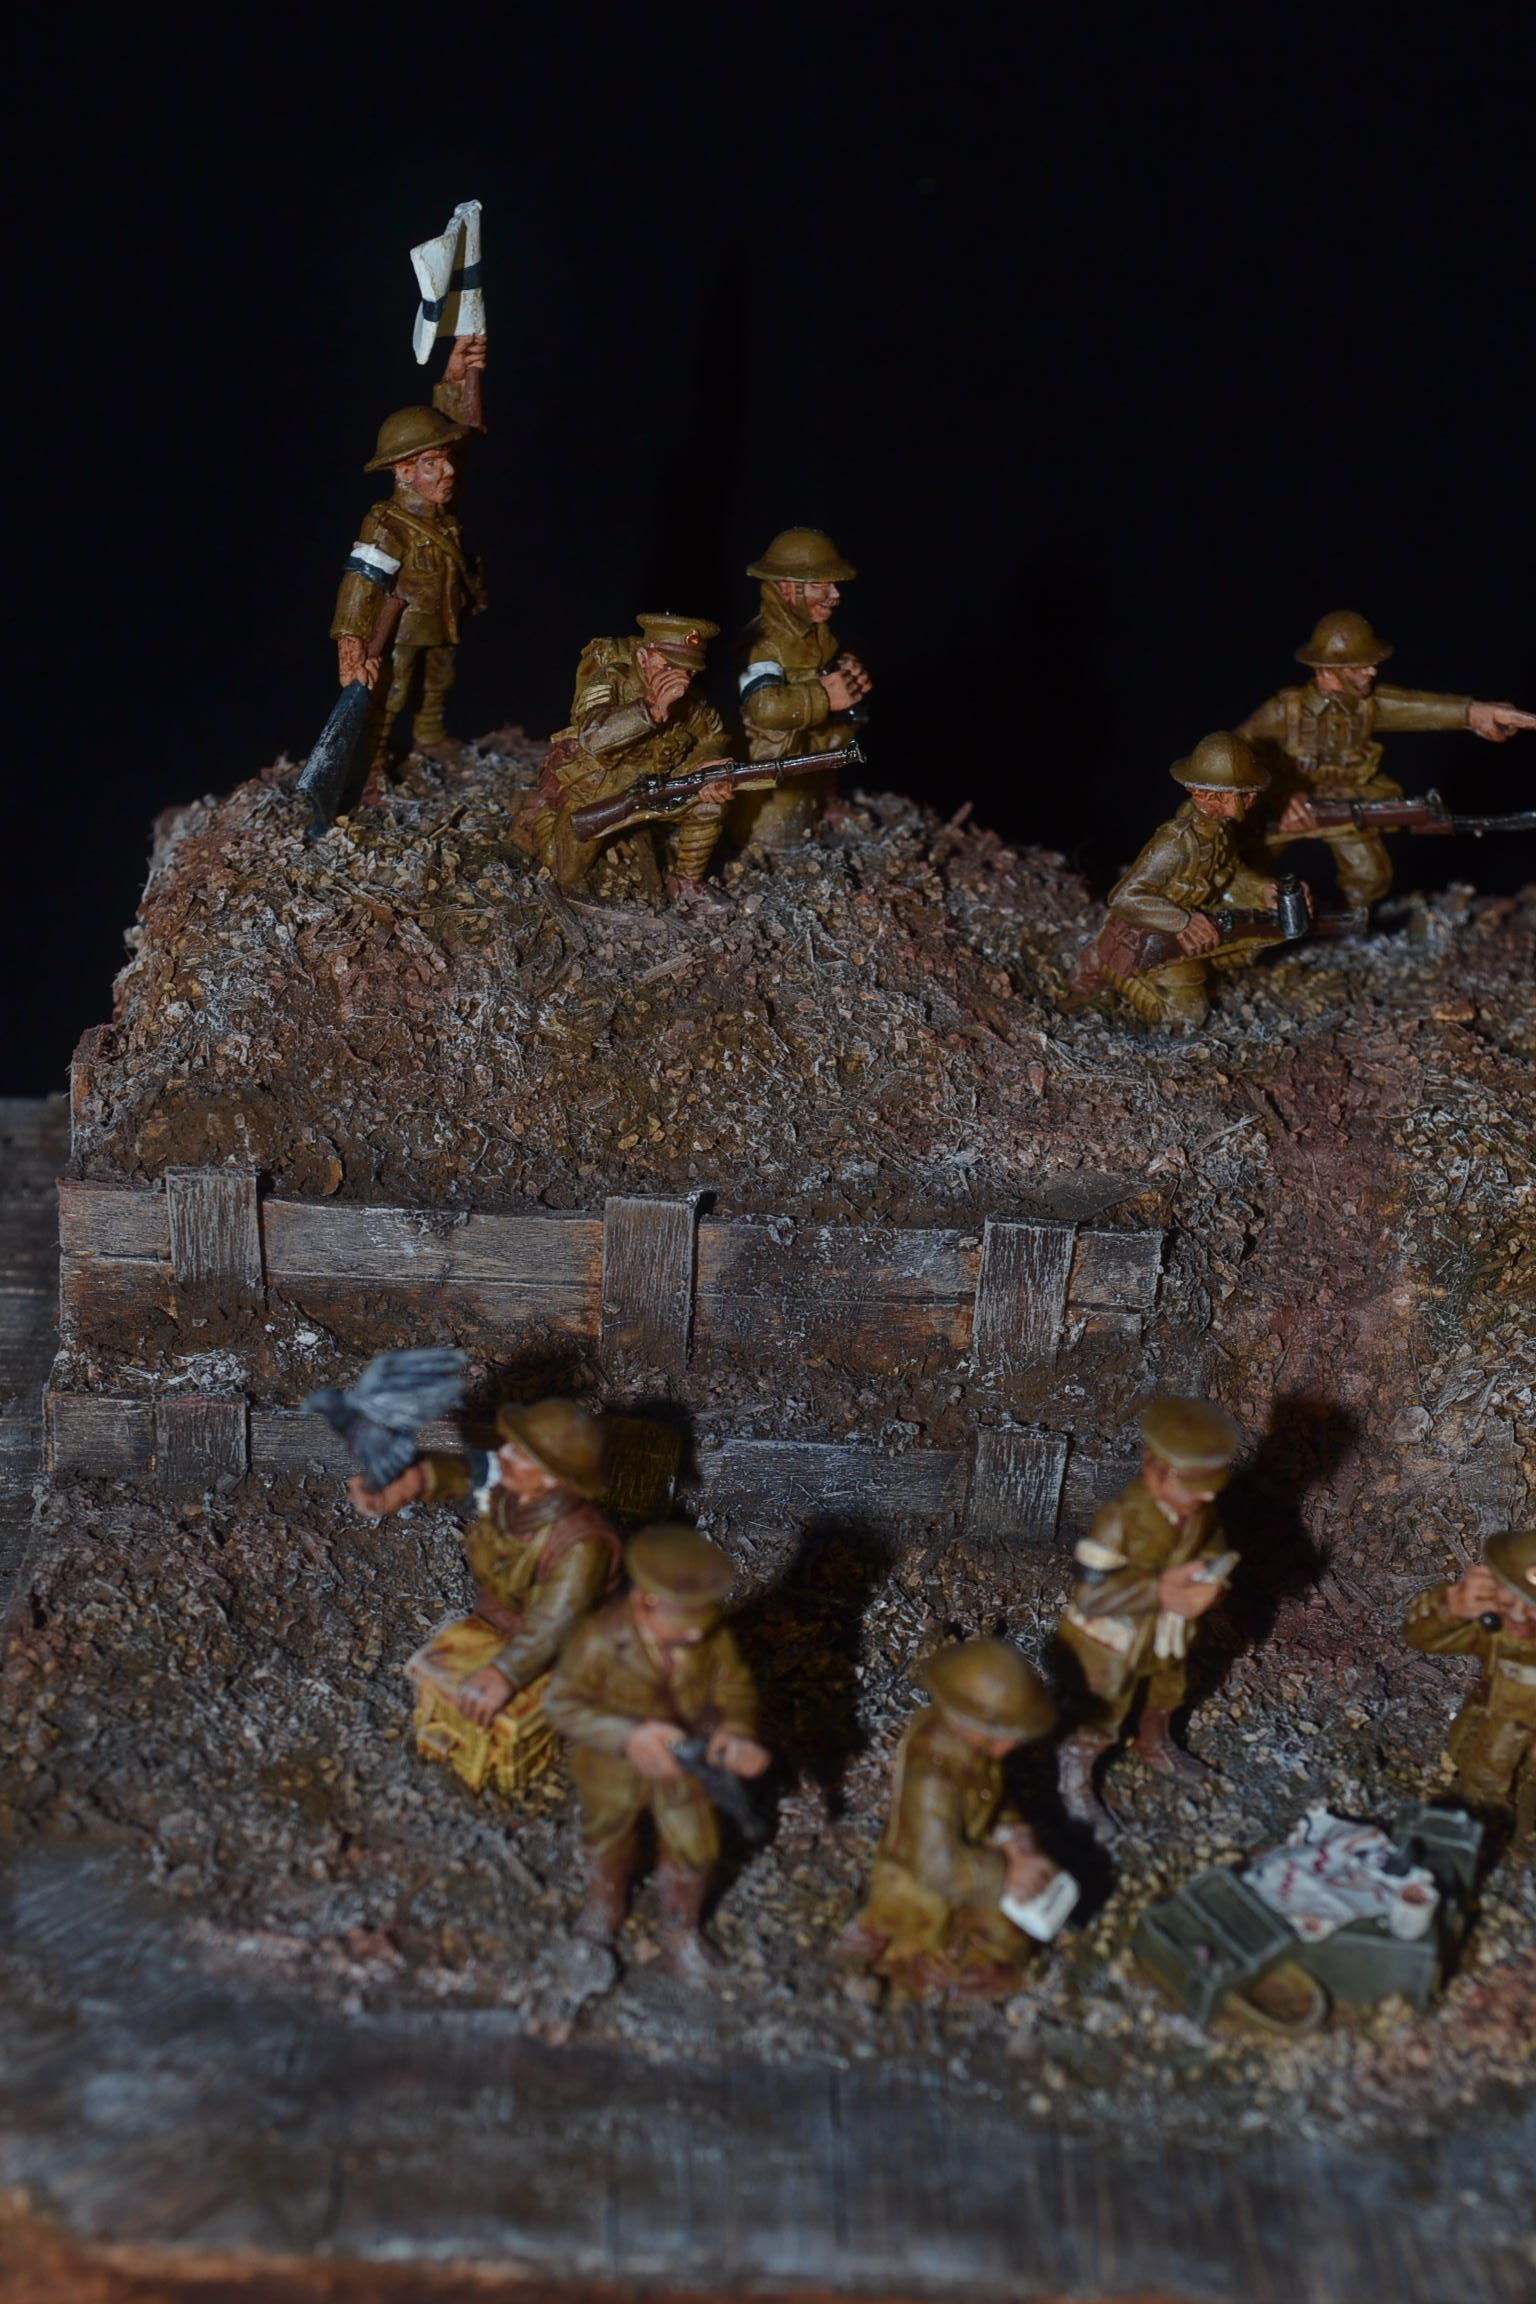
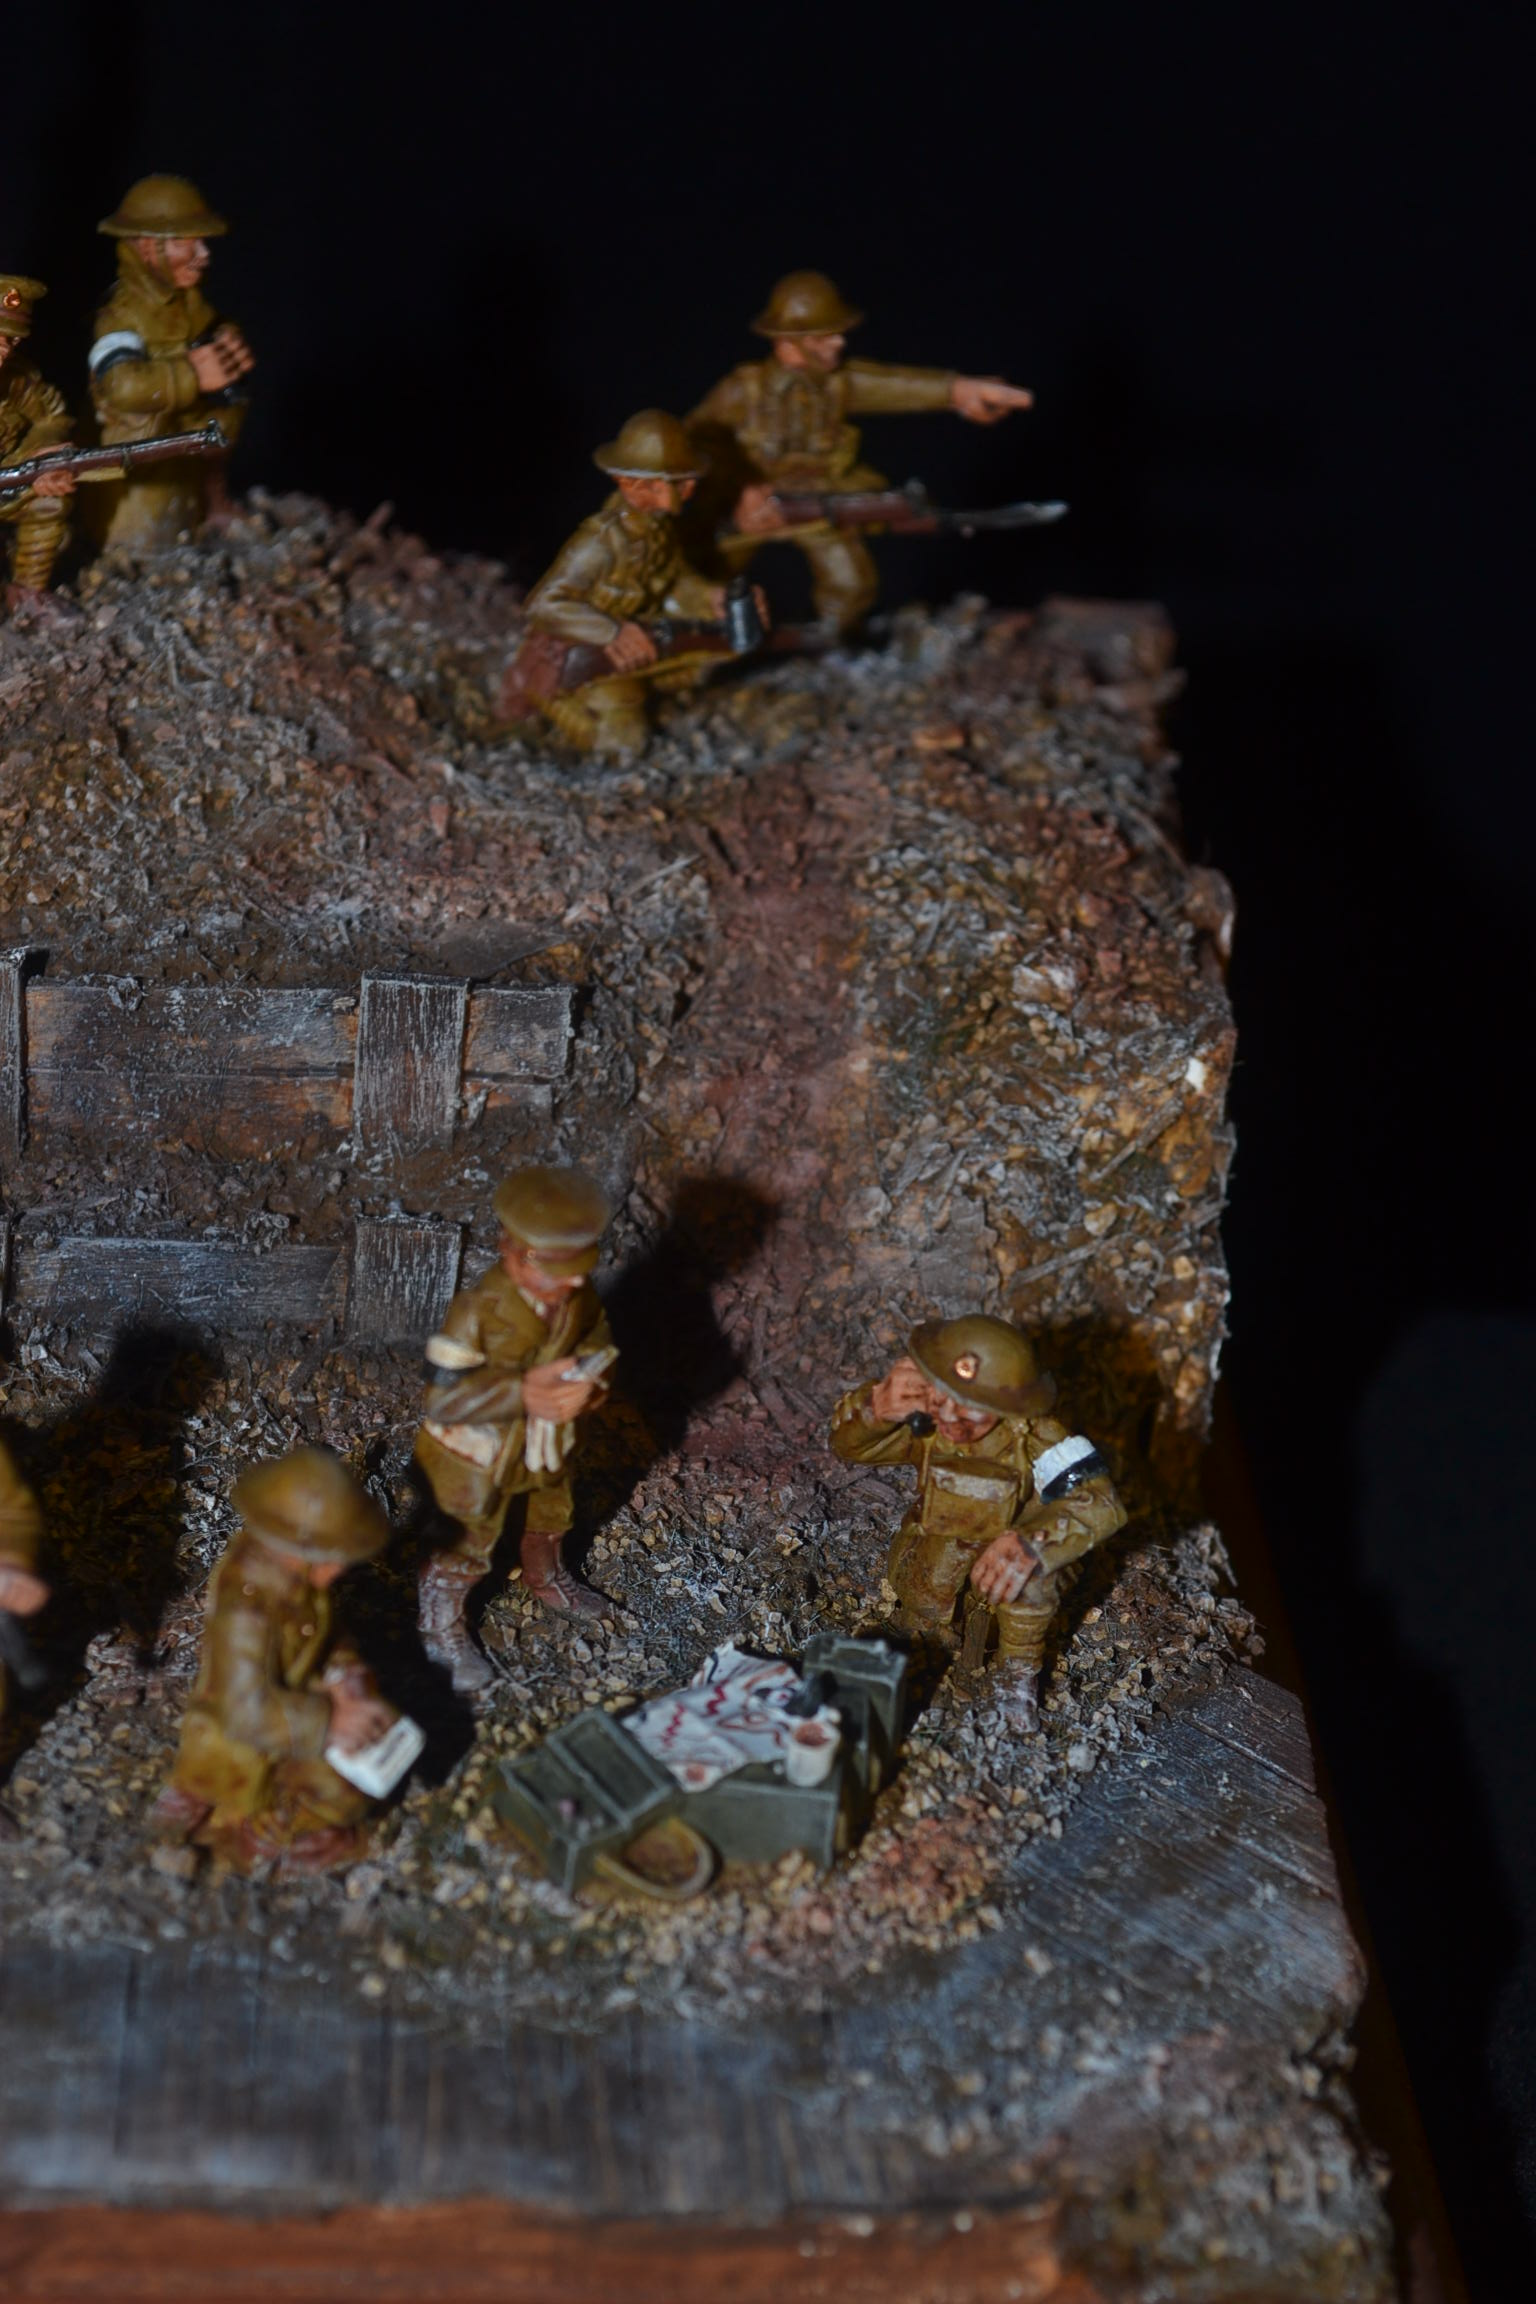
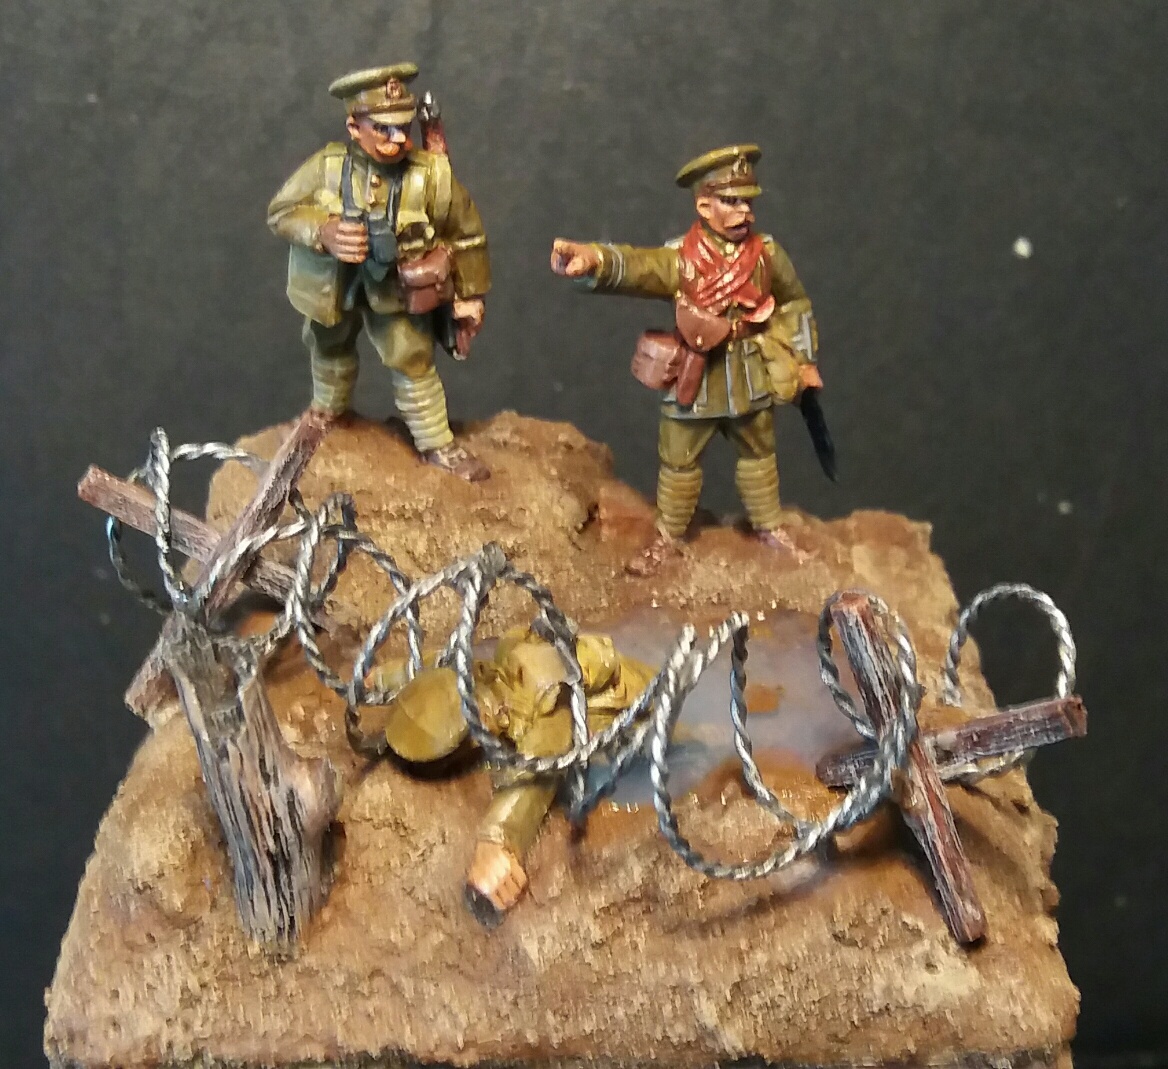
Model 10 – “British Command” – 1914 – 1918

Lions led by Lambs.  Not all the officers were incompetent!

DSC_0791

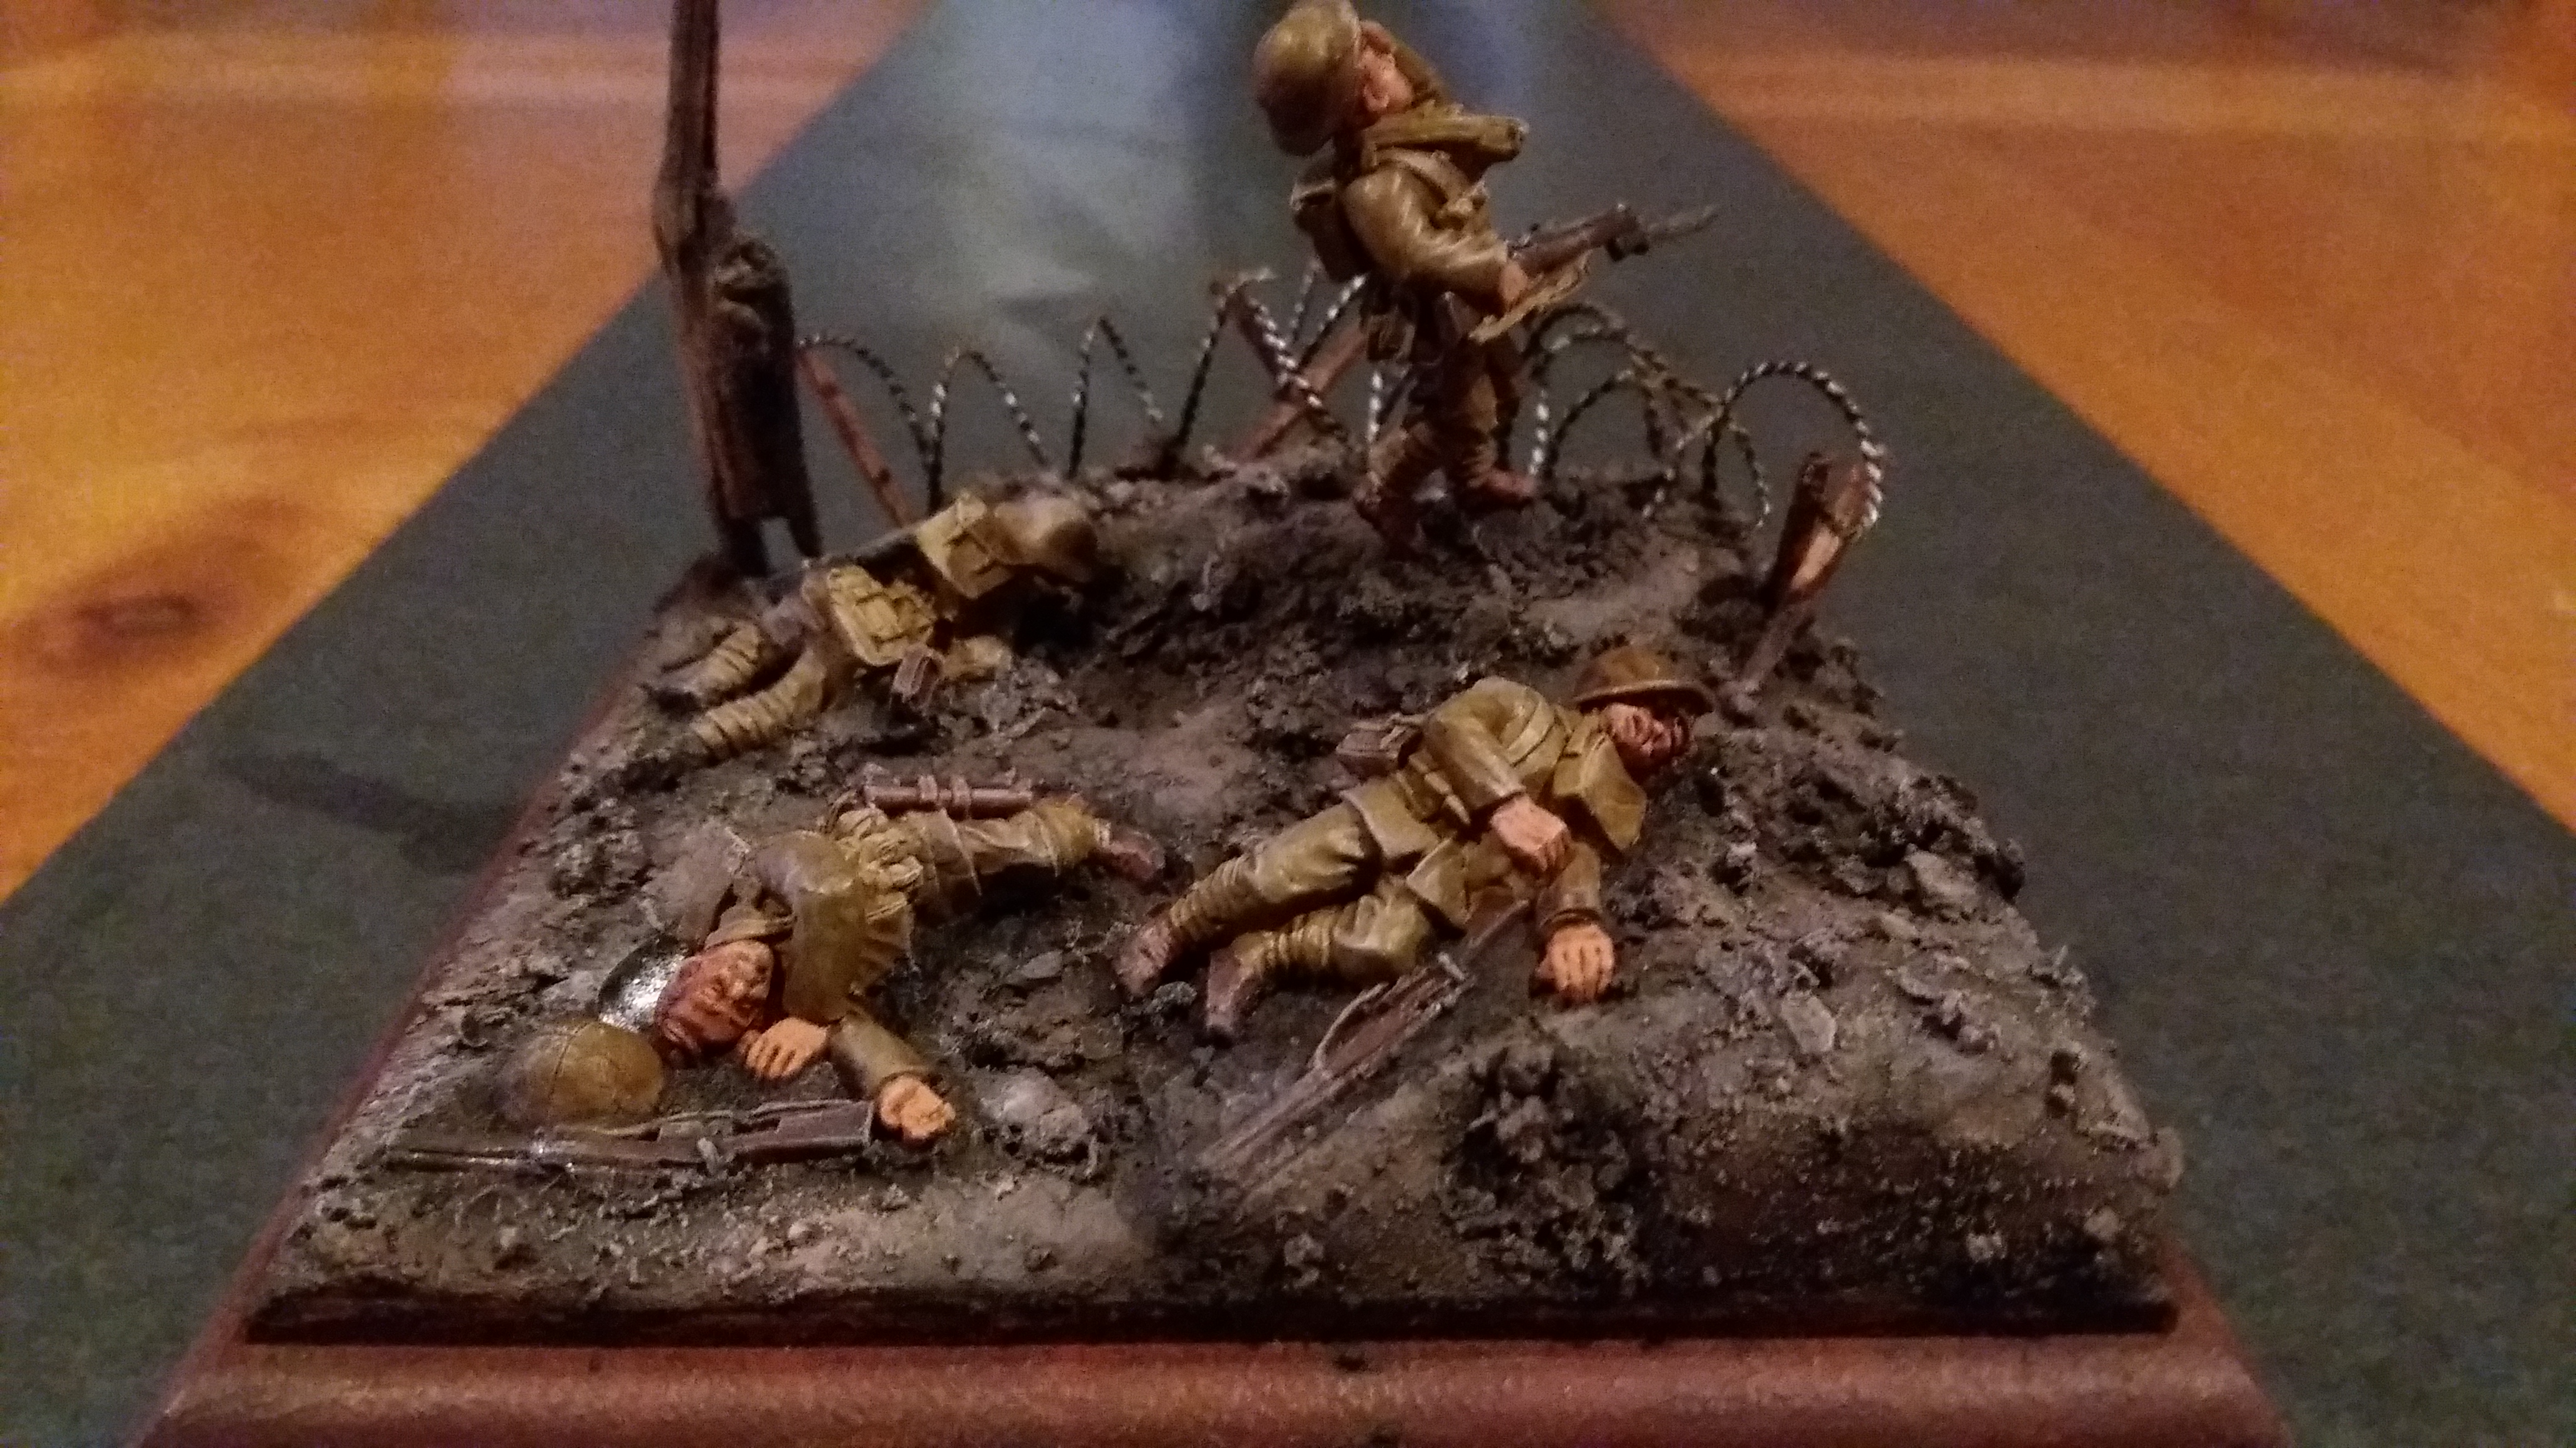
Model 11 – “British Casualties” – The Somme, July to November 1916

A sad reality of war.  Not everyone survives or gets killed. Some get to live with devastating injuries for the rest of their lives.

20171217_093600

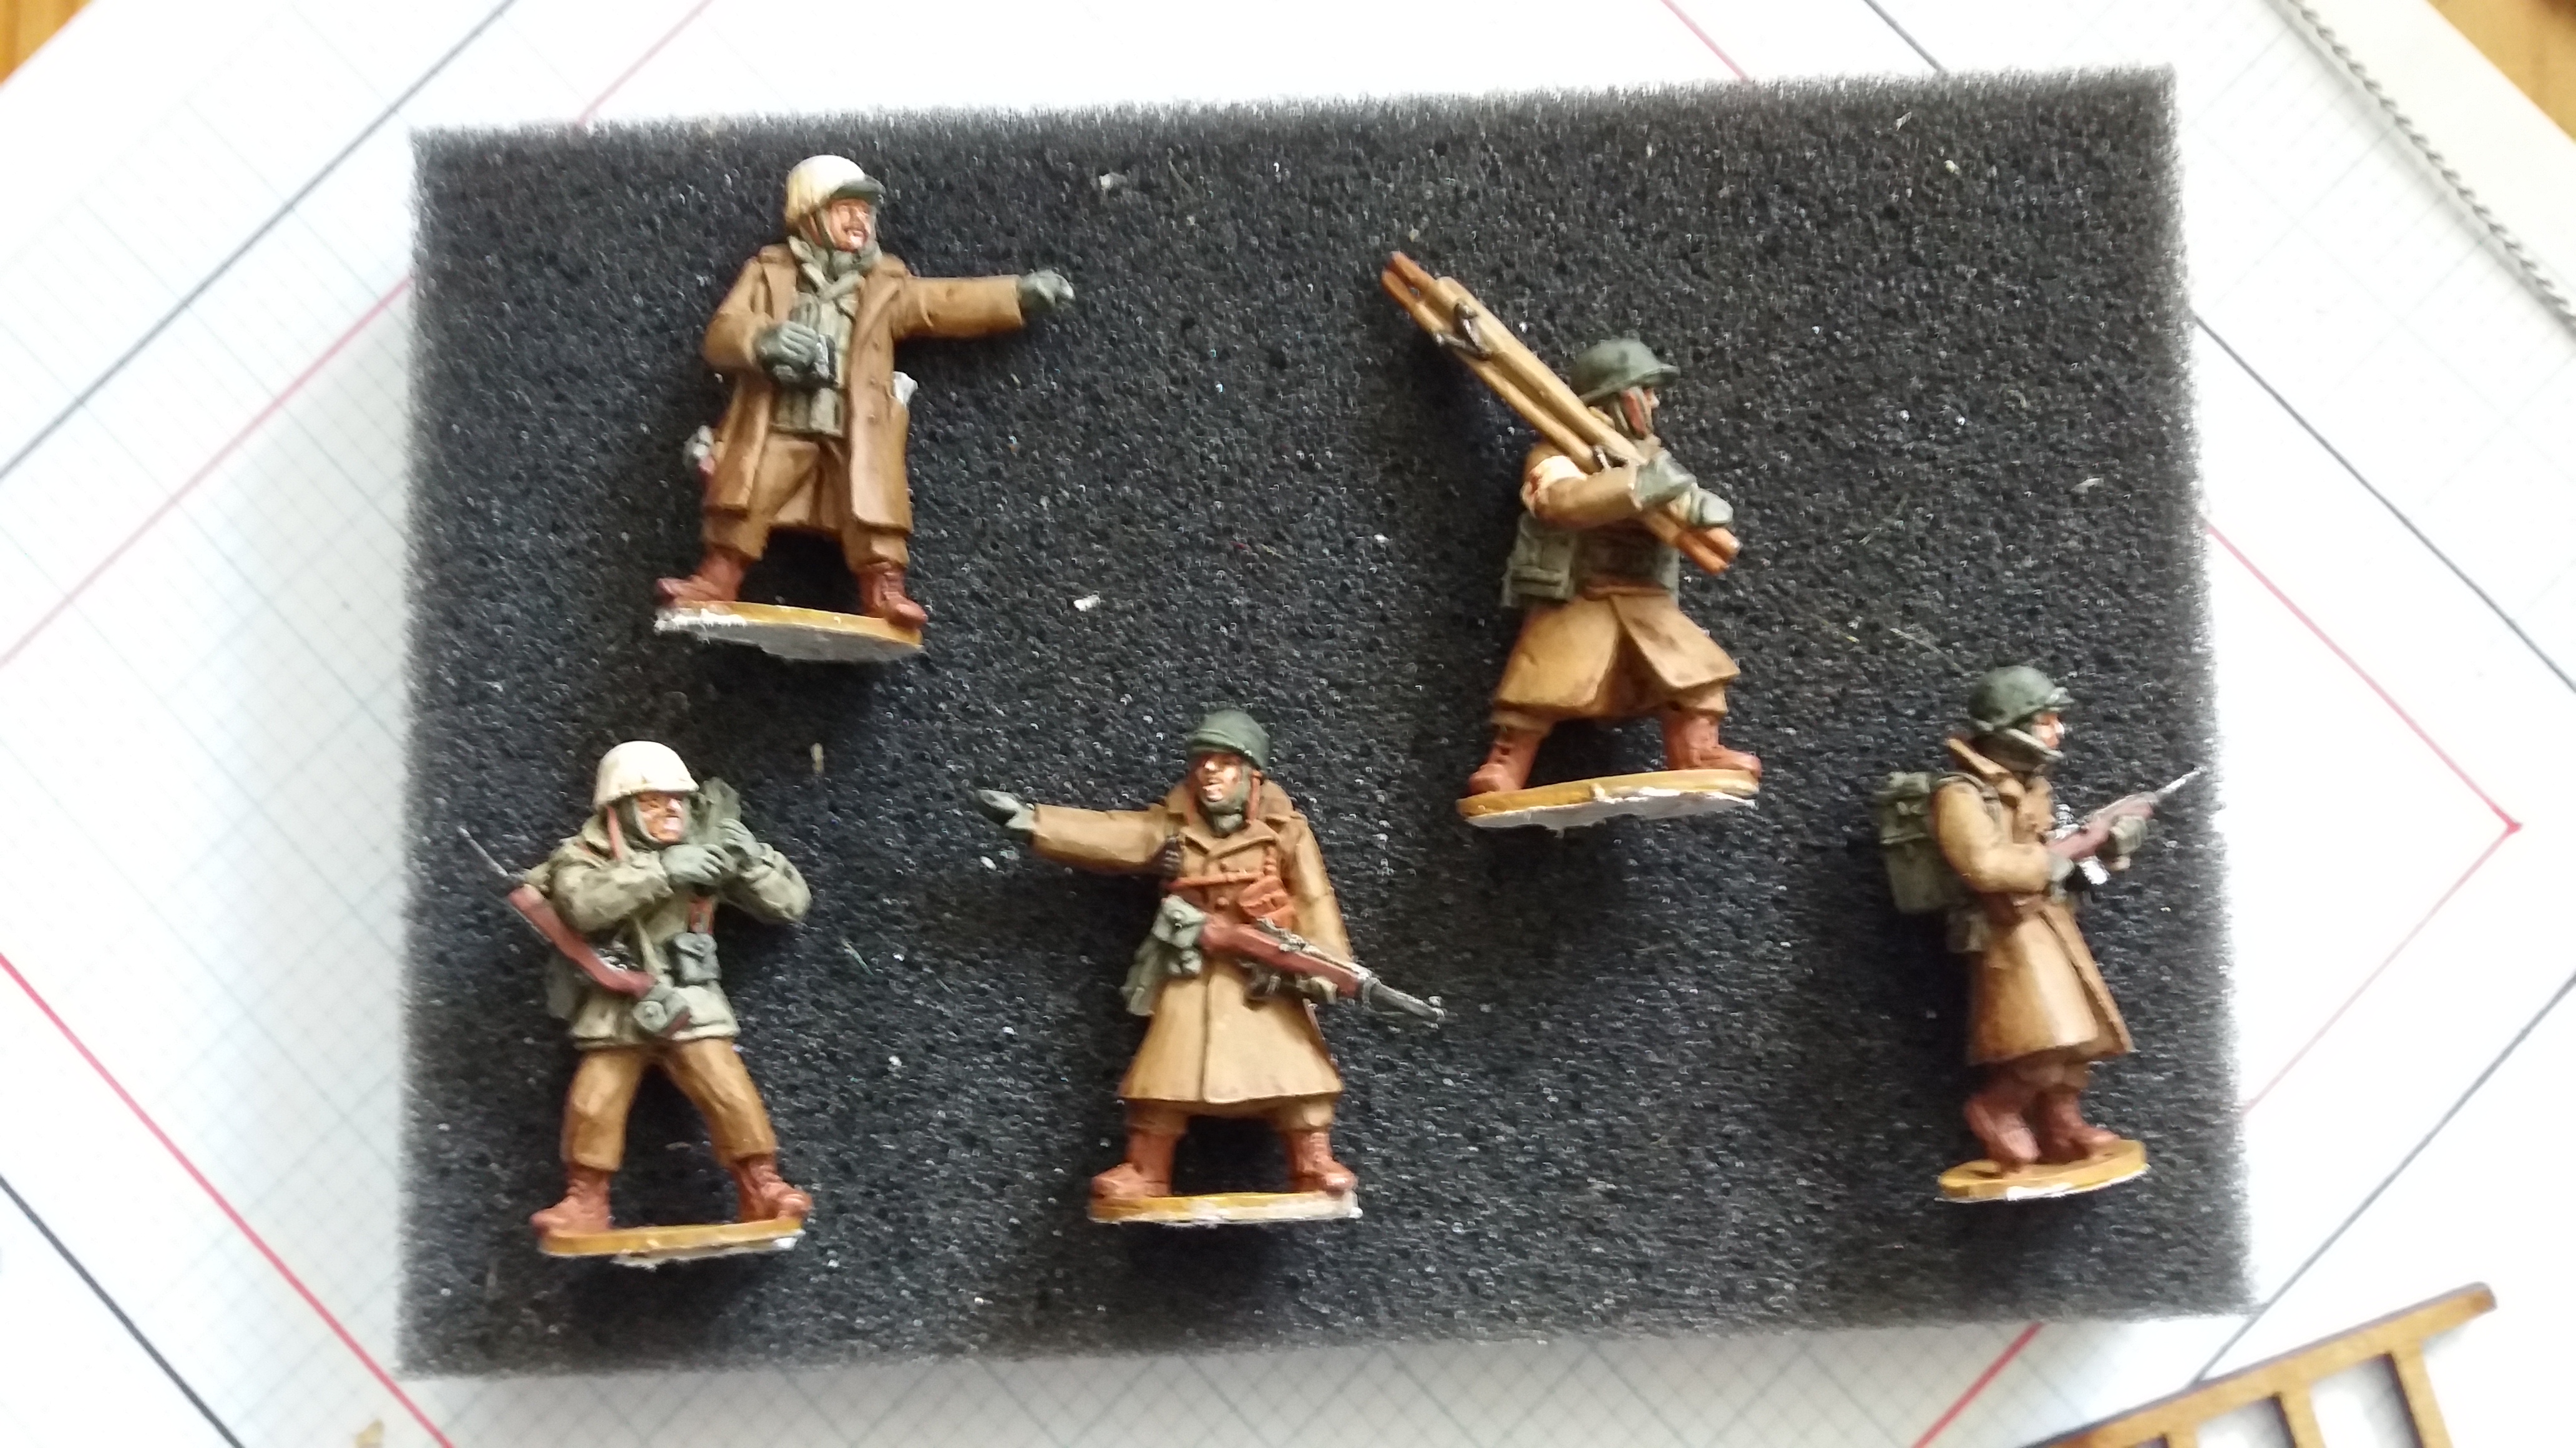
Model 12 – “British Signallers” – 1914 – 1918

Communication in all walks of life are key but not very Hollywood!  Underrated heroes.

DSC_0809

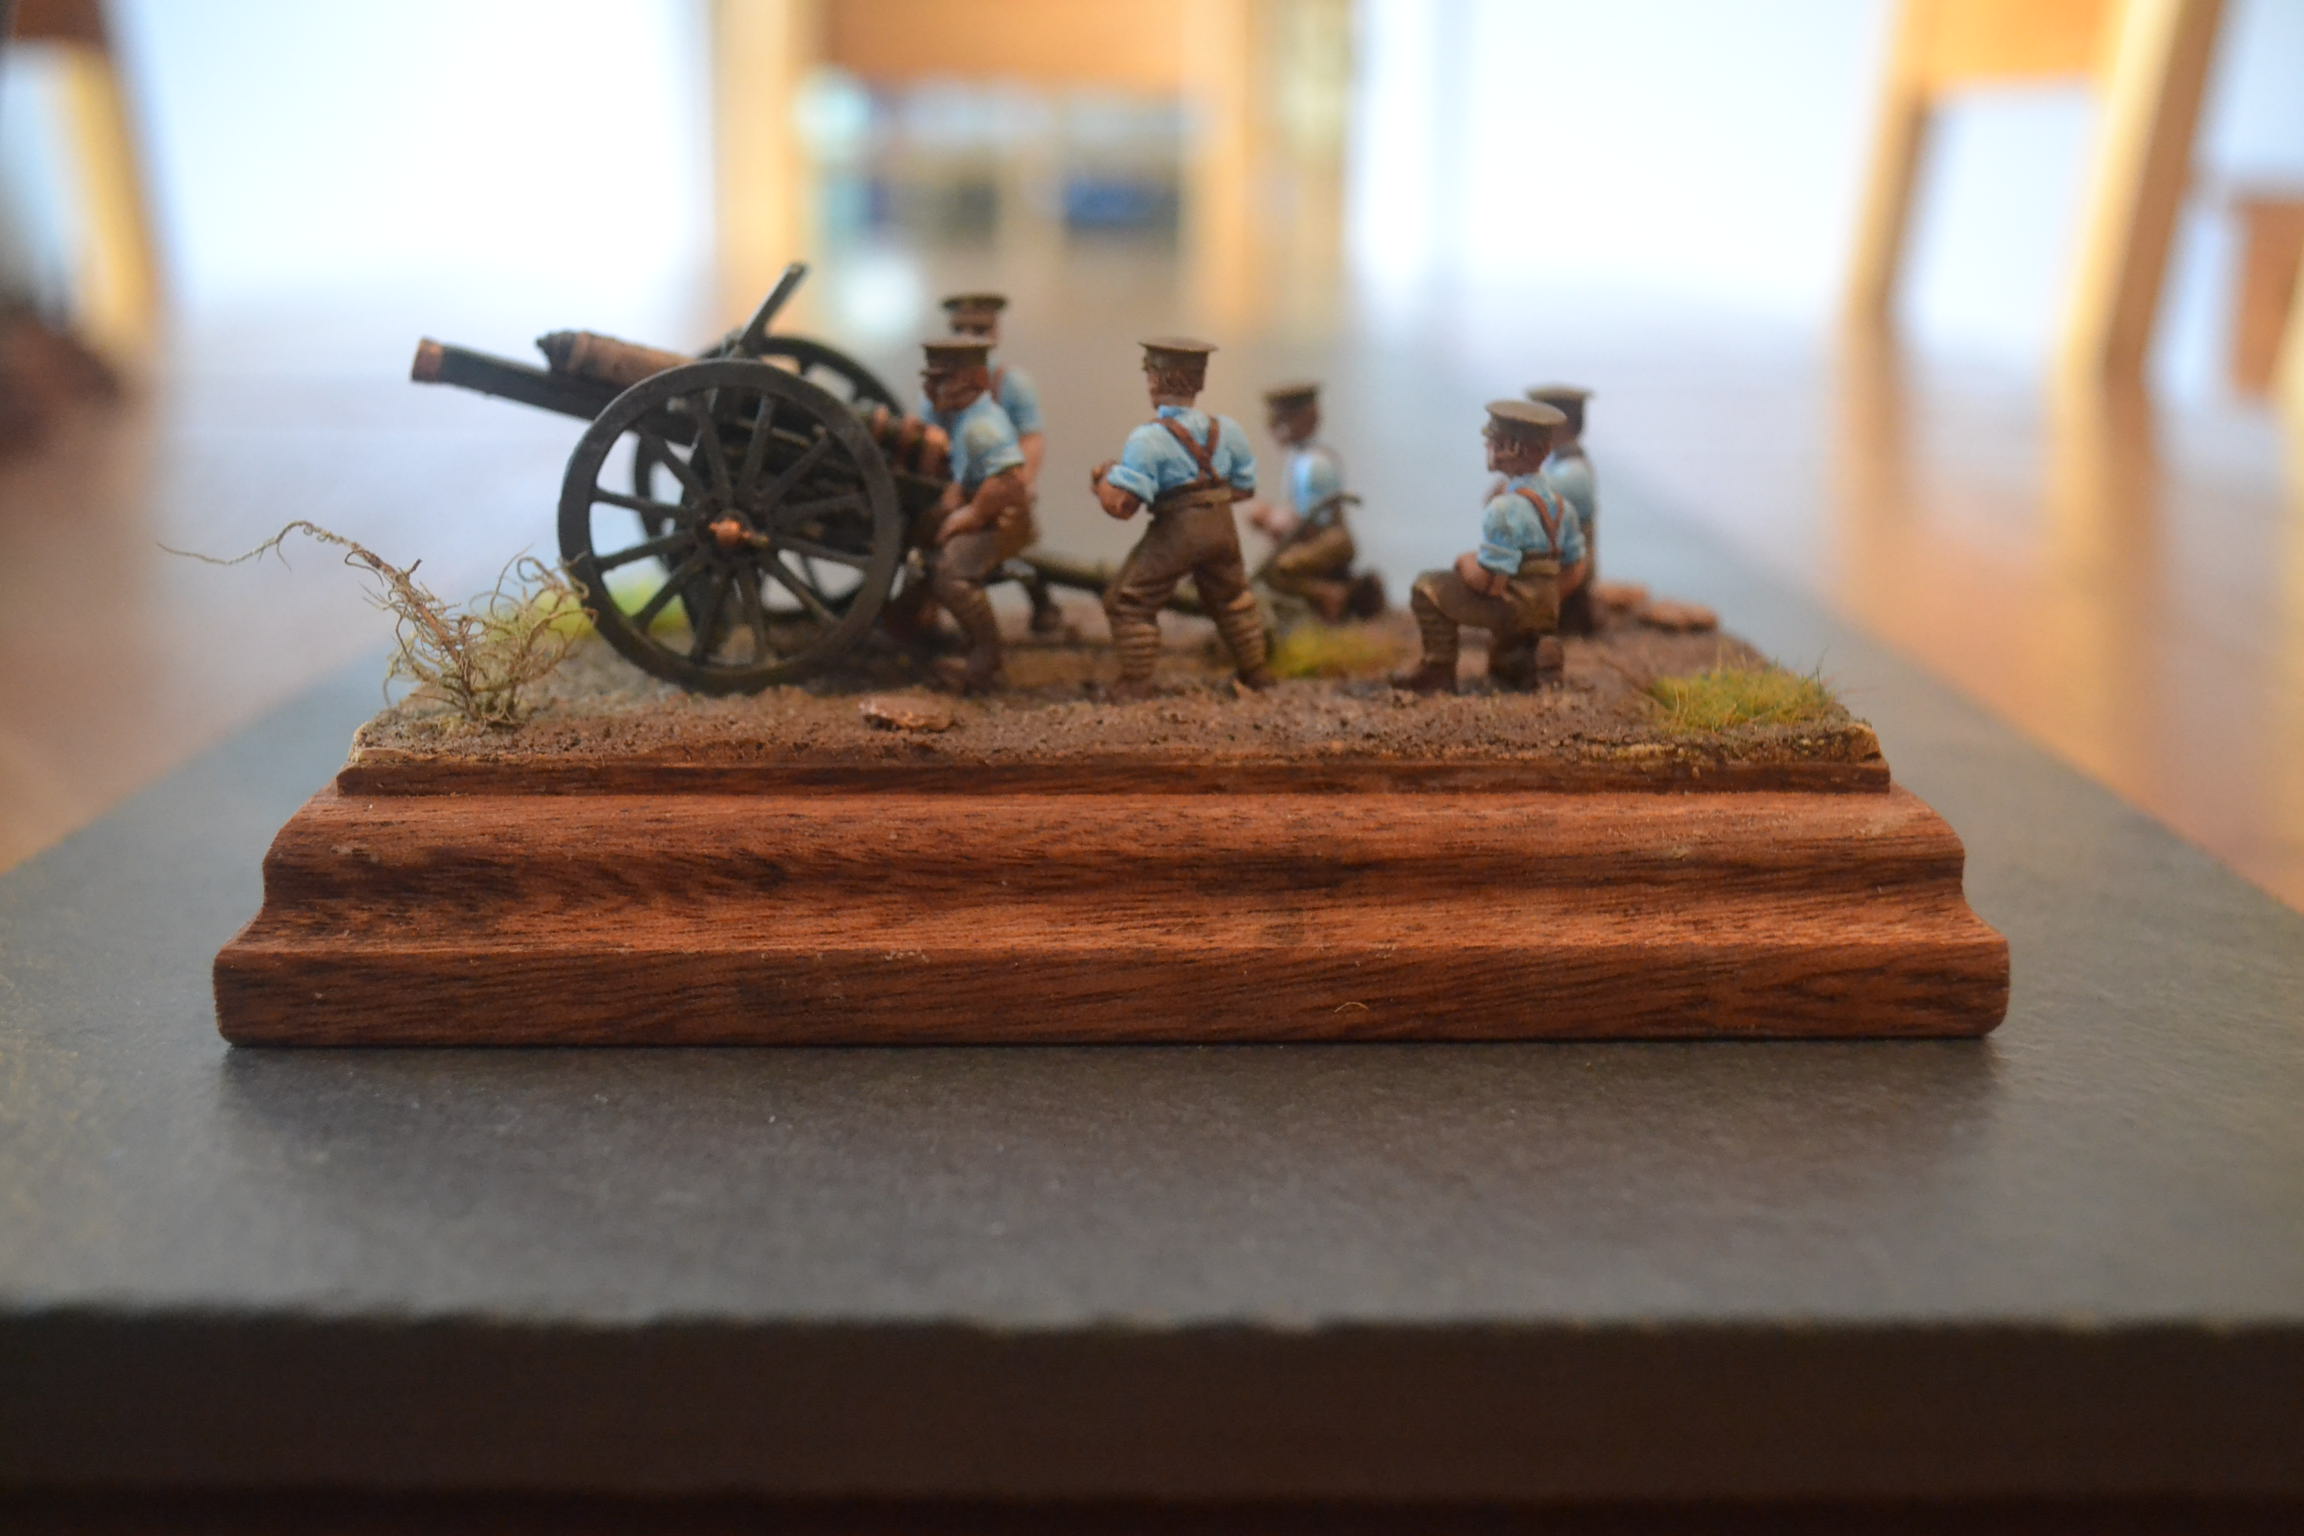
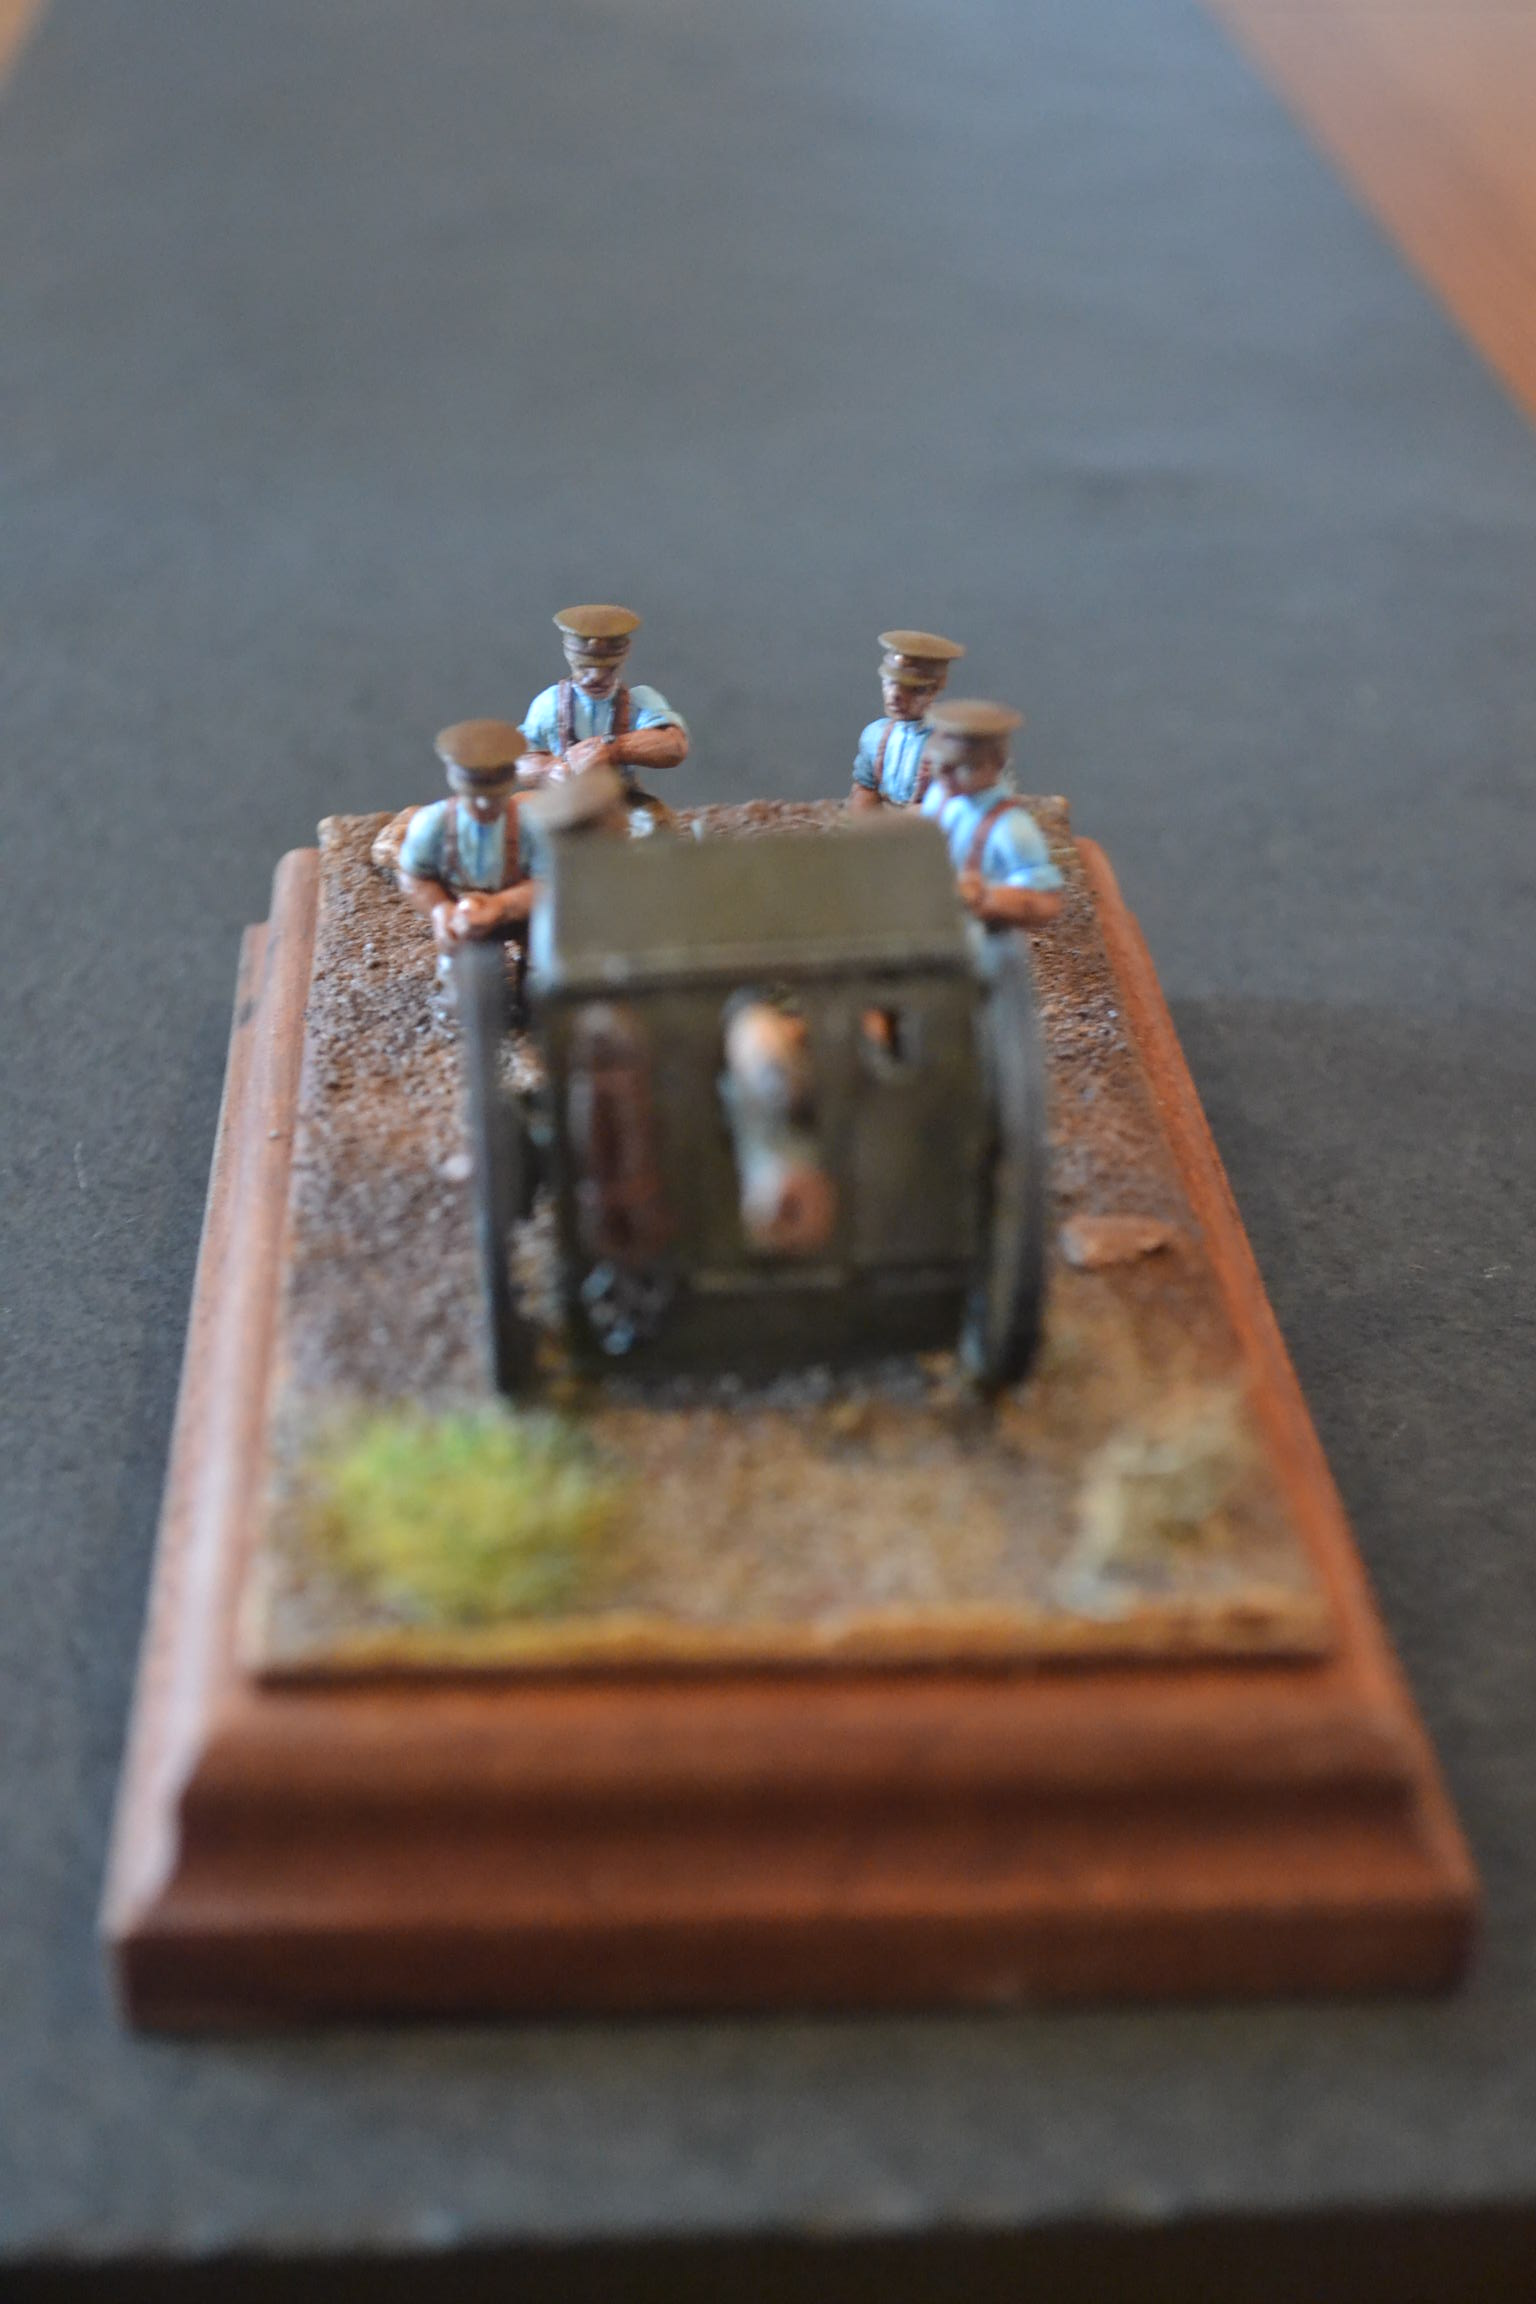
Model 13 – “British 18 Pounder Gun Crew” – 1914 – 1918

The volume of shells fired during the war was incredible.  No wonder the landscape was so devastated.  An artillery piece was another must.

DSC_0794

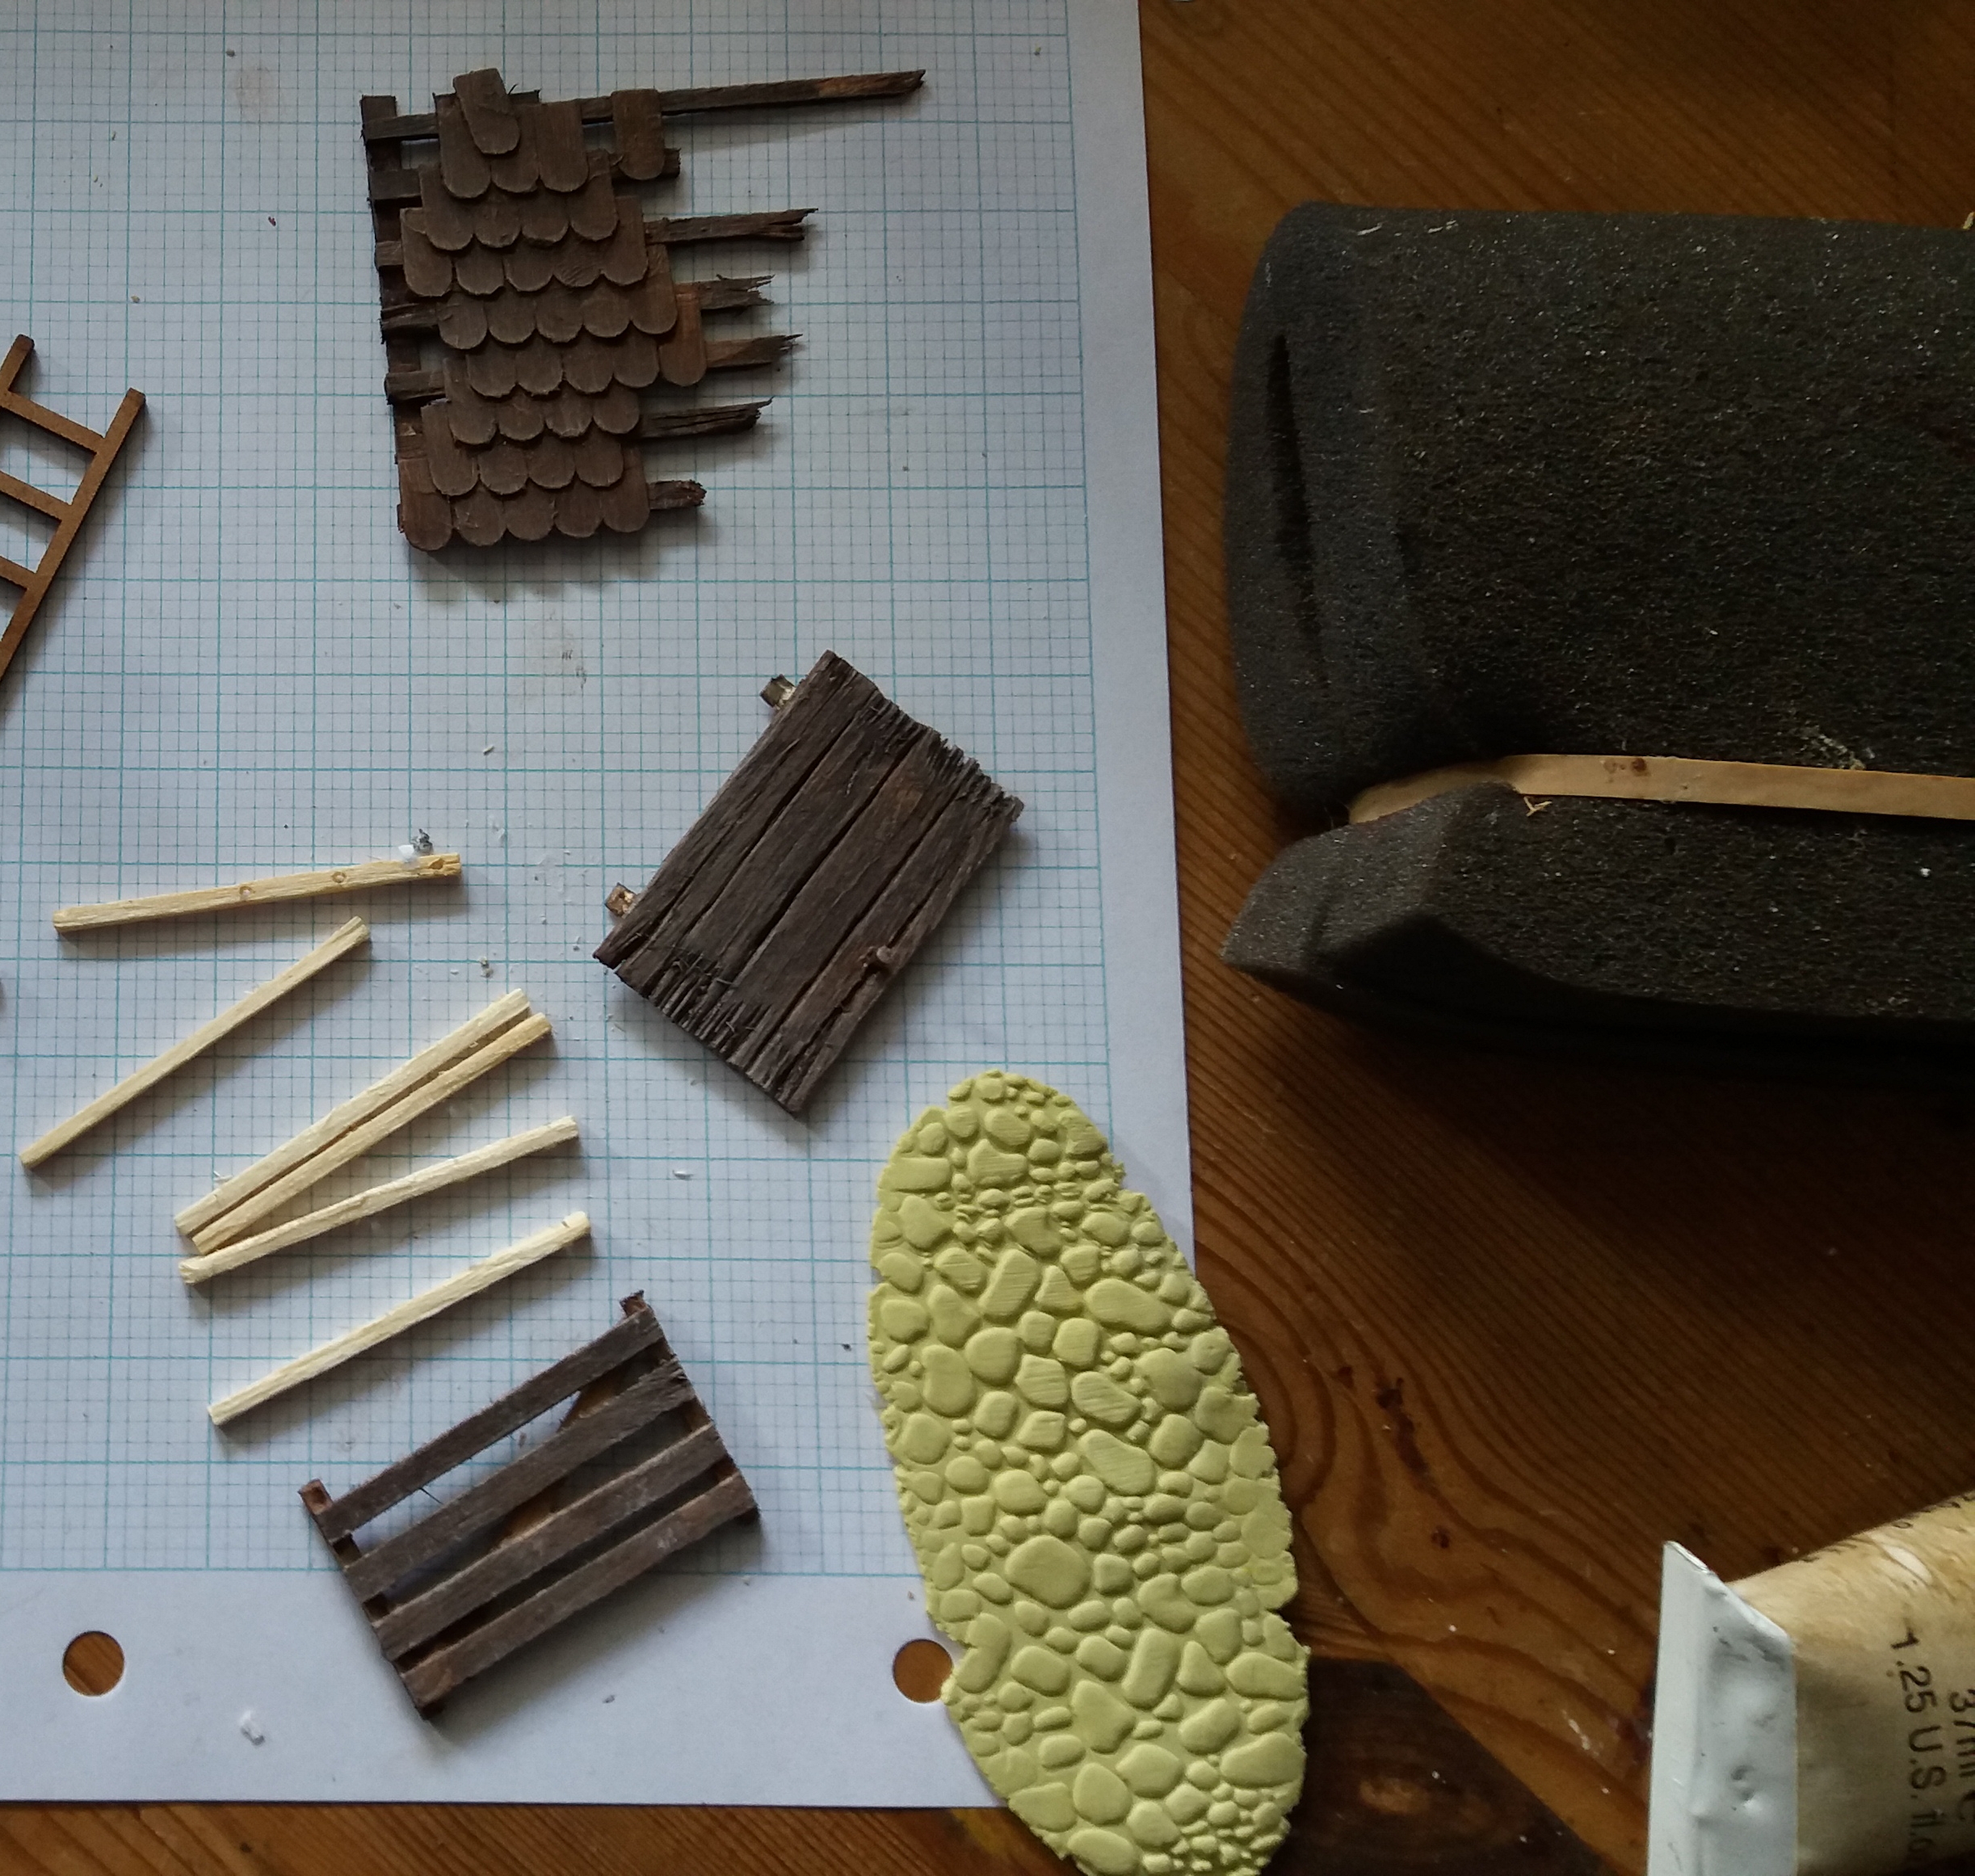
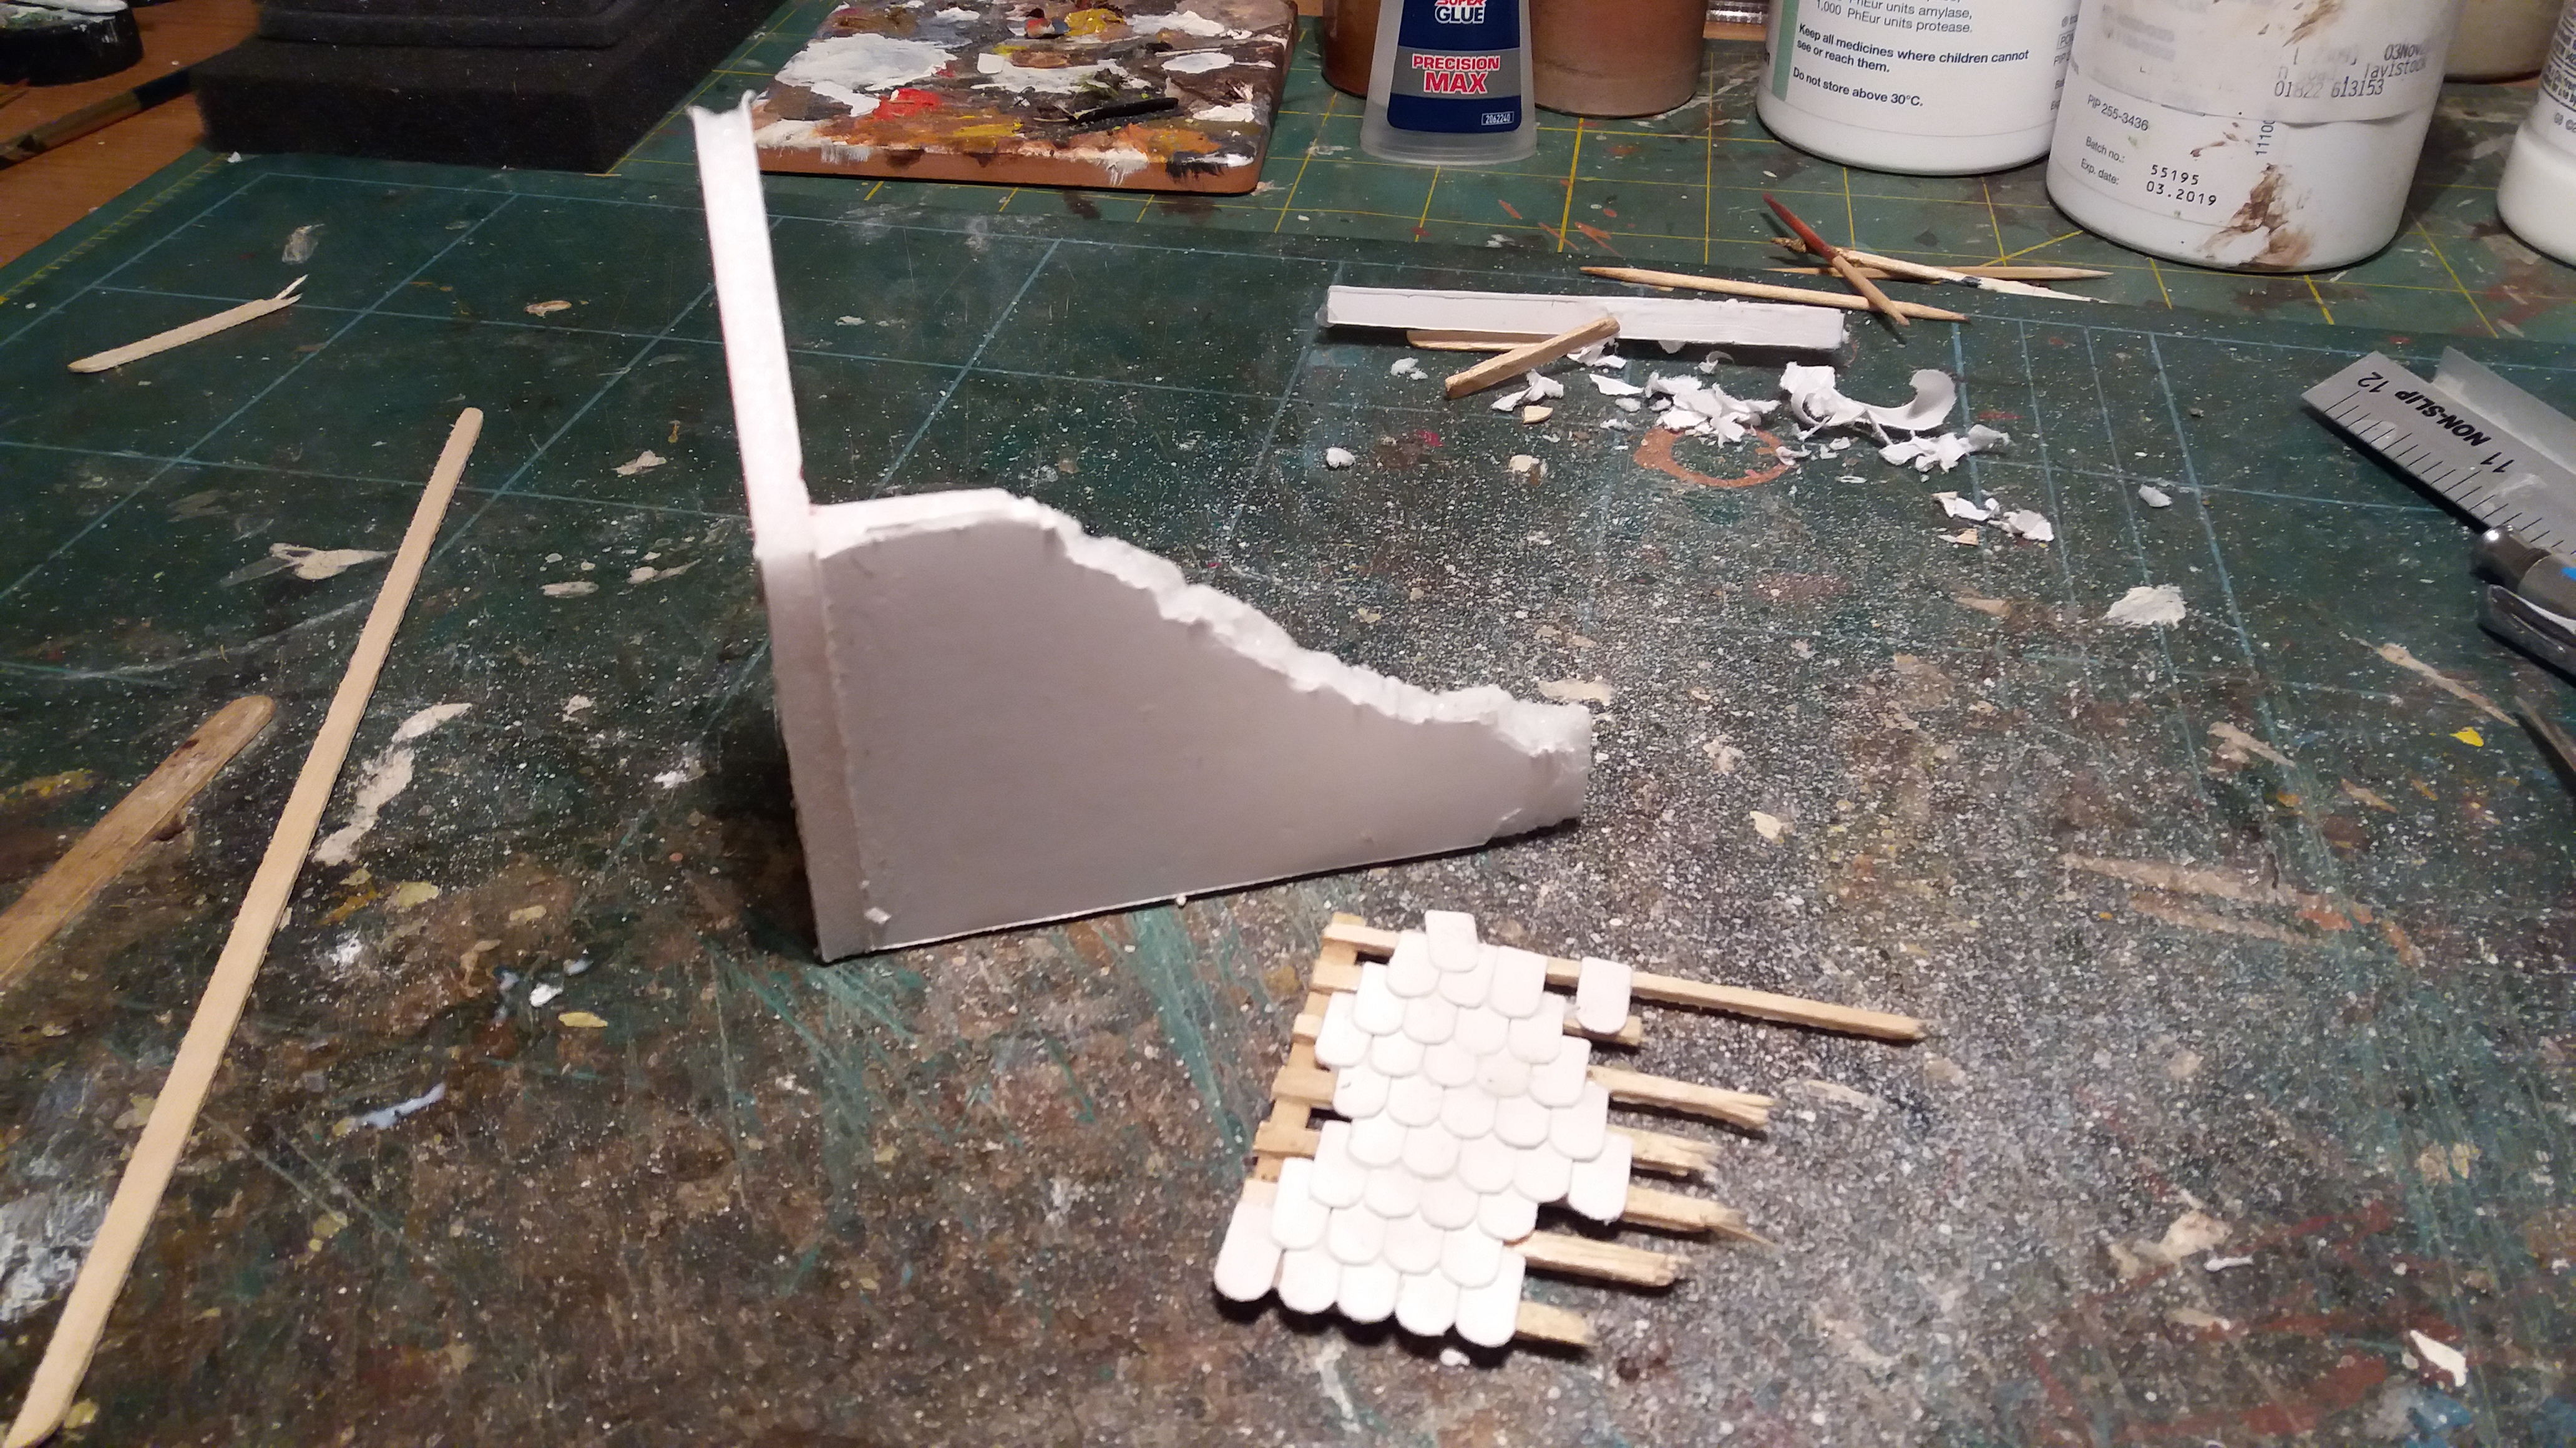
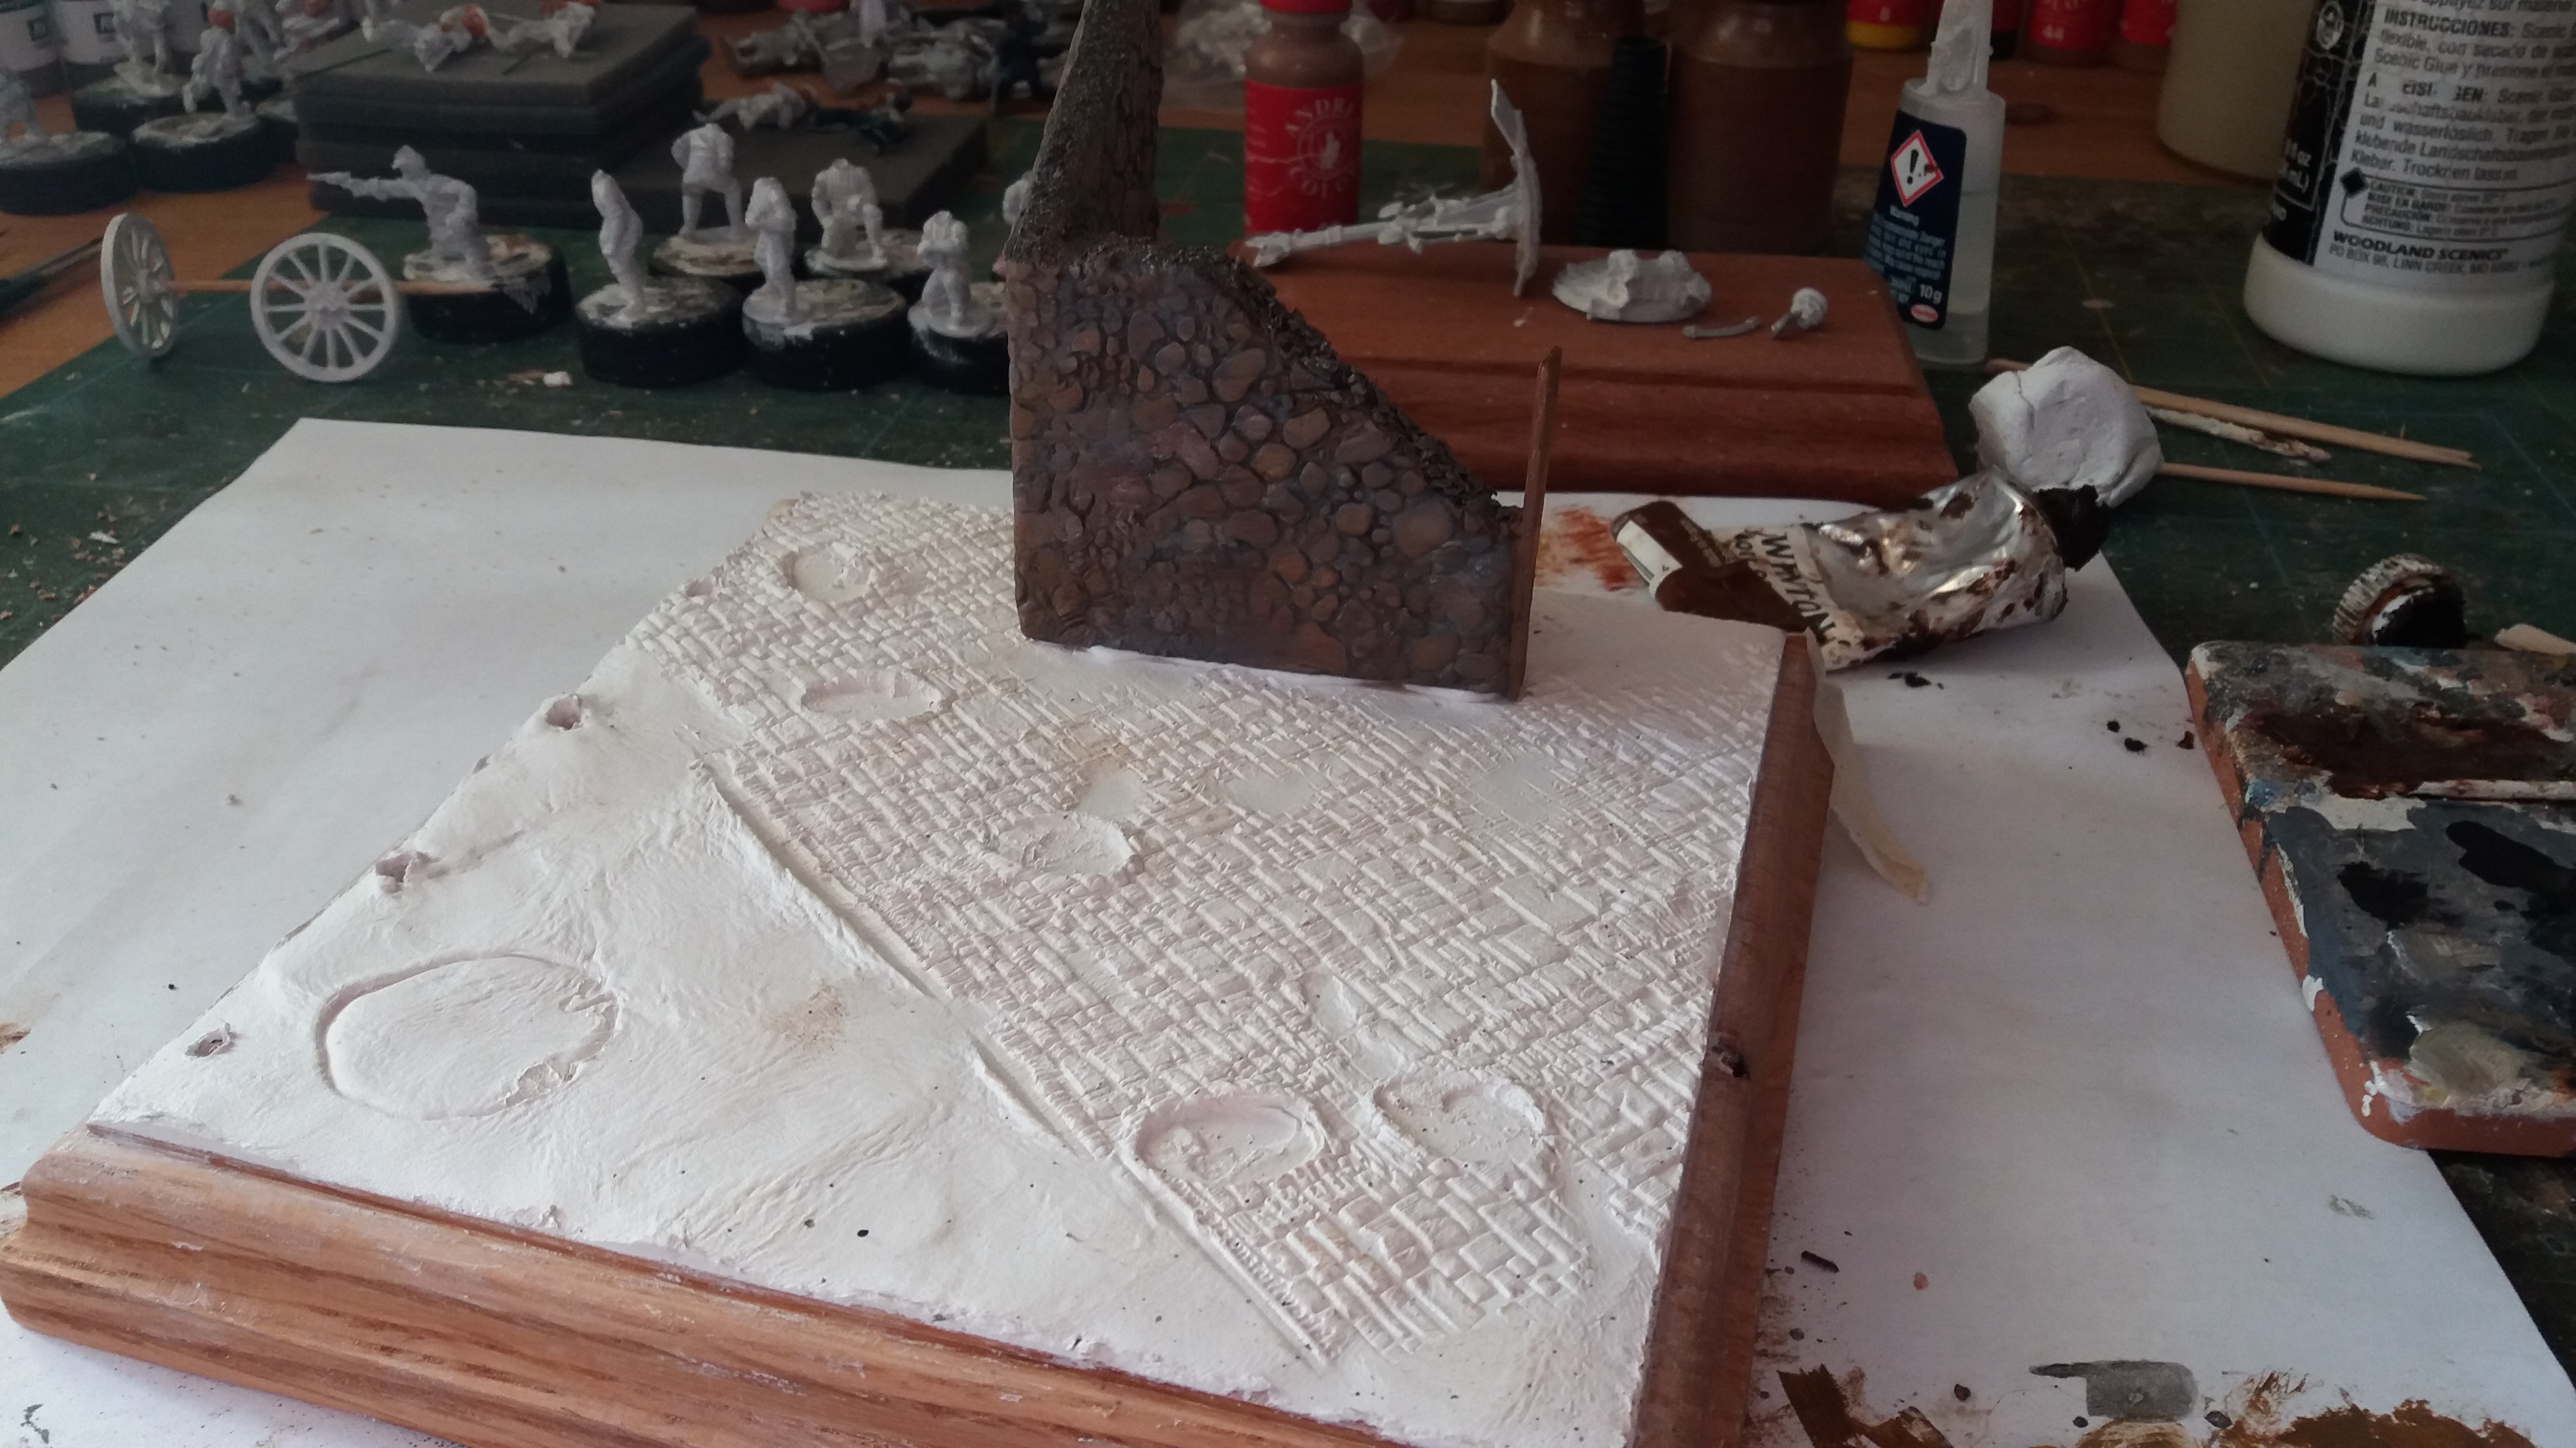
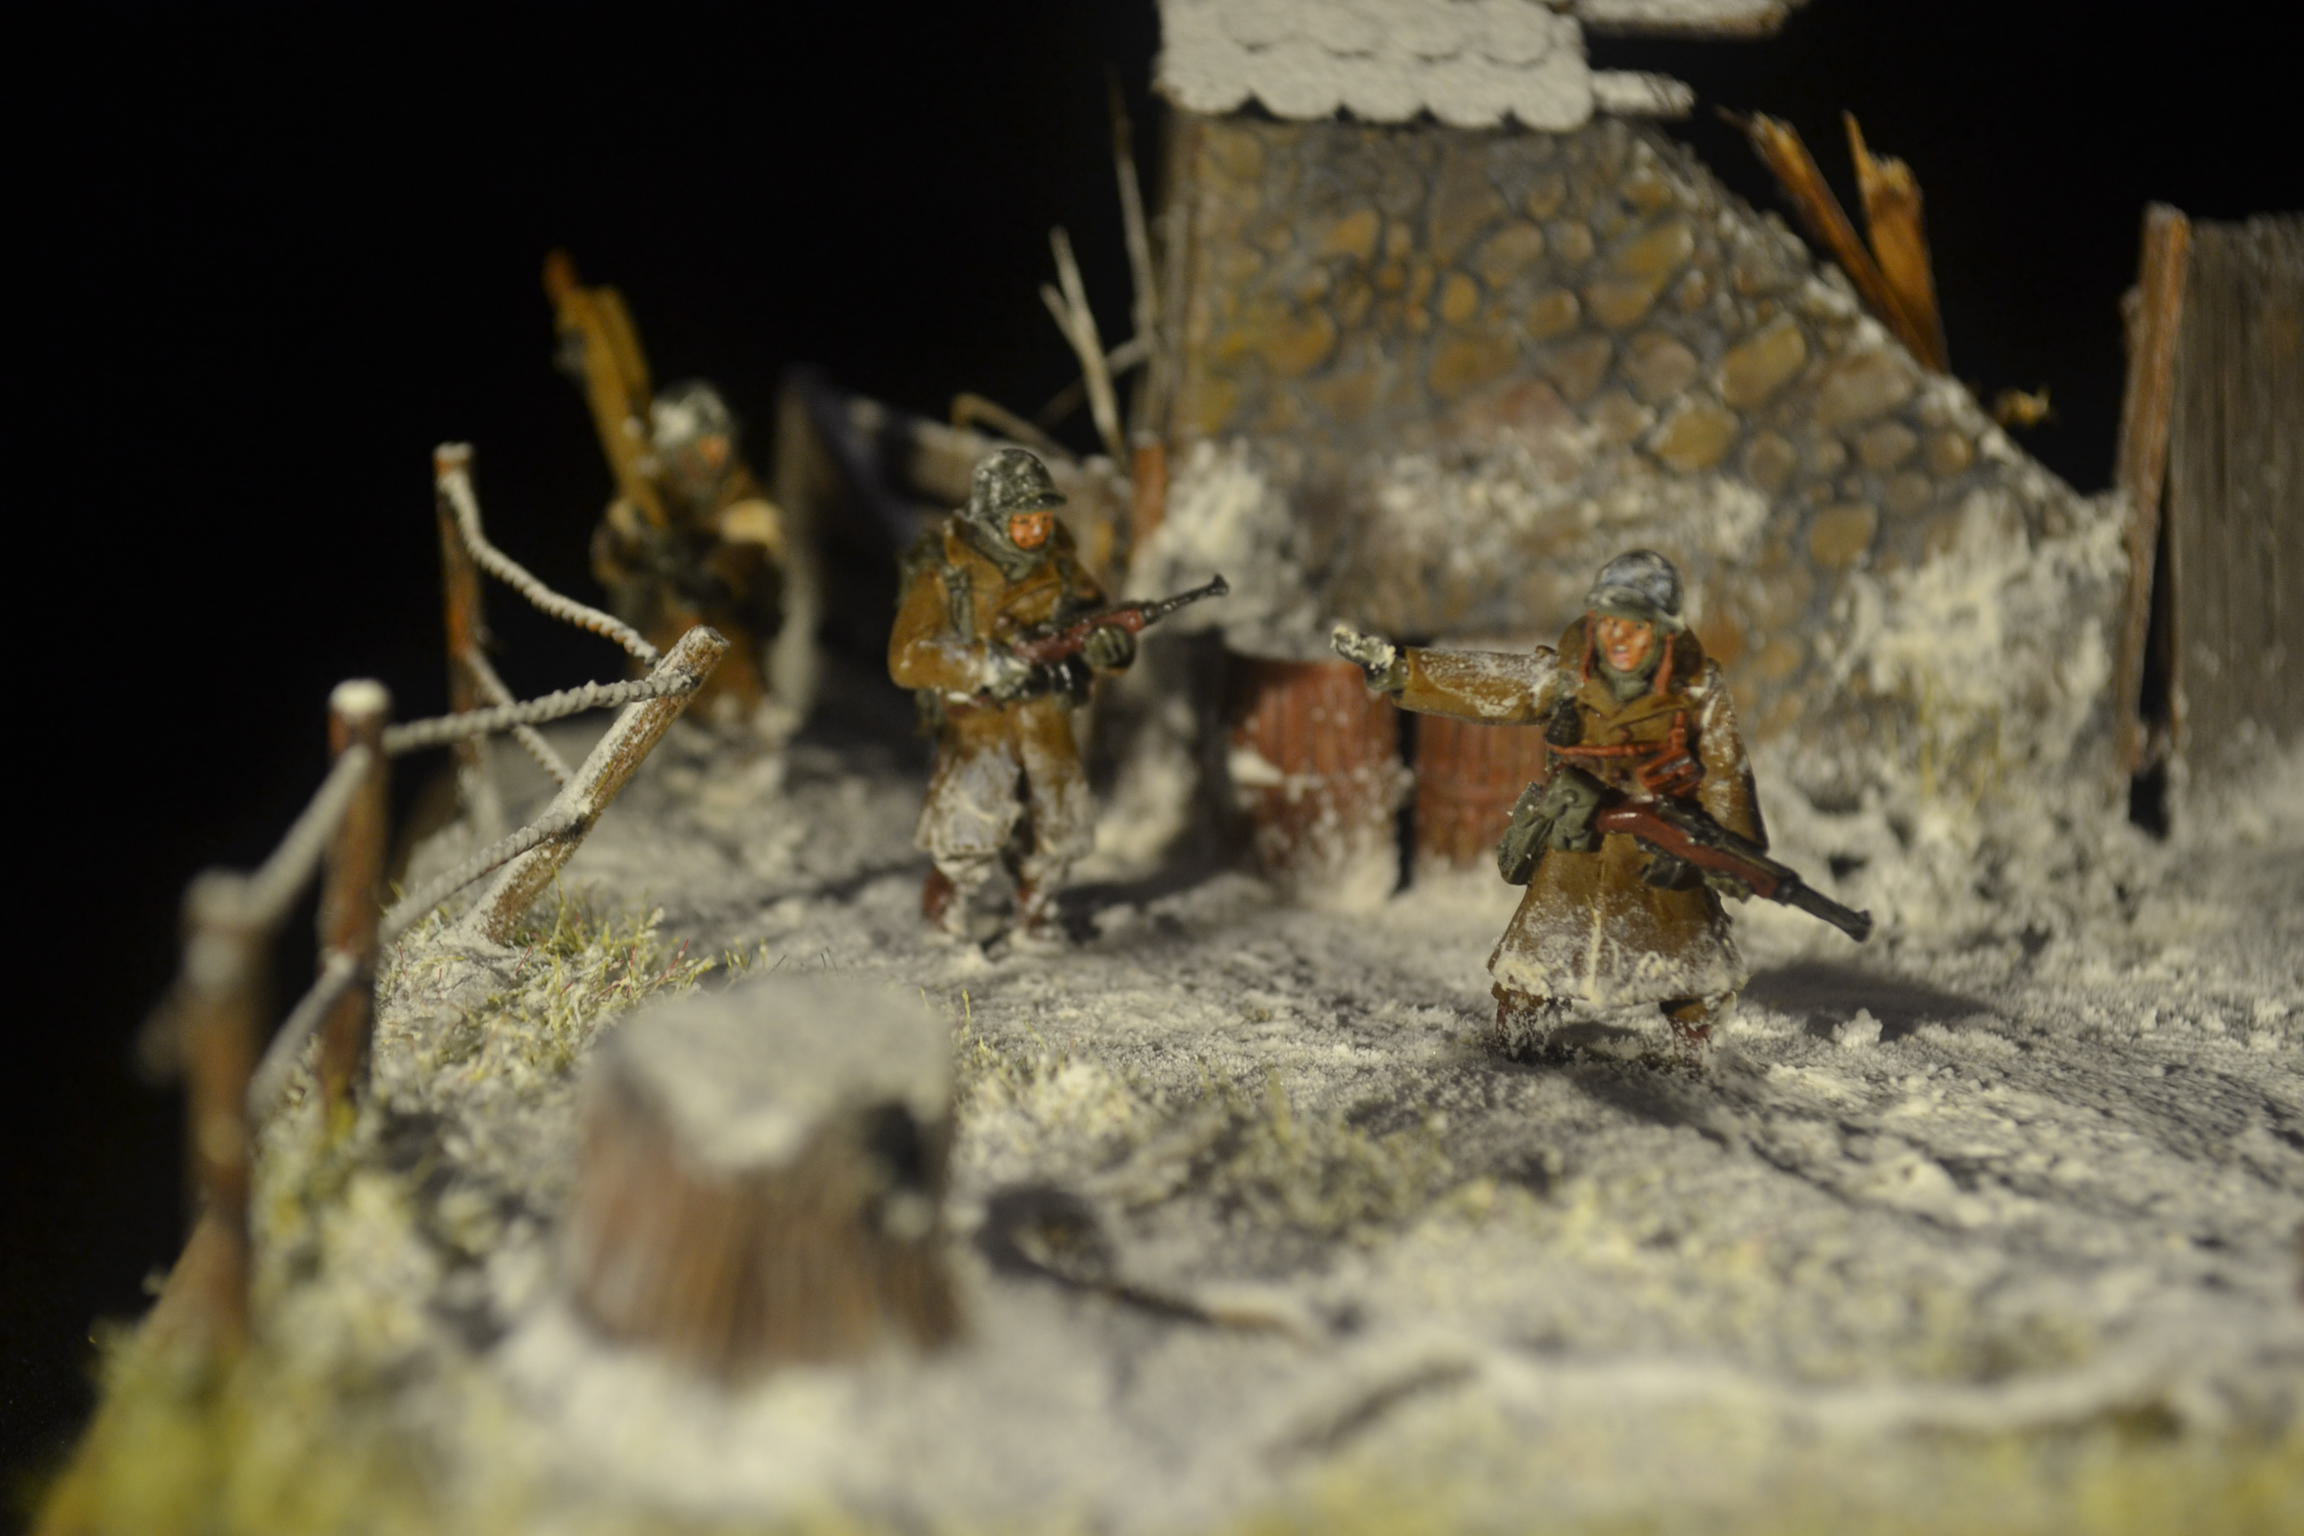
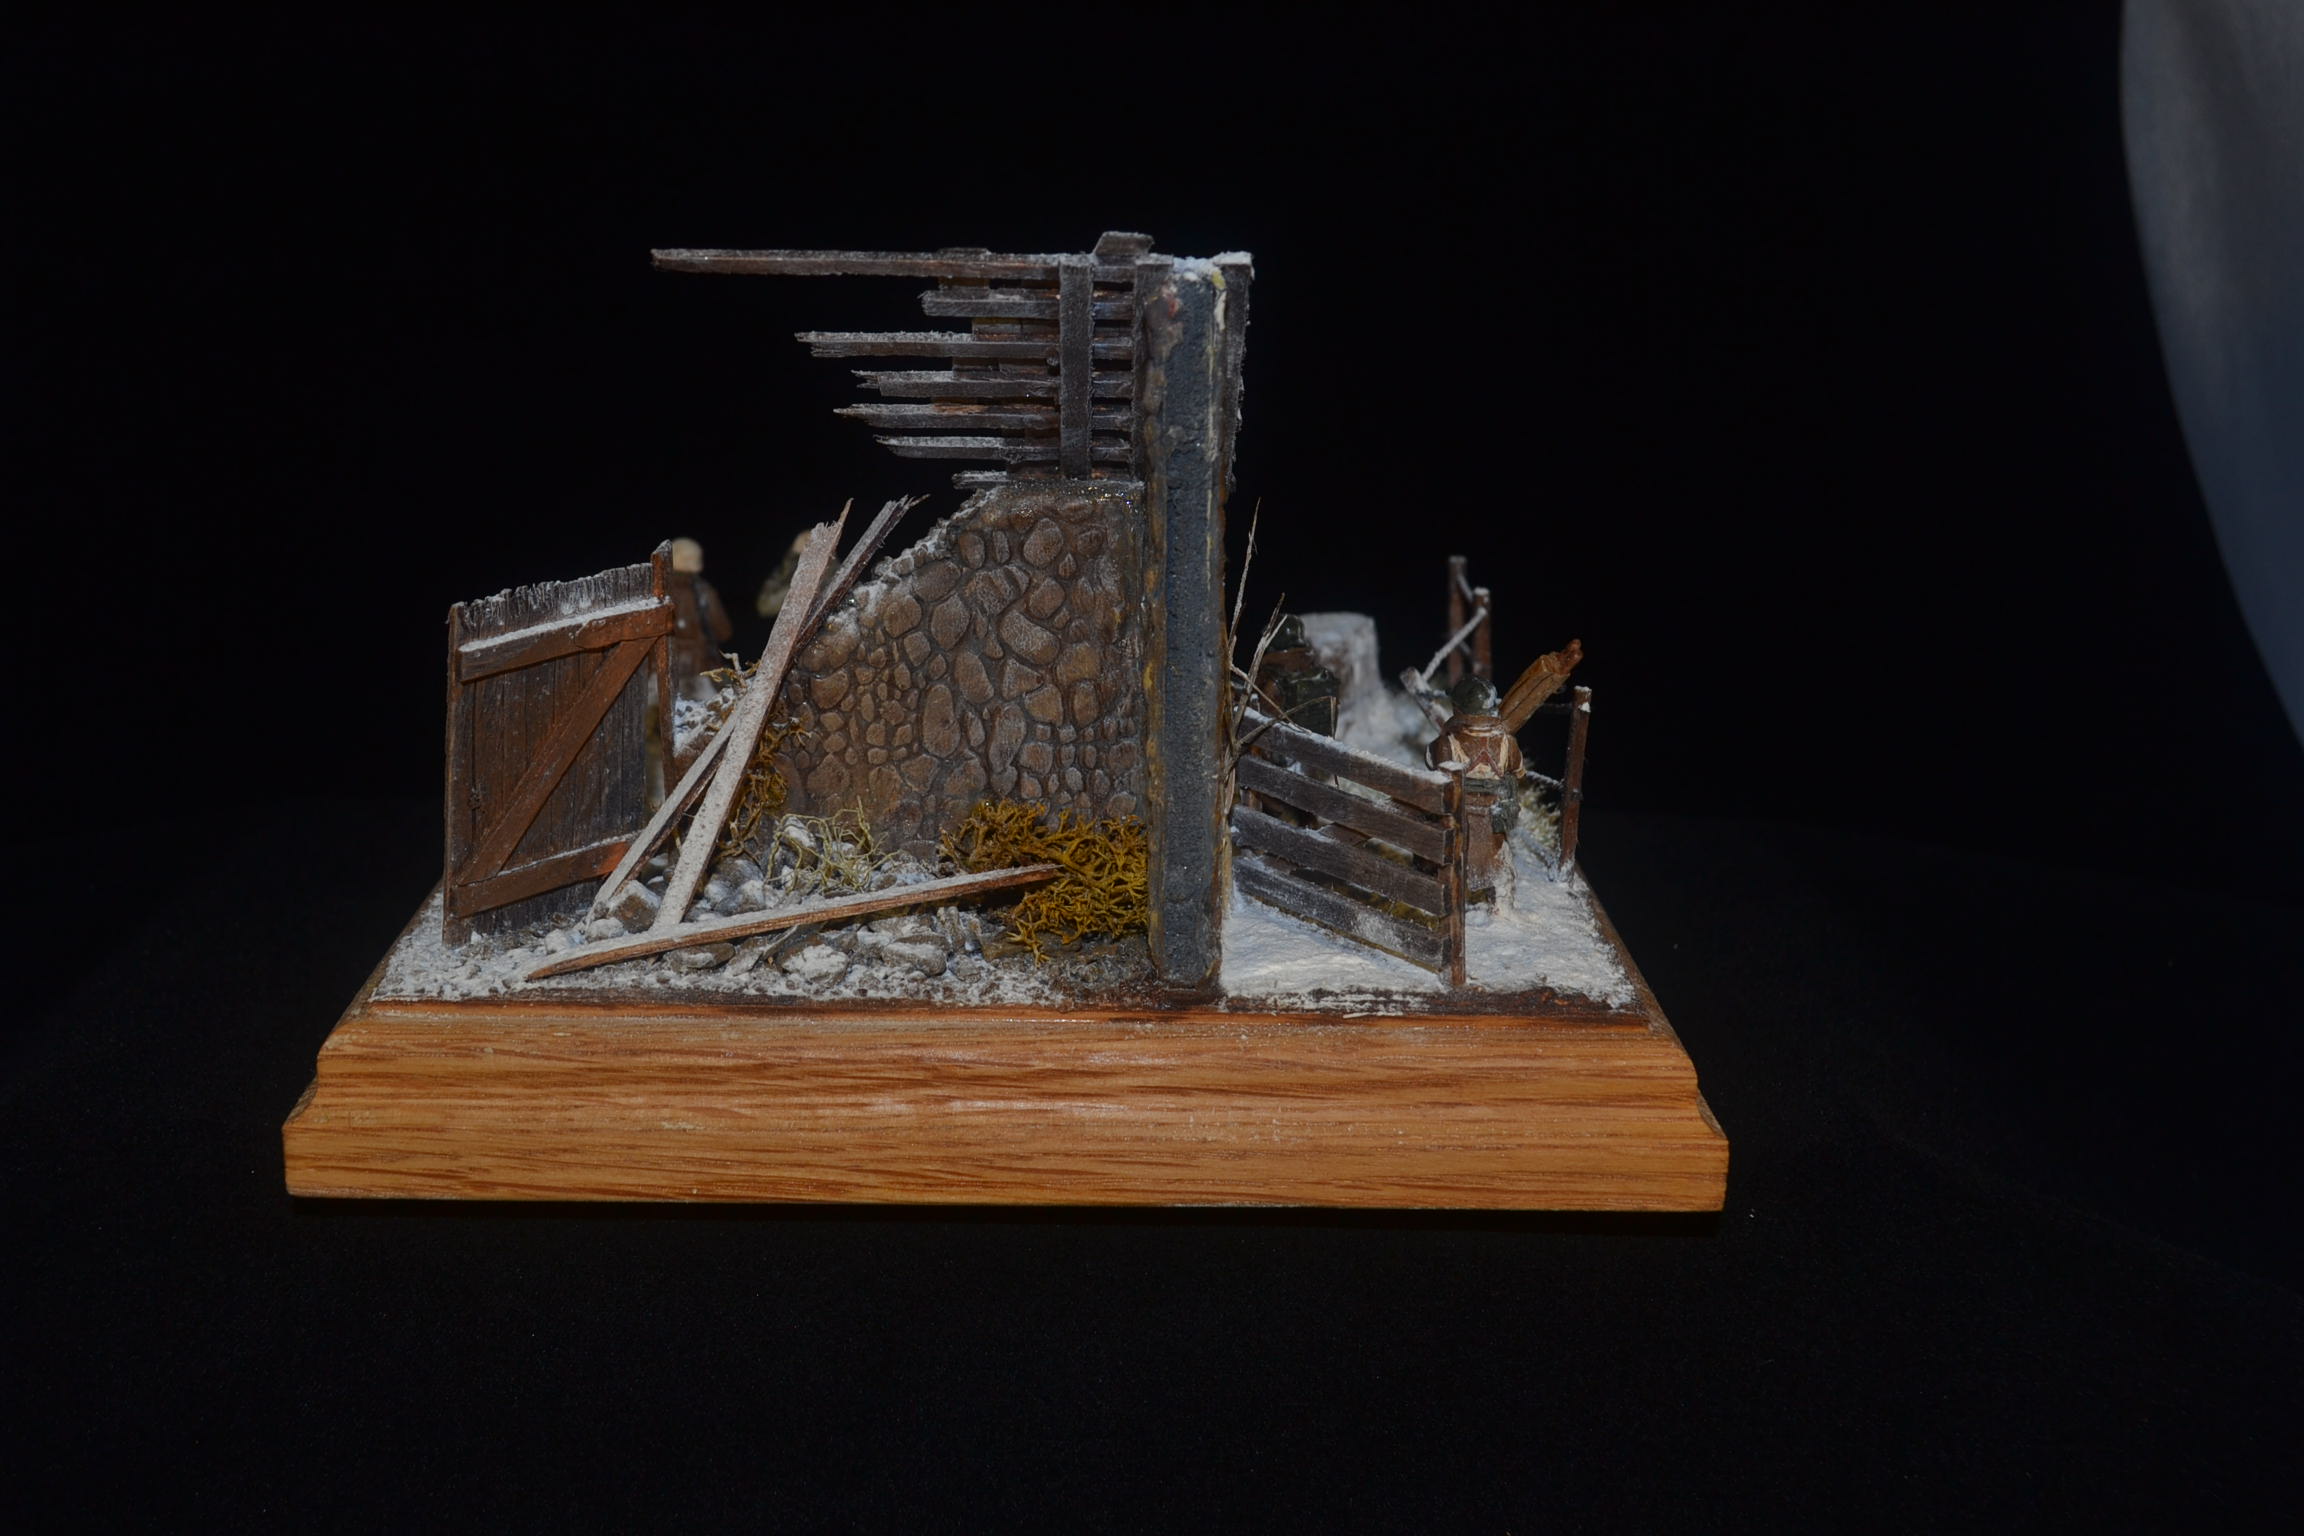
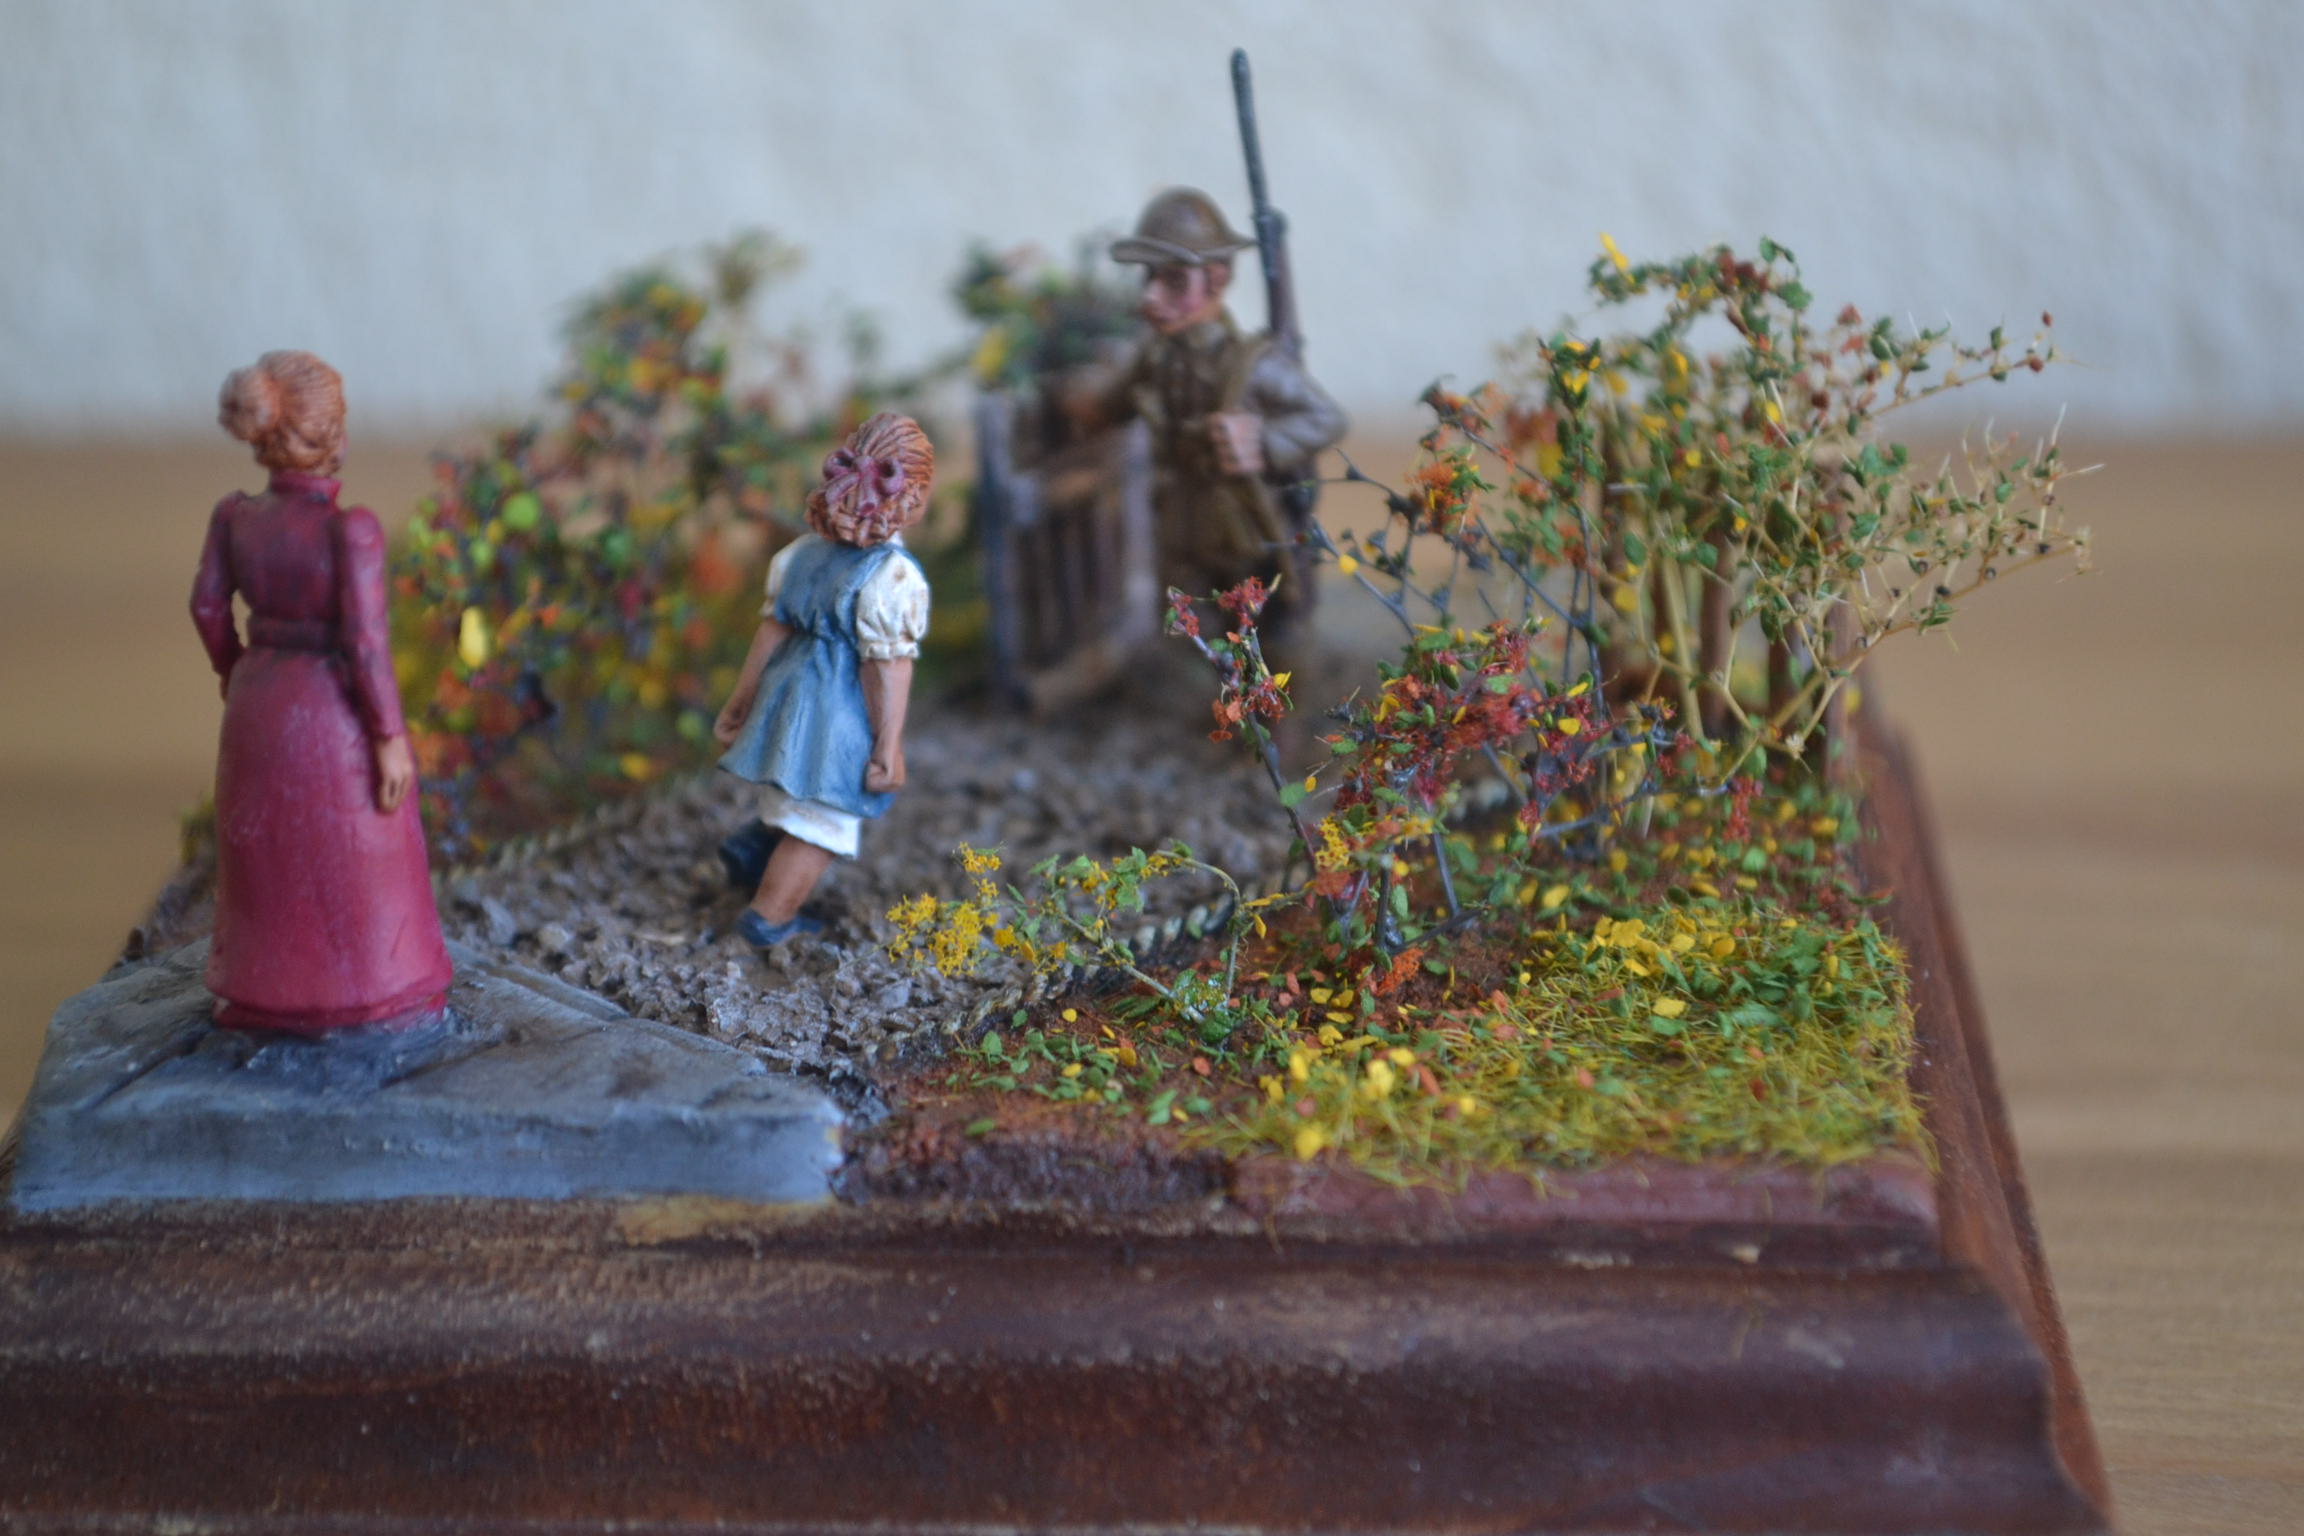
Model 14 – “British Troops French/Belgium Border” – 1915

I felt I needed a centre piece and fancied another building project.  I settled for a scene depicting troops making their way through a French/Belgium farm

20180206_101313

Model 15 – “Gone But Not Forgotten” – British Cemetary 1917

Not everyone died on the battle field, some died from their injuries after they returned home.

20171112_105927

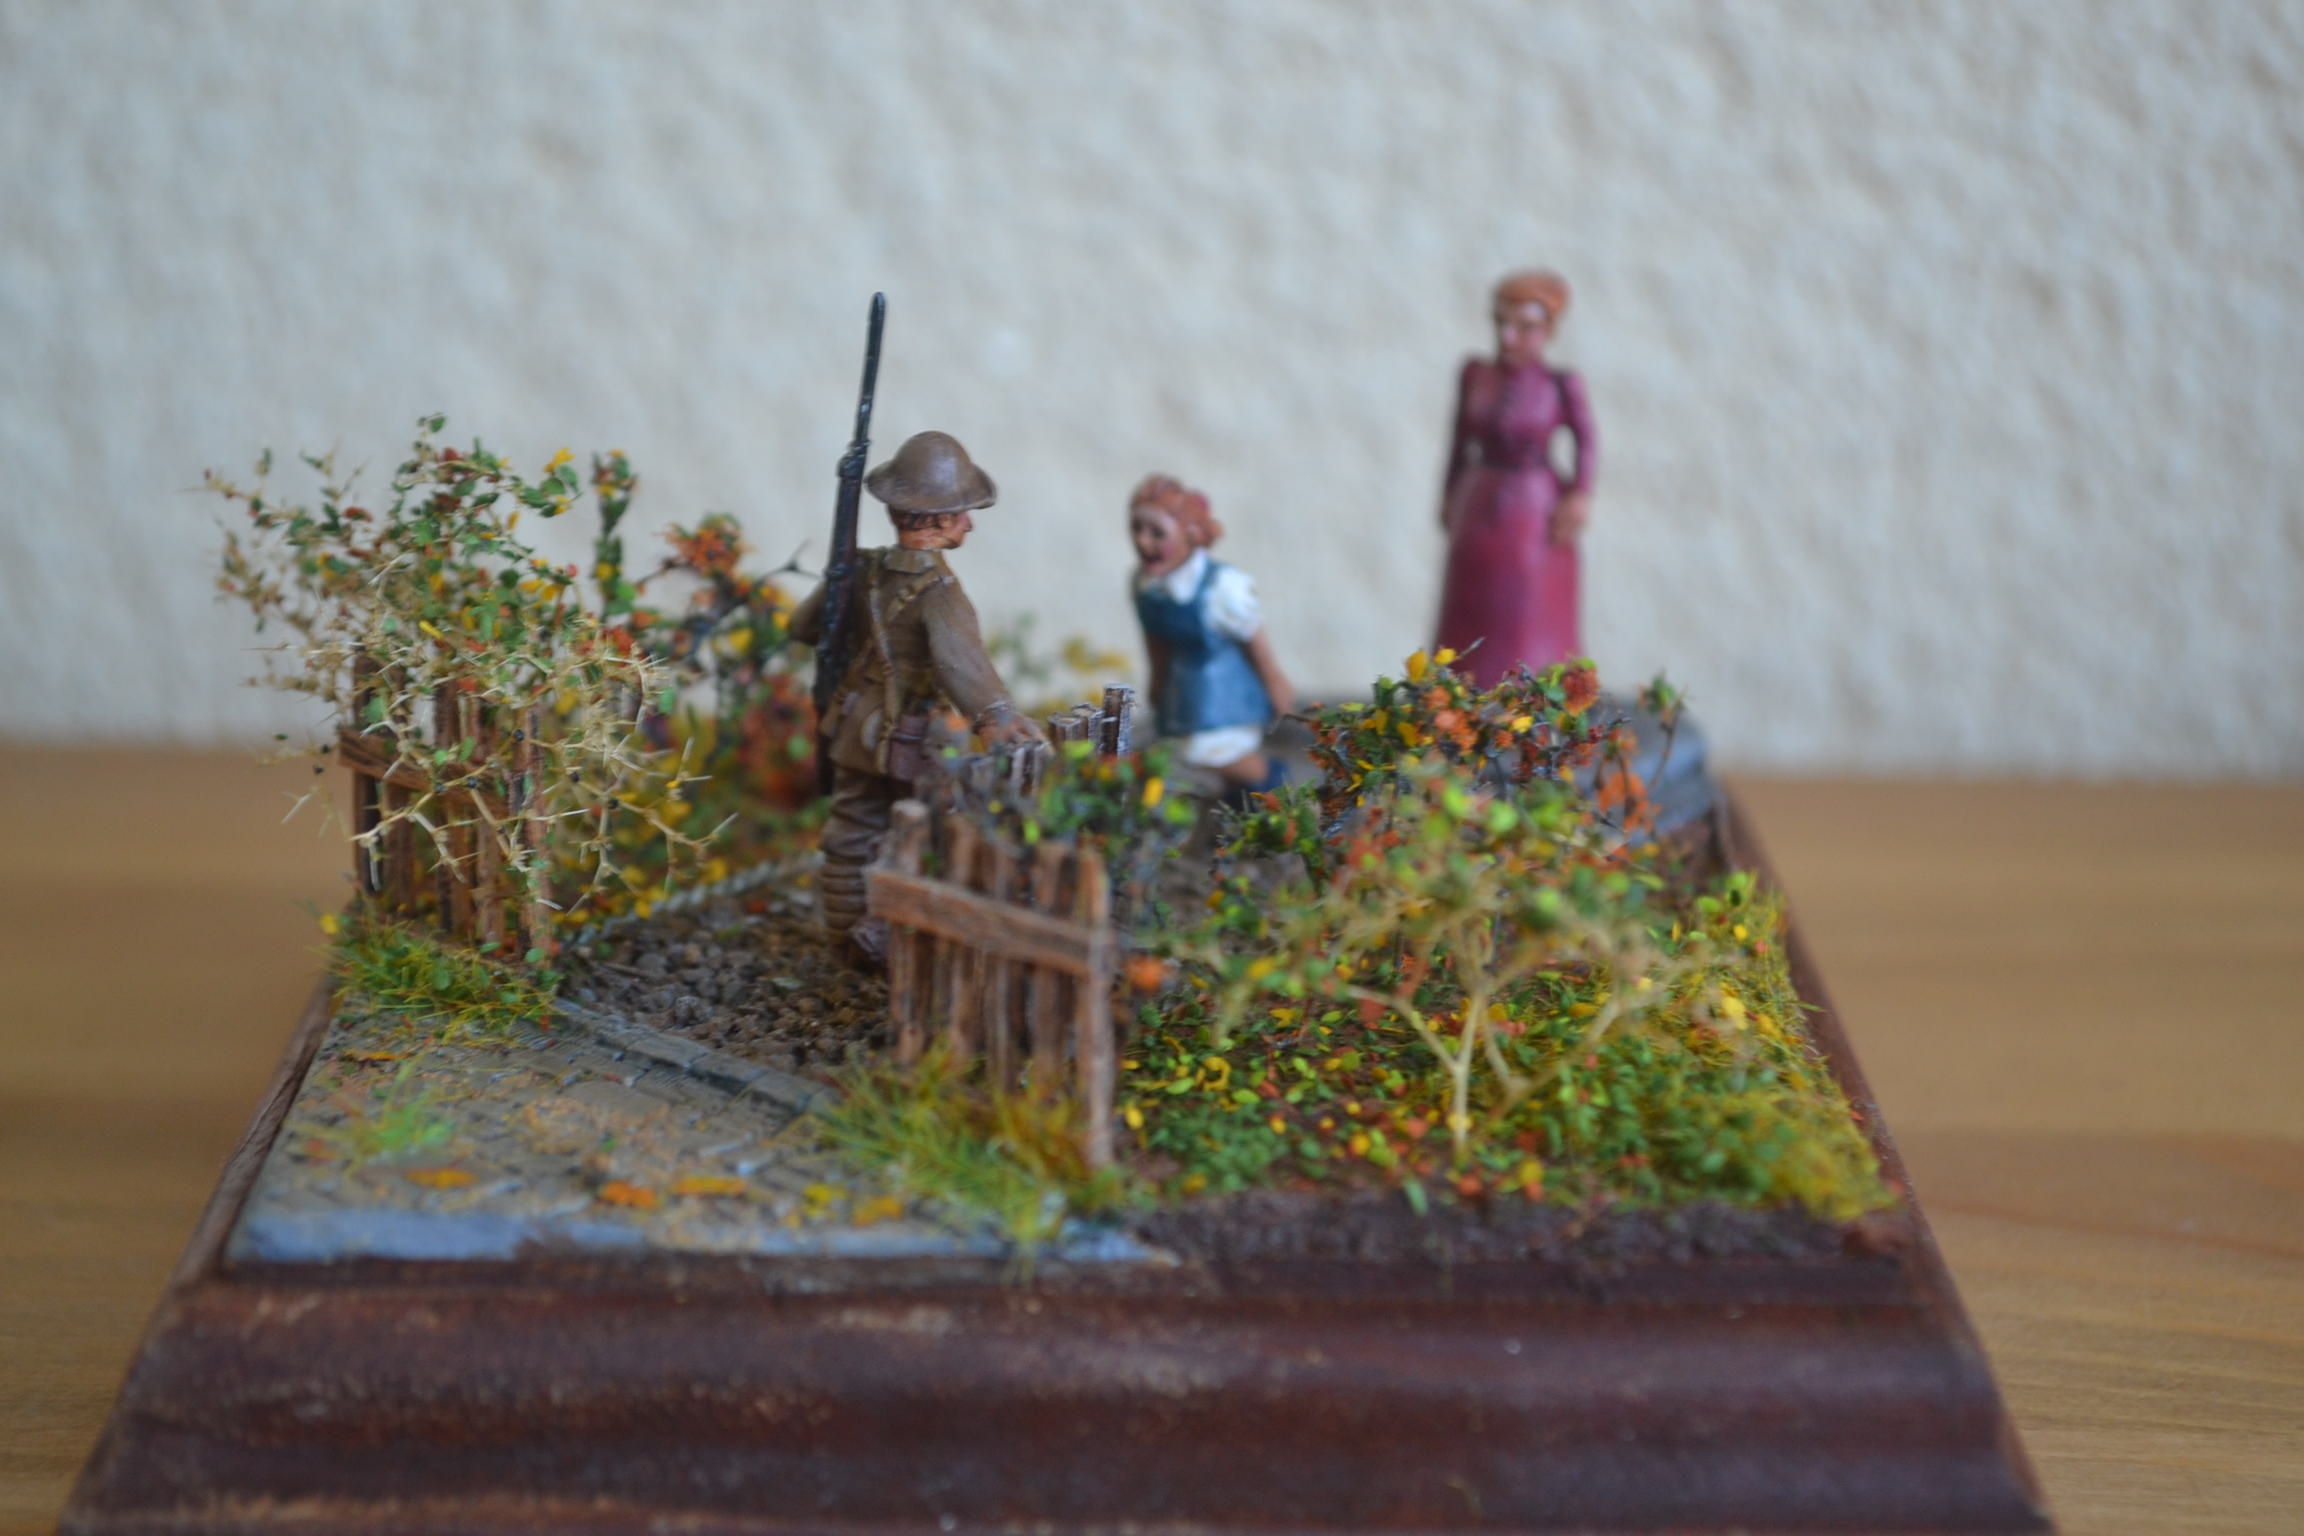
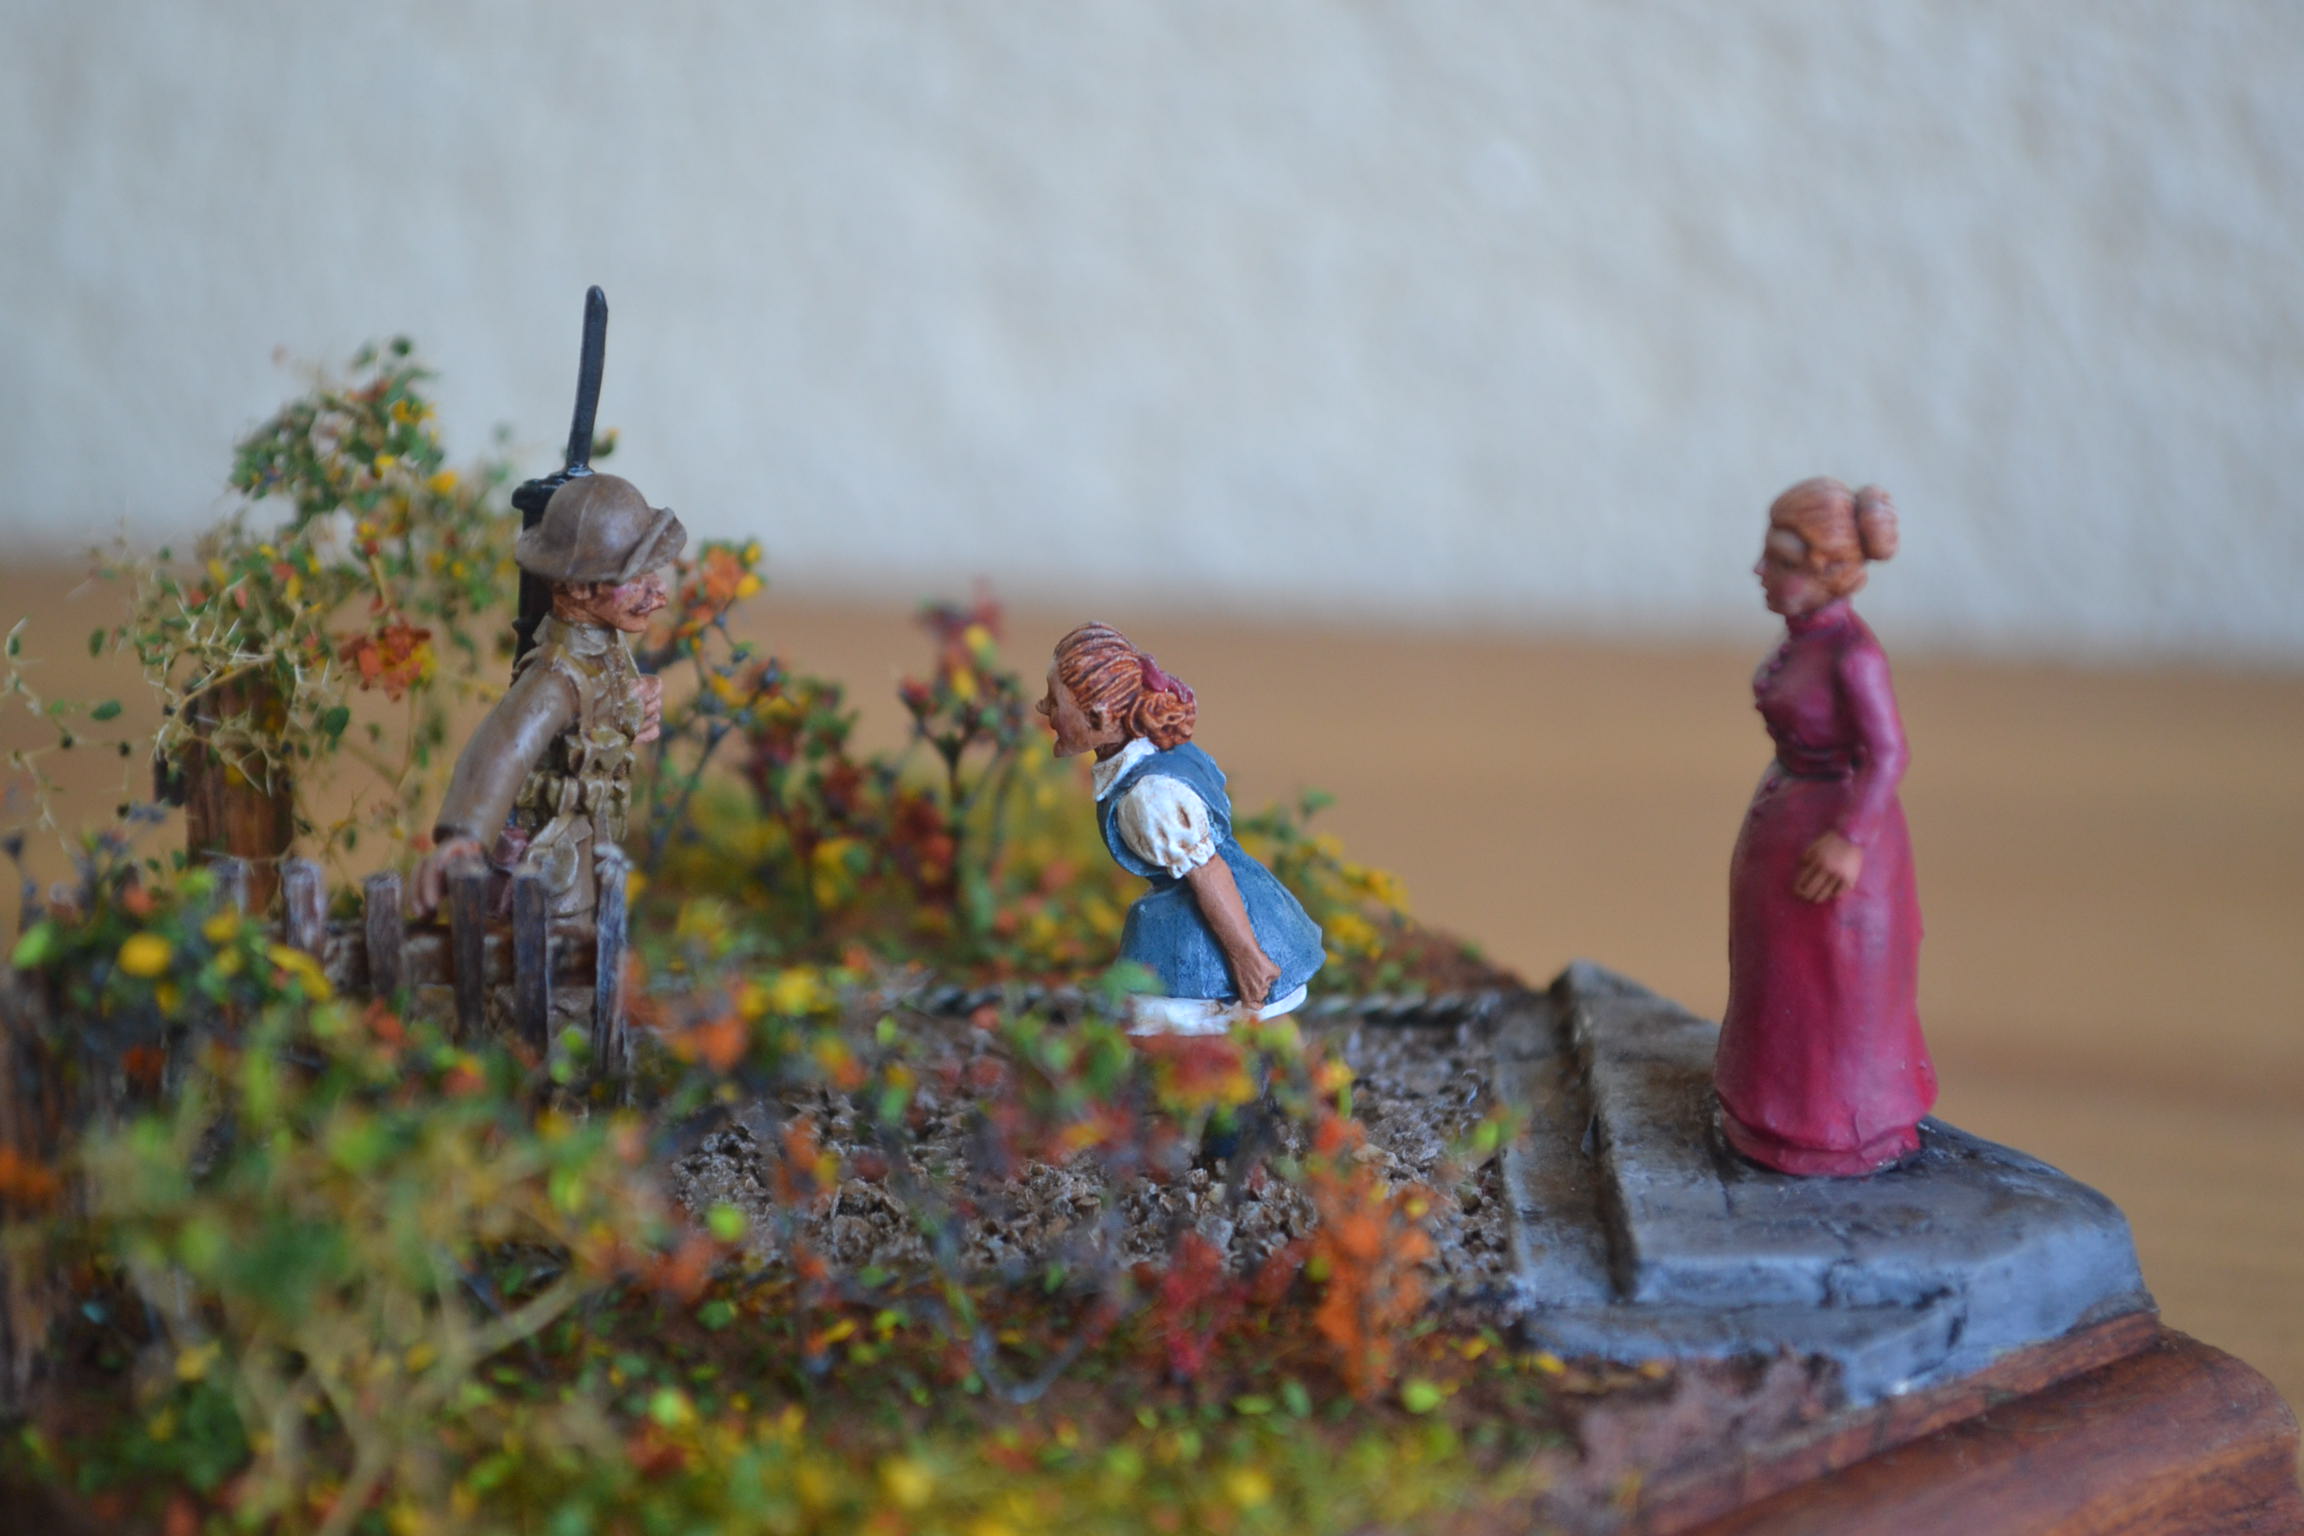
Model 16 – “Daddy’s Home” – November 1918

The last piece (for now).  I needed an ending and decided a soldier returning to his family would no nicely.

DSC_0836


TIM’s Memory Monday (No: 43)

This week sees the penultimate Memory Monday post.  After next weeks post I will move on to Dio-Bolical Monday for a while at least.  After that I’m not sure what happens.  I may work on further dioramas if something takes my fancy after I have completed the two I have planned.  If my creative juices are flowing I might even come up with something new.  If not I may take a break until Memory Monday is ready to make a suitably timed return.   

Looking back at this post I am reminded that this was the start of my love affair with Reaper Miniatures.  Little did I know that I would go on to do so many more.

—000—

28mm Reaper Wood Elf – Arthrand Nightblade, Wood Elf Sergeant – (The April Challenge – Project No: 2)

This was my original idea for the April challenge and fell under Azazel’s example “be inspired by another hobbyists work and create your own version of something you have seen online”.

Many of the figures produced by those who I follow and by those who follow me generally fall into the Si-Fi/Fantasy genre. Nothing wrong with that at all, in fact the figures created and painted are simply superb and appeal to me.  My problem, as someone who likes to do vignettes and dioramas rather than gaming, has been how to create the right setting for any figures I might undertake to do. As a consequence it has been something which has continued to sit on the back burner … until now!

The turning point came following a post by “Caseyrog, Wyrd Stones and Tackle Zones” entitled “Tinkering with Elves” (an arrestable offence surely!).  A great article featuring some excellently painted miniatures.  This inspired me to do a little bit of Google Image and Pinterest searching which resulted in the discovery of this lovely little figure by Reaper Miniatures It’s difficult to explain precisely why I fell in love with this figure but fall in love I did. You may not agree but to me the figures pose is very cool.

I deduced that Wood Elves live and operate in woods (there’s not much that escapes me!) and therefore a woodland setting would be a highly appropriate setting for a vignette or diorama. An idea which had been sitting on the back burner had now become a reality.

I’m not sure what future models I will do within this genre but I have no doubt that I will do others. In fact a couple of figures are on order already!

Photos of the completed model below.

TIM

DSC_0816DSC_0819DSC_0817DSC_0815DSC_0820


TIM’s Memory Monday (No: 42)

Only two more Memory Monday’s two go before moving on.  This model was the last of the WW1 themed items that I did before drawing a line under the project.  Next week will see an interim post followed the week after by the full completed timeline that I put together.

TIM

—000—

28mm WW1 Vignette – 18 Pounder Cannon and Crew

This week saw the end of my WW1 timeline with the completion of this little Vignette/Diorama.  I say the end but as I enjoyed the period I may well add to it at some point in the future if the right idea comes along and I can find the appropriate figures.  For now though this is it for the clubs June show in Plymouth.

Of all the pieces I have put together this one is probably my least favourite.  There are two reasons for this I think.  Firstly, the subject.  I felt I ought to at least feature an artillery piece and this one from Gripping Beasts caught my eye.  The downside is I wanted to do less conventional models and failed to deliver with this one.  I guess it’s a bit like going to see The Rolling Stones. They may have plenty of new songs to sing but if they don’t play some of their hits from 50 years ago then you’re going to be a little passed off!  Thus we have some artillery.

Secondly, the model isn’t a great piece of work.  It’s fine overall and may look OK but in truth I rushed it.  I think I just ran out of steam with the project.  I have enjoyed it and discovered lots of new things along the way.  I have tried to do other things in between but now it really is time to move on to something else and to use a few other colours. The April challenge will now receive my attention!

Images of the completed model appear  below.  In the next week or so I will try to put together a post of the whole project.

Oh, and in case anyone is wondering the guy third from the left in the first picture is holding a shell!

TIM

DSC_0793 (1)DSC_0791 (1)DSC_0792 (1)DSC_0794 (1)DSC_0790 (1)DSC_0796 (2)DSC_0795 (1)DSC_0797 (1)DSC_0789 (1)

TIM’s Memory Monday (No: 41)

If I have calculated correctly then I have three more Memory Monday posts to put up before I move on to Dio-Bolical Monday.  Hopefully in that time the remaining bits and bobs will turn up so that I can get started on the two projects I have planned.  Right now the absense of bases is causing me the greatest concern as they are literally the foundations of each build.  Fingers crossed they arrive soon.

In the meanwhile this post is of the iconic Willy’s Jeep and is very rare in my collection as it is a plastic kit and not a metal one! 

TIM 

 —000—

WW Rubicon 28mm Willys Jeep – (The April Challenge – Project No: 1)

An early entry for the April challenge under the banner of “build or assemble something”. This was not my planned entry, details of which will follow later in the month, this one was an accident.  Let me explain.

For quite a while now I have wanted to attempt a plastic kit.  I reckon it must have been the best part of 45 years ago when I last did one.  Why?  Because I loved the look of some them all those years ago, as indeed I do to-day, but I simply don’t enjoy making them.  My willingness to have another go was fuelled by my desire to try to encourage my model club who are well into such kits to base them, even simply as is the case with this one.  The passage of time also helped, it couldn’t have been that bad all those years ago could it?  Alas it was and readers of earlier posts will be aware that this little project was in danger of going tits up and being abandoned altogether.  Then the April challenge got me refocused on getting it done.  I figured if I was going to do it then I might as well kill two birds with one stone.

Pictures of the completed piece appear below and the eagle-eyed amongst you might notice that there are no “in progress images”.  There is a reason for this.

As I have mentioned previously I am not a vehicle kit person chiefly because me and glue simply do not see eye to eye.  I was dreading the build rather than looking forward to the challenge that lay ahead.  Nevertheless I was determined to complete the exercise come hell or high water but had no desire to record this momentous step by taking progress photos of deformed plastic covered in blobs of glue.

So how did it go?  Better than I thought but not great.  Were my worst fears justified?  Not the worst ones but the ones just below the worst ones.

The first issue I had was shortly after I opened the box and started to assemble the kit.  It turns out this Rubicon kit can be assembled into one of four configurations.  Being a man I don’t tend to read instructions so this point initially passed me by.  However, I got lucky.  I wanted to build the US version and without realising it this is the one I had started on when I discovered all the additional parts that I couldn’t work out what to do with.  Score – 1.

After eventually reading the instructions, assembly to be fair was pretty straight forward and the fit of parts were good, not that I have much previous experience on which to judge this.  I even managed to think to paint areas before assembly and to add things like mud to the wheel arches before fixing the wheels themselves in place.  Score + 1.

Unfortunately some things hadn’t changed, I’m still heavy-handed with glue.  As light a touch as I might have with a brush the complete opposite is true with glue.  Alas trying to apply super glue with a modelling brush which would be the ideal solution for me is simply a way of ruining a brush.  So, crucially glue everywhere, Score – 10!

I had hoped the figures would be my saving grace and although they were OK the faces left a lot to be desired.  I’ve been lucky of late in that a lot of the miniatures I have been working on have been superbly sculpted and the expressions on the faces have been simply awesome.  As a consequence I have been able to get away with my painting skills.  Unfortunately the faces of these figures were plain, very flat and featureless and although I felt I made the most of them the end result still left a lot to be desired.  Score + 1.

Final assembly of the kit including the figures went together better than I had hoped but for one error.  I’m not sure if the error is with the kit or with my assembly.  Having googled some images of completed kits done by others I think I can be certain the error is mine but quite where I went wrong I’m not sure.  The error in question is with the rear sitting down soldier and the way he is holding his rifle.  He’s holding it far to low down and although I was aware of this at the time I simply couldn’t get it higher and get the figure sitting in the back of the jeep.  Still that’s why I’m The Imperfect Modeller!  Score – 1.

On to something positive, the base work.  Now there is nothing much to the base, it’s all pretty basic and that was the intention, to keep it simple as a demonstration piece for presentation at the club.  However, if there is one thing I have learnt, albeit with room for improvement, it is how when creating dioramas and vignette bases to cover up errors!  With a considerable effort I pretty much managed to conceal excess glue thanks to some weathering, decals, ground work and opting to lay the windscreen flat to the point where the overall model just about looks OK.  Score 10 – not entirely merited but brings the overall score to 0 which feels just about right.

In summary, did I enjoy the experience?  No.  Will I venture into a kit build again in the future?  Only if the wife is present to tell me to read the bloody instructions or if I can learn how to better apply glue!

Conclusion?  Never say never but if I did embark on another kit then I would only do so if I was drunk!

TIM

DSC_0804 (1)DSC_0802 (1)DSC_0821DSC_0801 (1)DSC_0827DSC_0803 (1)


TIM’s Memory Monday (No: 40)

A return to the WW1 timeline project this week.  This was a two part project but both posts appear below.

TIM

28mm WW1 Diorama – Communications Team – Part 1

The weather in England, as pointed out by Just Needs Varnish in his most recent post, remains unsettled.  I beleive the technical term given out on the SouthWest Weather report referred to it as “f’ing awful” but I may have miss heard.  However, for every ying there is a yang and the good news is that the full on winter modelling season has been extended into spring.  Hooray!  As a consequence work has begun and is well underway on this the penultimate model in my WW1 Timeline sequence.

One of the things I wanted to avoid with the various WW1 stuff I have done to date were stereotypical trench scenes and tank dioramas and so far I think I have achieved this.  Not that I have anything against trenches or tanks but there were many other stories to be told I wanted to try to tell those.  Nevertheless trenches are hard to avoid completely and so this diorama does have a trench feel but I hopefully not a dominating one.

The emphasis on this little diorama is communications, a key component in any war but one which rarely gets highlighted.  How many WW2 action films have there been as a ratio to the film “The Imitation Game” for example?  To be fair communication as a subject probably doesn’t make for the best box office figures but you get my drift as to the importance of the subject I’m sure.

I’m not sure if the scene when complete will represent an accurate portrayal but it puts the subject out there and gave me an opportunity to paint a pigeon, surprisingly something I’ve never done before (I have however been “shat” upon by many a pigeon in Trafalgar Square!).

Progress so far consists of figures in various states of painting and ground work almost complete.  Construction of the base enabled me to recycle what I can only describe as various bits of “rubbish” which would otherwise have ended up in a land fill site somewhere so I’m feeling good knowing that modelling can be good for the environment too.

Progress pictures below.

TIM

20171114_19071320171114_18501420171115_15551220171115_20354820171114_18502320171114_185023

28mm WW1 Diorama – Communications Team – Part 2

Part 1 of this little diorama received a greater reaction than I anticipated with a couple of excellent comments relating to this rarely covered subject.  This, along with some pretty dreadful weather over the Easter holidays, inspired me to push on and complete the model.

The figures themselves painted up quite nicely and were all from favoured suppliers such as Gripping Beast and North Star. They are as they came with no modifications.  The ground work was completed by adding ground cover and a few more coffee stirrers for the trench effect.

Overall an enjoyable little diorama to put together and one which fits with my self-imposed brief of trying to cover lesser recognised aspects of the Great War for my timeline.  Just one model to go now, time for my own big push!

Pictures below.

Hopefully they provide sufficient detail to view the completed model but the number of figures made it hard for the camera to find a focal point close up and my own photographic skills were insufficient to compensate.

TIM

20171116_110637
20171118_173749
DSC_0789 (2)
DSC_0791 (2)
DSC_0800 (1)
DSC_0801 (1)
DSC_0798 (1)
DSC_0794 (2)
DSC_0793 (2)
DSC_0792 (2)
DSC_0799 (1)
DSC_0795 (2)
DSC_0796 (3)
DSC_0797 (2)

TIM’s Memory Monday (No: 39)

I calculate Memory Monday has another couple of months to run, a little longer than I thought.  I could shorten it but then again maybe I might run it up to Christmas which would be neat and start over in the New Year.  Much depends on how I get on with replacing it I guess.  In the meanwhile …

—000—

Not my intended post this week but three things happened to change the situation. Firstly, a model arrived which like Just Needs Varnish recently made reference to “I just had to do”. Secondly, the photographic light box I ordered from Amazon arrived. Thirdly, having realised earlier in the week via my Mid Week Musings that my blog was a year old on the 22nd March I wanted to post a finished model which gave me a buzz and not simply report on some work in progress.

I’ll deal with the model first.

I mentioned in a recent post that sometimes I find a figure I like but struggle at how best to base it and sometimes I have an idea for a vignette or diorama but am unable to find suitable figures.  More often than not a solution under either scenario presents itself but occasionally along comes a figure that instantly floats my boat, that I know just how I want to base it and therefore “must have it!”.  This was the case with “Legendary Viking Warlord – Ragnar Lothbrok, King of Sweden & Norway”.

I found the figure when I was doing some browsing on Pintrest. That site and Google images often throw up ideas and I managed to track the figure back to being from Gripping Beasts their SAGA range. I immediately ordered it along with three other figures which will most likely feature as future posts once complete.

Now the truth be known I have no idea if good old Ragnar is a real or mythical character and to be honest it doesn’t make much difference to me either way (that said I’ll probably Google him after I’ve finished this post just out of curiosity).  The fact is I simply like the figure for reasons I cannot quiet put my finger on.  The non action pose lends itself to being a lone figure and also to a still photographic image in my opinion and that’s what drew me to it.  I’m not sure if that makes any sense but it’s the best explanation I can offer for now and it isn’t much of one I know.

Photo’s of the model appear at the end of this narrative and by the time you get there I suspect you’ll wonder what the fuss is about but from my point of view this was one of those rare (all to rare as it happens!) occasions when everything came together nicely.  The figure itself is advertised as 28mm which I guess it is but it rather depends on your point of view.  Personally I tend to think 28mm should be measured from head (top of) to toe but some manufactures measure 28mm from eye level to toe which produces an overall head to toe height nearer to 32mm which is the case with this figure.

The figure as I mentioned is from Gripping Beast and I’m sure I have mentioned in the past that their products are excellent.  The SAGA range was largely unknown to me although I’m sure it’s familiar to the war gamers among you.  For me it represents a small departure from my typical eras of interest and a welcome change to WW1 as much as I have and am enjoying that project.  The base work was relatively straight forward.  The rocks were once again taken from the garden and the tree was another wire, sea-foam and filler construction.

On this occasion I stuck the sea-foam to the wire armature before applying the filler which produced a better result but was harder to paint, particularly as I don’t use an airbrush. Hard to believe I don’t use an airbrush at in this day and age but the way I see it when they drop the bomb and the power goes I’ll still be able to paint using a brush under the warm glow of nuclear radiated light. Which kind of leads me onto the photographic light box.

Not a lot to say but first impressions are that it will certainly improve my photos. Much to learn but I am pleased with the early results. The photos taken below of the completed model were all taken using it so you can judge for yourself.

TIM

DSC_0796DSC_0793DSC_0794DSC_0795DSC_0801DSC_0797DSC_0800

TIM’s Memory Monday (No: 38)

This is another of my little dioramas which I had largely forgotten about as it now sits in a box stored away.  I haven’t done a great deal of WW2 stuff in my time but although it is not on display it does get an airing every now and then when I go to shows with my club.  WW2 stuff is popular and the club typically has a theme running for this period in history.  Alas this year it gets to stay in its box thanks to Covid-19 so in some ways it is apt this model should be next in sequence for Memory Monday.  Originally this model was posted in three parts but as this is a re-post I have merged all three parts into this single post.

—000—

28mm – WW2 US Winter Troops – Part 1

Tiring somewhat of WW1 I felt the need to undertake something new, not so much in terms of figures so much as terrain.

Until very recently I had only dabbled with snow affects once in the past and that was a long time ago.  The result of which ended in the model below.

DSC_0969

The model itself, an Andrea 54mm figure based on Robert Redford’s portrayal of Jeremiah Johnson if I remember correctly, came out OK at the time but the snow and my early attempt at a tree stump now look far from pleasing and very dated.  It was only when I was dusting it that I thought I wouldn’t mind having another go at some snow based models.

Now before I continue I ought to answer a question that I am sure the previous paragraph has thrown up.  Why was I, a product of the male chauvinistic 60’s, 70’s and 80’s, doing my own dusting when I have a perfectly good wife capable of doing such things?  A good question for sure but Her who Must Be Obeyed has made it perfectly clear that she will not be held responsible for any breakages and thus the job rests with me.  To be fair she has a point.  Allow me to digress a little further.

We have a border collie who can open every door in the house.  I was once the proud owner of a remote-controlled Dalek which spoke.  The dog hated the Dalek and ran from it when it was in use.  Her Who Must Be Obeyed in her infinite wisdom thought it would be a good idea to stand the Dalek in front of our bedroom door to stop the dog from going in.  A cunning plan but one which led to the dog trashing the Dalek and me calling her a moron.  It is against this back drop that she now has nothing to do with my models and collectibles! Hard to blame her really.

Back to modelling.

I had a good browse on the Warlord Games site and found some great looking 28mm US winter troops which I decided to purchase.  I then found some snow and ice products produced by Precision Ice and Snow which I also bought.  Not cheap but the amount of stuff that came in the bundle I purchased will more than see me through the rest of my modelling days I expect.  As for a scene I thought I’d go for a derelict building or part of one to be more precise.  The combination of US troops, snow and a derelict building all adds up to something completely brand new to get my teeth into.

A check on my paints resulted in the need to order some new ones, all Vallejo in this instance, and while I waited for them to arrive in the post I started to get my head around the build itself.  Initially I did think I could cut some corners given that most of the end result would be covered in snow but I then decided that was the wrong approach.  If I was to do it properly I ought to build the thing to look right before adding the snow, in that way what ever might show through would in turn look right too.

The mini project is now under way and the pictures below are of the early stages.  I initially cut out some foam board for the two wall sections which were then glued together.  Milliput was flattened out and then rolled using a Green Stuff World cobblestone textured rolling-pin and then applied to the foam board both on the inside and the outside.  A little tip I discovered.  In order to easily pick up the rolled Milliput first lay down some talcum powder on to your flat surface before hand, it lifts up easily that way.

The gate was made from wooden coffee stirrers as was the door and the roof beams.  The tiles were made once again using my Green Stuff World tile punch.  The fence posts were made from match sticks and drilled to make way for the twisted wire that will be inserted in due course.

Next up will be the complete assembly of all the various bits and pieces, the figure painting and applications of static grass and other ground work but that will have to wait until next time.  In the meanwhile a few very unexciting progress pictures.

TIM

20180206_20325420180130_20534820180204_14094120180204_12241220180204_135702

—000—

28mm – WW2 US Winter Troops – Part 2

Desk tidied and lists written I am now feeling organised once again.  It’s now time to get some things completed and invoke a little more discipline starting with the continuation of this little diorama.

Figures have now been painted and “pre-snow” ground work almost completed. Figures arrived timely as always from Warlord Games and I was pleased with how they painted up.  The ground work to date was pretty straight forward but didn’t provide anything significantly new in modelling terms, that will come with adding the snow effect in what will be the third and final part of this little diorama.  All in all its gone together reasonably well so far.

The progress pictures below provide a good idea of how the completed diorama would look if I hadn’t decided to go for a snow scene.  It will be interesting to see just how it looks when a lot of it will get covered over.  Before and after photos should be interesting. Will it look better or worse?  No backing out now though.  I am committed to the end result so will have to wait and see. Besides I can’t have US troops wandering around in winter gear in the spring!

TIM

20180205_14365820180206_21342920180206_21332920180205_11351420180205_14371320180204_12234520180206_21340520180204_20460520180205_11351420180205_14373520180206_213238

—000—

28mm – WW2 US Winter Troops – Part 3

The concluding part of this little diorama.  With only the snow to be added I didn’t feel I could justify hanging onto this post until the weekend.

Figures fixed into position, all parts painted and assembled and ground work complete.  All that remained to be done was to apply the snow.

I mentioned in part 1 that I had acquired scenic snow materials from a company called Precision Ice and Snow.  A few words on what came in the bundle I bought, and before anyone asks no, I’m not on commission!

The various bits can all be bought separately or you can save quite a  bit by buying a bundle which is what I chose to do.  Everything arrived in a nice little draw string bag which contained:

  • 2 x 115g bags of Krycell fine (snow) for use with smaller scale models such as 28mm
  • 1 x 115g bag of Krycell Extra (snow) for use with larger models  – 1/35th upwards
  • 1 x 100ml bottle of adhesive
  • 1 x 50ml bottle of Ice and Snow wash
  • 1 x 50 tub of winter camouflage paint
  • 1 x sieve for applying the snow
  • 1 x instruction manual

All in all enough to do all the models in snow that I am likely to ever do.  The instruction book is great and there are various YouTube tutorials too if that’s of interest so I won’t bother going into greater detail.  Just to say that I followed the instructions and achieved the end result as shown in the pictures below.

Personally I like the stuff.  Looks realistic to me and goes where you put it.  For 28mm it’s really nice and fine and I love the way it has adhered to areas like the top of the fence and to the gate and barn door.  There are lots more ways of using this stuff and I’m looking forward to coming up with some other ideas in due course.

TIM

DSC_0793DSC_0792DSC_0789DSC_0797DSC_0790DSC_0796DSC_0793DSC_0794DSC_0791DSC_0798 (2)

TIM’s Memory Monday (No: 37)

This post went out in March 2018, I can’t believe that was two and half years ago.  How time flies!  I need to check how far I am away from completing the WW1 Timeline I set out to do back then.  I have a few more posts that weren’t WW1 but I think once I hit the end of WW1 project it will be time to put Memory Monday to bed for a while.  The aim was to give some older posts an airing for people who weren’t following me back then but there is a point when it is close to being repetitive for those who were.  The end is nigh!

—000—

28mm WW1 Vignette – Vickers Gun Crew

Not the best of weeks but I managed to complete this outstanding WW1 Vignette and begin work on a new WW2 project, more of which in a separate post to follow.

Throughout my WW1 project I’ve tried to steer away from the slightly more convention images of war in an effort to tell the story in a different way.  As commendable as this idea was, in my own mind at least, there is a point at which something’s have to appear.  A Vickers Gun Crew being one such example.

Once again I turned to Empress Miniatures.  They really do some great figures and these came under the banner of the Mutton Chop range.  Composition is basic, there’s only so much you can do and in this instance only so much that I wanted to do.  From a timeline perspective it was also a model that I could fit in pretty much anywhere within the sequence.

Another one down, only two more to go.  Beginning  to lag a little now but I will get there! This one is one of my least favourites and I wasn’t going to post it today but for the fact that I would have failed my self imposed deadline. The groundwork leaves a little to be desired, the photos don’t help, so at some point I will go back and revisit it.

TIM

20180307_155950DSC_0805 (1)DSC_0808 (1)DSC_0806 (1)

TIM’s Memory Monday (No: 36)

A return to my WW1 project this week.  An end piece was essential to complete my timeline and I chose a soldier returning home and walking down the front garden path to be met by his excited daughter and his wife.

—000—

28mm WW1 Vignette – “Daddy’s Home!

Today’s second post.

No excuses, I’d simply fallen behind on my WW1 timeline project and needed to get back on track, thus establishing the aim of completing an outstanding item for this week and the next.

Although June is still some time away I can’t believe just how quickly January and February have passed by.  As a consequence I did a review of just where I was with this project and my audit indicated that several vignettes and dioramas were complete, some were being worked upon but some had not yet been started.  It also struck me that I hadn’t given any further thought to a model which would act as the “end” piece in the sequence.

Obviously the war ending is the stand out incident but was it really the end?  In my imagination I envisaged marching troops through London in front of crowds of cheering people but bringing that to life was difficult to get my head around, not least of all because I struggled to find anywhere near the type or number of figures I would have required.  I also thought of something very sobering such as a graveyard scene – Gone But Not Forgotten – but whilst I did do one (see an earlier post) I decided that although relevant if was not how I wanted to end the sequence.

In the end I decided on the idea of daddy coming home from the war and being greeted by his wife and child.  For many this was the real end of the war, seeing a loved one returning home.  More up beat and more personal.  So here you have the returning soldier coming down the garden path.  Would he have had his rifle?  Possibly.  Would he have had a fixed bayonet?  Almost certainly not!  I did think to remove it but on closer inspection I thought I would almost certainly cock it up so felt it was better left alone!  It’s the story that’s relevant not the accuracy.  That’s my excuse any way!

So now I have a beginning and an end to my timeline and but need of a few more for inbetween. No time for slacking as the clock continues to tick.

TIM

DSC_0836
DSC_0837
DSC_0841
DSC_0844
DSC_0843
DSC_0842
DSC_0837

TIM’s Memory Monday (No: 35)

One of the nice things about looking back at my past models is reminding myself of the things I learnt along the way, either in terms of scenery building or figure painting.  At the time this model taught me a lot and the techniques I employed were refined a little in future builds.  I am also reminded of the mistakes I made and how Imanaged to cover them up!

For those of you who might be interested a  link to Part 1 of this diorama can be found here.

—000—

The Last Of The Mohicans – 28mm Diorama – Part 2

A succesful week, helped considerably by the stay in doors weather, which has seen the completion of this model and also of one of my outstanding WW1 vignettes, the subject of a separate post to follow this one.

Not a great deal to say on this one.  The fir trees were completed with a couple of applications of static grass, the water effects were applied but need to dry a little further and the figures were painted and fixed in position.

The figures are in my opinion nicely designed but they aren’t the greatest of castings and they lack the crispness of other models that I have painted.  As a consequence they aren’t the best but perhaps I’m just getting my excuses in early!

The last photo was taken with the Magua model placed behind this diorama (my brothers idea, credit where it’s due).  The idea was to see how dramatic, if at all, the backdrop would look.  I think  a combination of both bits of landscaping could make for an interesting diorama, I just need to get my head around what figures to use.  There is no rush however as right now I’ve got more than enough lined up!

Photo’s below.

TIM

DSC_0808DSC_0810DSC_0811DSC_0813DSC_0814

20180226_132301