

The main objective for this week was to get the external paint work done on the base section of the Mill. Looking ahead there will be some refinements to what I have done as once the section is fixed into position it will need to be blended with the surrounding base work, more on that though further down the line.
As with the inside of this section I needed to make a note of how I painted the outside to stand a better chance of consistency when I paint the other three layers which make the completed building.
The base colours were all straight forward, The wood work was Artiste “Brown Umber” and the brick and stone work was Artiste “Black” mixed with Artiste “Sand” to obtain a grey colour. Once the base colours were laid down and dry they were given a Lamp Black oil wash. The result is shown in the first two images below.
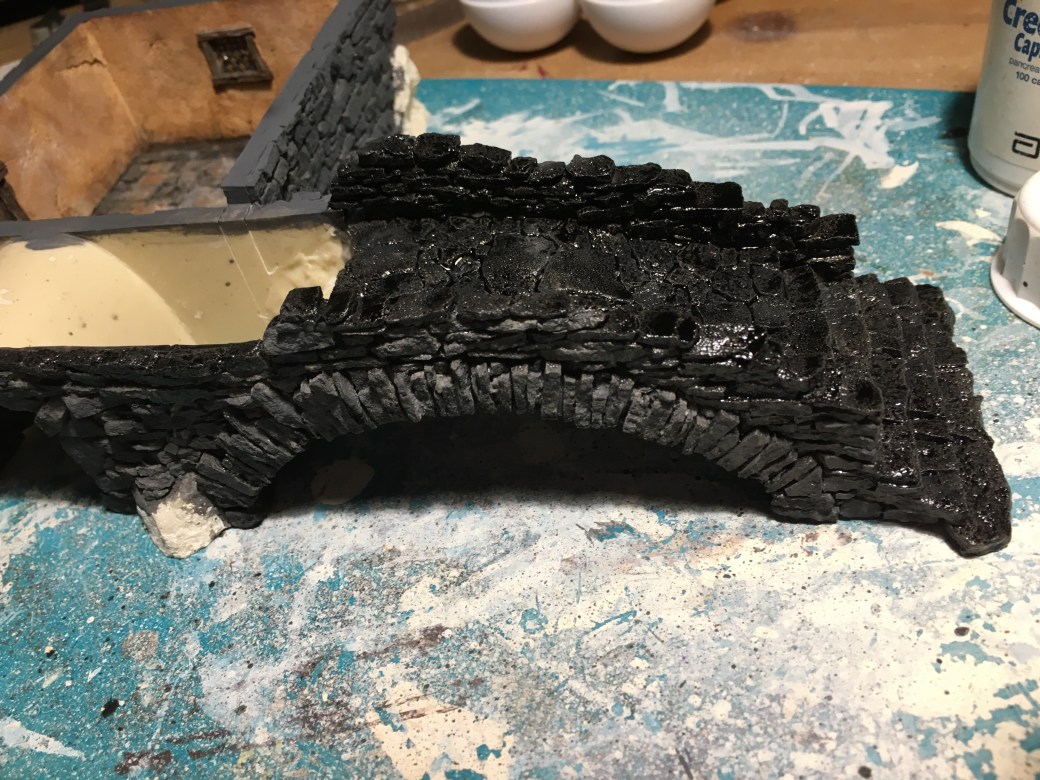
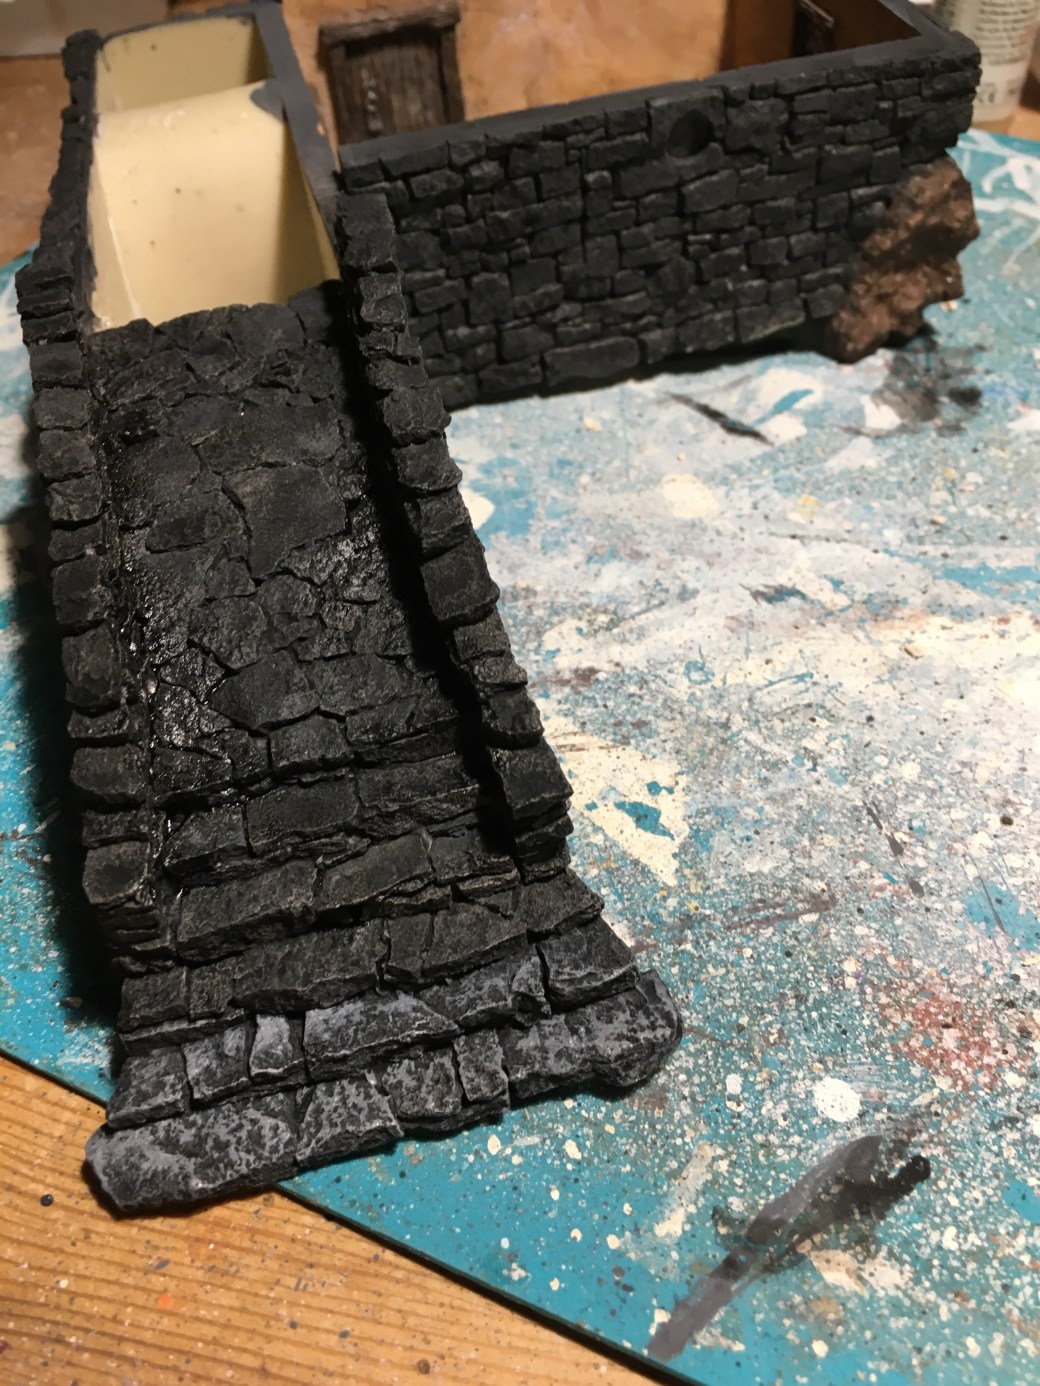
After setting aside to dry it was time to start dry brushing. The initial phase was to simply take the initial grey mix and brush over the top. The initial mix then had some more “sand” colour added to lighten it and then this was dry brushed again. Another couple of lighter mixes were added after that. In the image below you can see that I also started brushing on some of the Vallejo pigment that I had used on the inside flooring.

As well as the Vallejo pigment I also used some Humbrol Earth and Rust pigment to add colour variety. On the lower sections where the Mill would attract the damp I added green and yellow inks to hopefully give the impression of lichen and moss. These are areas witch will also be looked at again once the section has been properly based. For now though the current end result can be seen in the images below.


The windows were painted using Vallejo Model Color Iraqi Sand which was then given a wash of Citadel Reikland Fleshshade. The lattice work was then painted using Vallejo Gun Metal and Silver.
With the internal and external painting methods determined and noted down they will be used again as applicable throughout the rest of this building. The good news is I won’t need to repeat these methods in future posts where I have used them, I can just post photo’s.
This week I also received the orders I had placed with Other World Miniatures and Mirliton in Italy. Both look good and I couldn’t believe just how quickly the Italian order came, less than 48 hours! Incredible. As to the figures themselves I’ll be introducing those to you bit by bit as they get painted.
Next step unsurprisingly is to work on the next tier starting with the inside once again.
TIM

Man, you make it look and sound so easy! The mark of a true master 👍
LikeLiked by 5 people
Thanks Alex. I guess some of it has become easier but then again I’ve been doing stuff like this for more years than I care to remember!
LikeLiked by 3 people
Looking great TIM, the stonework with the algae, looks very natural, which is perfect in my books.
LikeLiked by 3 people
Thanks Dave. A natural look was what I was after so I’ll tick that box. 🙂
LikeLiked by 3 people
Looks excellent, the stone is realistic and the green really adds to the realism. The window is superb, it looks like there’s a glow from candles or a fireplace.
LikeLiked by 3 people
This is a great start Tim!
LikeLiked by 4 people
Yep, now up and running Lord Commander, up and running. 🙂
LikeLiked by 3 people
Nice progress.
Cheers Roger,
LikeLiked by 5 people
Thanks Roger. I reckon that’s 1% under my belt. 🙂
LikeLiked by 2 people
That really does look the part, Dave! 🙂 Nicely weathered and worn!
LikeLiked by 4 people
Thanks John, it’s coming along slowly. 🙂
LikeLiked by 2 people
You’re making better progress with it than I am at trying to identify that motorbike! 😉
LikeLiked by 3 people
😂😂
LikeLiked by 3 people
Very nice- the green moss effect looks great.
Cheers,
Pete.
LikeLiked by 4 people
Thanks Pete. 🙂
LikeLiked by 1 person
Your work on the stone is great here!
LikeLiked by 5 people
Thanks Dave. 🙂
LikeLiked by 2 people
I’ll repeat that the green algae is perfectly done. Did you use one coat of ink? Or several to build it up? I strkggle with the mossy damp look on stone.
LikeLiked by 4 people
Thank you. Mostly done with two or three coats of yellow and green ink using the colours individually and mixed and also diluted a little with water as both ink colours were to vibrant used straight from the bottle.
LikeLiked by 1 person
Thanks TIM.
LikeLiked by 2 people
Every building needs a good foundation and you’ve certainly nailed that here. I’m excited to see what miniatures you got but I will wait patiently until you’re ready to unveil them 🙂
LikeLiked by 3 people
Thanks, it’s off to a good start but more work will be needed once it has been based. Once I get myself organised I might put out a figure preview although I still have it in mind to buy a few more yet.🙂
LikeLiked by 2 people
I love the tabletop world models. Looking forward to seeing what you do with it. I was always disappointed that if you got their river sections, that you’d either have to create the banks yourself or set it into a board (though this is mainly down to my ham fistedness at doing things like this).
LikeLiked by 3 people
Couldn’t agree more about Tabletop World, their models are fantastic. The river section does offer a challenge and one I’ve still got to get my head fully around!
LikeLiked by 2 people
One of the chaps on a forum I use a lot bought a good number of the models and river sections and this post covers how he did his resin pouring and lessons learnt etc. it may give you some inspiration: https://eefl.freeforums.net/thread/821/river-project
LikeLiked by 3 people
Cheers mate, will check out. 🙂
LikeLiked by 2 people
Looking at the post, all the images have gone 🤦♂️. I’ve messaged him to see if he can restore them
LikeLiked by 3 people
Thank you.
LikeLiked by 2 people
Really wonderful use of shades, dry brushing and pigments. Looking so realistic.
LikeLiked by 3 people
It’s coming along Mark. 🙂
LikeLiked by 1 person
This project is coming along well mate, those pigments you use, are they a powder you dust on and how do you get them to stay attached ?
LikeLiked by 1 person
Just powders brushed on Pat, they don’t go anywhere.
LikeLiked by 1 person