

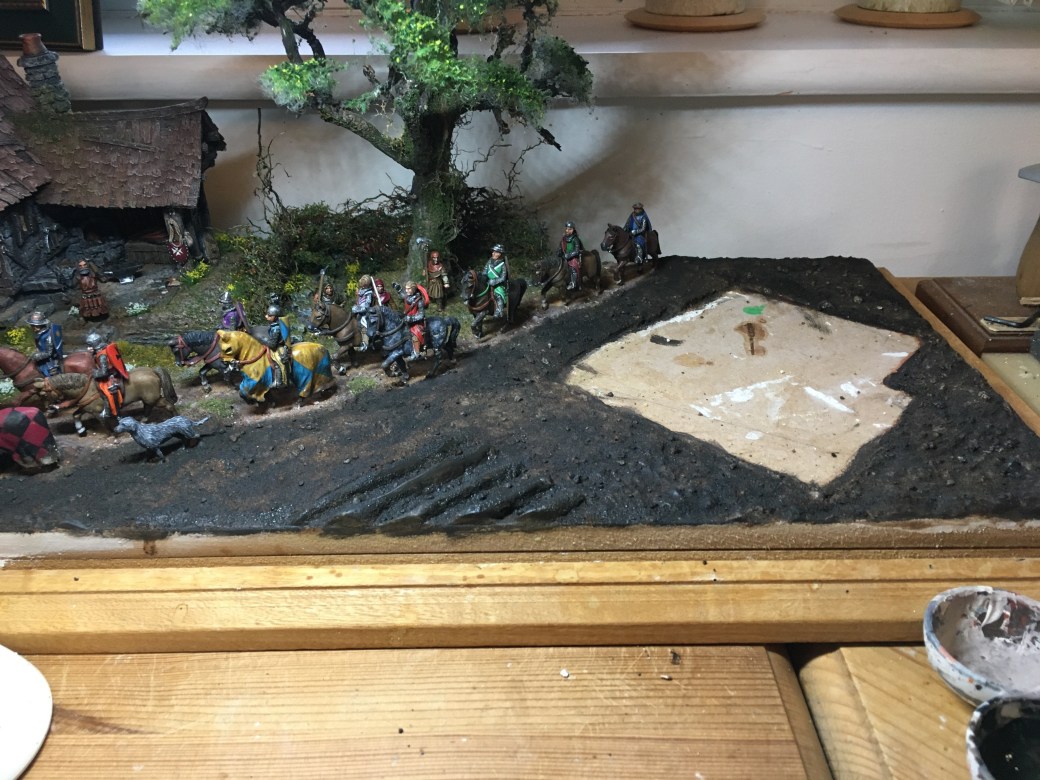
I got a lot done this week, well more than I thought I would. After placing the Barn on the base I drew around it to determine the area where I needed to lay down the initial ground work. Ideally I wanted to get as much done as possible before I stuck the Barn down as this would make access much easier. I followed the same technique as I’d used when basing the horses and likewise stuck to the same colour scheme too.
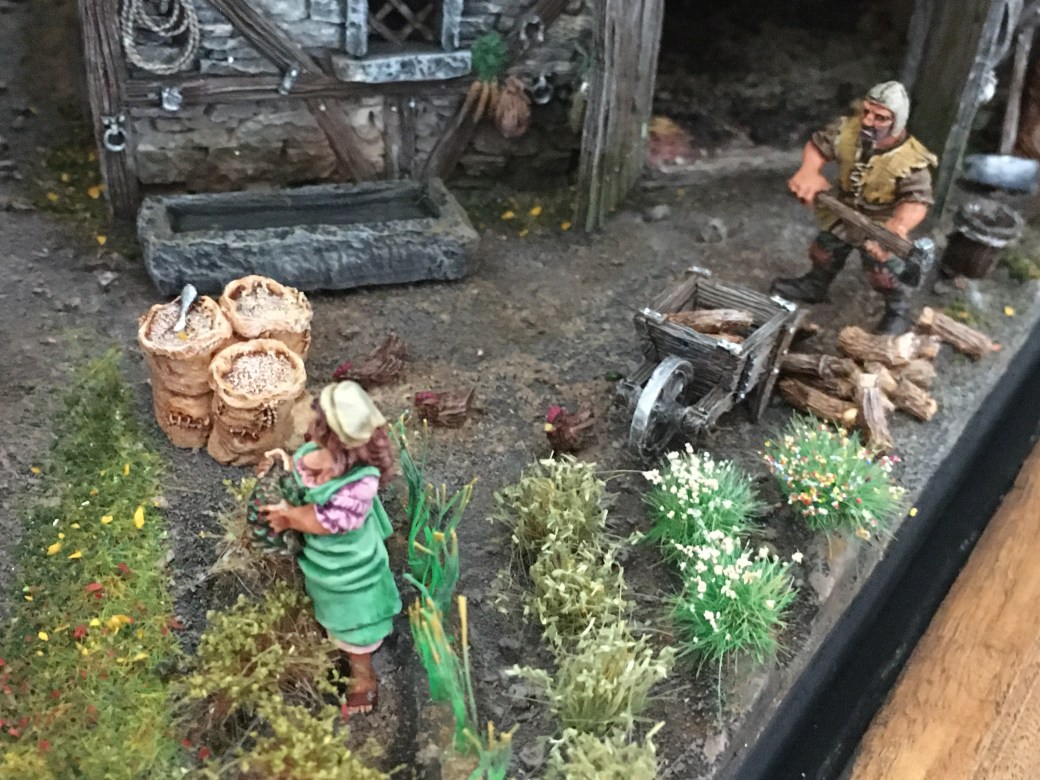
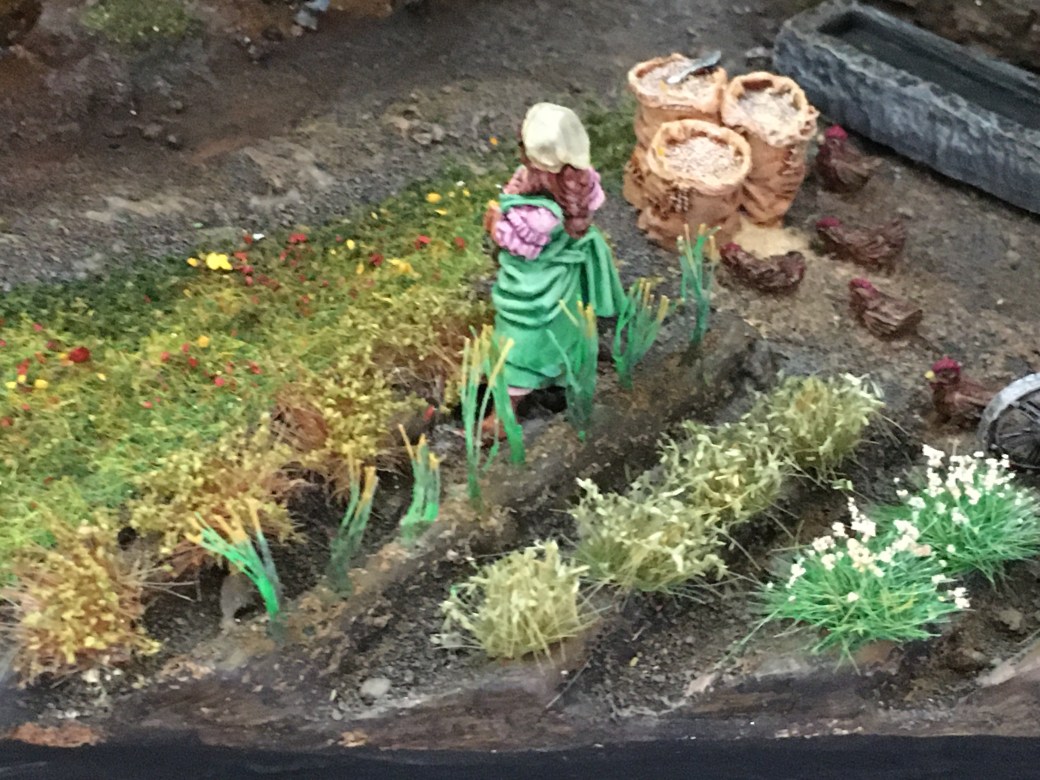
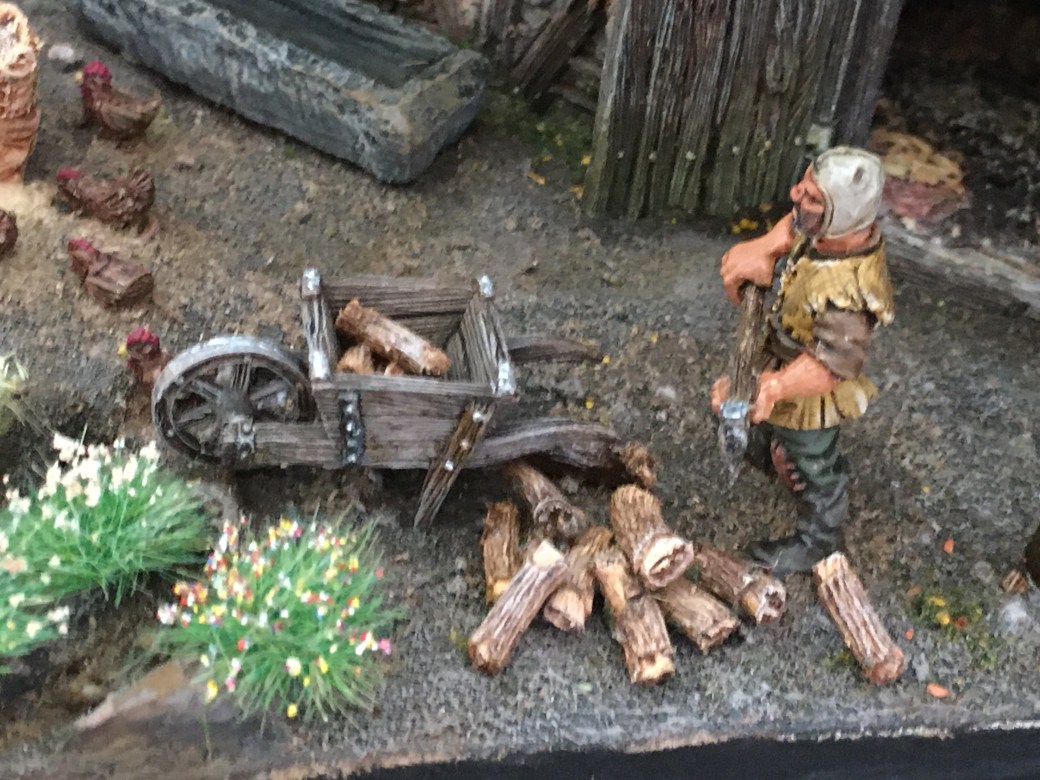
I had already planned in my head to create some visual interest at the front of the Barn and had settled upon a section of a veggie patch along with some chicken’s, sacks, tools and a wood pile. I also remembered that I had a small wheelbarrow and a water trough to include at some point as well.
A few of the bits I’d painted much earlier on so I didn’t have that much to paint other than ground work and plant life. You’ll see I also added some grass to break up the earth ground work. I also fixed one of the pairs of doors to the Barn as well.
Progress pictures below. Next week I’ll work on the sides and rear of the Barn and get more of the base edging painted black. If I achieve that then the diorama will be almost complete but for a few minor bits to do.
TIM


Splendid sir, really got that area looking like it belongs at the front of a barn, the chickens I must say are great!
LikeLiked by 3 people
Cheers mate, glad you like it. 🙂
LikeLiked by 2 people
Great progress Dave, would say you are on the home stretch now, and all the extra details you’ve added, give a sense of life and movement to the whole piece.
LikeLiked by 3 people
Cheers Dave. Yes, very much on the home stretch now. Another week or two should do it I reckon. 🤗
LikeLiked by 1 person
Hang about – where did all those knights come from?! I seem to have missed a week… The village is coming together beautifully – every update just breathes more life into it.
LikeLiked by 4 people
Haha, yes you must have missed a week! Nearly there now. 🙂
LikeLiked by 1 person
Nice work, Dave! 🙂 I wish you’d finished your veggie patches before I did mine, as I’d then have realised you’re meant to put the veggies on the raised bits and not in the furrows (I know absolutely nothing about growing things, obviously)! Barbara has now pointed out that the furrows are probably for drainage, something she never even mentioned when she saw mine!
LikeLiked by 4 people
Haha, you should listen to Barbara! I suspect you will harvest more with your veggies though than I will do with these of mine! 🤣
LikeLiked by 2 people
Haha, sounds like she didn’t have the heart to tell you!
LikeLiked by 3 people
Glorious work mate!! Unbelievable levels of detail here, looking ace!
LikeLiked by 4 people
Thanks Alex. It’s nearly there now I’m pleased to say. 🙂
LikeLiked by 3 people
Looks great to me.
Cheers,
Pete.
LikeLiked by 3 people
Thanks Pete. 🙂
LikeLiked by 1 person
Excellent progress again this week, mate! What I admire most about this diorama is how much life it has. Not only are there lots of details to take in but it just feels like a living, breathing scene from the Medieval ages. That’s not easy to accomplish in a diorama and I think you’ll be really proud of this one when its finished!
LikeLiked by 3 people
Thank you The detail is what I enjoy about dioramas, as you say it breathes life into the model. Nearly there now. 🙂
LikeLiked by 2 people
Wonderful stuff, the veg patch looks great. And love the way that chap is gazing at his buxom friend with his chopper in his hand! 😁
Cheers Roger.
LikeLiked by 3 people
Haha, the good old Middle Ages when you could get away with saying things like that! 😉
LikeLike
From pics 1 and 2, I thought you were going to have a lot of work turning that white lamp into a medieval tower or something! 😉 Great work TIM, and so nice to see it all coming together. Love the minis you chose for the villagers. It looks so real. Question for you, because I debate about this all the time with miniature basing….do you put the terrain down, scrape it away and then glue additional items on? Or glue the additional items and add terrain around them? That’s always a challenging bit!
LikeLiked by 2 people
Thank you. As for the basing I find myself using both methods at various times. My preference is always to base the figure and then do the basing around it. Unfortunatley access doesn’t always allow for that to happen so I’ll base then scrape out, insert the figure and then touch up the basing as necessary. 🙂
LikeLiked by 2 people
Yea, I guess the main issue I’m usually trying to avoid is giving the mini a ‘sunk in’ look. If I have to add terrain paste around the mini, like if they are already pre-molded onto a base, then it’s easy to start covering their feet. Alternatively, I can spend an inordinate amount of time trying to chop them off the base, which also has its own issues. Good to know that there isn’t a perfect way to do it! Sometimes I just think I must be doing this all wrong, haha!
LikeLiked by 2 people
Figures moulded to bases are harder for sure when it comes to that “sunk in” look which is one reason why I prefer the “slotter” style figures. The problem is we don’t get to pick and choose the style we prefer and just have to settle for what the manufacturer produces on the figures we wish to buy.
LikeLiked by 1 person
Indeed. Luckily for me, Osprey/NorthStar have started ditching the moulded base on some of their minis. I still have to deal with the old ones, and I’ve sort of gotten used to it. But it can be a pain. Sooooo, on the chickens – you painted them completely and then glued them to your base? That looks like another little tricky one.
LikeLiked by 2 people
The chickens were an example of laying down some filler and texture first, scraping out a suitable sized hole once dried and then sticking the chickens in. Once they were stuck I mixed some more basing texture with the paint already added and patched and blended any minor gaps. The order of doing this is important and in this case I worked front to back, one chicken at a time so as not to box myself in and make access even more difficult.
LikeLiked by 2 people
Oh yea, hadn’t even thought about the order initially! That’s really important to make sure you get access to them. It’s mind boggling how much thought goes into all this, especially for dioramas!
LikeLiked by 2 people
You’re not wrong! The planning side is ery significant that’s for sure.
LikeLiked by 1 person
Woah, I love fields in dioramas!
That whole thing is so nice.
Someone should inform the magazine that North Star publishes to put the finished images in! (Wargames Illus?)
LikeLiked by 2 people
Not a bad shout but I do need to finish it first! 😉
LikeLiked by 1 person
This is really coming together. All the little details are selling the scene. Well done!
LikeLiked by 2 people
Cheers mate, glad you like it. 🙂
LikeLike
Got to like a man that puts in lots of detail Dave!The carrots on the wall, the scoop on the sack, chickens, wow mate very impressive!
LikeLiked by 1 person
Thanks Pat but the detail is what we both love and what to some extent it is all about. 🙂
LikeLiked by 1 person