

Originally it had been my intention to put up a “Work In Progress” post before publishing the final diorama but after some deliberation I decided against it. If there was a “wow” factor to be had then it would be lost by a WIP post so I decided to go for a “Making of …” post instead! The original post and final photo’s can be found here.
The Inspiration
Like most of the things I do the initial inspiration comes from finding some figures that I would like to buy and paint. The challenge then becomes how to fit them into a diorama. In some cases an idea alludes me for some time, occasionally completely but sometimes ideas come thick and fast as was the case with this one.
It all started with some internet browsing and discovering a site called “Other World Miniatures”, not a site I was aware of. Various searches led to me finding a set of 5 Giant Rats which I rather liked the look of and thought would be fun. Instantly I was reminded of the horror author James Herbert and his trilogy – The Rats, Lair and Domain. All books I have and read on more than one occasion. The seed was sown. The fact that “Backtothehammer” and “Pete S/SP” both picked up on this was great to see.
The Concept
A while ago I made a conscious decision to try and limit my dioramas to small bases. There were two reasons for this. One was space, dioramas take up a lot of it and I have a lot of them now. The other was aimed at stretching my imagination. How to get as much detail as possible onto a small area? The only way is up!
In the book “The Rats” the furry little bastards appear all over the place but the “London Underground” and the more obvious “London Sewer System” were already set in my mind but what was the story line and how to represent it?
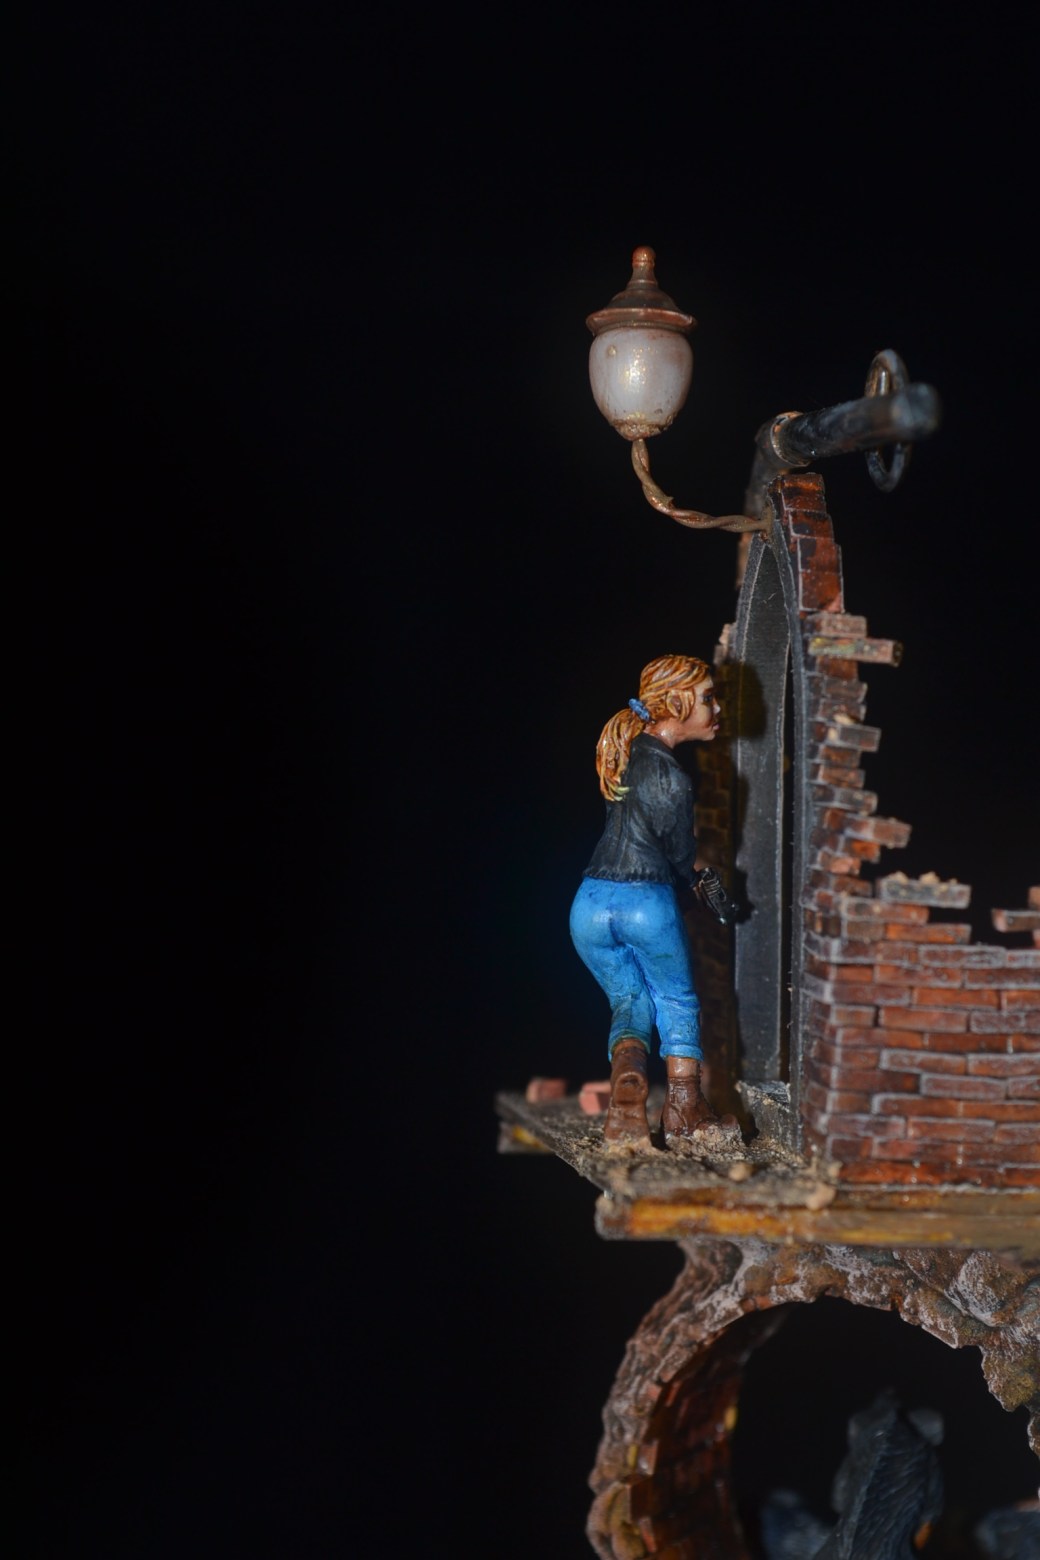
Clearly for the rats to appear as “Giants” some humans would have to feature for scale otherwise the idea would be lost. From there is was an easy leap to the rats being mutated as a result of some form of nuclear fallout. Now all I needed was a contrived situation which would bring the humans and the rats together and the search for food by both groups seemed natural enough.
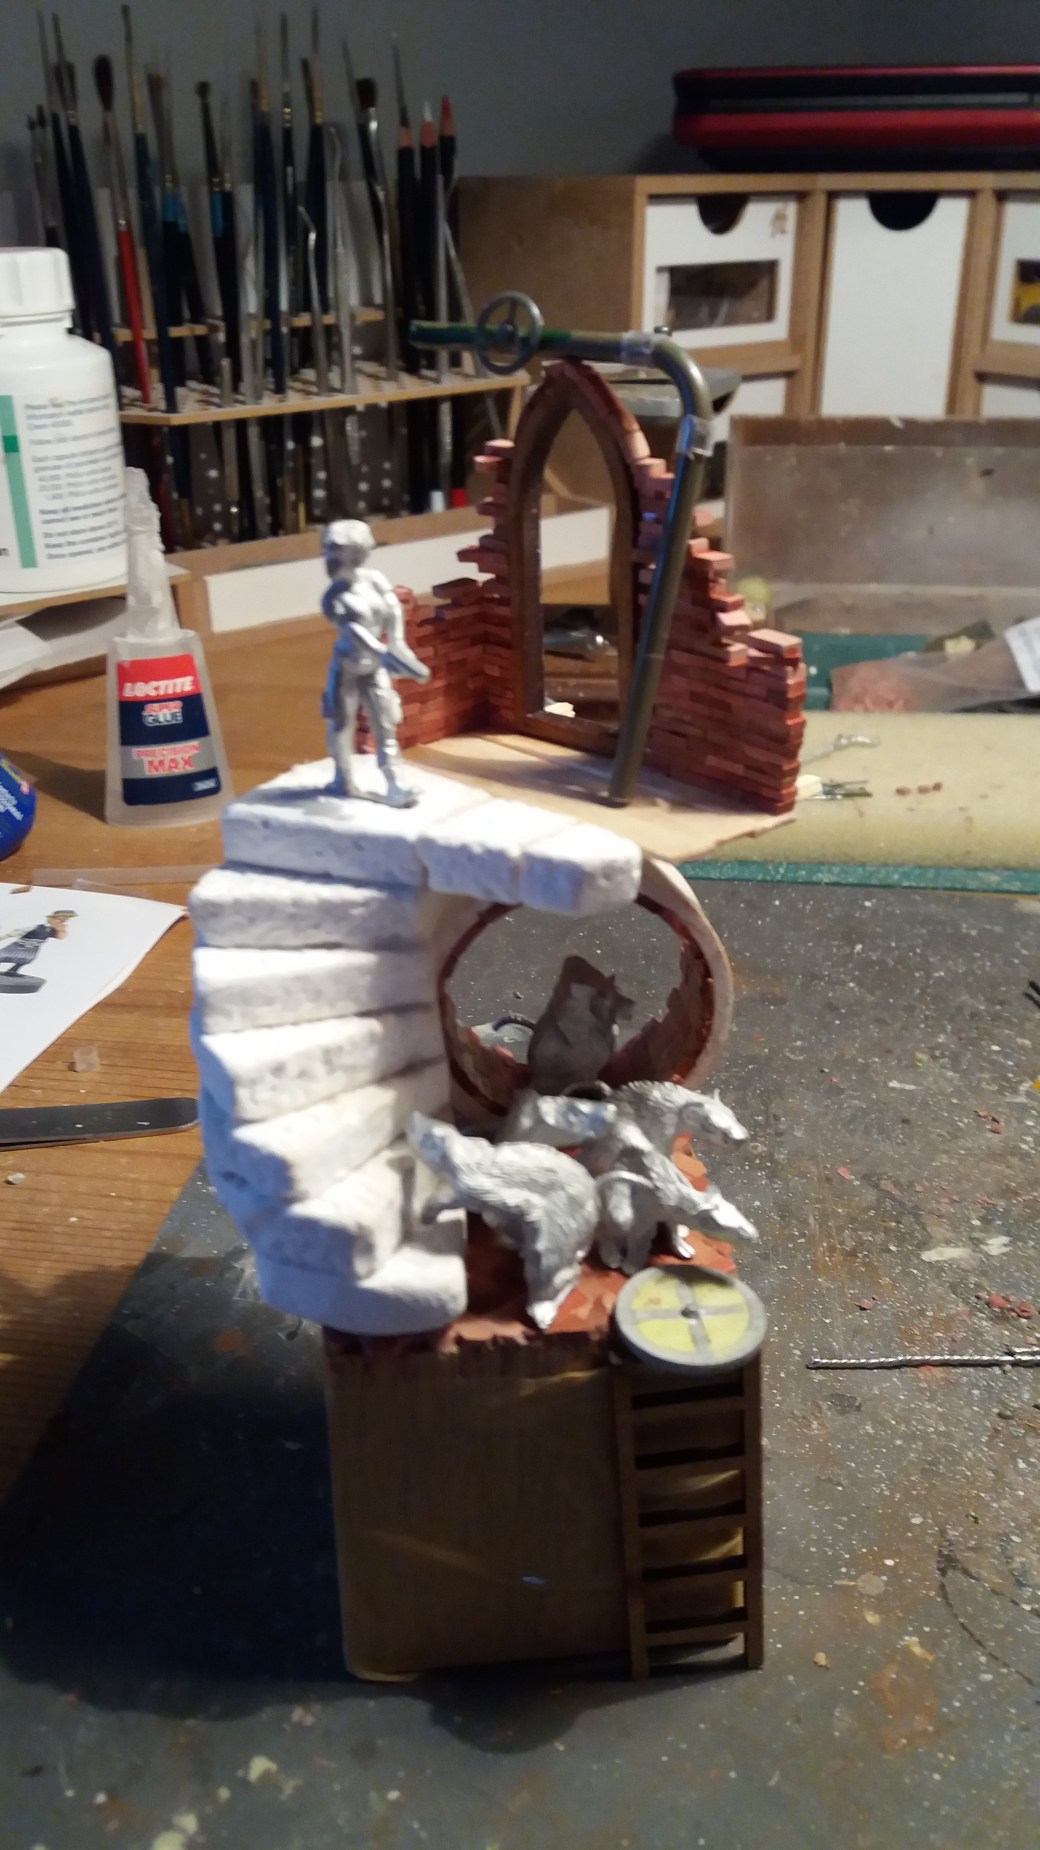
How to depict the search in a diorama format required some thought and of course I needed to find suitable figures too. Hasselfree Miniatures is one of my go to sites these days and once again they came up trumps. I bought four figures all of which I thought would be suitable but in the end settled on the two I used as being the most appropriate. To my mind they both look like they are acting cautiously in their search and that was most appropriate.
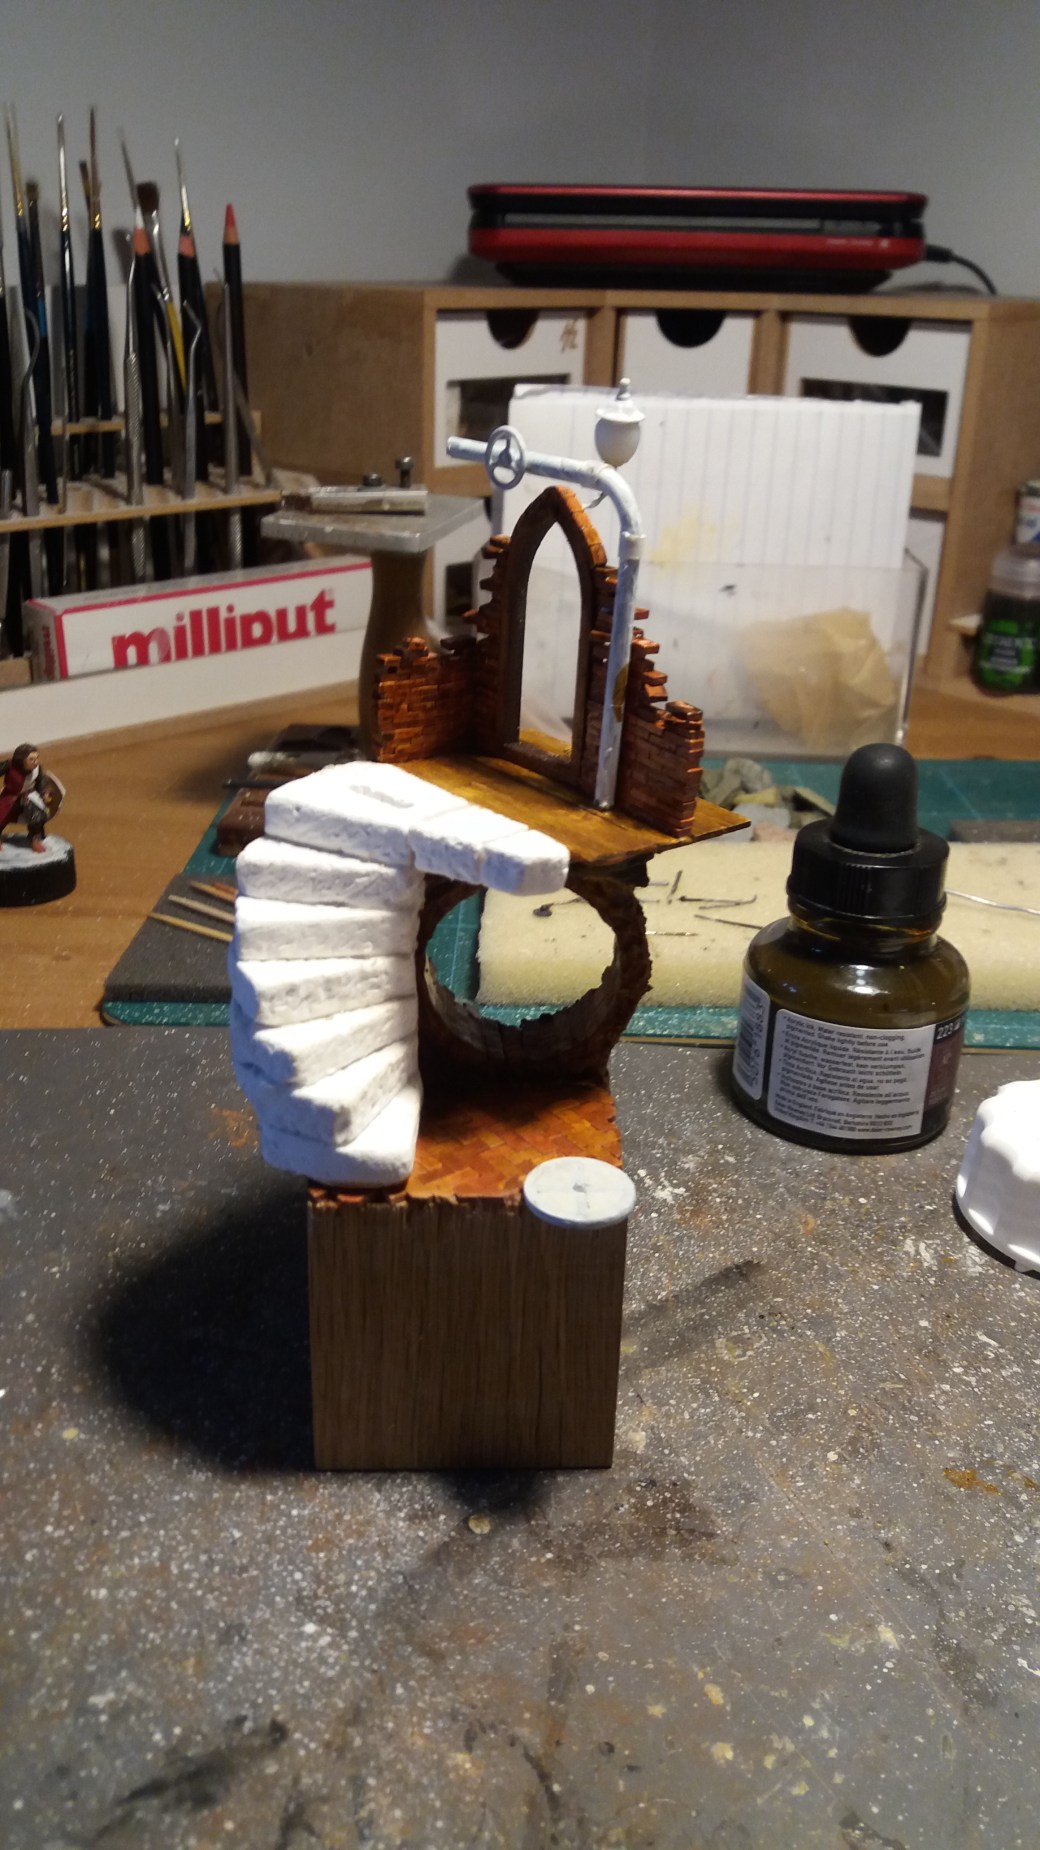
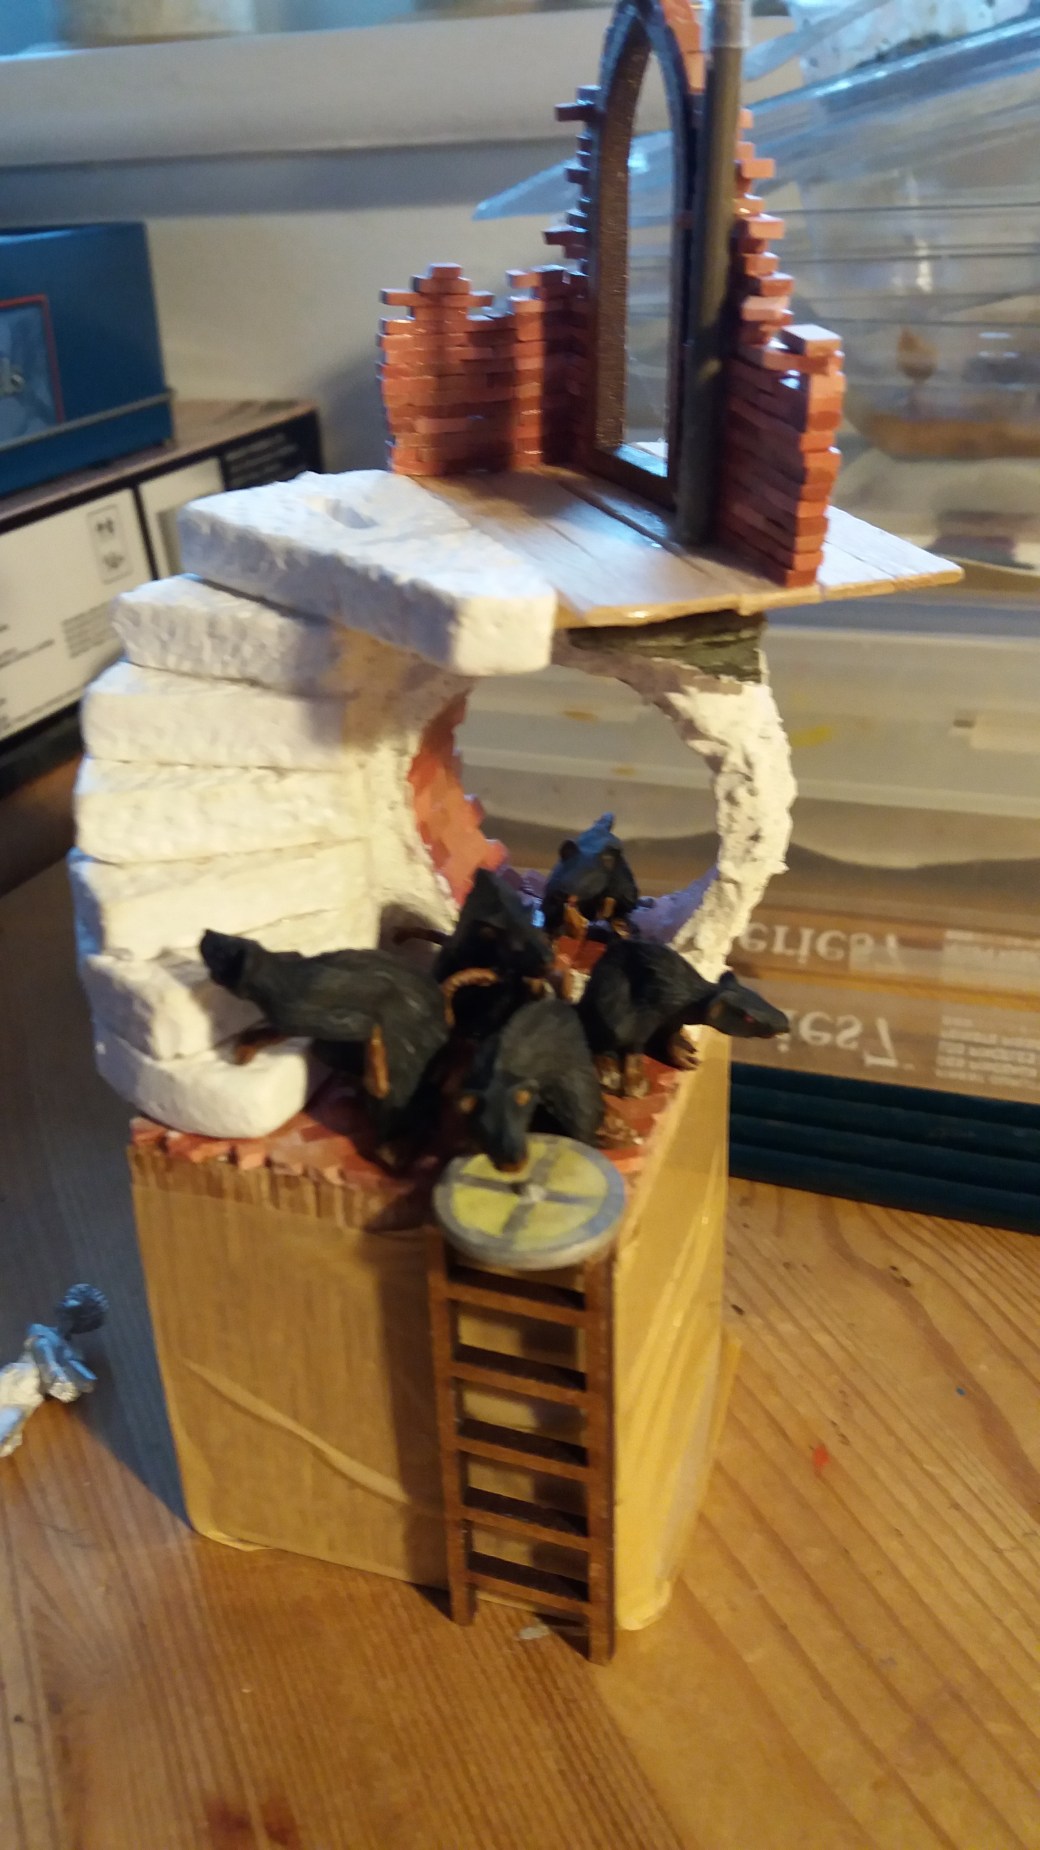
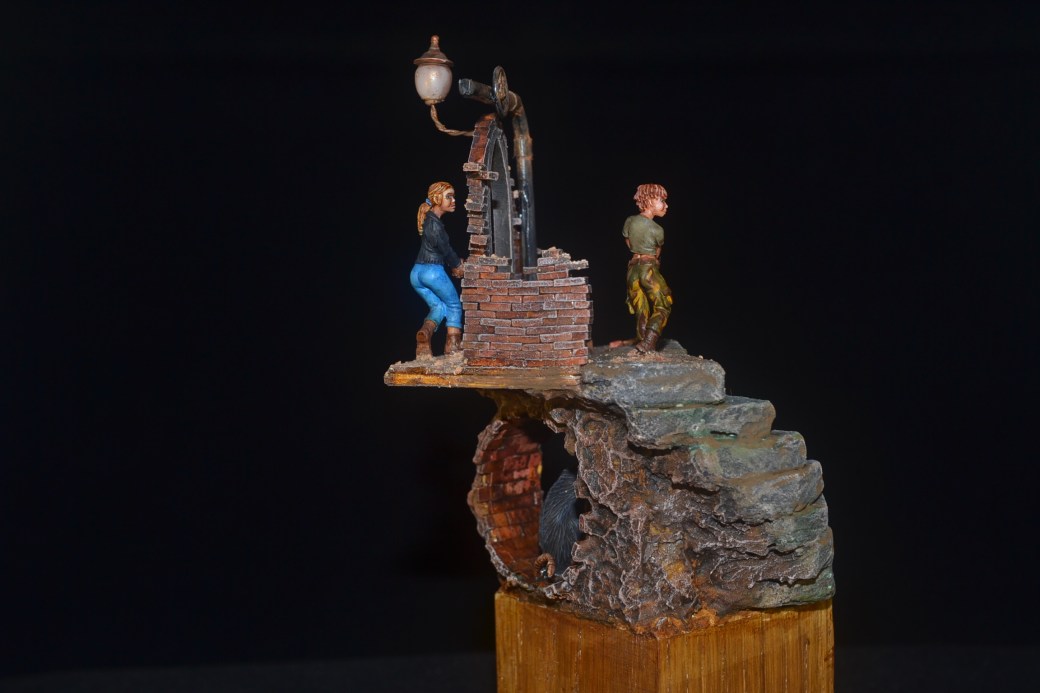
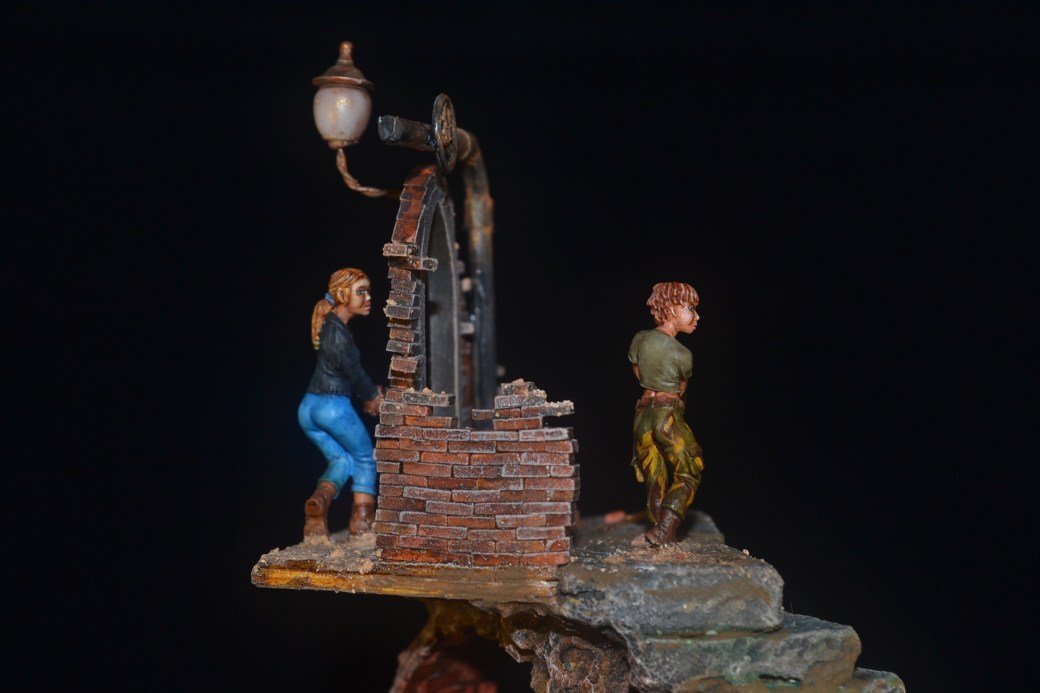
With the only way being up it seemed like a good idea to have the diorama on three levels – basement/sewer, stairs, building/room. Now all I had to do was build it!
The Build
It made sense to start building bottom up so first of all I laid down some bricks. The bricks are 28mm scale and come from “Juweela” who produce scenic materials. These bricks are simply brilliant. I went with bricks to reflect the London Sewer system built by the Victorians.
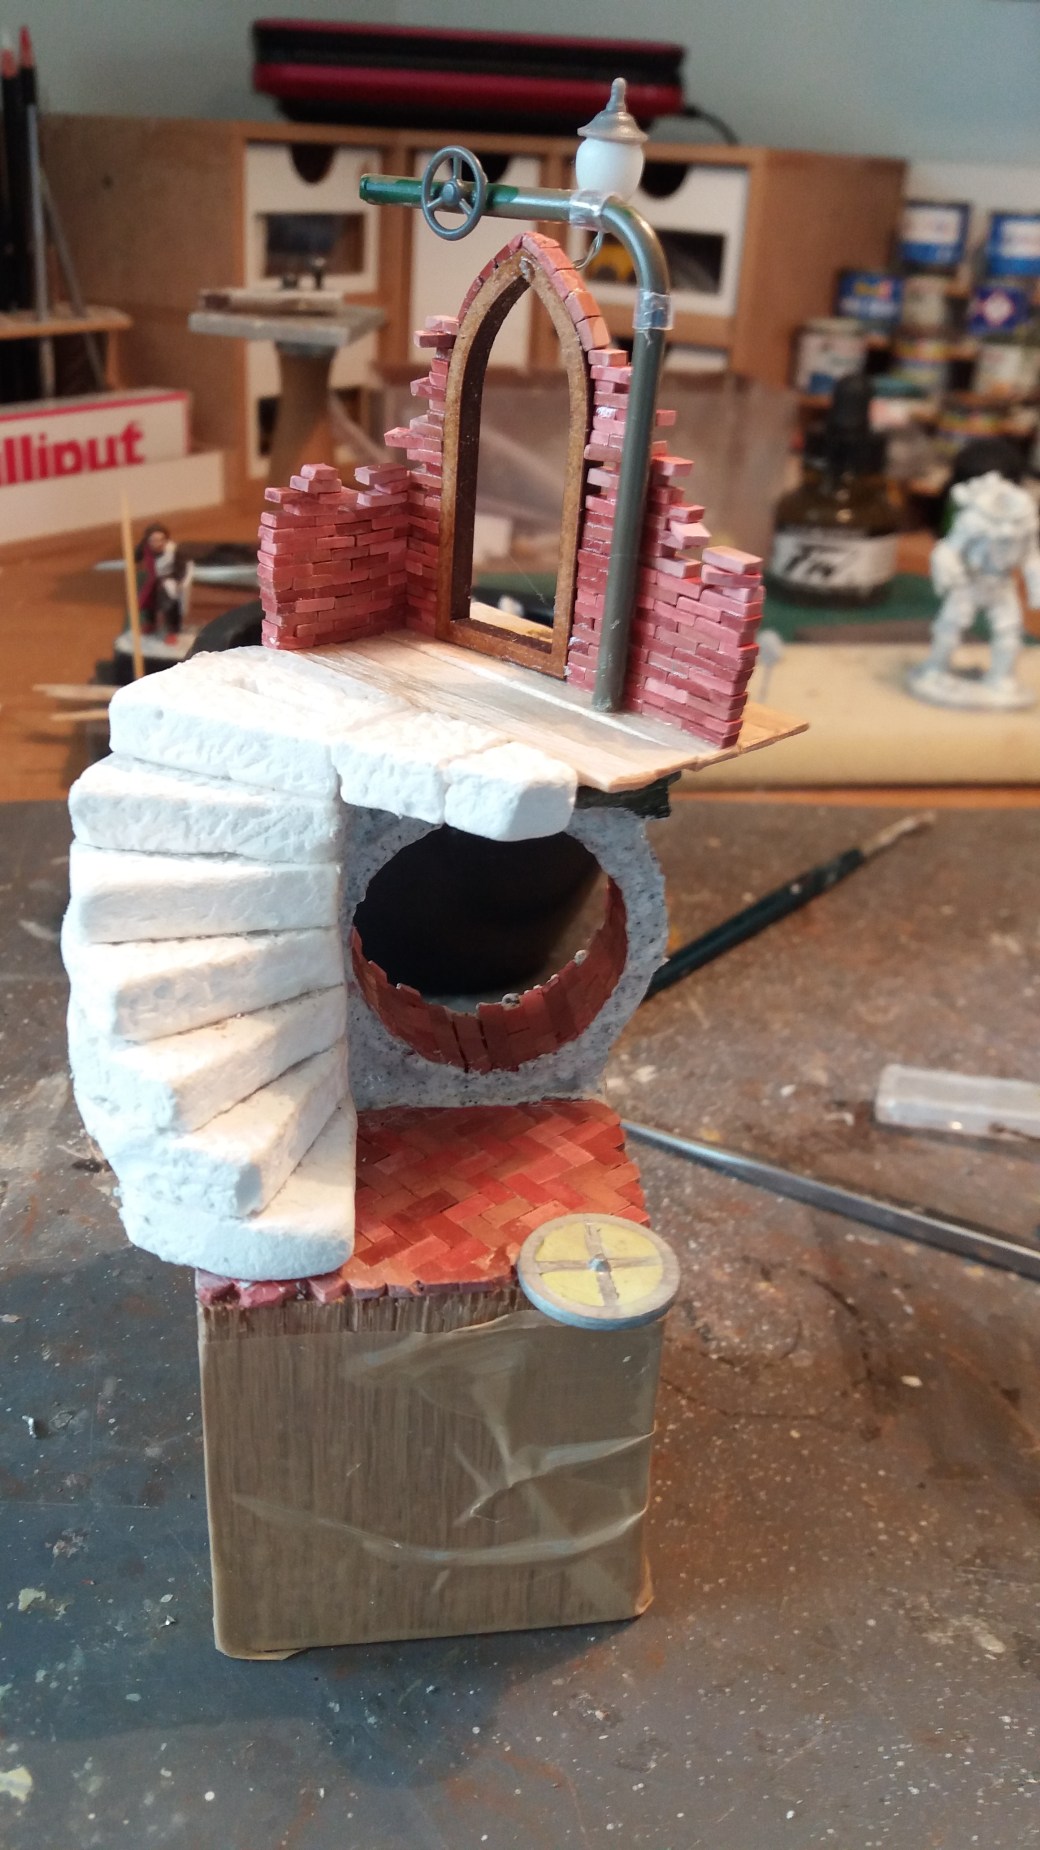
I small circular section of plastic piping found in the garage was used to produce the “tunnel” effect which was then clad with bricks before being positioned on the base.

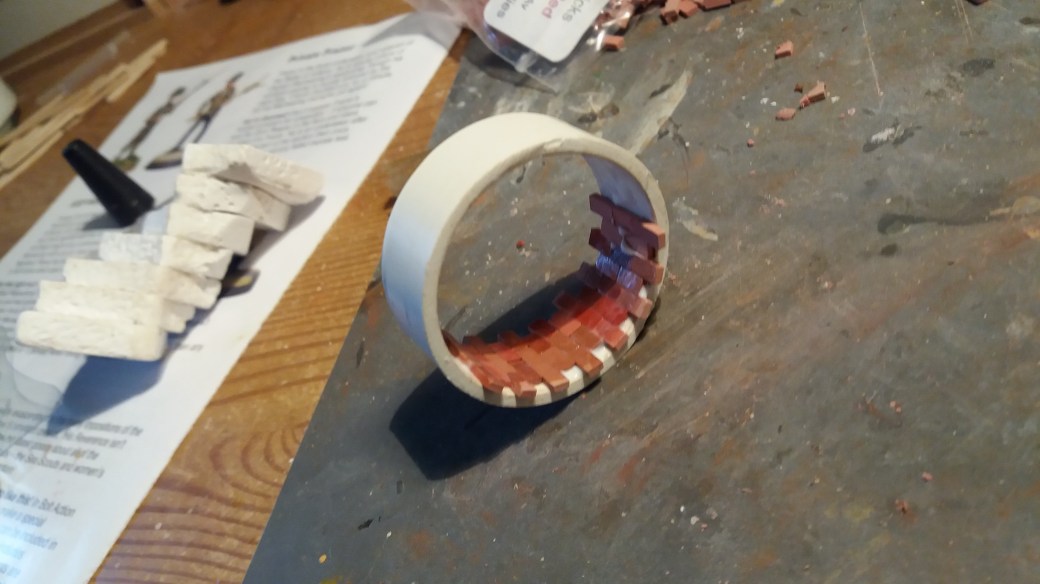

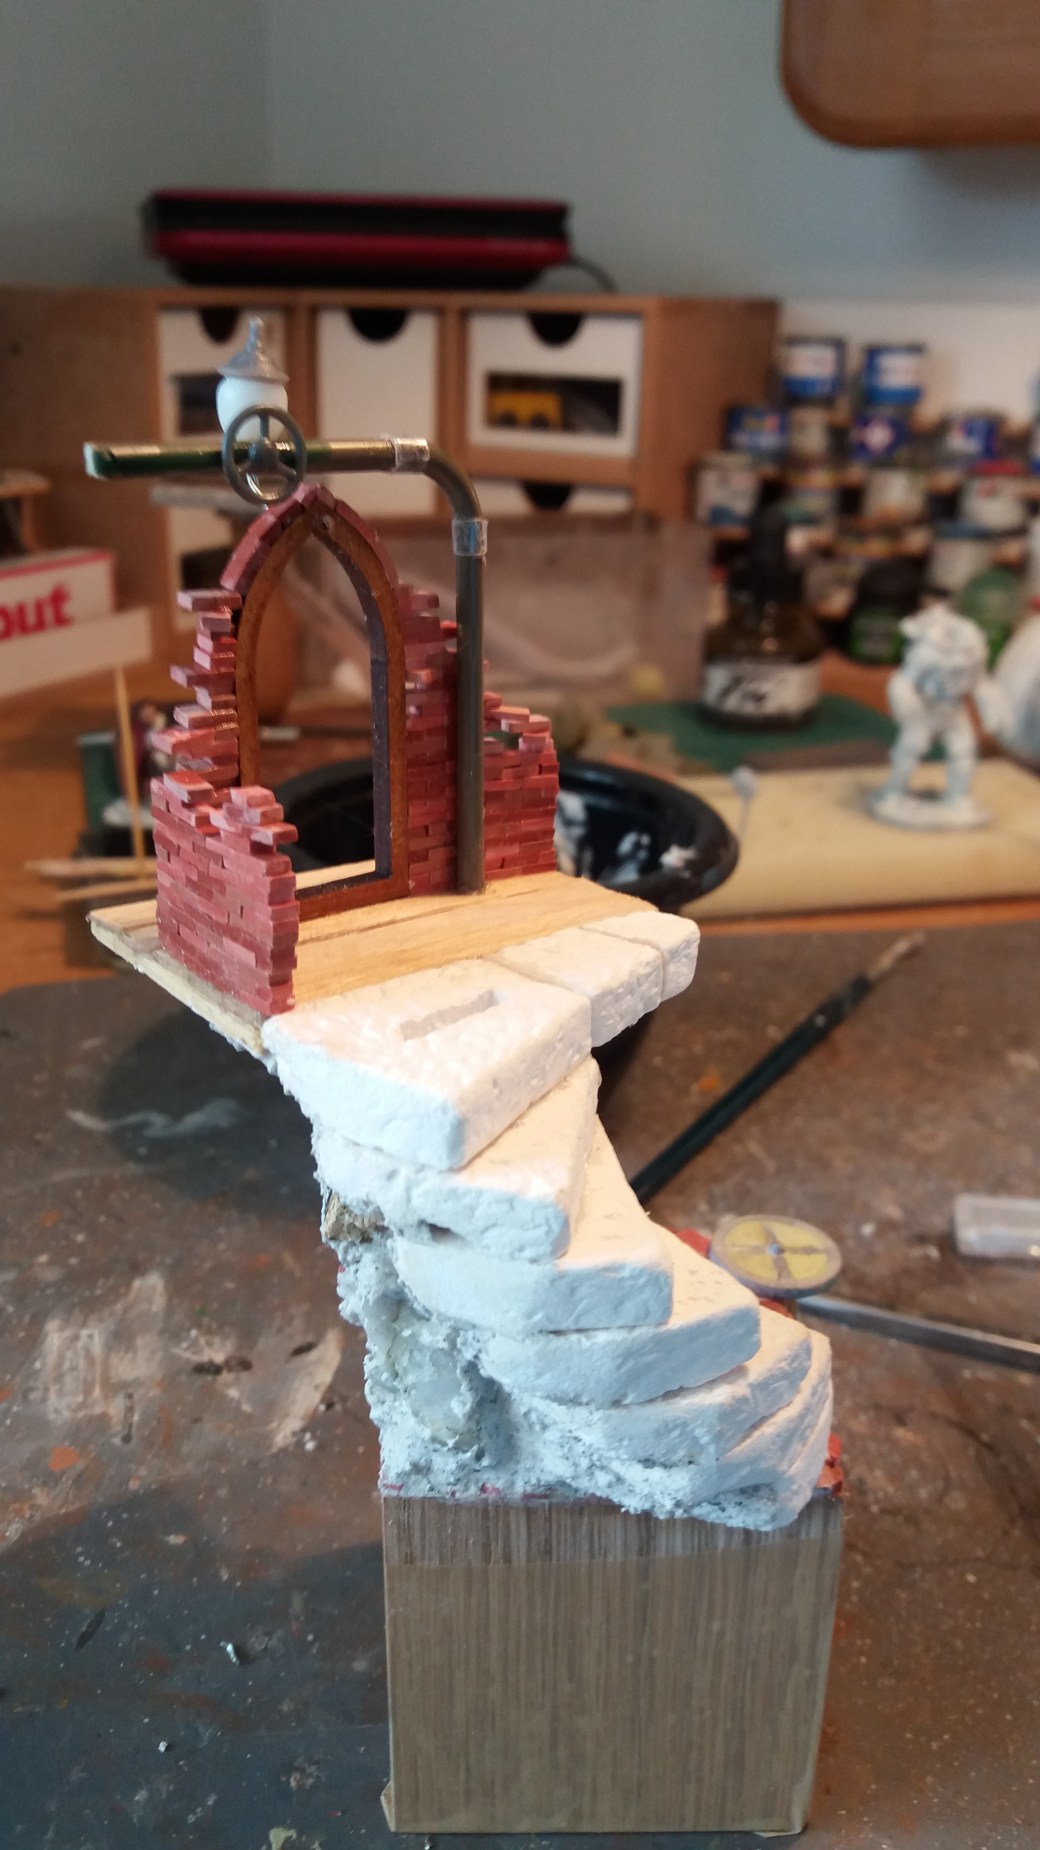
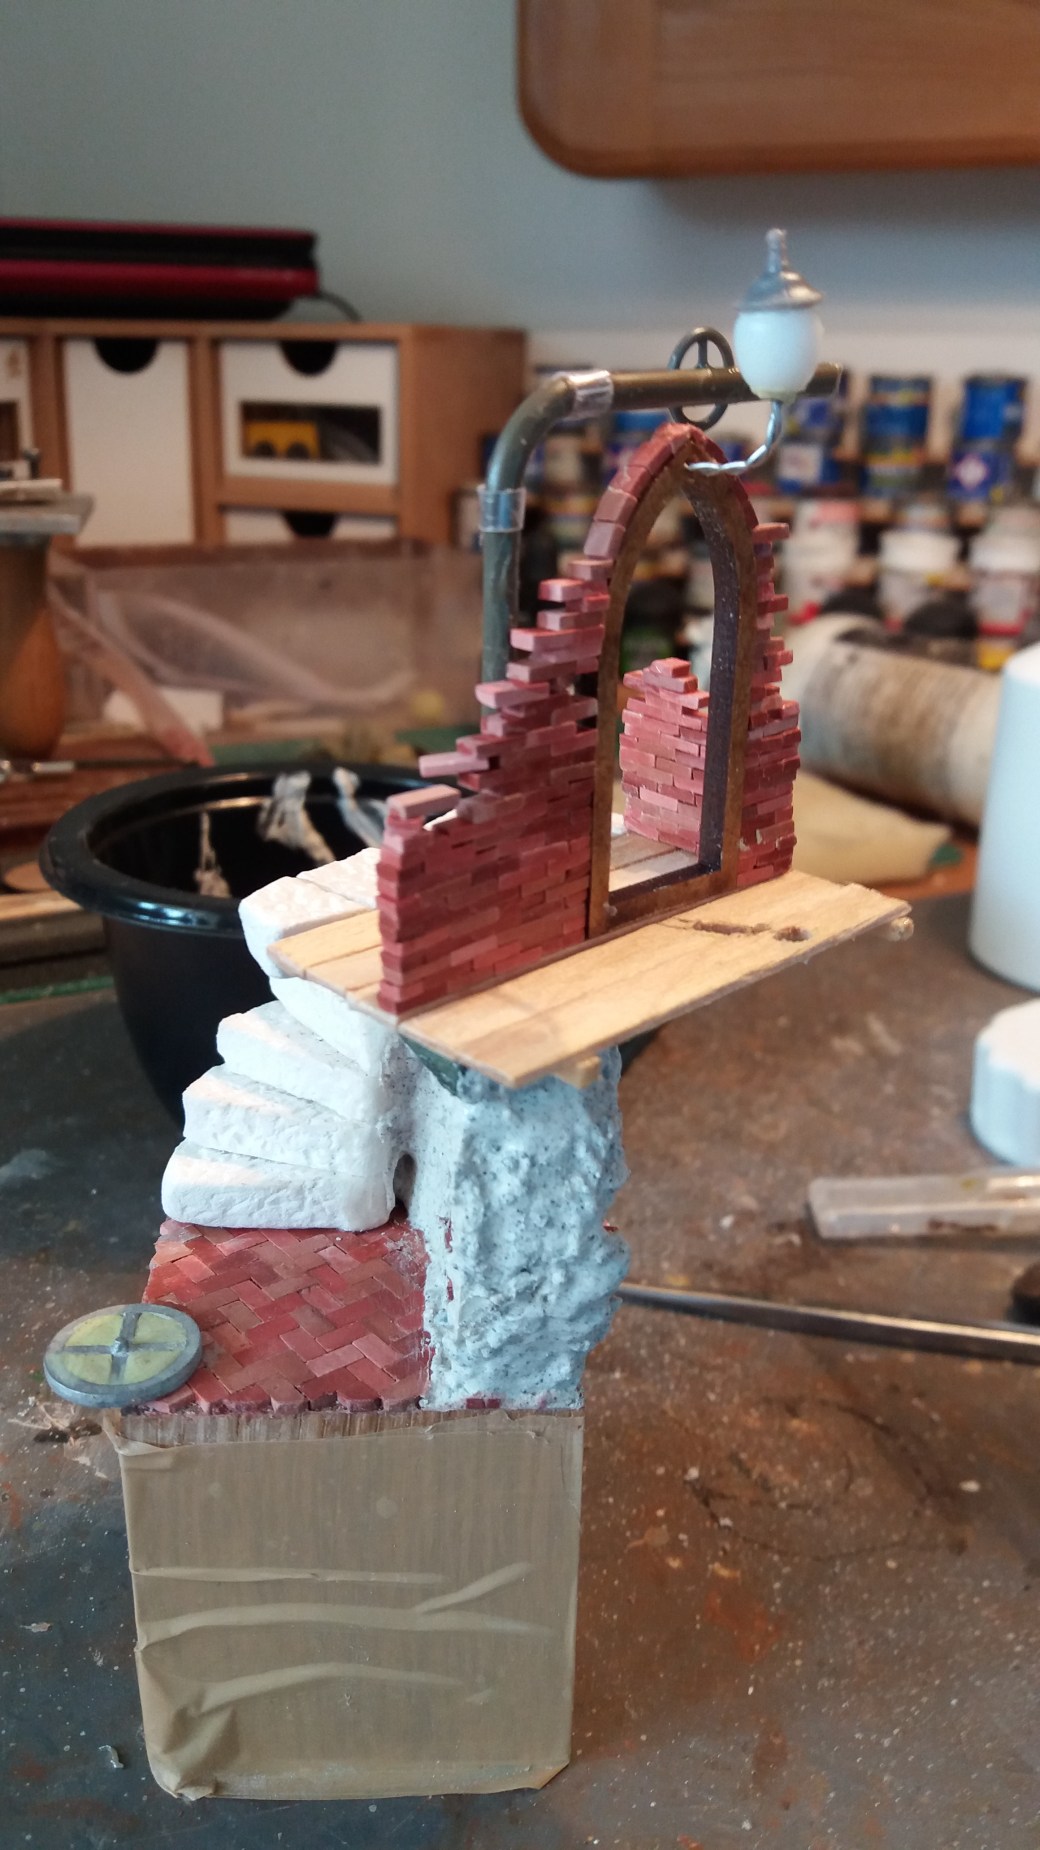
The next job was to build the stairs. This was done by casting some pieces from a “Hirst” mold and trimming as applicable. I also needed to create a floor (using coffee stirrers and match sticks) to connect to the stairs which would in due course have a brick wall and door added to it as well as one of the figures. The other figure would be positioned at the top of the stairs and in the image below you can see that the stairs have been prepared to take the slotter base of the figure.

Now it was all about building up the walls and adding more details. The door is an MDF purchase which was made to make the Gothic windows in my “Wizard Library” boxed diorama.
I had some over and they were ideal for a door entrance.
The walls alone felt a little plain so I decided to add some pipe work. For this I simply used some plastic sprue. I had a small steering wheel from an army jeep model in my bits box which made for a nice addition and the pipe joints were made using the protective plastic tubes which come with paint brushes.
The light was a spare one from my WW2 Diorama …
… which was broken down and attached using some twisted wire.
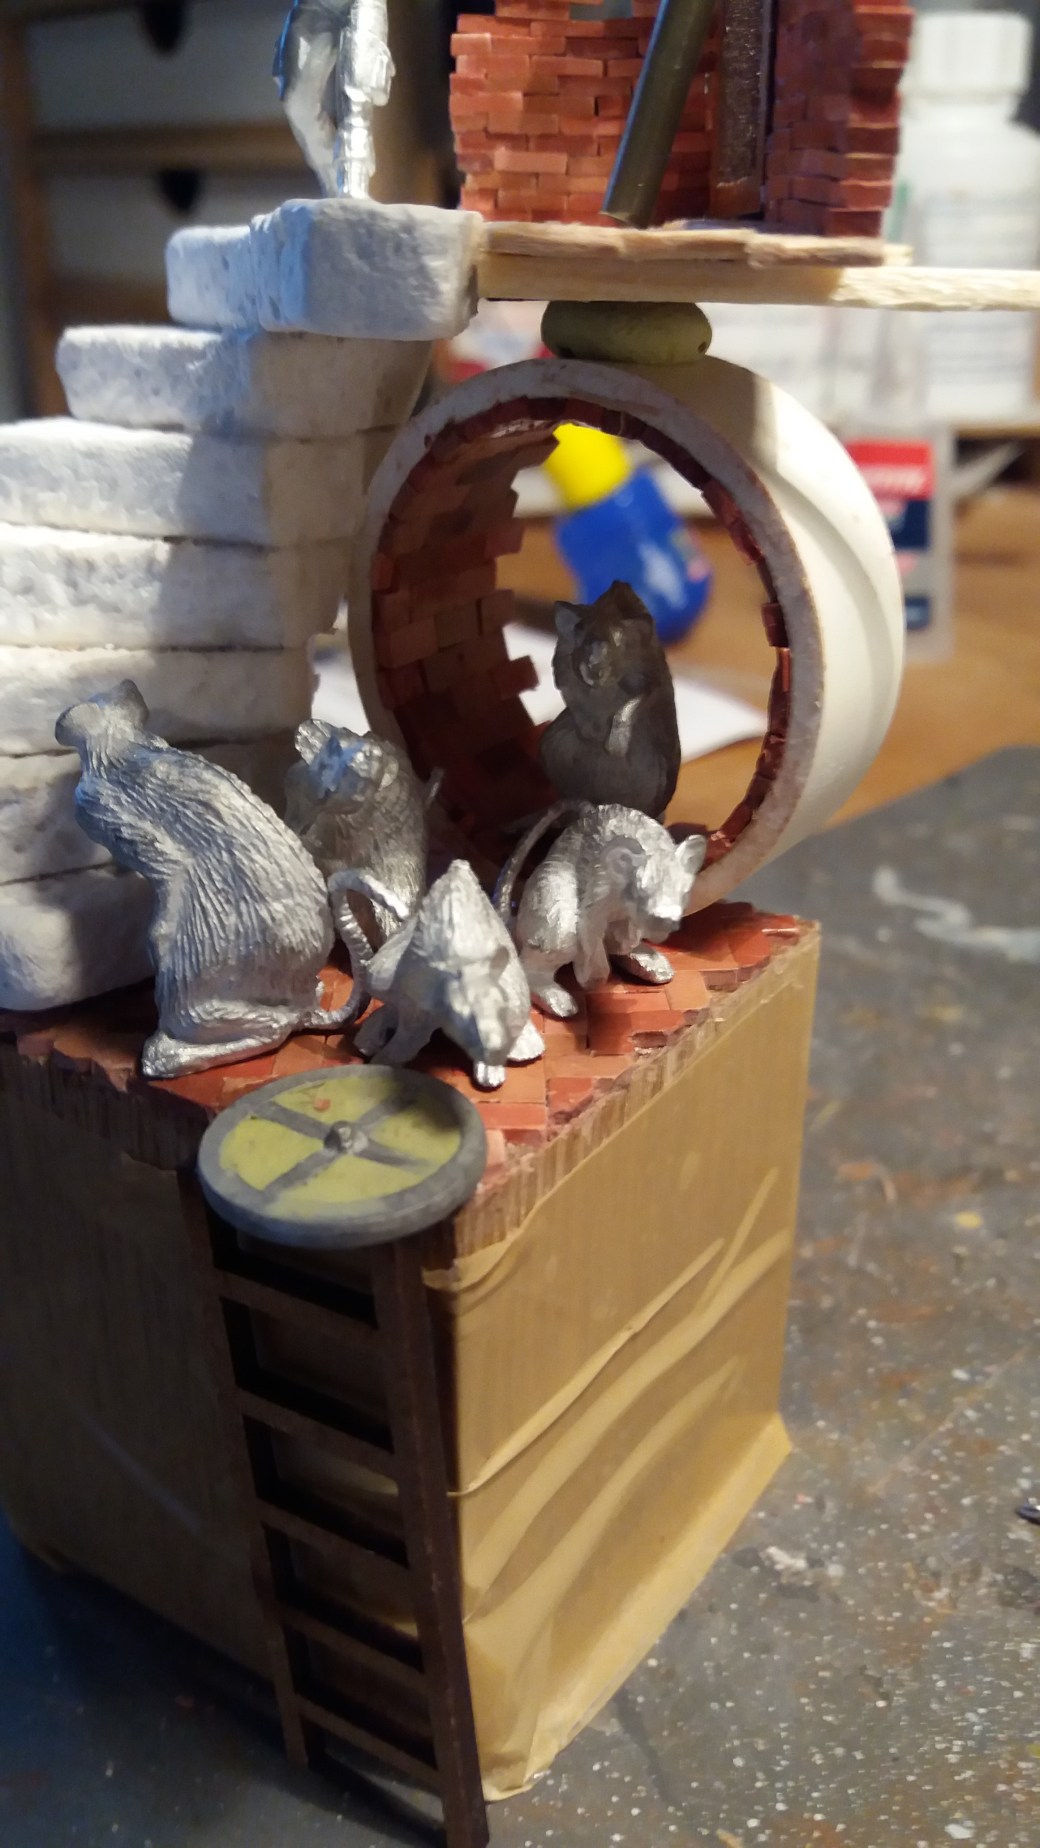
Another spare wheel was used as a drain cover at the base of the sewer and to which later a ladder would go under.
It was then time to start using some filler with PVA to fill the various gaps.

In between these various stages I conducted a few dummy runs in terms of figure fit and positioning. I also played around with the various components.
I wanted this to be a piece that had interest from various angles and was chuffed with “Wudugast” who picked up on this point and kindly commented accordingly. Having set myself a bar to reach it will be interesting to see if I can replicate the concept in future dioramas. Clearly some ideas will lend themselves more readily than others. Time will tell.
So the build complete it was then just a matter of painting things up.
Completed Diorama
Job done.


The Narrative
An accompanying narrative is not something I normally do, in fact I think this is a first. It was fun to do and I felt the diorama needed an explanation. Something to consider again perhaps? For anyone wondering, the words are my own and not a quote from a book.
Until next time. Don’t let the bed bugs bite … or the rats!
TIM

Great article, and thanks for showing those progress photos, it is interesting to see how these scenes come together!
LikeLiked by 4 people
Glad you enjoyed it. The biggest problem with WIP posts is remembering to take photo’s as you go a long!
LikeLiked by 5 people
so true!
LikeLiked by 2 people
A great post, it is really interesting to see how things come together.
LikeLiked by 3 people
Excellent stuff! Nice to see how it’s built up. Yet again, you seem to have a knack for building in the vertical plane!
LikeLiked by 3 people
Cheers John. 😊
LikeLiked by 2 people
The finished work is great, but its also fascinating to see how you got there. I really like the plastic pipe that you put the bricks inside such a cool idea.
LikeLiked by 3 people
Thanks mate, glad you like it.
LikeLiked by 2 people
Awesome behind the scenes look at the diorama mate. You could do another for “Lair” and “Domain”
LikeLiked by 3 people
I might do. I certainly enjoyed this one enough to do another.
LikeLiked by 2 people
Yes please
LikeLiked by 2 people
Brilliant mate – I love a good ‘making of’ read! You clever thing you 🙂
LikeLiked by 2 people
Haha, not so sure about the clever bit but glad you liked it. 🙂
LikeLiked by 2 people
Thanks for showing that mate , and it is a problem remembering to take photos. I’m so glad you gave us the Wow first ! I love it all but if I had to I would say your work on the bricks is marvellous . I can’t decide which is your best work ,this or the Wizard so I’ll call it a draw !
LikeLiked by 2 people
Very diplomatic. I’m just glad you like them both.
LikeLiked by 2 people
really great to see how you put it all together. Individual bricks look great- worth the time investment.
Cheers,
Pete.
LikeLiked by 2 people
Thanks Pete and you are right, the bricks are well worth it and make such a difference.
LikeLiked by 2 people
Awesome stuff once again mate. I always enjoy seeing the way things like this are built, and the time and effort you put into the details definitely paid off!
LikeLiked by 2 people
Great stuff.
LikeLiked by 2 people
I thought I fell in love with this diorama on your last post, but that was just infatuation. Now it’s full on love. Or lust. You get it!
Great call on the order of posting, very effective. Not sure what a Hirst mold is though?
You and I love the methodical, so thanks for remembering to take photos so we could see all this (btw remembering to take photos mid-project is a common challenge I fully identify with!)
Epic, yet again!
LikeLike
Thanks Mark. I have to say I do like WIP posts by other people, facinates me to see how people work and the level of creativity that goes in to a model. Usually pick up tips too. Hirst Moulds are a US company that make dozens of moulds for plaster casting. Cost a furtune to buy in the UK!
LikeLiked by 1 person