

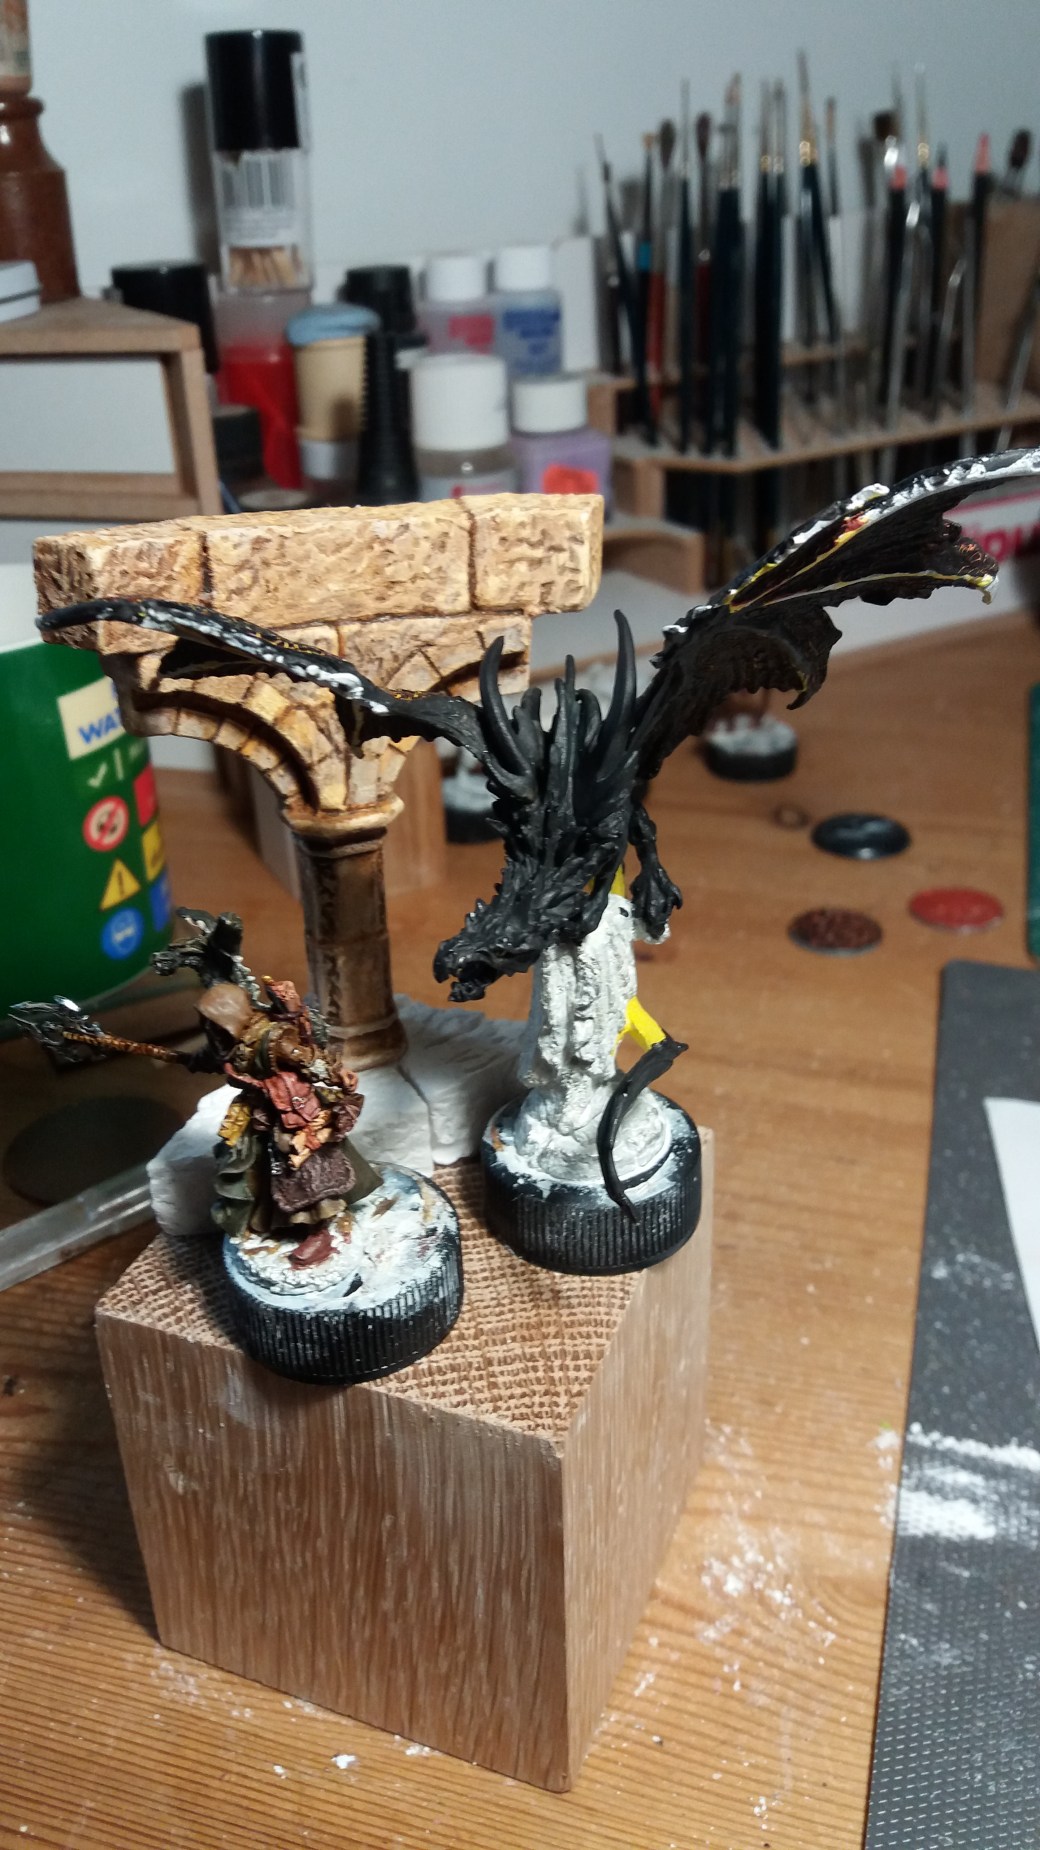
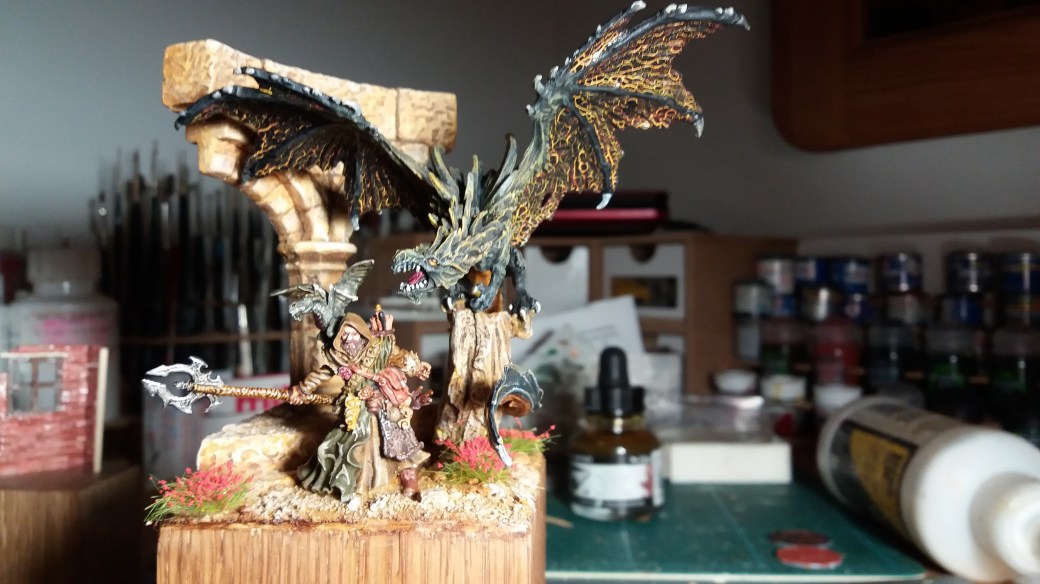
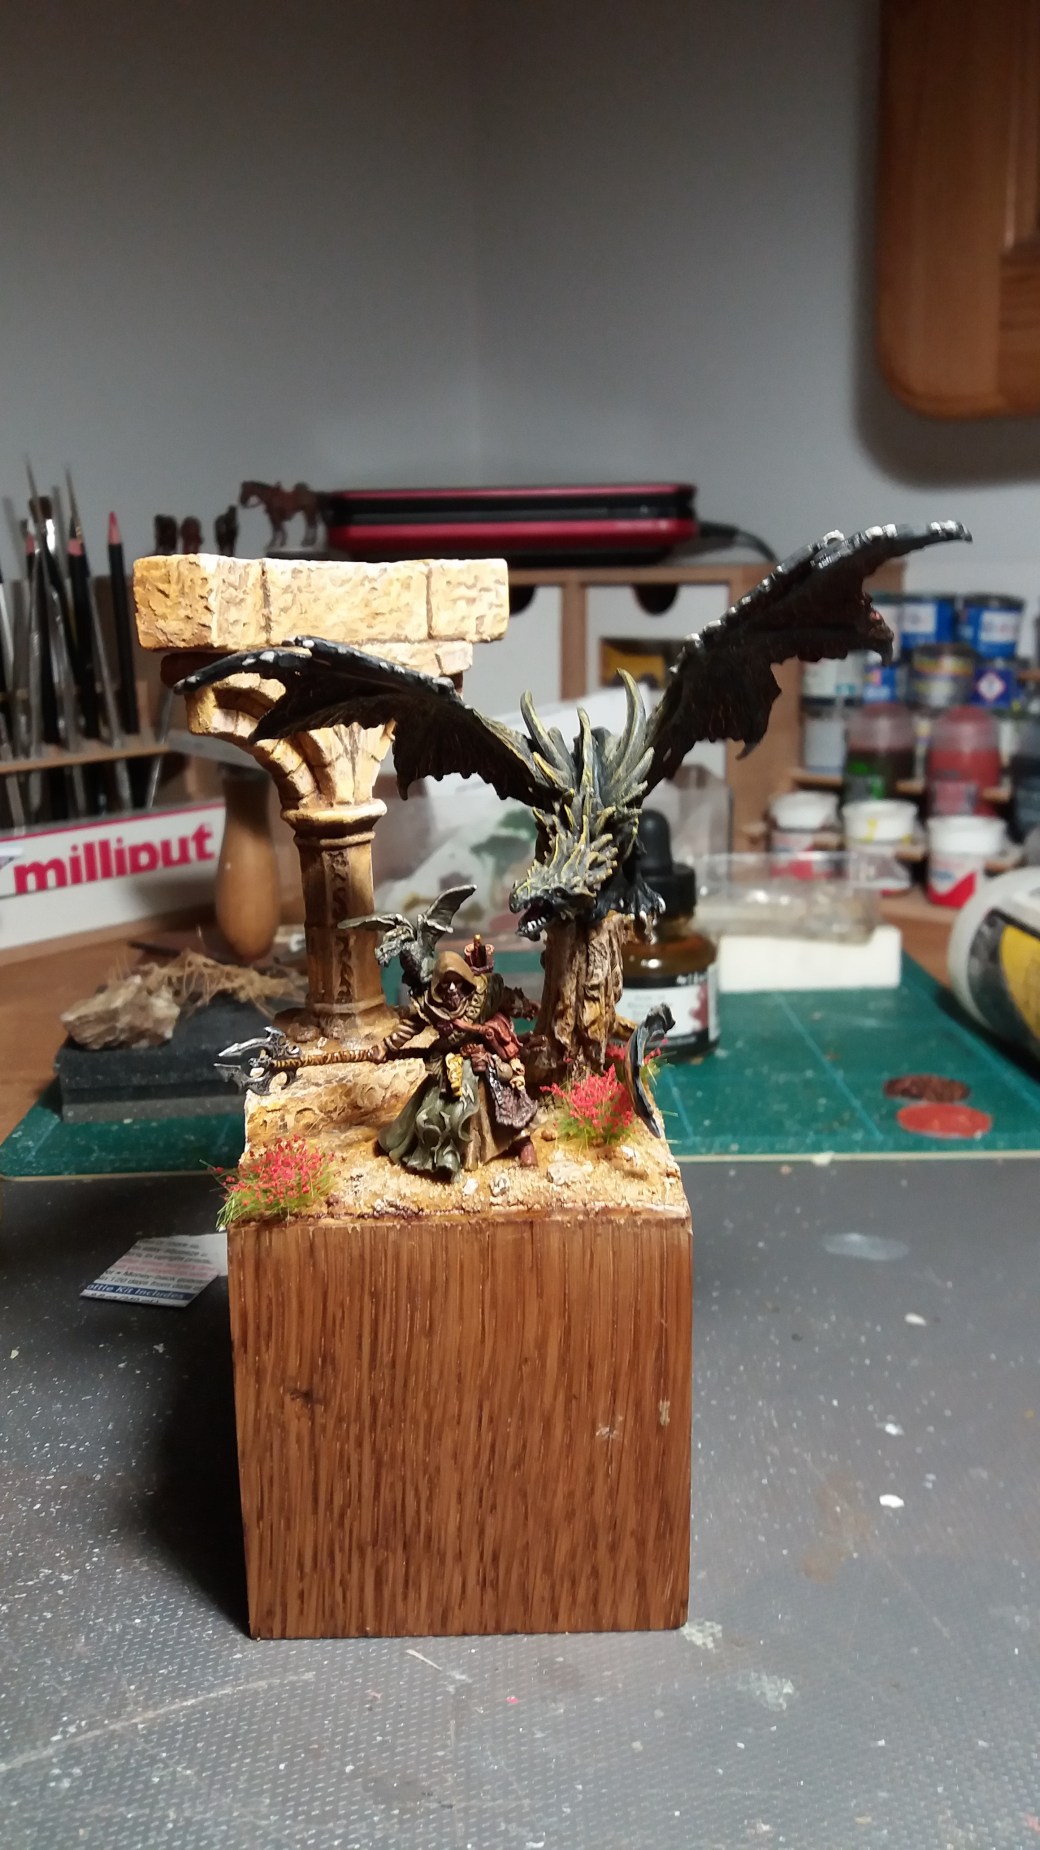
This weeks post is the background to how “The Dragon Master” was built. Here is a little reminder of the finished Diorama.

For the most part it was a straight forward diorama, the key element being the textured wings. To start with though I will deal with the basics.
Both the dragon and the figure are both white metal items from Reaper. The figure goes by the name of “Trathus Varr”, a nice little wizard and an ideal choice for the model given the baby dragon perched like a parrot on his shoulder. The dragon is a “Temple Dragon” mounted on a pillar.
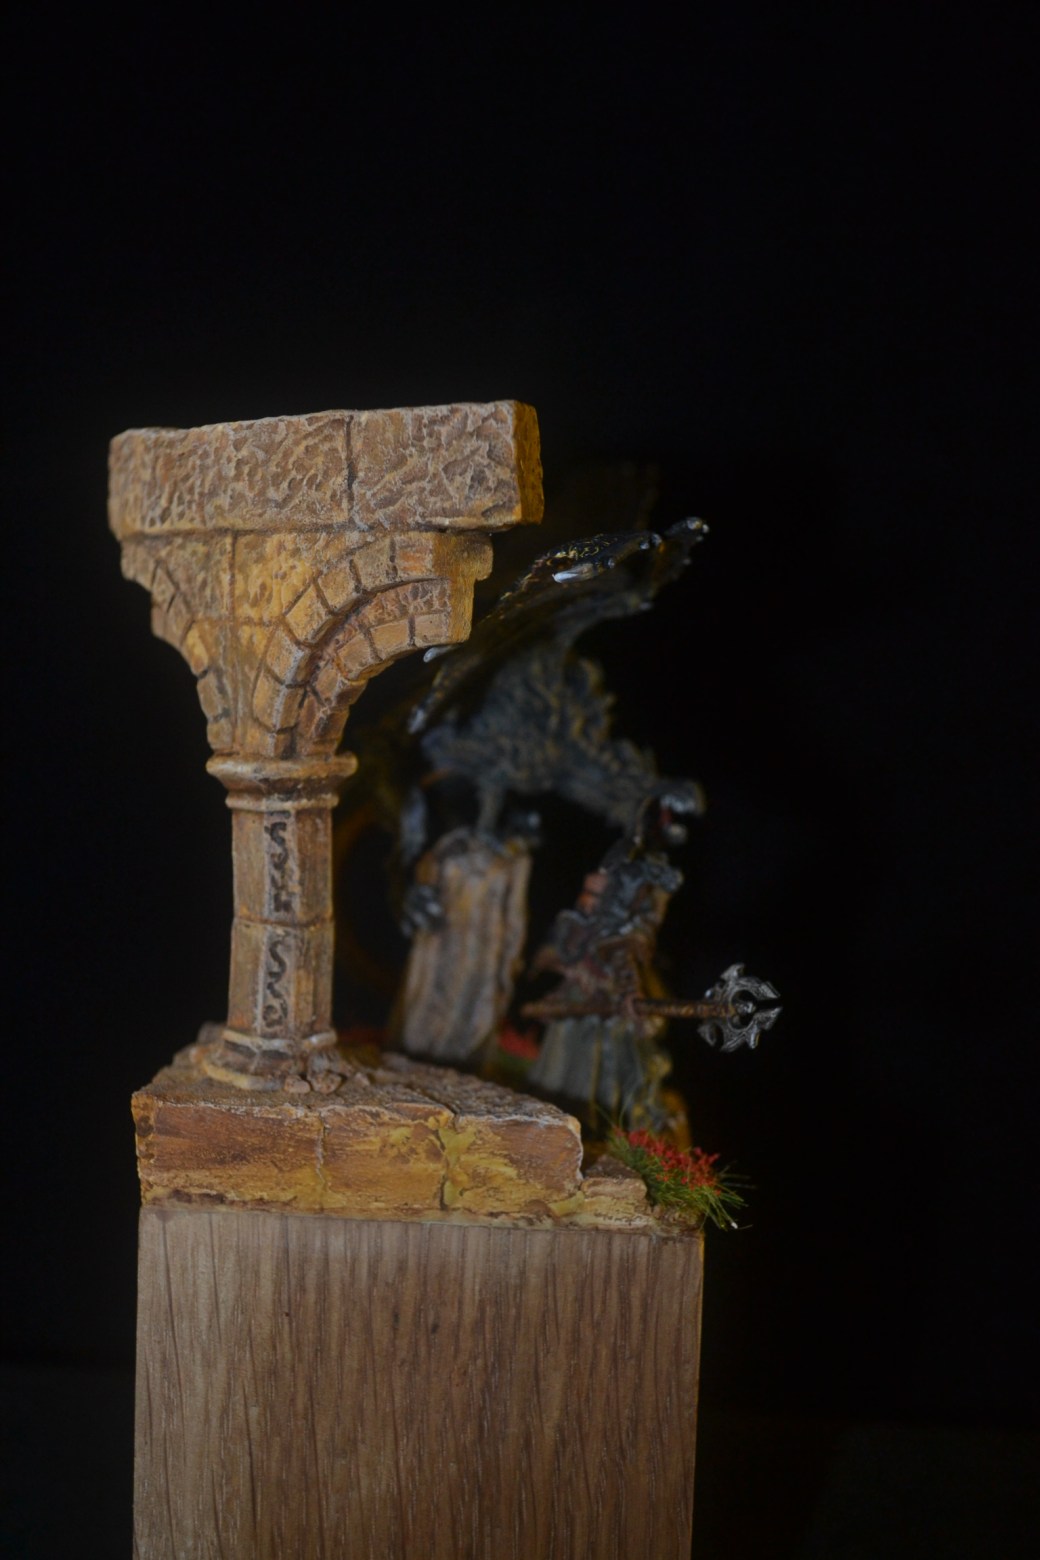
As the dragon was already on a pillar I decided on a sort of “Game of Thrones” type setting and so I cast a few pillars and arches using a “Hurst” mold which I had purchased a while ago but rarely used. The plaster absorbs watered down acrylics nicely and for the most part produced natural shading and highlights. The wizard was a straight forward paint job but he has a fair bit of detail and was fun to do. He was painted entirely in acrylics.
On to the dragon wings. This was not something I had ever done before so it was always going to be a bit of a risk but I had done a couple of small samples using Citadel Textured paints and could see no reason why it wouldn’t work. Alas it didn’t prove to be quite as straight forward as I had hoped.
Attempt No: 1
For my first attempt I painted the upper wings yellow, allowed it to dry and then applied a coat of “Citadel Mordant Earth” textured paint which was then left to fully dry over night. Come the following morning it was clear under a magnifying glass that the textured paint had shrunk but the lines revealing the yellow paint underneath were so fine they were barley visible with the naked eye. Nothing for it but to strip it down and start again!
Attempt No: 2
I concluded that I needed to put the textured paint on much thicker. After re-priming I once again undercoated with yellow and set about putting a thicker coat of “Mordant Earth” on a section of the wing rather than the whole lot. This time if it didn’t work out I would have less to clean up. We live and learn!
Left overnight to dry once again the result was an improvement but only in places. I wasn’t entirely sure why it hadn’t worked but concluded that the level of thickness might have been uneven and hence the patchy result. Nothing for it but to strip it down again and try something else.
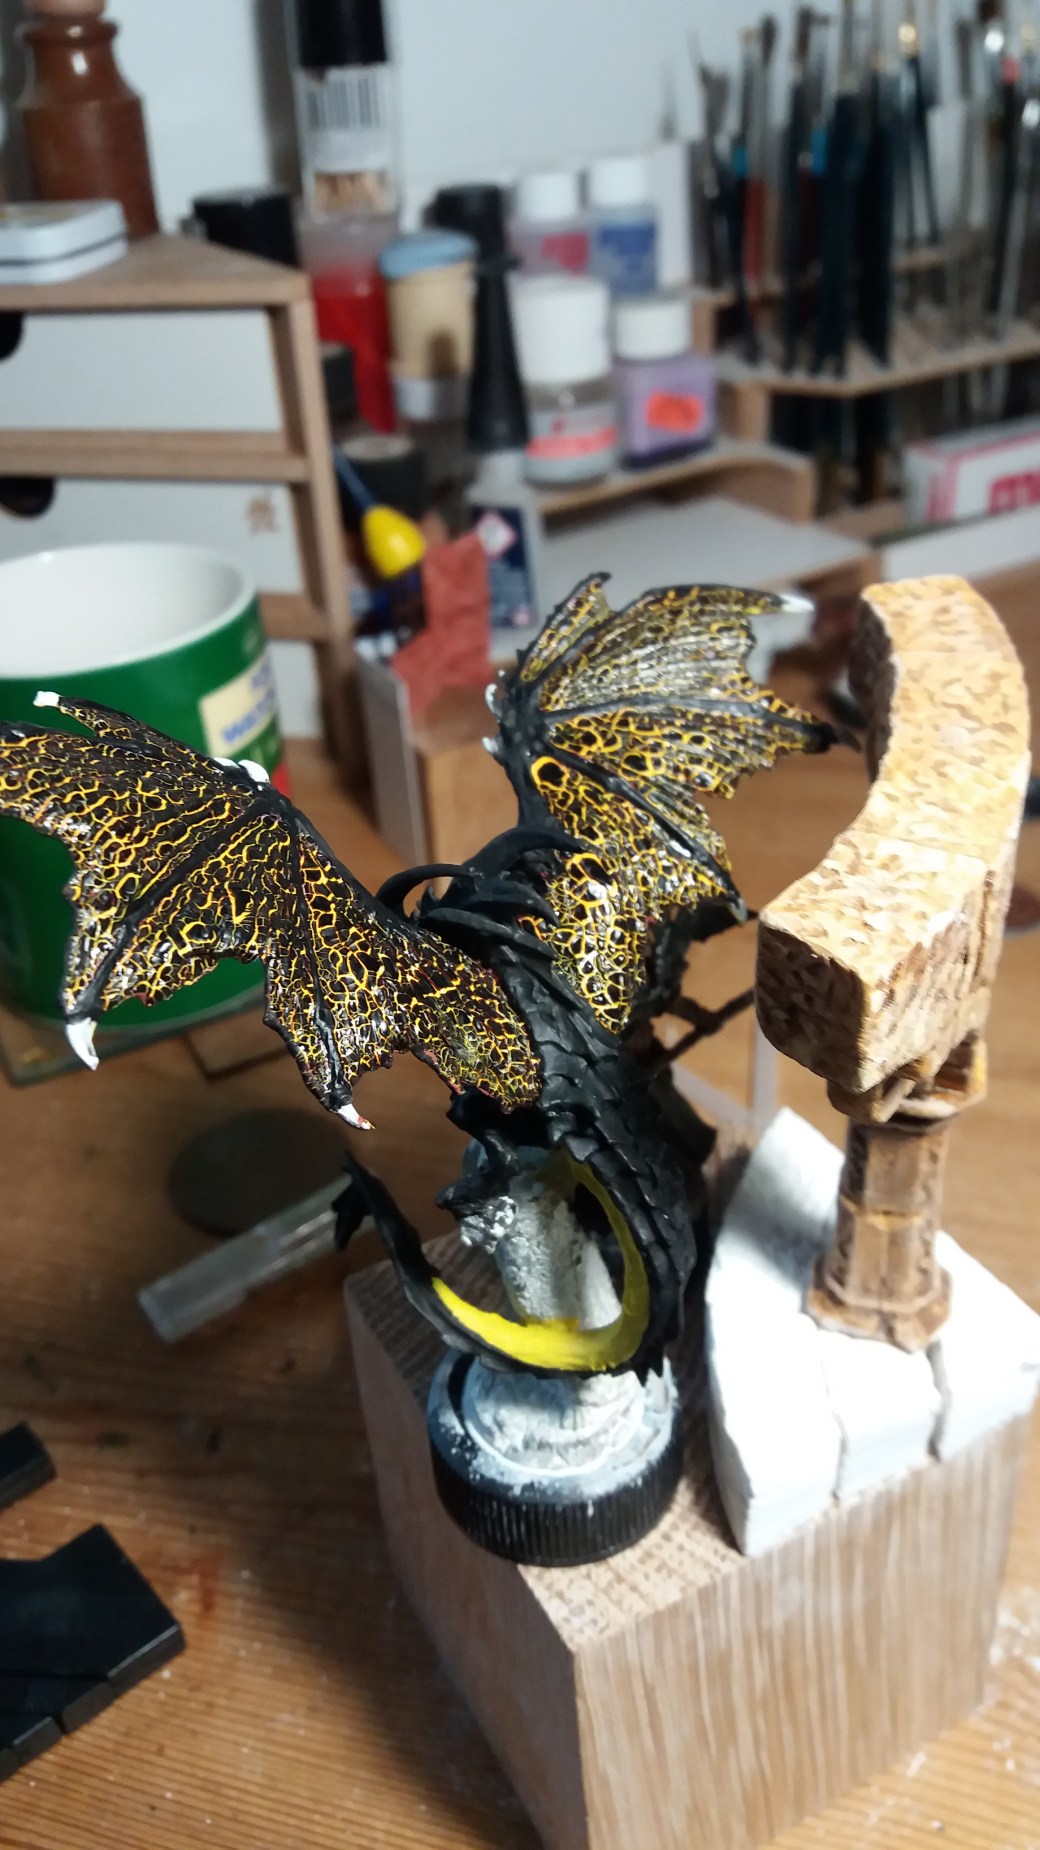
Attempt No: 3
Third time lucky?
Not sure where I was going to go after this attempt but I decided to have one more shot at it.
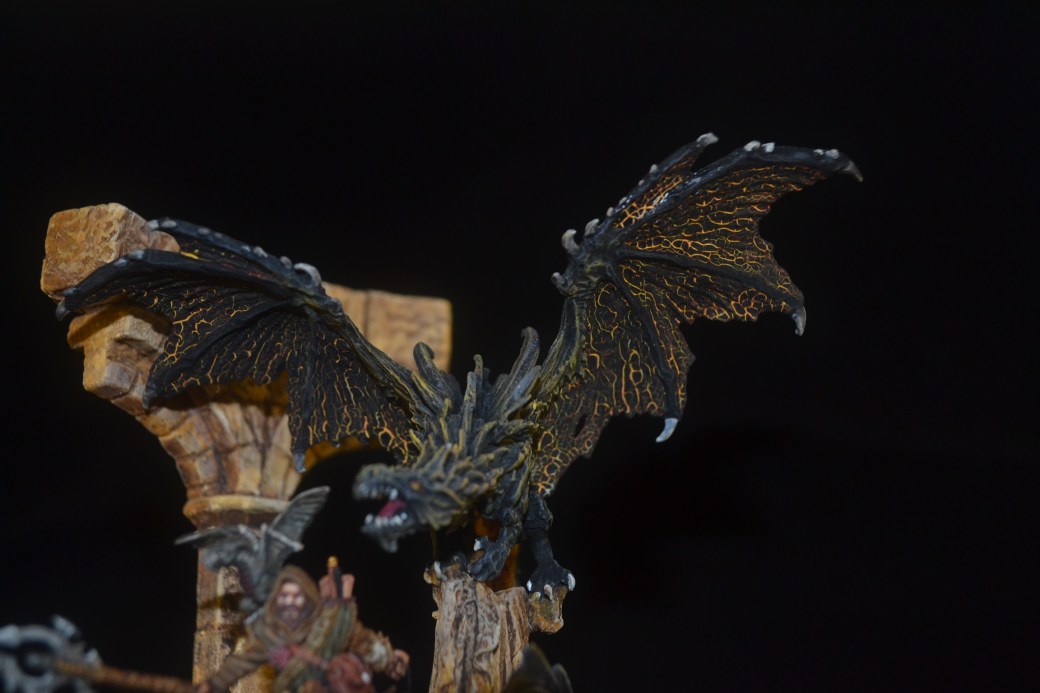
Once again I undercoated in yellow only this time I put down a textured coat of “Citadel Martian Ironearth” first. I followed this immediately by putting “Mordant Earth” directly on top. This way I could be more certain mthat I had built up a decent and even thickness. Once again it was left to dry overnight.
Come the morning it was looking pretty good and I was pleased with the result. There was, however, a problem. As part of the shrinking some of the newly formed dragon scales had started to lift. Bollocks! I quickly mixed some diluted PVA and washed it over the top and much to my amazement it all settled down.
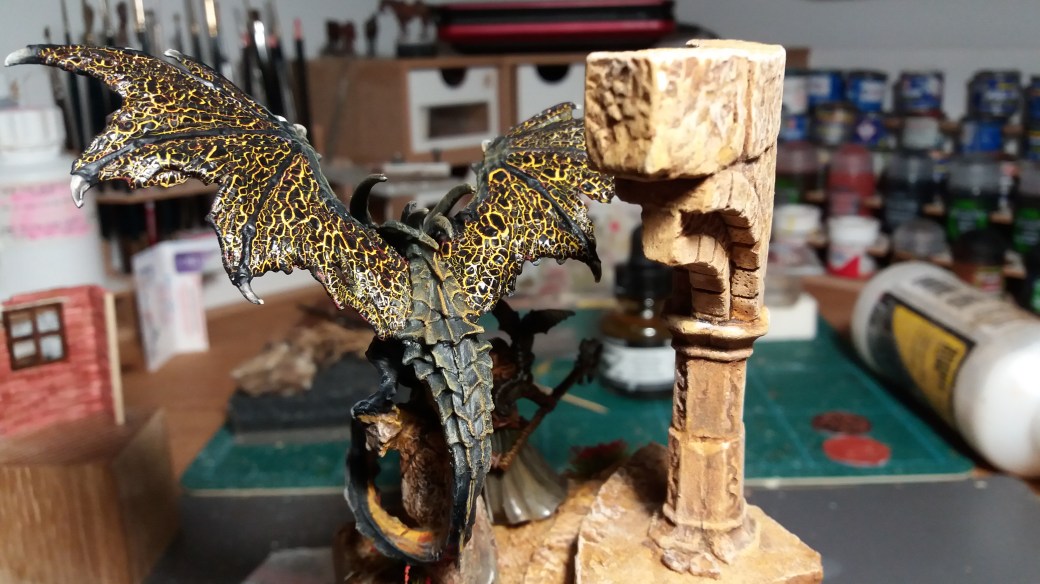
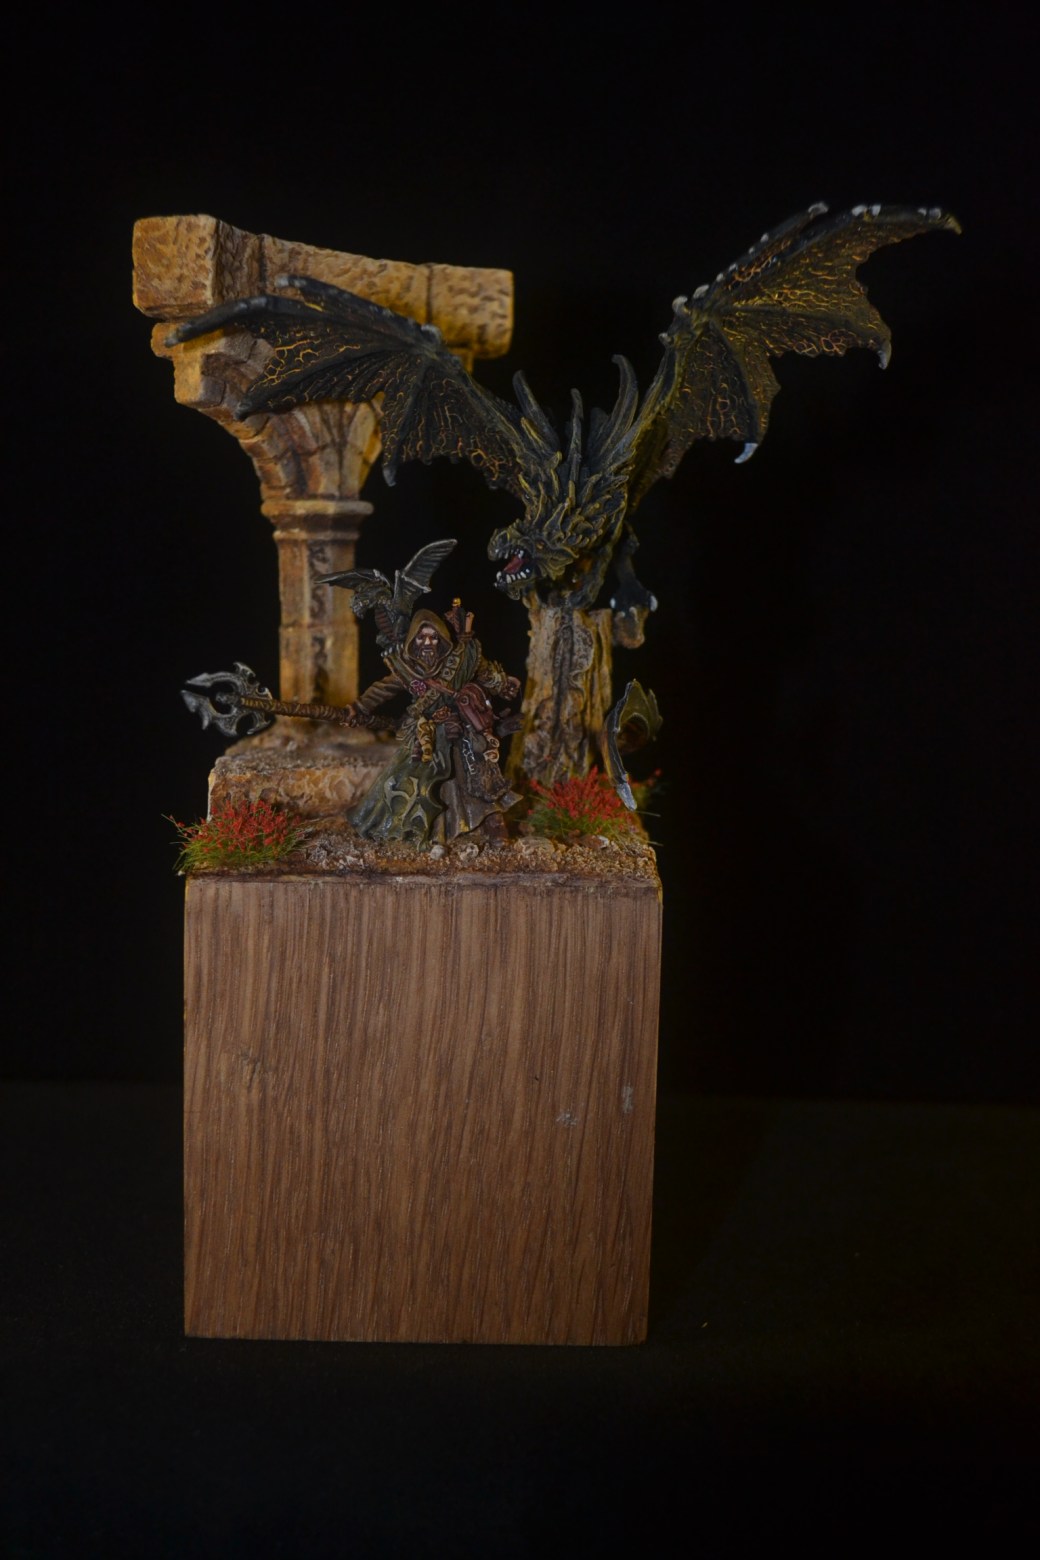
All in all I felt I had cracked it (please excuse the deliberate pun!). Here on it it was a case of repeating the process on the reminder of the upper wings and then again below. Relatively plane sailing after that. Finish painting the dragon, assemble the base, fill any gaps and apply highlights etc, etc. and then good to go.
Below are a few work in progress images taken in relation to Attempt No: 3 followed by a few more images of the completed diorama.
TIM
—000—


Great work once again, I especially like how the wings came out!
LikeLiked by 4 people
Great stuff Dave! Two things spring to mind if you try these things in future, 1) would a coat of gloss varnish left to dry before applying the textured paint help e.g. less “grip” for the textured stuff lets it “shrink” more (maybe?), and 2) PVA provides a good seal, but I’ve used it in the past and found that years down the line it can yellow (maybe not so bad watered down?). Of course, I could equally be talking complete crap! 😉
LikeLiked by 3 people
Interesting idea about the gloss varnish John and not something I would have ever thought of but has to be worth a try that is for sure. Nothing ventured and all that. Can concur with the PVA but hopefully, fingers crossed, the watered down application will stand the test of time. 😊
LikeLiked by 4 people
Awesome 😎
LikeLiked by 2 people
Fantastic. The finished result was certainly worth the effort.
LikeLiked by 2 people
Thank you.
LikeLiked by 2 people
Cool man. I’ve orobably several times before, when it comes to your work, but it’s one of your best mate
LikeLiked by 3 people
Cheers IRO.
LikeLiked by 2 people
Errr * probably
LikeLiked by 3 people
Hey Dave! I mirror our mate IRO if I could work out what it was he said HAHA ! ,Interesting post mate .I’ve made some of you wire trees and now I’m back in town I hope to post my latest work on the weekend with one on it, weather permitting ,its been a bugger of a start to summer over here !!
LikeLiked by 2 people
Excellent Pat, will be interested to see how you got on with them. Hope you enjoyed your break away.
LikeLiked by 2 people
Brilliant Dave. I echo John on the use of gloss varnish underneath. The final work is sublime.
This may be of some future help: https://www.scribd.com/document/355936482/Textured-Paints-pdf Not all of them crackle.
LikeLiked by 1 person
Thanks for the link Mark, will check it out.
LikeLike
Looks fantastic, and the cracked effect has come up amazingly well!
LikeLiked by 1 person
Cheers mate, it was a trial but I got there in the end.
LikeLiked by 1 person