

Progress this week was slower than anticipated. Looking back I can’t really account for why that was. I didn’t lack for enthusiasm but a few bits and pieces domestically and a few model bits arriving in the post provided a degree of distraction. Still, I’m not working to any sort of deadline so I don’t intend to beat myself up about it. Looking back at the previous post my aim for this week was to start on the base section and the base itself. As I managed both I guess my objective for the week was achieved.
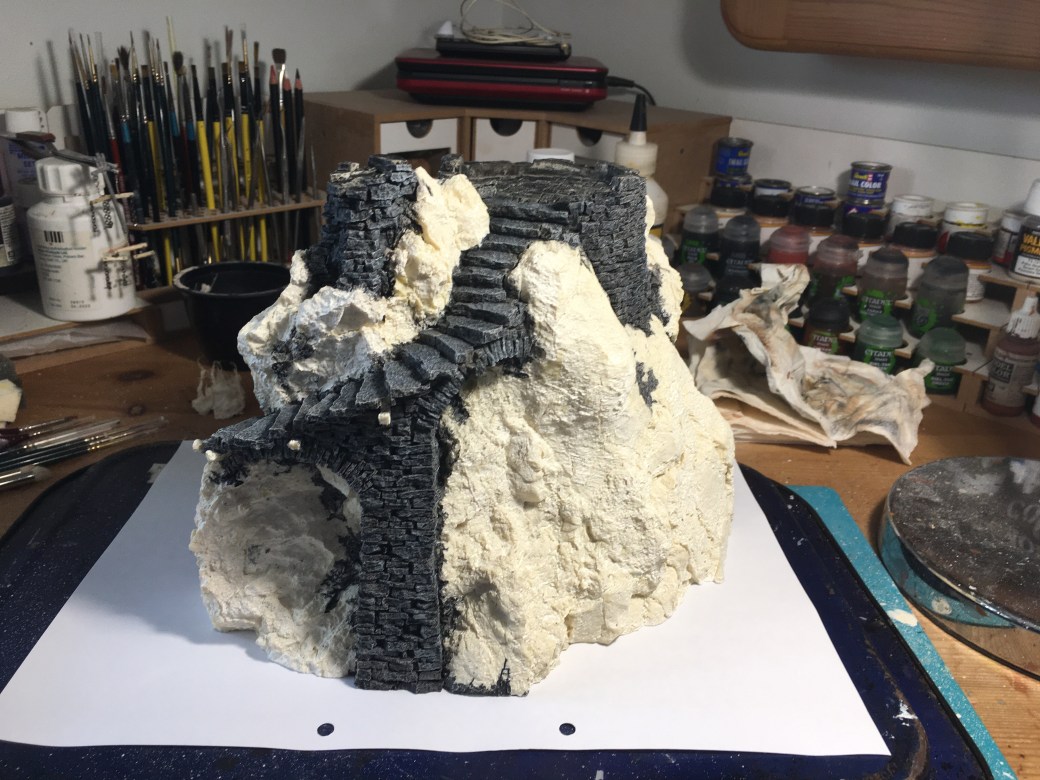
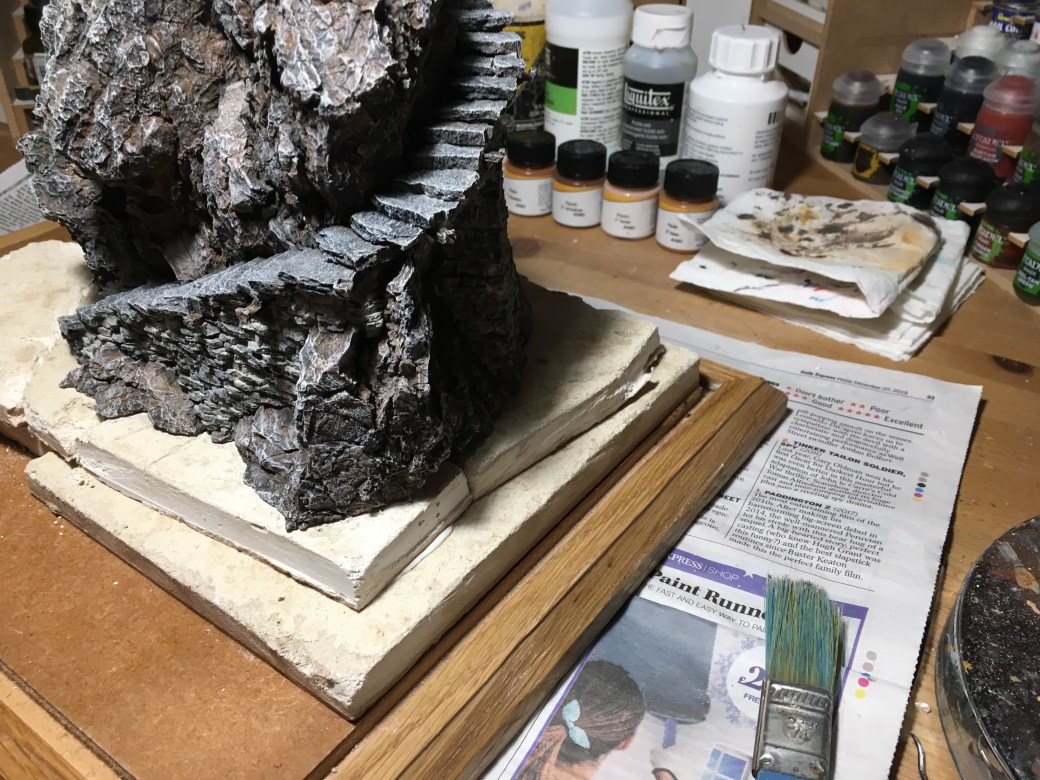
The first image shows the base as it was last week with the stone work largely done but with the rocks still to be painted. In the second photo the rocks have been painted, a little weathering has been done on the tower stone work and I have cut some rough pieces of plaster board to elevate the tower further. You can also see the wooden base the tower will be fixed to as well.
I’m still going for an overall dark look but at the same time needed some contrast between the dark grey stone colour of the tower and the rocks so I settled on various shades of brown.

The reason for elevating the tower further is because I want to have it set on a wider rock base with the sea lapping up against the rocks. Well that’s the theory at least although I’m still not entirely sure how I am going to do the sea but I am more than happy with pressing on with the rock outcrop. As usual I looked to the slate and granite chippings I have on my front garden path as the go to material to use. I needed a few and although I can’t explain my selection process I some how instinctively know what shape and texture I’m looking for. Washed and dried I then set bout trying to put them into position whilst ensuring they blend in with the rocks on the model itself. Far easier said than done and far more time consuming than you might think.
The first image below shows another angle of the base sitting on the roughly cut plaster board pieces which have been stuck together and fixed to the main base using PVA. The second and third photos show the plaster board having been carved out and shaped with the granite and slate chippings being positioned and held in place, again using PVA. The last picture was a brief inspection one of how the base of the model and the base being built will line up.


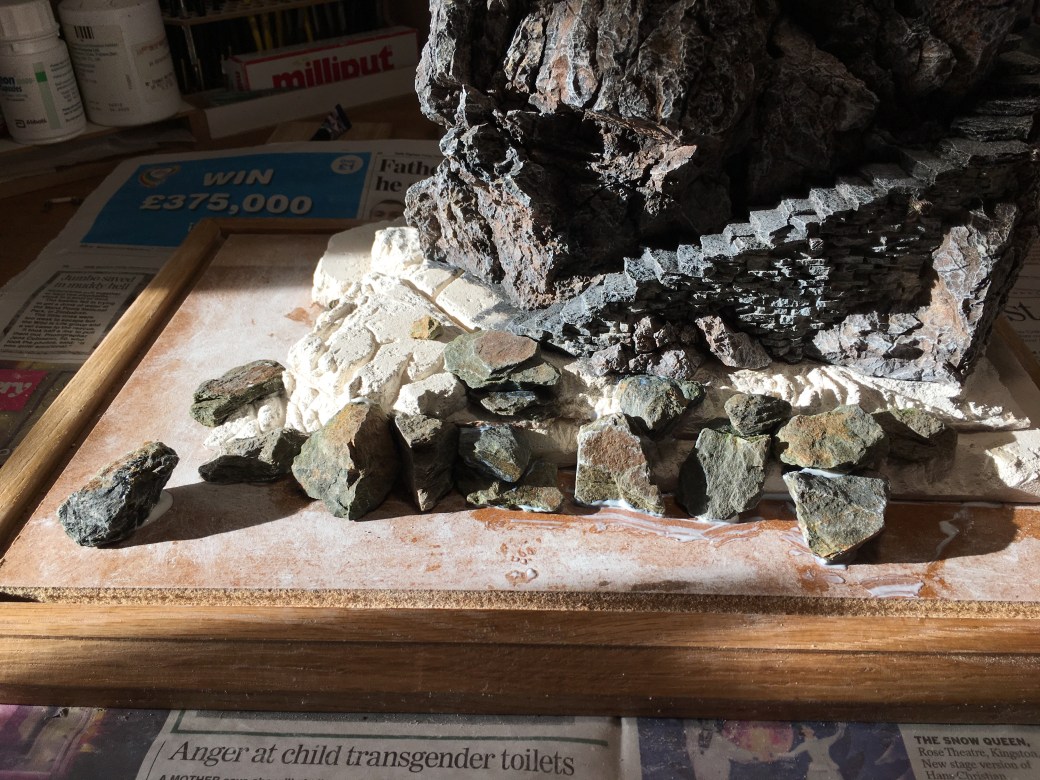 There are more stones and chippings to be added but for now these need to dry otherwise everything will slip and slide all over the place. From a personal point of view I am happy with how this is coming along. To others, a bit like my Fools Gold diorama, this stage looks like a complete mess but trust me it’s going to look OK in the end! 🤞
Where do we go from here?
Finish adding the stones and chippings and then I need to add filler of some sort to the base while I think about how I am going to do the waves. That’s going to need a lot of thought and there will be some drying time needed as well but if I can get my head around the waves I will be pleased. It might also be a good time to make a start on one of the figures too.
TIM

It’s good to see the less glamorous bits mate – a reminder that excellence is built on a solid foundation!
LikeLiked by 4 people
An excellent pun but one which is highly relevant too. 🙂
LikeLiked by 3 people
Nice progress Dave, have you though of using clear bathroom sealant for the water, I saw this Youtube vid on it and it looks pretty good…..
Cheers Roger.
LikeLiked by 3 people
By a remarkable coincidence Roger that is something I have been looking at and the route I currently favour. Not sure if it was the same YouTube vid but the one I saw was by Luke of Lukes Apps/Geek Gaming. Combined with another technique I think this is the way I will probably go.
LikeLiked by 3 people
Just looked quickly at your link. Not exactly the same but similar. Will have a proper look later so cheers for pointing me in that direction. 🙂
LikeLiked by 2 people
That looks great. The brown rocks look especially realistic.
This might prove useful to you too:
Cheers,
Pete.
LikeLiked by 4 people
Thanks for the link Pete. I have seen this one before and in fact it was a big part of my inspiration for this diorama in the first place. Awesome work isn’t it? Not sure mine will be on a par but if it is half as good I’ll be happy. 🙂
LikeLiked by 3 people
Excellent work TIM, the stonework is really good with all the different tones in it. As for the waves, one method is to pour resin over a plastic former, like a empty drinks bottle, and build it up in layers, then add details with water effects.
LikeLiked by 3 people
Cheers Dave, I’ll give that one some thought for sure, not an approach I had considered. 🙂
LikeLiked by 3 people
Can’t wait to see how you tackle the ocean and waves. I’ve never done any water effects before but it is something I’m curious about. It’s coming along really well. I love how realistic it’s looking already. Keep it up sunshine 👍🏼👍🏼
LikeLiked by 4 people
I’ve dabbled a little with water effects but waves are new to me. Have got a few ideas now, all a little bit different but will have to make a decision soon and then see how it turns out. Whatever I end up doing I’ll put in a post and then if you like what you see then you can either have a go at some point or try another method. It is nice trying something new though. 🙂
LikeLiked by 3 people
Yeah I’ll let you be the guinea pig haha.
LikeLiked by 2 people
Oh man, this looks super. I found this toilet paper technique intetesting for water effects:
LikeLiked by 3 people
Thank you, another technique to consider that’s for sure. 🙂
LikeLiked by 3 people
I’ve used this method, it’s really good for small waves, but I would think you could keep adding layers or build a form before adding the paper waves!
LikeLiked by 1 person
All I can say is that I’d be completely out of me depth with this! 😉 It’s all coming along rather well though!
LikeLiked by 4 people
Haha, thanks John. Think of,it as water tank and you’ll be fine.
LikeLiked by 1 person
Wow, I hadn’t imagined it coming up out of the sea like that – brilliant idea. Water effects are a whole uncharted world for me so I’ll leave wiser minds to chip in their advice – can’t wait to see how you handle it in the end though. 🙂
LikeLiked by 3 people
Yea, water effects are very much another world but they do add a great dimension. As for how I handle it I’m more than a little curious about that too right now! 😉
LikeLiked by 3 people
The rick work looks great, I like how you have managed to get contrast between the rock and stone work but still make it look natural together, Well done.
LikeLiked by 2 people
Cheers mate. Trying to keep all the stone and rock looking interesting was a bigger challenge than I anticipated so glad you think it looks good so far.
LikeLiked by 2 people
Looking great and truly intrigued how you will progress with the water effects. I only have a small hope that you’ll find a way to add barnacles to the rocks! Not sure why – I just think there’d be a lot
LikeLiked by 3 people
Love the idea of barnacles Mark 🤣 no detail too small!
LikeLiked by 1 person
If anyone could do it, you could Dave!
LikeLiked by 1 person
Excellent work Dave, I really must try the old plasterboard method for rocks.
LikeLiked by 1 person
Thanks Steve. It really is a simple but effective method, well worth a try in my opinion. 🙂
LikeLiked by 1 person
I think your attitude about progress feeling slow is spot on. I’ve actually been feeling the same way this week on my project. Just gotta keep making progress and it will get finished in due time, I figure. Everything is coming together nicely and I really like the idea of adding waves to the base. This is a really ambitious project which is commendable. I hope you find the inspiration you need on Youtube, that was going to be my recommendation. Water effects are not easy so definitely test out what you’re going to do on a practice piece to ensure you’re ready to do the real thing on the diorama.
LikeLiked by 2 people
Thank you. It is getting there for sure and I am very much enjoying it. I just wish I could switch off these lockdown blues from time to time. Still, thank goodness for the hobby, heaven only knows how I’d cope without that to lean on these days. 🙂
LikeLiked by 1 person
I know what you mean. Here where I live it has been really cold and it snowed a bunch so I’ve felt trapped inside. Being able to paint has kept me somewhat sane and staved off cabin fever for now anyway.
LikeLiked by 1 person
Hot damn this thing looks good. I find myself in need of a big woodland tower type thing, but lacking any storage space for Big Terrain I shall have to live vicariously through your efforts for the time being.
LikeLiked by 1 person
Eventually I think space is every modellers dilemma, I know it’s mine! Fortunately I have somewhere to put this one when completed but the next project is another matter entirely. 🙂
LikeLike
I’m a bit behind on posts, but this is looking really good already. Can’t believe how real the rocks on the side look!
LikeLiked by 1 person
Cheers Faust, hopefully you’ll still think that as you catch up. 🙂
LikeLiked by 1 person