

Unless I have any others tucked away unbeknown to me then “Fulumbar” is my last dwarf. It will be some considerable time I think before I do another. I therefore thought I would go about trying to give him a nice little setting. I had in mind a rural setting with a little bit of water and a stone wall. Nothing to fancy but just enough to set the scene on a 40mm square base.
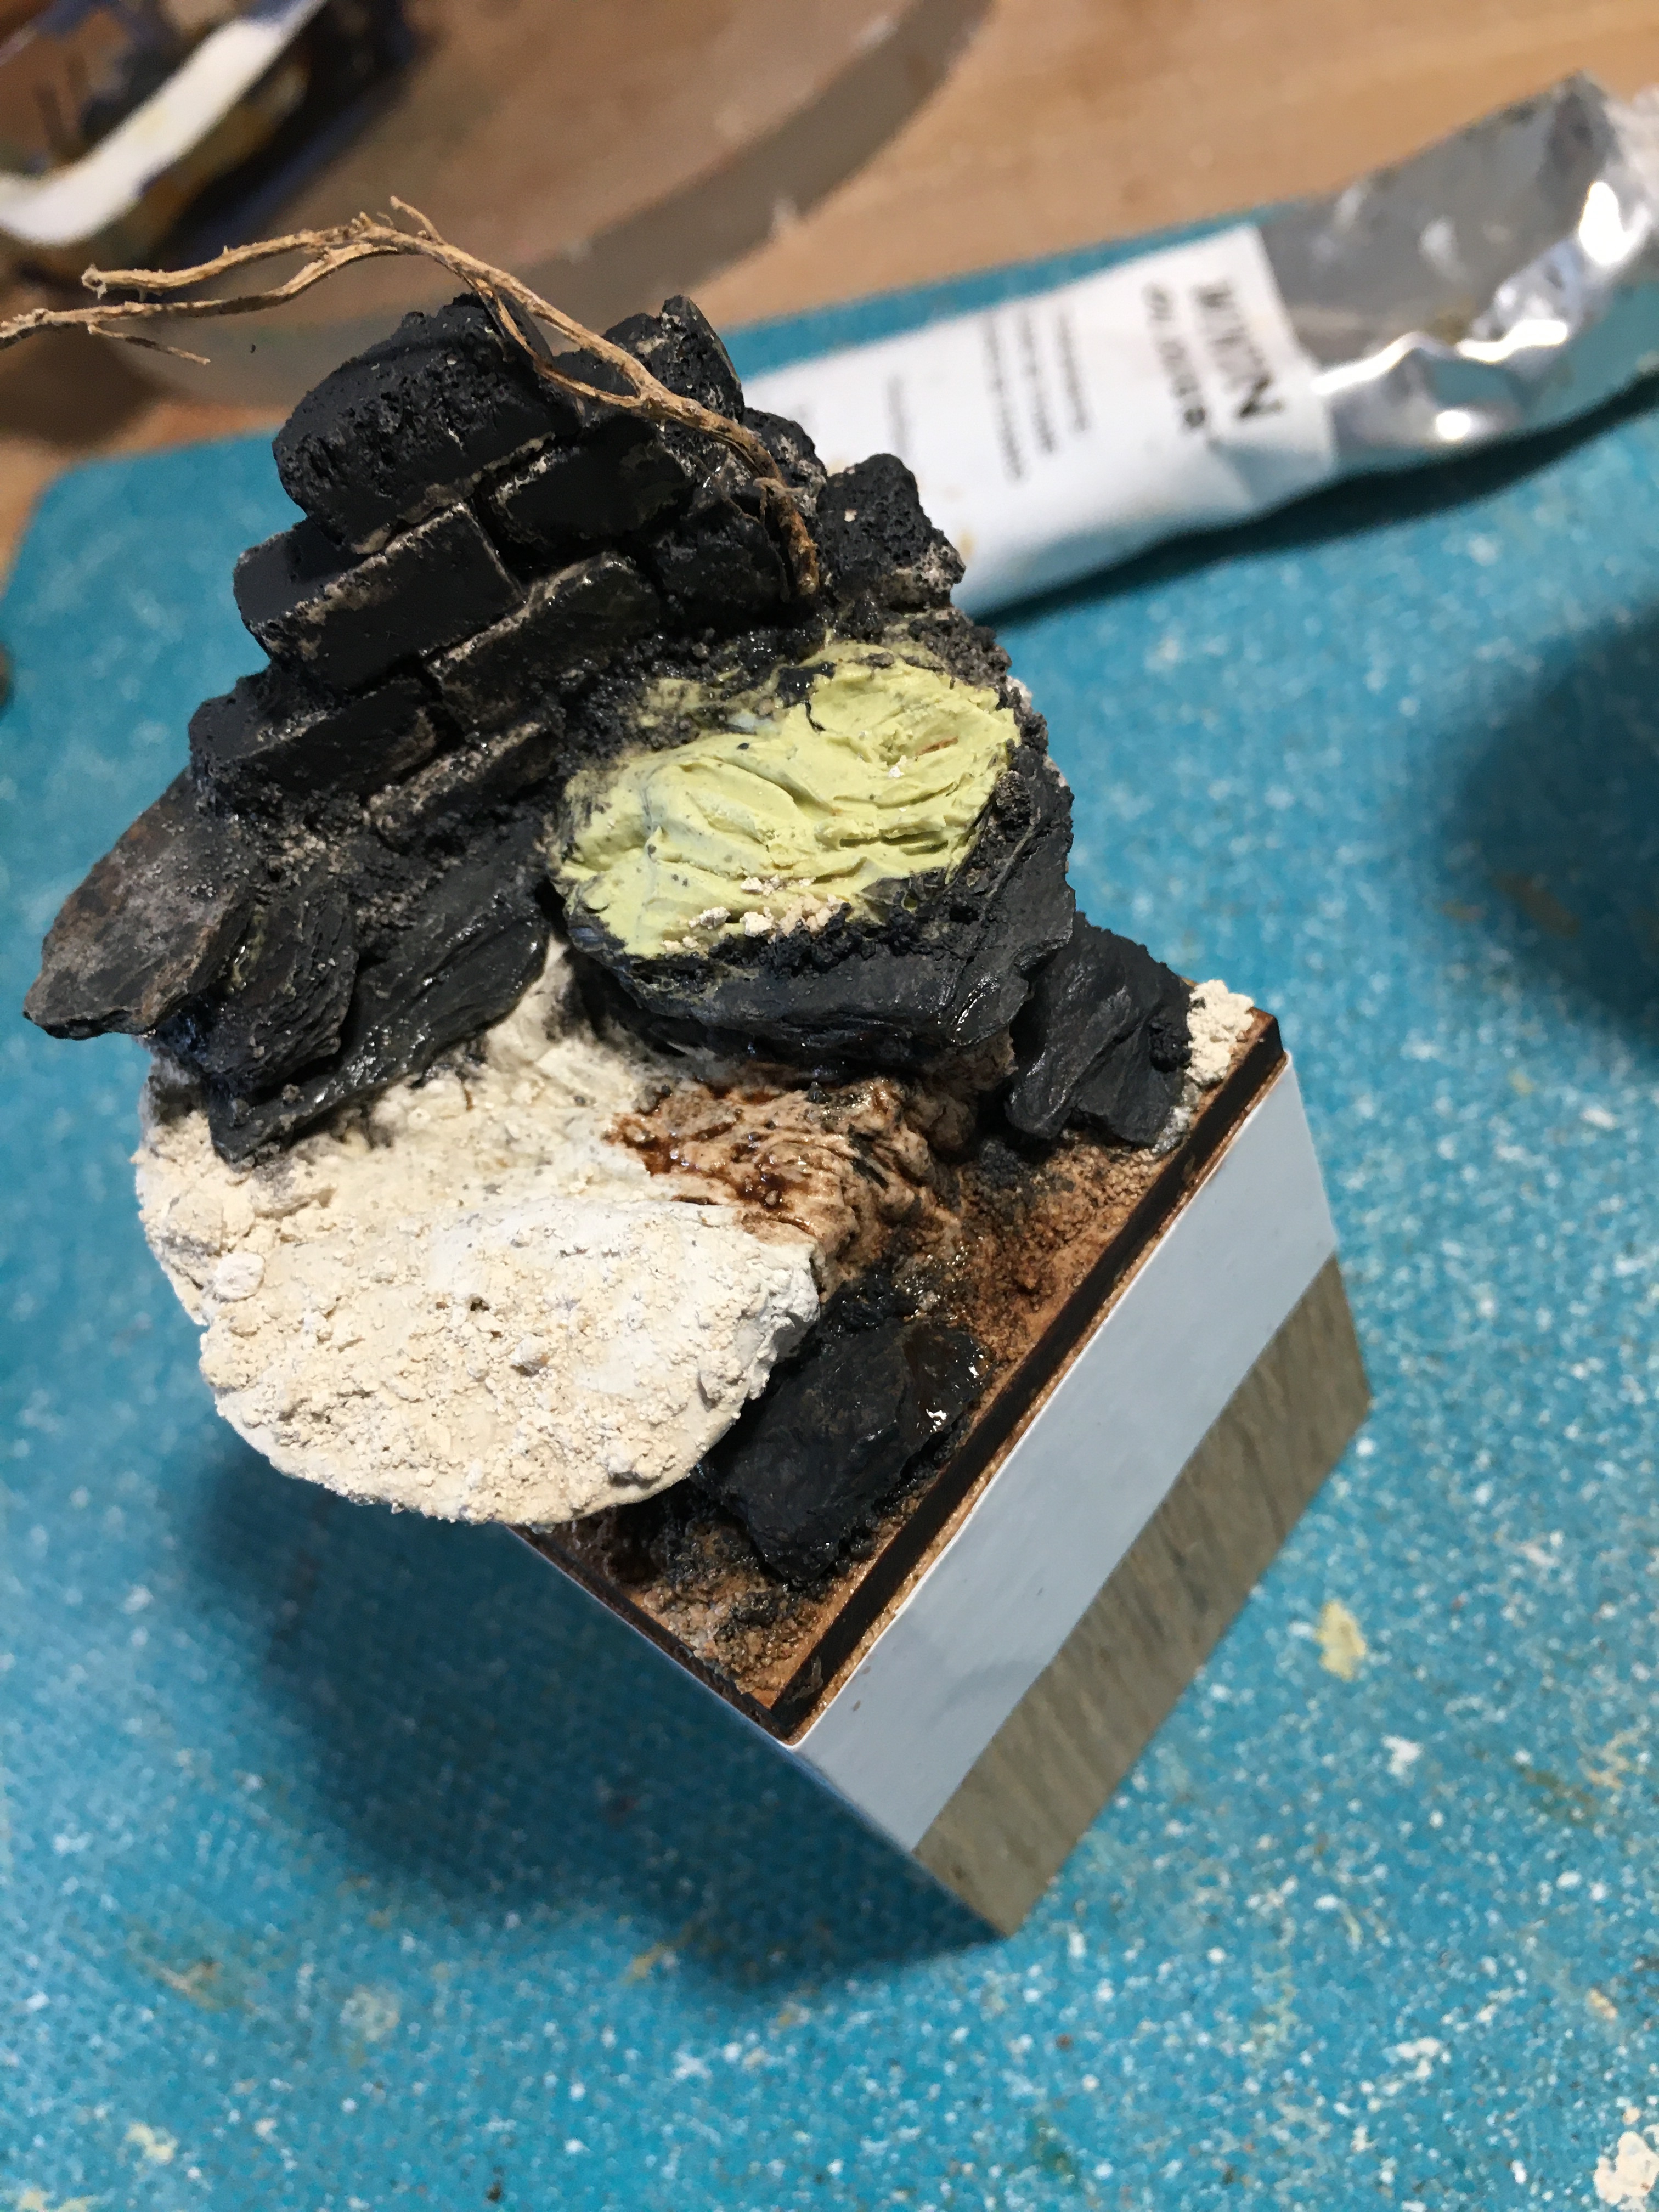
The first step was to get a little bit of height into the base which I did using a few stone chippings and a small lump of DAS air drying clay. Once the clay had harden a little I started to cut into it to create the space for where the water would eventually go.

The next step was to build a little section of wall taking care not to take a small chunk out of my thumb! I used some plaster board to make stone bricks and then simply stuck them together with some PVA and set aside to dry. I then set about filling a few gaps, adding a little texture and planting a small twig.


Once dry it was time to get some initial colour onto things.

Base colouring mostly done it was time to turn my attention to toning things down some what and trying to get a more realistic finish. Muted colours were dry brushed on along with a little green here and there.

Time now to work on the figure itself.


The little chap is close to being finished and there is some more work to be done on the base. Neither should take very long so feeling pretty certain it will be done by next week. All being well I should also have time to spend getting another figure or two done for my Medieval Army.
TIM

Looking good mate – I love seeing the progress shots!
LikeLiked by 3 people
Cheers mate. 🙂
LikeLiked by 2 people
Great work so far on your next Diolight TIM, even though there is alot on the base it doesn’t look cluttered which shows great placement
LikeLiked by 4 people
Cheers Dave. These little dioramas might be small but they are a challenge and require a surprising amount of thought, well for me at least! 🙂☺
LikeLiked by 4 people
Looking good, you’re making me want to break out some more of my own dwarfs and get them painted. Mind and stop carving bits off your thumb though eh!
LikeLiked by 5 people
Cheers Wudu. As for the thumb it’s the time in lockdown mate, it’s reduced me to self harming! 😉
LikeLiked by 4 people
Looking really good so far, Dave! 🙂 That looks a nasty nick in your thumb, I can believe there was swearing when it happened!
LikeLiked by 4 people
Thanks John. Yes, I only do pain with excessive expletives! 😉
LikeLiked by 2 people
Very nicely done mate! the wall looks amazing (sorry the Dwarf look great too 😁).
Heard one of your “final thoughts” pieces at work today that I thought you might appreciate…
“Remember, taking Viagra won’t make you James Bond, but it might make you “Roger” More!”.
Cheers Roger.
LikeLiked by 4 people
Cheers Roger. Love the Bond line! 😂
LikeLiked by 2 people
Very nice- it was great to see the base come together. Done in oils right?
Cheers,
Pete.
LikeLiked by 3 people
Thanks Pete, and yes you are right, done in oils.
LikeLiked by 1 person
Brilliant showing of your thought process (and some self carving). The dwarf looks great too, will do well on that base. Really nice!
LikeLiked by 3 people
Cheers Mark, glad you found it interesting. 🙂
LikeLiked by 1 person
I get insights from WIP posts like yours that are really valuable
LikeLiked by 1 person
Off to a great start on this one! I love the concept (dwarves and water don’t get used together often) and the sculpt and paint job are both excellent. Keep those thumbs safe in the meantime and I look forward to seeing the final results 🙂
LikeLiked by 2 people
Thank you. Should be finished for next week all being well. 🙂🤞
LikeLiked by 1 person
I do love Dwarves…and this is a great example.
As usual your standard is inspiring, I really like the tone and colouring on the beard, it adds to that “old grizzled” fighter look.
LikeLiked by 1 person
Cheers Anthony glad you like it. 🙂
LikeLiked by 1 person
Love the way you have done the wall mate that green is so effective, making bricks out of the plaster boards a great idea, I managed to get some in Melbourne before we left! now I see it everywhere on the new houses popping up around us !!!
LikeLiked by 2 people
Thanks Pat. Plaster board is great stuff, I reckon you’d have some fun with it. 🙂
LikeLiked by 1 person
These posts always make the process look so effortless 😂. I’m curious if you are now so practiced that most things turn out ok on the first attempt or if not how often you have to go back and fix things you don’t like?
LikeLiked by 1 person
I think my success rate if I can call it that is now much higher than it used to be for sure. Simple case of practice and learning new and often easier ways of doing things too. In reality whilst the end result might look OK it’s not always what I was looking to achieve!
LikeLiked by 1 person
Nice, really like how that base is showing up. Be careful with the gouging. I’m still waiting for the nerve in m my hand to grow back, after stabbing myself a good one!
LikeLiked by 1 person
Ouch, that sounds as though it was bad mate. At times we need danger money for what we do!
LikeLiked by 1 person