On The Work Bench – Building Project No: 7 – Part 4

For various reasons, not all of them to do with modelling, this has been a busy week.  It’s also been a week in which I realised I have a great deal to do in the coming weeks and months and less time to achieve it in than I would have liked.  Failing to deliver on numerous commitments is not an option I want to consider so I’m  left with little alternative but to get my finger out!  With this in mind I managed to make progress on this diorama and, as an added bonus, managed to complete a vignette that had taken a back seat over the last couple of weeks.  Details on the vignette will follow as a separate post shortly after I hit the publish button on this one.

A few finishing touches were needed to the building itself, one of which was painting the filler that I had been placed at both ends of the “drinking straw” ridge tiles and had simply forgotten to do. I also completed the wire aperture for the tree which will feature and also managed to get the filler added to it along with the first few coats of paint.  Hopefully the tree will be completed this week.  A few figures have also been completed and all the others are well on the way.

The diorama when complete will also feature a small barn/shed.  The main significance of this building being to provide the “walk through” between it and the main a house for the British troops, something which will make far more sense when the diorama is complete.  I’ve managed to get the walls done, the roof made and the painting done but the door still needs to be attached which will happen once the building has been fixed to the base and the ground work has been built up around it.

The barn/shed itself was made using foam board on this occasion. The board was clad inside and out using coffee stirrers.  The roof was made using a tool I acquired from”Green Stuff World” for making corrugated panels using metal foil.  This was the first time of using this tool and it wasn’t quite as easy as I’d hoped.  In the end I found it worked better if you turned the key slower. Although I didn’t think I’d been turning it quickly the metal kept going off at an angle.  In itself this wasn’t much of a problem but it meant I had to square up each sheet that had passed through and that produced a lot of waste metal foil which wasn’t particularly cheap to buy. I shall definitely being looking at alternative materials to use In the future but the tool did produce a good result.

The nice thing about using the metal foil for the roof was when it came to weathering it after initial coats of paint had been applied.  Simply scratching away some of the paint exposed the metal beneath and produced a nice result along with the addition of a few applications of Humbrol Rust weathering powder.

If I’m lucky I hope to have this one finished in a couple of weeks.  The figures need to be completed along with the tree and numerous other bits and pieces but the assembly will undoubtedly take a while as it will need to go together in stages in order to access individual areas for  fixing and painting.  In the meanwhile I  need to get ready for the Plymouth Model Clubs annual competition on Monday (my first) as well as this year’s first show which will be at Bovington in a couple of weeks.  Hopefully both will prove to be fun.

Latest progress photos below.

TIM

20171213_11562420180107_19124820180107_19131020180107_19130120180105_17283020171223_20340920171223_20345620171223_203534


On The Work Bench – Building Project No: 7 – Part 3

This week saw the main building of this diorama virtually completed.

Before the outside painting was started there was a need to complete some internal details.  Clear plastic was placed behind each window to provide the glass and an internal wall was added.  I couldn’t be certain if it would be possible to see into the building through the windows but couldn’t afford to take the chance.  Once the building was stuck down and having decided on a fixed roof there would be no opportunity to do so later.  The internal wall was given some wallpaper and a couple of pictures were placed on the wall to be visible through each window.  I had also decided that the front door would be ajar and so I also added an internal porch and flooring for appearance.

The wooden shutters were painted and fixed into place as was the chimney and the front door.  For the rounded ridge tiles I used a plastic drinking straw.  A piece of drinking straw was sandwiched between two pieces of foam board to create the chimney.

The outside painting, walls and roof, was done using a variety of oil paint colours thinned with white spirit to create washes of various dilutions.  Darker colours were used for the brick pointing and lighter colours to provide highlights as appropriate.

Before fixing the building into place it was appropriate to construct part of the groundwork, specifically the cobbled area around the building itself as this was created using another Green Suff rolling-pin.  Milliput was used instead of DAS clay on this occasion.  Time allowed for some vegetation to be added around the building, primarily to cover up the joins between the bottom of the building walls and the base as well as to add colour and authenticity.

Next up is creating the small outside barn, a tree and a few other bits and pieces as well as painting the dozen figures which will feature.

Progress pictures appear below but suffer from too much shadow and so appear rather darker than the actual model.  I will try to do better next time but photography is not one of my strengths!

TIM

20180107_19144820180107_19135320180107_19134020180107_19133420180107_19145820180107_19153020180107_19140320180107_19141120180107_191515

On The Work Bench – Building Project No: 7 – Part 2

Progress this week has been slower than I would have liked owing to a major dose of Man Flu.  Apparently there is a strain which is doing the rounds which has been labeled Aussie Flu and is by all accounts rather nasty.  All of this has of course been wasted on “her who must be obeyed” who’s level of sympathy extended only to the words “Man Up”.  As every man knows, Man Flu is generally considered by 50% of the world’s population (mostly men it must be said) to be worse than child-birth.  There is of course a counter argument to this by approximately 50% of the world’s population (mainly women unsurprisingly) that this is of course nonsense.

Despite pointing out these statistics the level of sympathy from “her who must be obeyed” surprisingly went down!  Further more it was pointed out to me that when she had the same as me a few days earlier she still got on with the house work, cooking the meals and doing the shopping.  Proof, if indeed proof were needed I pointed out, that her viral strain was clearly not as bad as mine and hence why I had to stay in bed.  I can’t recall what she threw at me.  Women, can’t live without them but can’t shoot them either!

So, as I say, model progress not as much as I had hoped but a fair bit done none the less.

Having stuck the four sides of the building together it proved necessary to do a minimal amount of cleaning up and do some patch work on each of the corners.  This was done using Milliput and a cocktail stick to etch in the brick work where appropriate.  My next step was to start work on the roof.

As I mentioned previously I had already decided that the roof on this building would be fixed and because of this I chose cardboard for the base layer.  Had I decided to have a removable roof then I would have chosen MDF, the same base layer used for constructing the walls.  The other reason for using cardboard (in this case cardboard from a corn flakes box) was because in this instance I wanted to get the bowing effect that comes when the PVA dries out which doesn’t tend to happen when using MDF, hence using it for the walls.  Old buildings often have warped roofs and I was hoping to get this by using cardboard instead.

Having cut the cardboard to a length slighty longer than the building and with a little bit of an over hang front and back I then drew horizontal lines 5mm apart to indicate where each row of tiles would be placed.  The next job was to cut out each tile and glue them down.  To produce the tiles I used a tile cutter which was a Christmas present to myself from “Green Stuff World”.  Essentially it’s a hole punch and they do others in various leaf shapes.  Santa bought me one of those too.  Thereafter it was all about glueing each tile in place and as the finished roof took over 1100 tiles it took a while.  That said it was an ideal job given I wasn’t at my best and I had YouTube to keep me company throughout.  A little tip if you find yourself doing this.  Dip the tip of a cocktail stick into PVA every so often and use it to pick up the tiles instead of trying with your fingers.  Makes the job much easier and surprisingly speeds the process up a lot.

When doing the roof tiles I find it’s best to do so much and then let it dry before doing some more otherwise it can all become a bit messy.  It also helps with your sanity too.  So, while things were drying I set about making other bits and pieces such as the fence, log pile, five bar gate, water trough, window shutters and doors.  These were mostly made either from match sticks, wooden coffee stirrer’s or both.  For the doors I also used some metal foil to make the hinges and twisted wire for the fence.

That’s as far as I’ve got since last week.  This coming week I’m hoping to start the out building shed and begin painting some of the figures.  I’ll also give some thought to the inside of the building before permanently fixing the roof in place and attaching the chimney and ridge tiles.  I also need to finish the windows and then start on … (to be continued).

Progress pictures below.

TIM

20171213_14121820171213_11565320171213_14120220180103_13570320171213_115646-120180107_180723

On The Work Bench – Building Project No: 7 – Part 1

Welcome to my first post of 2018!

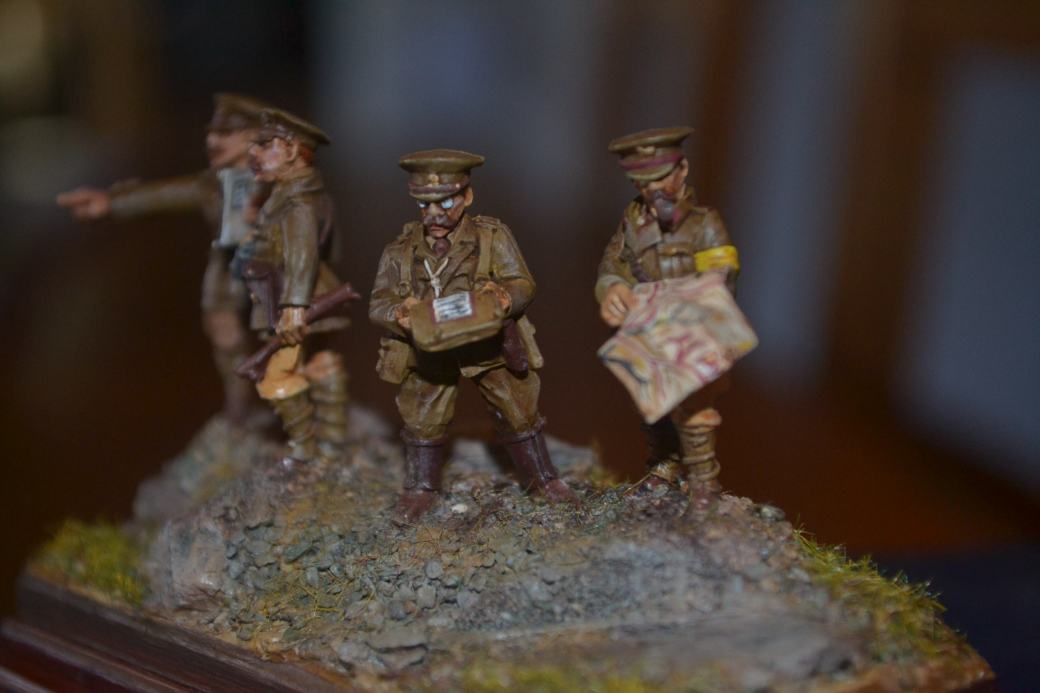
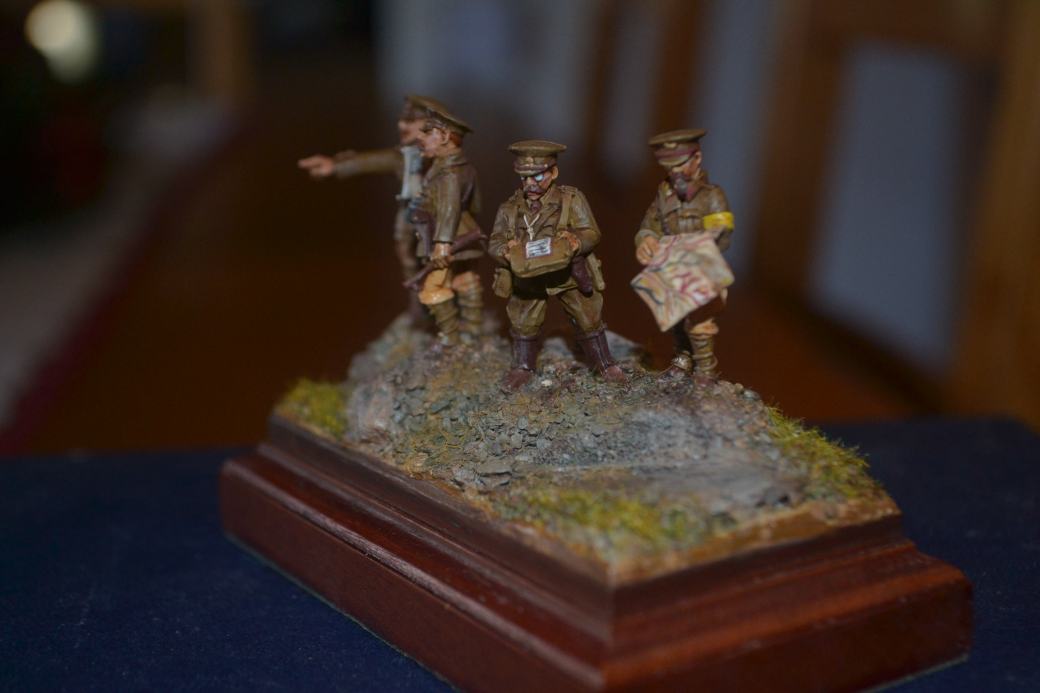
Those of you who follow my blog will be aware that I have been keen to start a new building project and over the last few days I’ve managed to get things started.  The diorama when complete will be a further addition to my WW1 series.  I’m not sure I would describe it as the centre piece but it will be the largest piece in the eventual timeline.

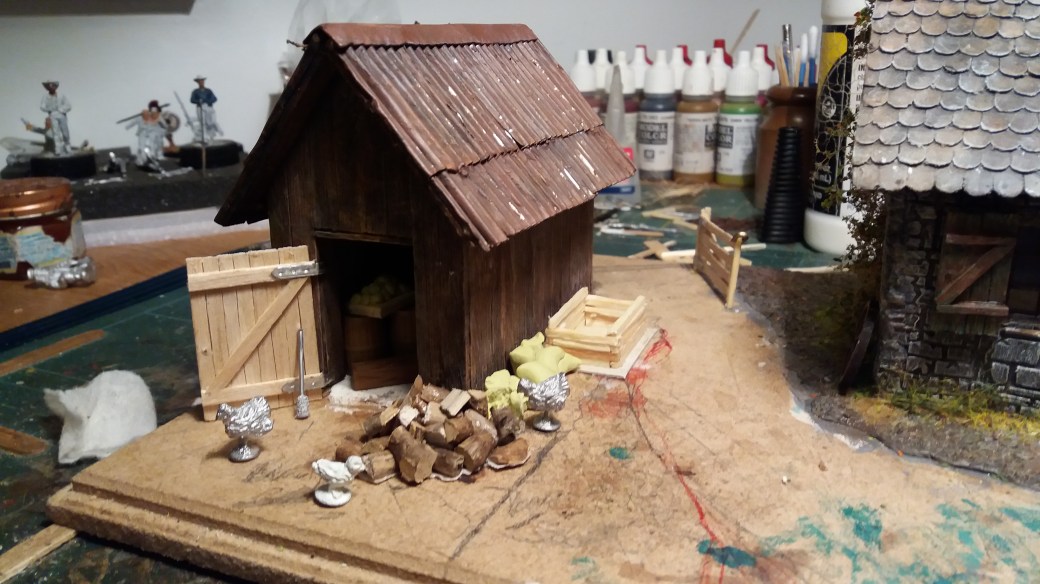
Some modellers I know begin their next project by sketching out plans for the proposed build, I’m not one of them.  I’ve never really worked from sketches, mainly because I’m useless at drawing and so learnt instead to formulate and retain all the details in my head.  I can’t therefore share with you a picture of what the end result will look like until it’s complete.  However, the basic idea behind the model is that of a rustic type cottage/farm-house on the French/Belgium border with two or three civilians/farmer types watching as a dozen or so British troops pass through their land on their way to the frontline.  Not very exciting I grant you but the best excuse I could come up with for the type of building I wanted to construct.  In my head it looks OK!

One thing that I do though before starting a new diorama is create a written list following a brain dump of all the things I could potentially include in the model.  I then use it as a check list as I go along.  I then look to see what’s in my bit box and follow this by working out what I can scratch build and what, if anything, I might need to buy.  For this model the list, which will most likely be added to, currently looks like this: –

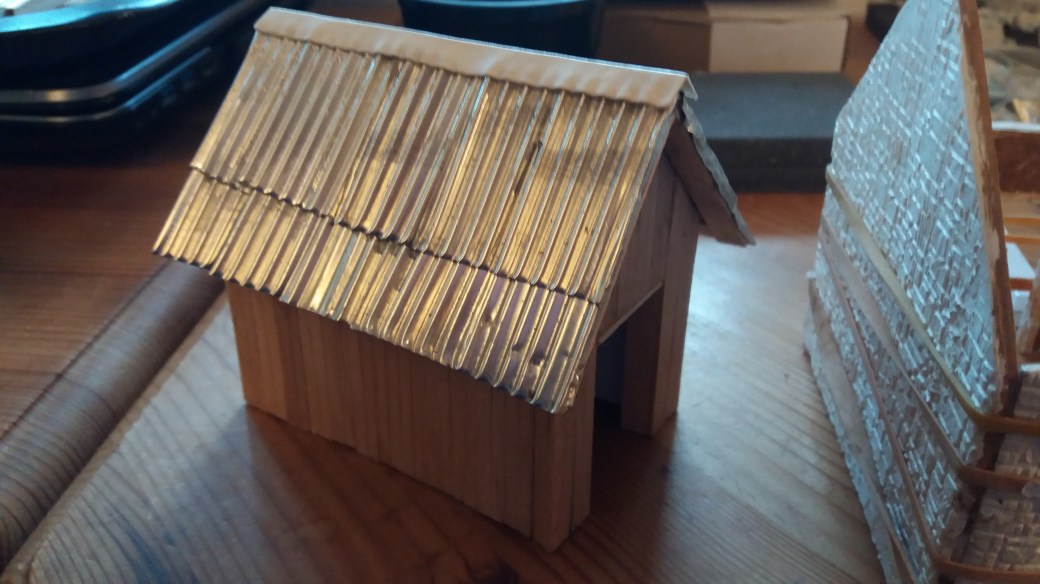
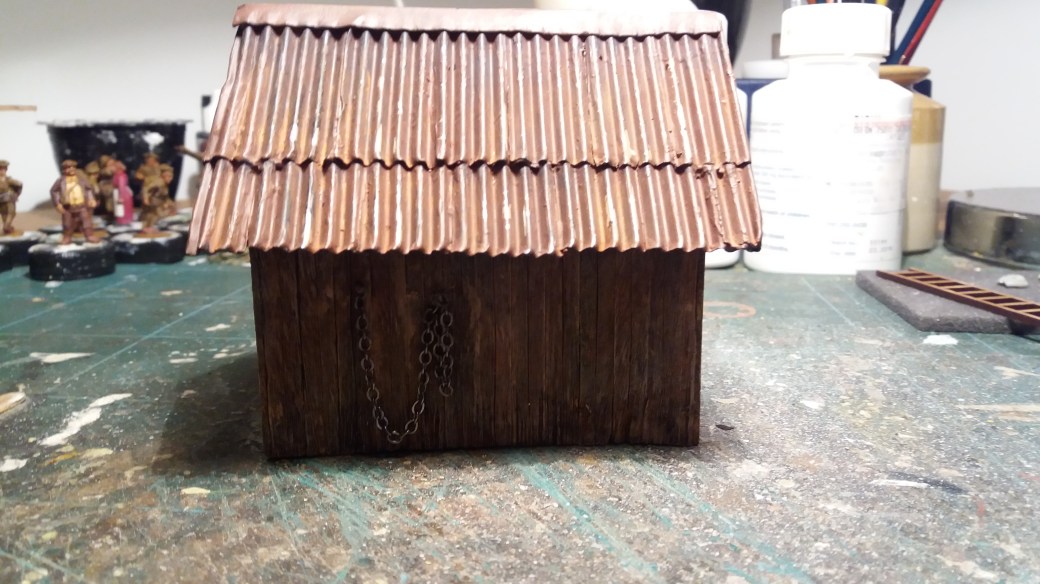
water trough, wheels, ladder, barrels, window shutters, chimney, tree, plants, chain, rope, fence, chickens, sacks, tools, fence, gate, cobblestones, puddles, wheel tracks, door thresholds, door handles/knobs, hinges, boxes, crates, grass, walls, furniture, wood pile, path, animals, shrubs, ridge tiles, roof tiles, weathering, shed with corrugated roof …

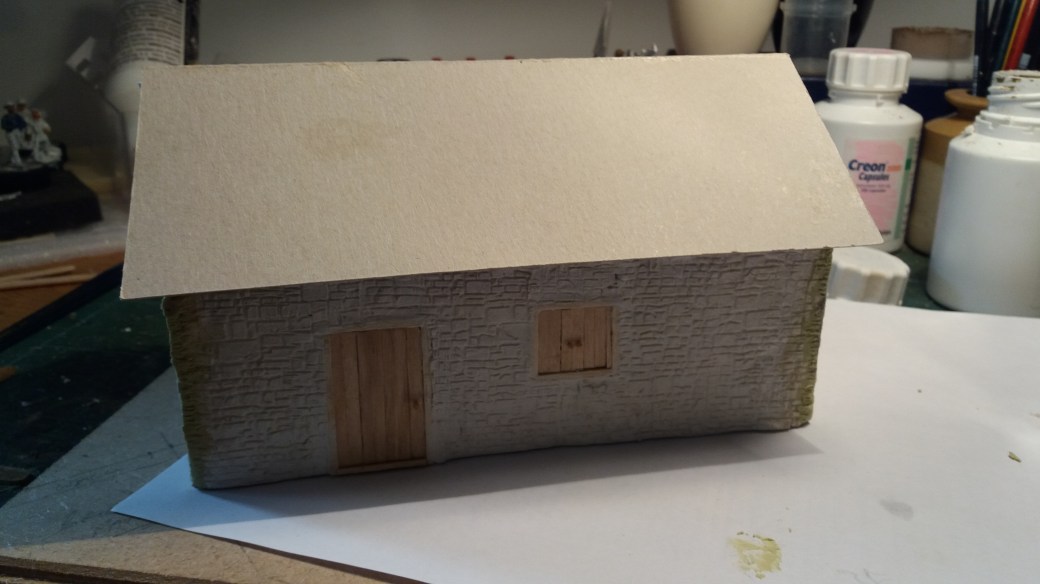
The starting place for all my buildings is the base.  Paul at “Just Bases” does some nice stuff and the biggest base that he does which has an acrylic cover measures 351mm x 201mm x 135mm high and is reasonably priced.  Someday I’ll do something bigger but storing it will be the difficulty and packing it away to keep the dust off of it seems a shame; for now this is as big as I go.  So, taking account of the base dimensions I decided to go with a building which measuring 190mm x 100mm x 100mm high.  I also decided that the walls of the cottage would be stone in appearance and that the roof would be fixed and not removable like some of my previous builds.  I also decided that the basic construction would be made using 3mm thick MDF which would then be suitably clad.  I have used cardboard and foam board before but find they both bow as the cladding dries out which doesn’t look great and makes it harder to assemble the sides and ends.  The MDF warps a little but it’s minor by comparison.

Having made these decisions my first step was to measure and mark out the sides and ends followed by the locations of doors and windows.  The first buildings I ever constructed were MDF kits produced by Sarissa Precision which were excellent but very two-dimensional.  My painting skills weren’t, and still aren’t, good enough to produce a 3D appearance so I went with cladding to achieve some relief for shading and highlighting.  However, what these kits did give me was an easy way to achieve 28mm scale measurements.  For this build the doors measure 40mm high x 25mm wide and the windows are 20mm square.  One door and window to the back wall and one door and two windows to the front.

My next step was to cut out the four sides and check assembly.  This was followed by marking out the door and window locations and then cutting them out too.  Once done I used match sticks to make window and door frames which were then glued in place and left to dry.  Once dry, each side of the building was in turn coated with DAS clay which was then levelled and smoothed out.  I had never used this clay before but was advised via a YouTube tutorial to add PVA to make a kind of dough mix.  The PVA apparently prevents the dried clay from future cracking.  Having only ever done this once I have no idea if this is true or not but I figured better safe than sorry and besides it did seem to make sense too.

Before the clay dried (the clay air dries and does so reasonably quickly but I thick adding the PVA slows the process down) I used my recently acquired “Green Stuff” textured rolling-pin to produce the stone effect.  This was another first and I was extremely pleased with the result.  It is best to wet the rolling-pin a little as this prevents it from sticking.  I also found that it worked better to roll the pin forward a little and then roll it back on itself again making small advances as you move along.  Rolling back enables the impression the roller makes to be more defined but if you go to far forward the roll back is less likely to line up accurately with the initial impression made (I hope this makes sense!).  Once done I cleaned the rolling-pin up using soapy water and a nail brush before any clay residue had a chance to set.

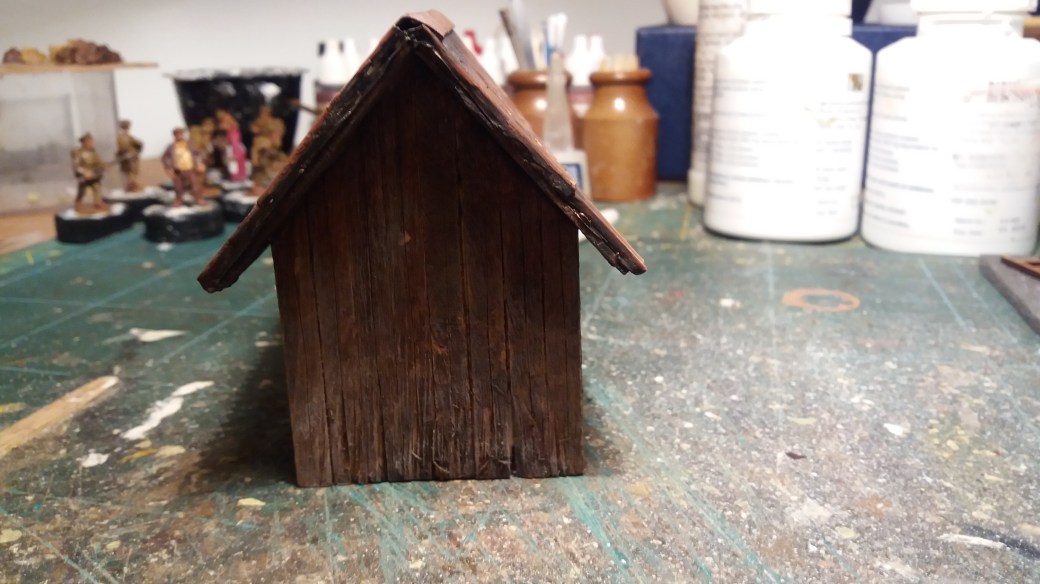
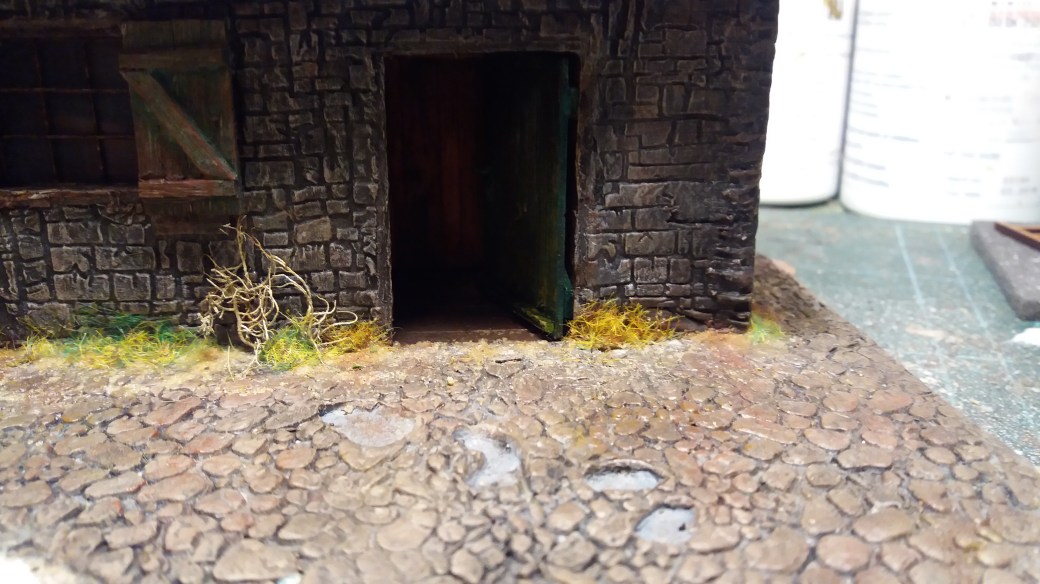
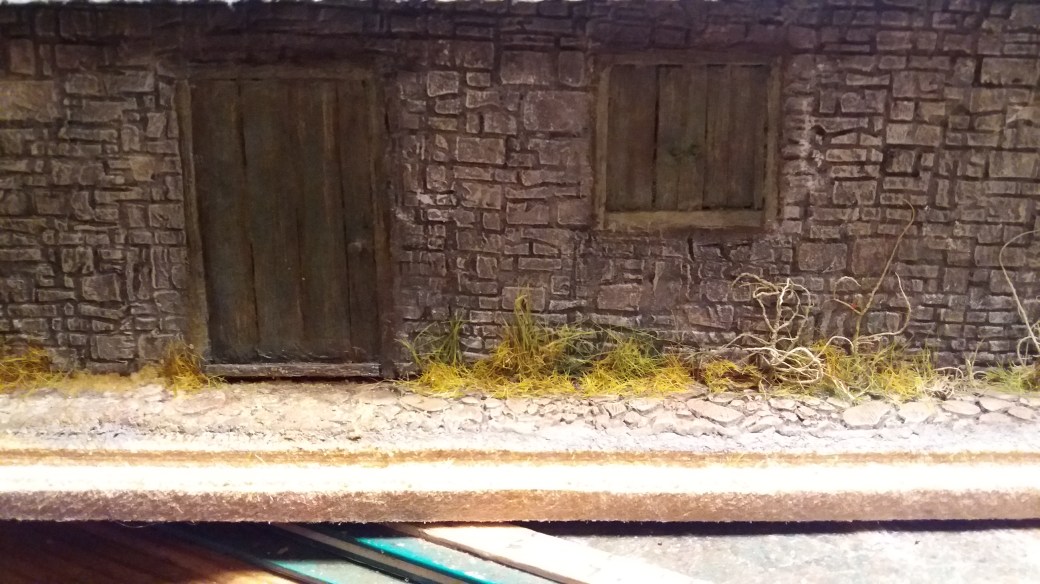
Having let everything dry overnight I then wanted to complete a couple of other things before assembly.  The first was to complete the door and window on the rear wall.  I decided the door would be in a shut position and the window, which would have wooden shutters, would have these closed too.  For both the door and the window shutters I used wooden coffee stirrers cut to length and glued in to place.  Holes were drilled in both the door and window shutters to accommodate the tip of cocktail sticks which were used to make knobs and handles.

The second item I wanted to complete before assembly was to construct and glue into place the internal window frames.  In the past I have tried to use all sorts of materials for this and haven’t been truly happy with any of them.  I think it’s the scale which has given me the difficulty as I just couldn’t get things to line up as I wanted or make them without breaking.  However, following a moment of inspiration I tried using some preformed mesh wire, the same as I had used to make railings on a previous model, and found this worked very well.  I rebated the MDF at the back of the front wall a little and inlaid the section of wire and then glued it into place and left it to dry.

Once everything was dried it was time to test the assembly before gluing.  A little sanding was required to ensure a smooth fit although it was evident that some filler would be needed at each of the corners once put together.  To ensure a stronger bond I glued small sections of foam board to each internal corner and then held everything in place with a few elastic bands to pull it all together before leaving it all to dry.

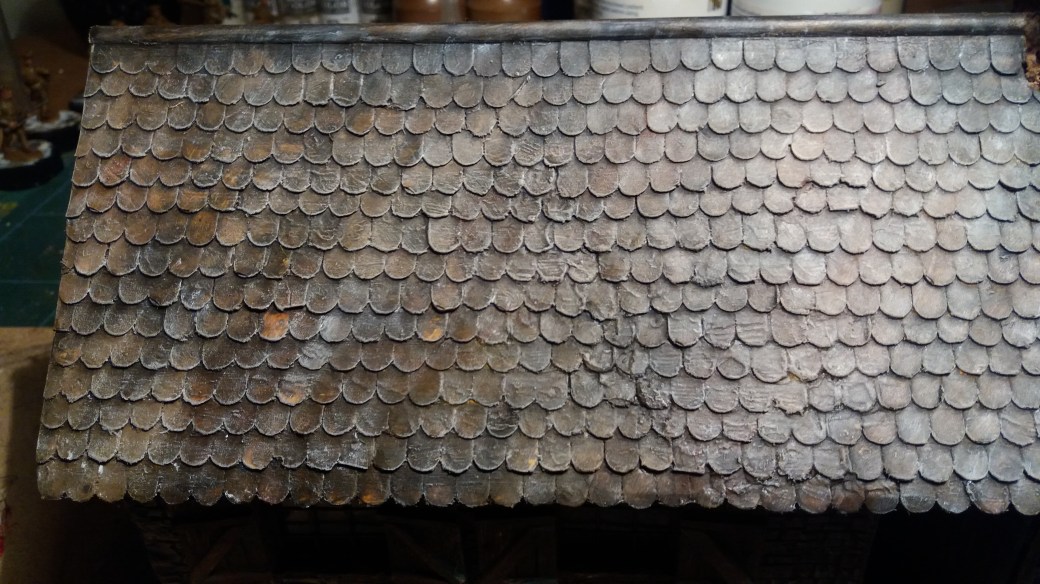
Next up is the roof, windows and shutters, the door and the Chimney and …… but these will have to wait until part 2.

Progress images below.

TIM

20171212_13331820171213_11563320171213_115619

WW1 British Command – 28mm Scale

So, Christmas is over, the parents have made the short journey home and most importantly the wife imposed modelling ban has been officially lifted!  To be fair it was important to spend some quality time with the old folk as well as the kids. However, there is only so much TV dross I can take so I confess to feigning an after dinner sleep on both Christmas Day and Boxing Day.  This proved positive though and gave me some time to gather my thoughts together with regard to this years  modelling past, and more relevantly, next years modelling future.

In modelling terms this year saw the start of my blog, a major departure from 54mm scale figures to 28mm and my involvement with the Plymouth Modelling Club.  All have proved to be very enjoyable.  I love the sense of community that my blog provides and the comments I receive are extremely motivational.  Dropping down in scale has enabled me to do so much more and my creative juices have increased considerably.  I still love 54mm scale but producing buildings and dioramas in this size is simply far to space consuming.  Joining the modelling club, not everyone’s cup of tea I know, has also proved a success.  I think more than anything it has given me an opportunity to compare my work with others and although I’m not the most gifted modeller I do feel that I can hold my head up and make a contribution.  On to the future.

First up is the completion of the WW1 project.  I have a few items to finish and a couple to start and then I think it will be time to call it a day.  I’ve no doubt I will return to this period as I love it but I need to use some other paint colours!  Looking ahead I have a few ideas around the Zulu wars which may get off the ground and a WW2 scene is gathering some momentum in my head.  I found some Viking figures recently which I liked the look of and Santa brought me some American Civil War and Old West figures which as some of you may know is my genre of choice.  Aside from figures there are a few diorama ideas that I want to explore and as I may have mentioned previously, I have a growing urge to start another building.  In fact I’m pretty sure this is where I will kick-start the New Year.

At the end of January the Plymouth Model Club hold their annual in-house competition.  There are a couple of categories which I will enter and it will be interesting to see how I fare.  If I do well then you’ll hear more about it!  The club does do monthly competitions and I haven’t done too badly at those but I suspect some members will have geared themselves up for this one event so it’s hard to tell.  In any event it will be a new experience and should be fun.  Thereafter there are a number of shows to attend including Telford in November.  I’ve heard a lot about Telford but never been.  By all accounts it’s a huge and fantastic event and will doubtless be the subject of future blog posts.

Back to actual models and this posts offering.  As I mentioned previously I have a couple of WW1 items to finish.  This was one of them.  There was very little to do so the limited amount of time available following my modelling ban was more than sufficient to get this one off of the work bench.  The model itself is a simple enough affair.  The figures are from Gripping Beasts and Great War miniatures, all white metal and all very nice castings.  The quality of Gripping Beasts in particular is fantastic.  Figure painting was done using a combination of acrylic and oil paint.

My WW1 timeline needed some officers in it and this is what I came up with.  It’s hard for me when dealing with this historic period to put the series “Black Adder Goes Fourth” to the back of my mind.  It’s tempting therefore to say these officers are trying to determine what square foot of land they plan to sacrifice 20,000 men for.  Every which way I’ve turned when researching elements of this project the tragic loss of life and various statistics associated with this war simply beggar belief.

Model photo’s appear below.

To close this post it’s appropriate to acknowledge the New Year.  I believe in the power of positive thought (although I’m not the greatest exponent of it) but I suspect like many others my New Year Resolutions rarely last more than a few weeks.  I have therefore, to quote Baldric from Black Adder, a “cunning plan”.  For 2018 I have come up with three resolutions which hopefully will prove successful.  In no particular order they are:-

  1. Having never smoked I’m going to pull out all the stops to make sure I don’t start in 2018
  2. I will resist all temptation to drink alcohol at breakfast
  3. I will aim to increase my weight and go up a waist size but will not be upset if I fail!

Happy New Year.

TIM

DSC_0791DSC_0792DSC_0791DSC_0795


Battle of Britain Pilots 1/32nd Scale

I hadn’t intended to create a post today but then again I hadn’t anticipated a modelling ban from her who must be obeyed over the Christmas period either.  So, while the wife has popped out to do some last-minute food shopping I thought I’d sign in and get started.  As she left the house I was charged with doing some cleaning before my parents arrived for Christmas but I figure they wont notice if it hasn’t been done given that mum is 86 and dad is 91.  I can always claim to have done it and blame the dog if she spots anything out-of-place.  Then again she’ll moan at the dog but not at my dad so I may blame him instead.  He’s deaf too which will provide for additional insurance.  Don’t you just love family time at Christmas?

Back to modelling.

The WW1 project will continue into the New Year and hopefully Santa will bring a few much-needed bits and bobs to enable the final models to be completed.  I’m suffering building with drawl symptoms so the need for a larger diorama featuring some sort of construction will I think begin in January.  The good news is I’ve done all I’m going to do for the RAF exhibit needed for June 2018.  For those who do not know next year marks the 100th anniversary of the RAF.  I like planes but I don’t model them so my contribution to the clubs homage is a couple of figures, the first of which I posted details on a short while ago.  The photo’s below are of my second contribution.

The figures represent two WW2 Battle of Britain fighter pilots, we’ll say Spitfire pilots, I like Spitfires they’re iconic.  The figures are 1/32nd scale so it was nice to do something slightly larger for a change.  Very basic base work as I didn’t want to distract from the figures, which is also another way of saying I couldn’t be arsed on this occasion.  The enamel pin was a cheap purchase off of Ebay for which the proceeds went to charity which was nice.  I like these military pins and I’ve used a few now and they’re a great way of setting off the base in my opinion.

Not much more I can say about this model other than it was painted using a combination of acrylics and oils.  The figures are also plastic which is most unusual for me as almost everything I do is white metal.  I hope you like the photo’s.

All that remains is for me to wish everyone a very Merry Christmas and a Happy New Year and to the followers that I have thank you for doing so.  Those of you who are in Australia will experience Christmas and New Year ahead of the rest of us (time travel but not as we know it) so enjoy.  Be careful surfing on the backs of those Great Whites (you guys are so tough!) and throw another prawn on the barbie for me.  I’m off to watch Crocodile Dundee and a DVD of the Bodyline Ashes tour.

Gotta go, she who must be obeyed has just pulled into the drive!

Until the New Year …

TIM

DSC_0789DSC_0790DSC_0797DSC_0793DSC_0795DSC_0796DSC_0794


Casualties of War

This week’s offering is a simple 28mm vignette of a couple of wounded WW1 British soldiers being attended by a clergyman officer.  I figured that within my growing sequence of scenes for WW1 something along these lines was a must have. Photos appear below.

The figures  – the one on the stretcher and the clergyman officer offering a cigarette – are both from Gripping Beasts while the standing smoking figure is from Great War Miniatures.  All white metal and excellent castings.

The Great War preceded the British National Health Service by some 30 years so back in those days a cup of tea and a woodbine was generally regarded as a “cure all”.  Whether you’d lost a limb, been the victim of a mustard gas attack or just suffering from undiagnosed post traumatic stress there was nothing like a fag, a cup of tea and a pretty nurse to ease the pain while reflecting on how lucky you were!

Brave men all of them. Arguably ignorant of what they signed up for but brave none the less. I do however wonder what they would have made of the world we now live in and if they felt their efforts were worth dying for?  Think I may need to set up another blog for the purpose of having a daily rant!

Wishing you all very Merry Christmas and  Happy New Year.

TIM

20171217_17252520171217_17250220171217_09360020171217_17250220171217_17253220171217_17262220171217_17261120171217_172517


WW1 28mm Stand Alone Figures

An odd week this week where work got in the way of modelling.  I’m not a big fan of the phrase “Work Life Balance” mainly because it has the word “work” in it.  Still on the positive side of things I managed to get a couple of minor figures done and off the work bench and I also received a couple of exciting modelling tools in the post.  OK, so exciting is a bit of an exaggeration but I am looking forward to using them in due course.  More on them in a moment.

I couldn’t get my head around how to use the first figure in a vignette or a diorama so I decided in the end to paint it up as a stand alone.  The figure itself is a dead ringer for Field Marshall Haig, which was probably the intention of the sculptor, and as Haig was a major (and highly controversial figure) during the war it was very appropriate to include him in my timeline sequence.

The second figure is a very basic conversation.  Basic to the point that I pretty much just cut his legs off!  Well to be fair I did have to do a bit more than that to tidy it up but not a lot more.  So why cut his legs off?  Well, in January my model club has its annual in-house competition.  I plan to submit models in the diorama and stand alone figure categories, it’s my thing after all, but I wanted to enter another category too.  I’m not a plane, tank or vehicle kind a guy so chose to focus on the miscellaneous category.  I wanted a quick win and something different and so decided to go for a 28mm Bust.  A bit of a cop-out I know, particularly given how much fantasy stuff is out there, but next year I’ll give it a better go.

The modellers out there will appreciate the scale of a 28mm figure but others might not so I decided to put a Vallejo paint pot next to each figure for perspective.

So, back to the two tools.  Some of you will have probably been aware of them both for years but I only came across both of them by chance a couple of weeks ago.  First up is the corrugated iron maker, the other is a textured rolling-pin.  I bought two of these, one produces a cobble stone effect, the other a brick work effect.  Basically you roll it over Miliput or similar product and it leaves the appropriate impression behind.  Well I like them anyway and am looking forward to seeing how they come out.

Photos below.

TIM

20171209_19542720171209_19410620171209_194111-120171209_19525520171209_195255-120171209_194829-120171209_195657

“It Will All Be Over By Christmas” – WW1 28mm Diorama (Part 2)

A little narrative on the completed diorama, images of which appear below.

Following the declaration of war with Germany a patriotic call to arms led to mass recruitment the length and breadth of the country.  Recruitment centres were set up just about anywhere with lengthy queues forming outside town and village halls as well as on the open streets. My diorama is set in the grounds of a modest stately home with men queuing along the pathway outside the main gates.

A few observations regarding the construction of the diorama. The recruitment posters are all real posters which were downloaded images appropriately resized. The table was made from match sticks and the red, white and blue bunting from paper. The railings were constructed using wire mesh and simply cutting away pieces here and there. The paper forms on the table are real Attestation papers printed and downsized.  The tree was another wire tree constructed along the same lines as others I have done and which I have covered in past posts.  The shrubs and bushes were constructed using seafoam and leaves from Noch.  The grass edging was constructed using twisted wire to replicate Victorian rope tiled edging often used in grand buildings of the day.

The figures are all commercial 28mm figures from various suppliers and are without any modifications.

Although I’m not creating my WW1 models in the sequence of the timeline I am hoping to create this particular model will be number two in the sequence and is the natural follow on from my “War Declared” vignette which I recently posted.

Images of the completed diorama are below.

TIM

20171023_15533520171023_15530020171023_15534820171023_15532820171023_15540620171023_15554420171023_15544120171023_15545320171023_15541320171023_15550520171023_155427

“It Will All Be Over By Christmas” – WW1 28mm Diorama (Part 1)

“It will all be over by Christmas” – well at least that’s what many of those brave men thought when they enlisted following Britain declaring war on Germany.  The truth was far different of course.

In my last post I mentioned my aim of trying to put together a modelling timeline of significant WW1 moments with the intention of creating a few depicting less obvious images of the time.  Life in the trenches is the image most people think of when reflecting upon the Great War and rightly so but there are others too which I (and perhaps it is ony me!) think are relevant.

The idea behind this latest model is the enlistment and recruitment of the civilian men into the armed forces of the day.  Only when I looked into this a bit more did it get me thinking about how significant I felt this was.  There was the obvious bravado of young (and old) men thinking it truly would be over by Christmas and that all they had to do was give the “bosh” a bash on the nose.  What I hadn’t appreciated until I googled images of recruitment posters was the level of propaganda. No punches were pulled in implying you were a coward if you didn’t sign up!

All in all it certainly made me wonder just what would happen in this day and age.  Would the people of today sign up quite so readily to be lambs to the slaughter?  Hopefully we will never know.  Nevertheless this is definitely a topic for a deep and meaningful conversation to have after consuming large quantities of alcohol!  I digress, back to the modelling.

So, having decided on the subject for the model I set about trying to find appropriate figures.  Civilian figures as I think I may have mentioned before present a challenge, too few out there on the market.  That said I came up trumps having found some great figures by Footsore miniatures.  Military figures proved easier to find and so before too long I was getting started.

Painting the figures is well underway and a rough outline of the diorama is floating around in my head (I never work to plans or drawings – perhaps I should?).  All things being well the diorama will be finished next week but in the meanwhile a few figure images to be going on with along with sneak preview of the base work.

TIM

20171021_12001620171016_15275320171021_12001920171021_120029