Ann’s April Challenge was a simple one, just get some outstanding crap done. What I like about a challenge like that is it makes me realise I am not alone. At some point we all start something which either never gets finished or takes a hell of a long time to get done. I’ve often wondered why this is.
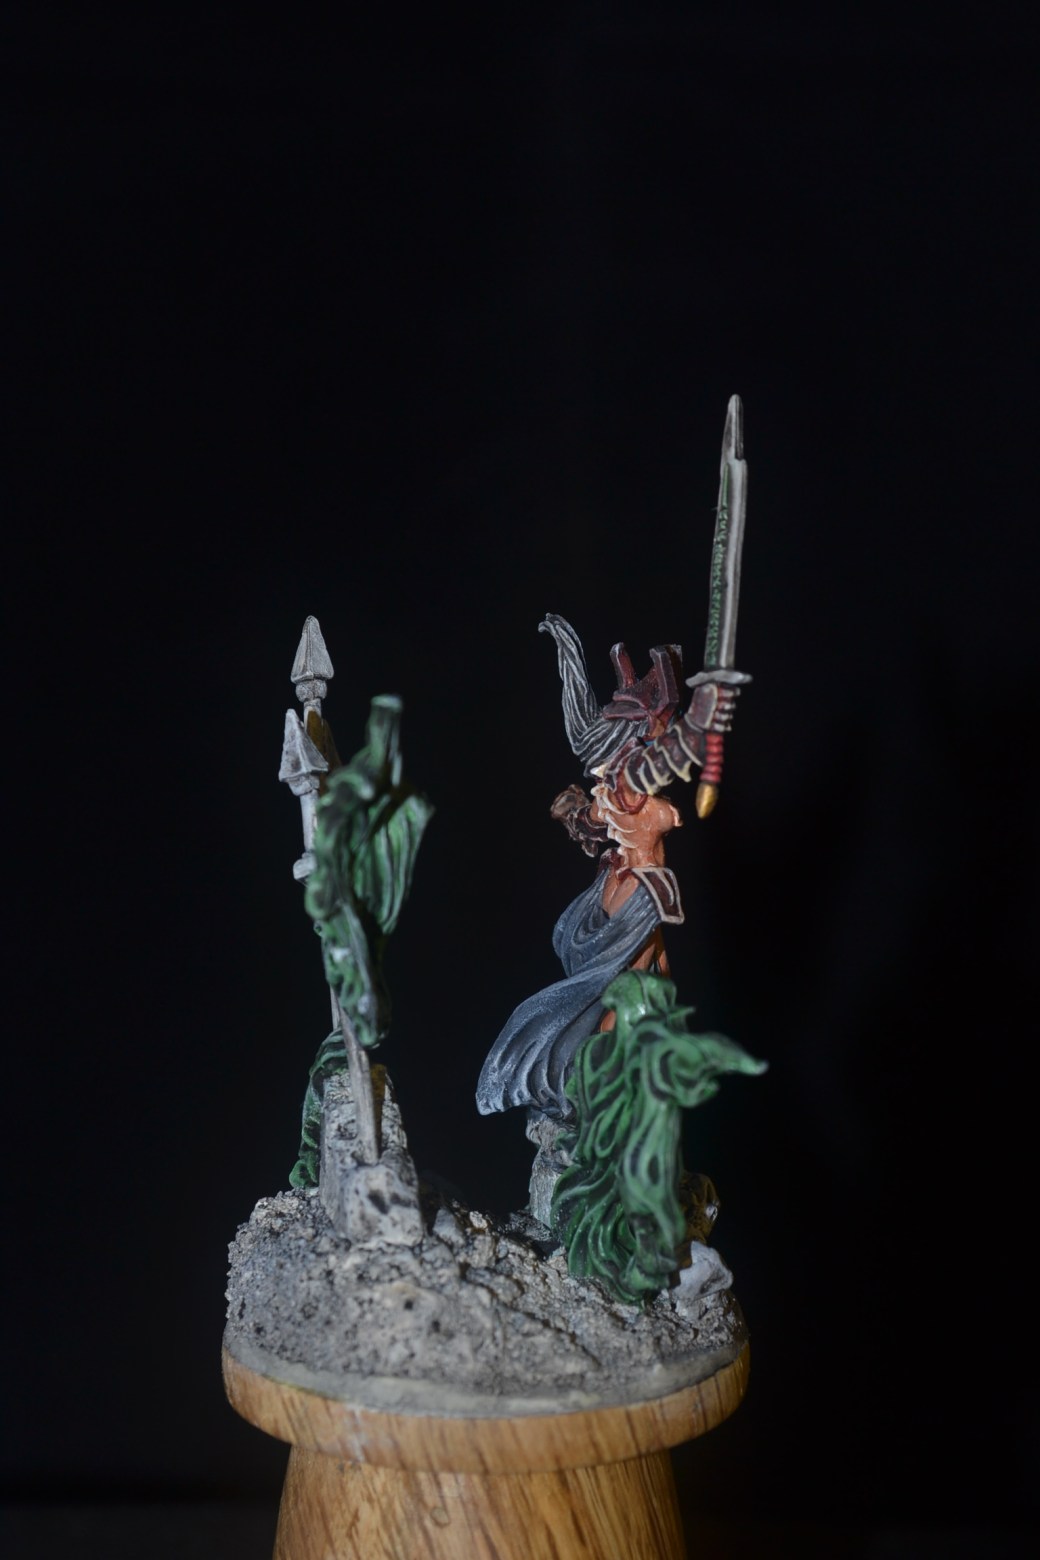
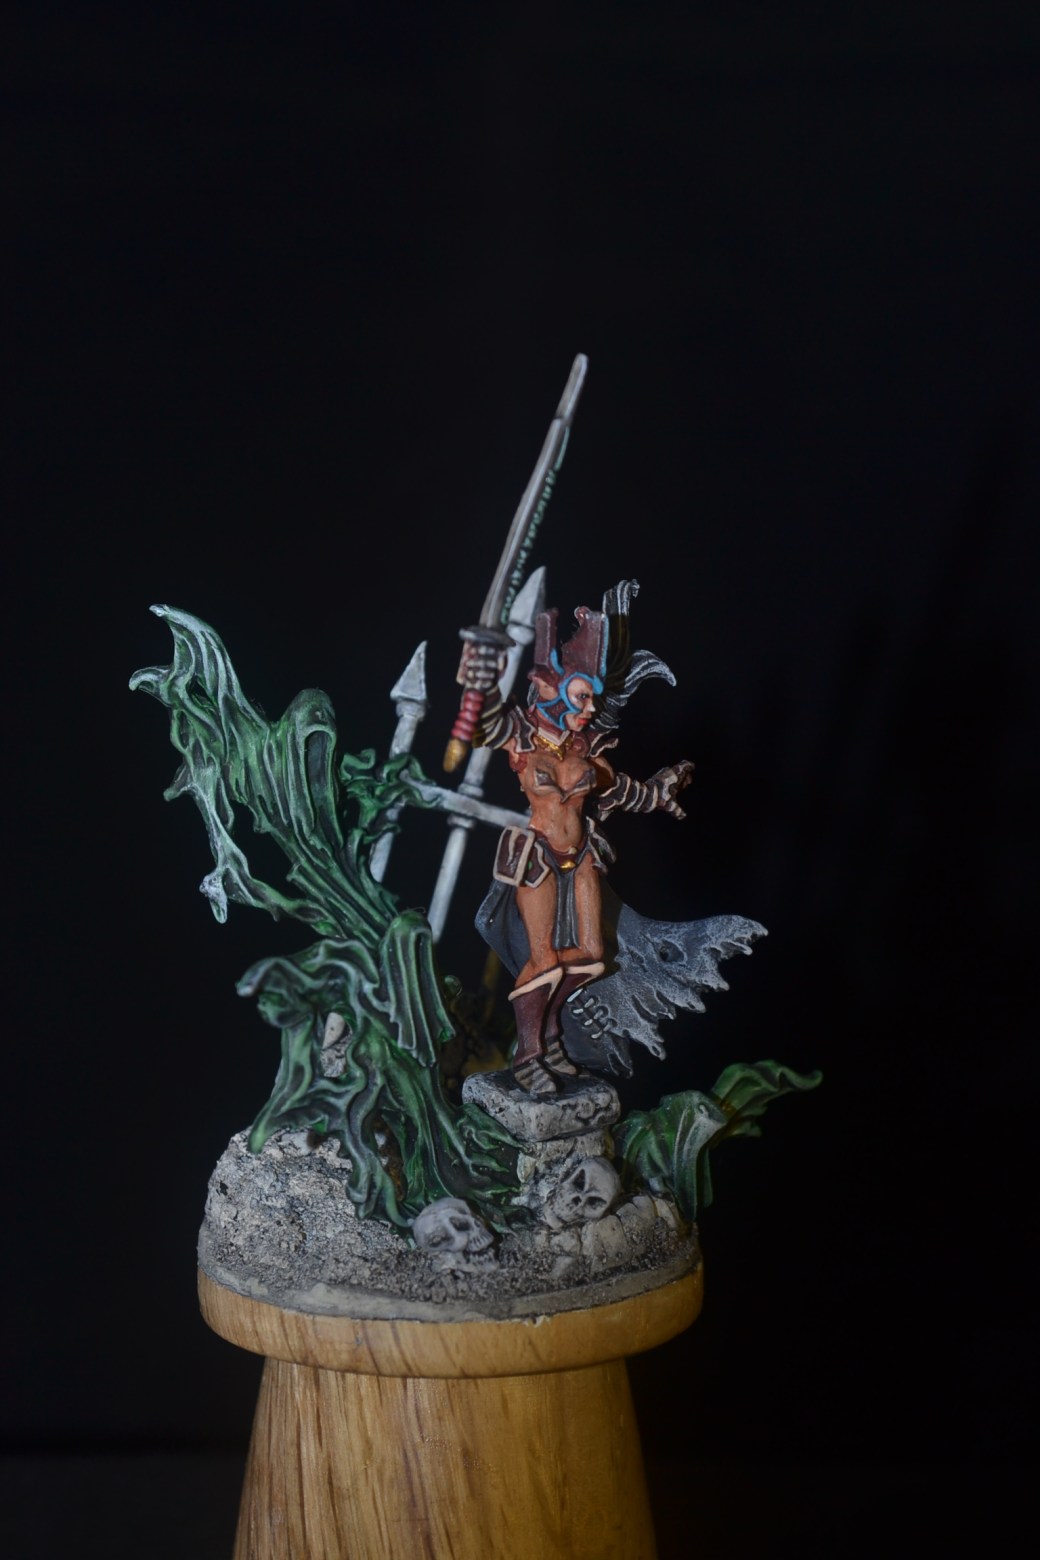
Personally I think it is down to one simple reason. I get excited about the next project and move on before the previous project I was excited about gets finished. This was the case with this figure – Reaper Miniatures “Marise Greyshroud”. I had a few ideas for this one but then I got inspired by a bigger diorama and so this one got pushed back further and further until Ann’s Challenge came along.
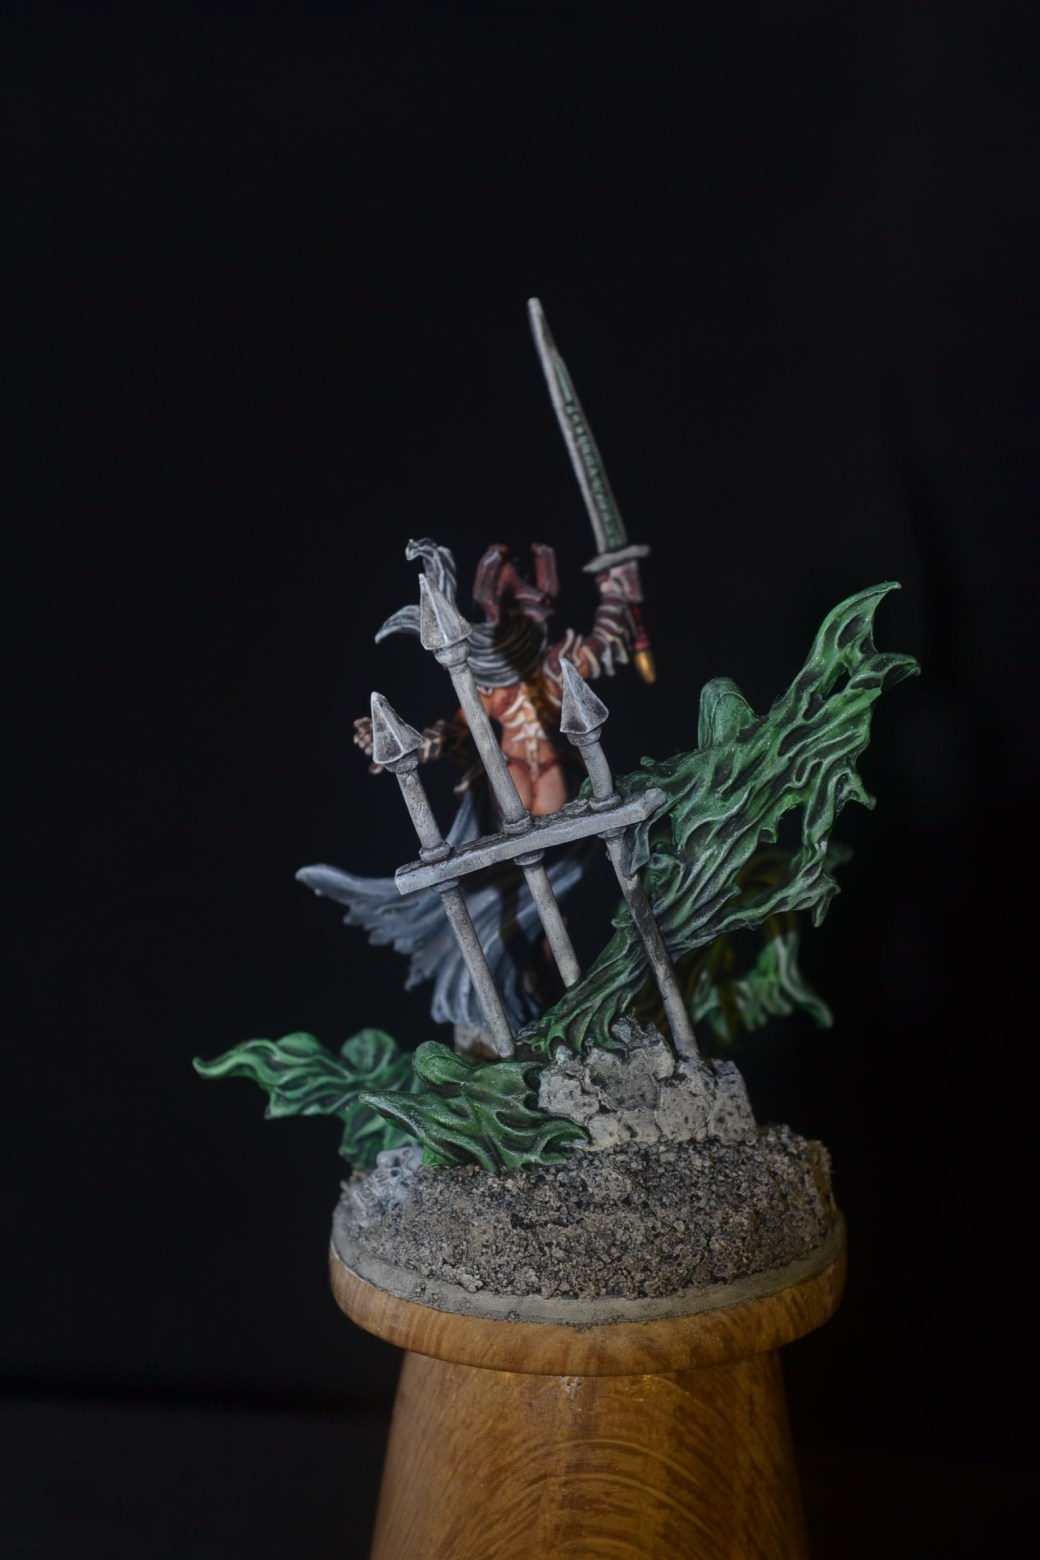
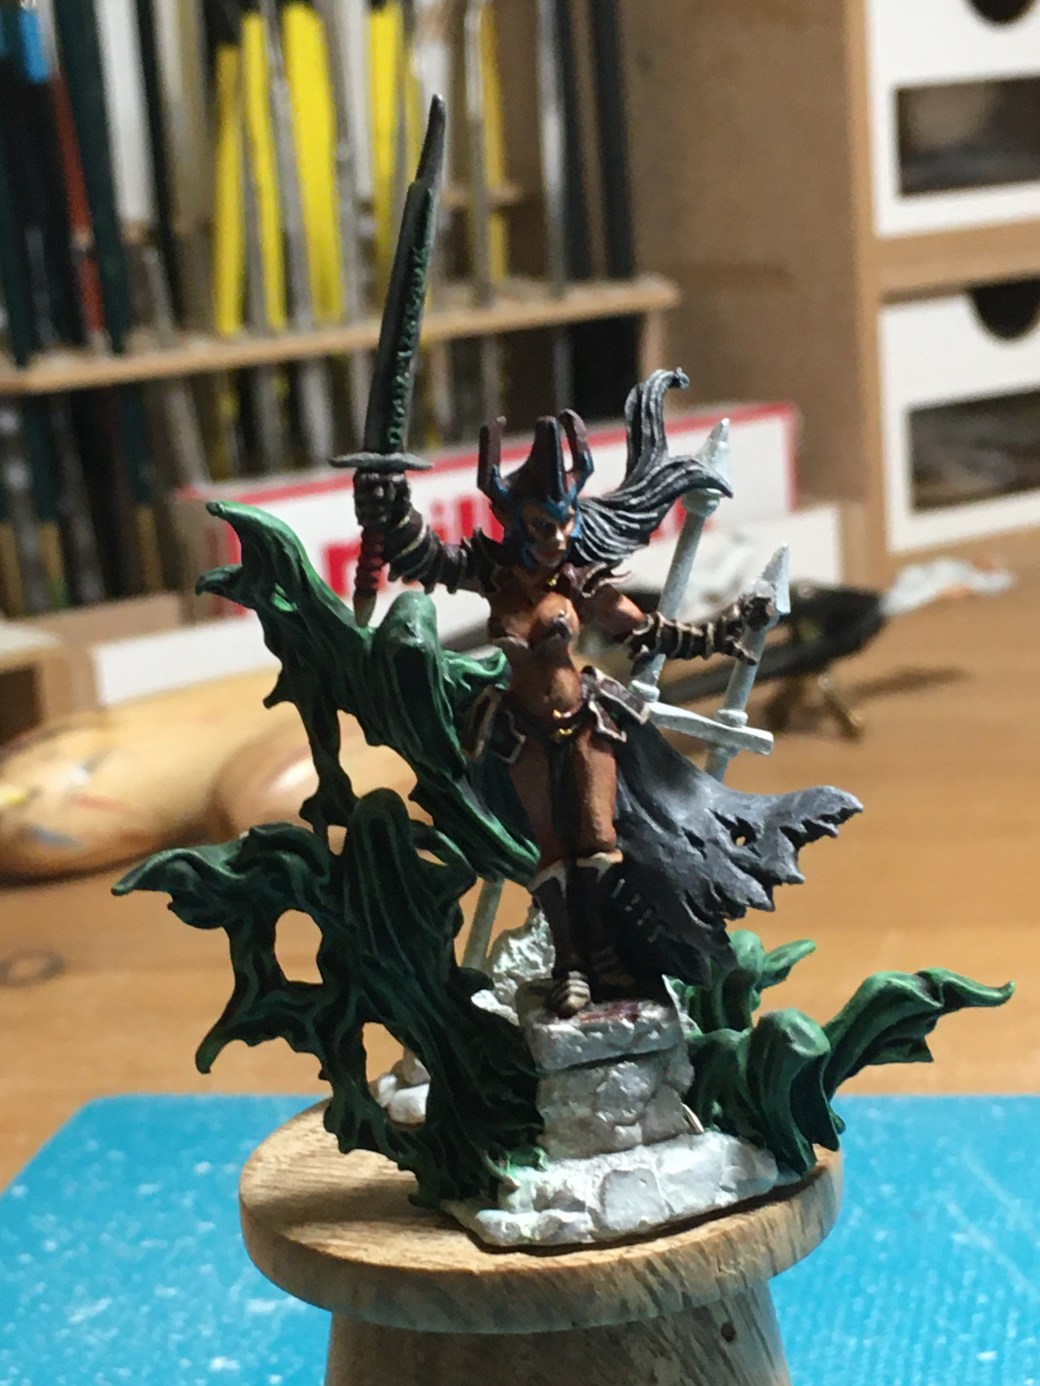
Not a great deal to say about it. Purchased early last year but since then it has sat neglected on my desk gathering dust. Not an exciting piece (although I liked it at the time) and this is reflected in the paint job I think. A simple bit of base work with a couple of skulls added for further interest and it is now done as far as I am concerned. Not one of my favourites but if it wasn’t for Ann’s challenge it may not have got finished at all.
Looking at my desk I notice I have several other part completed figures. I really ought to get these done but I think I will wait for the next challenge!
Well finally I got this diorama finished, I hope you didn’t get bored with the WIP posts. By coincidence today would have been Salute 2020 at the Excel centre in London. Unfortunatley it had to be cancelled due to the Covid-19 outbreak and since then the venue has been converted into a 4,000 bed Nightingale emergency hospital. Who would have thought that a few weeks ago!
Back to the diorama.
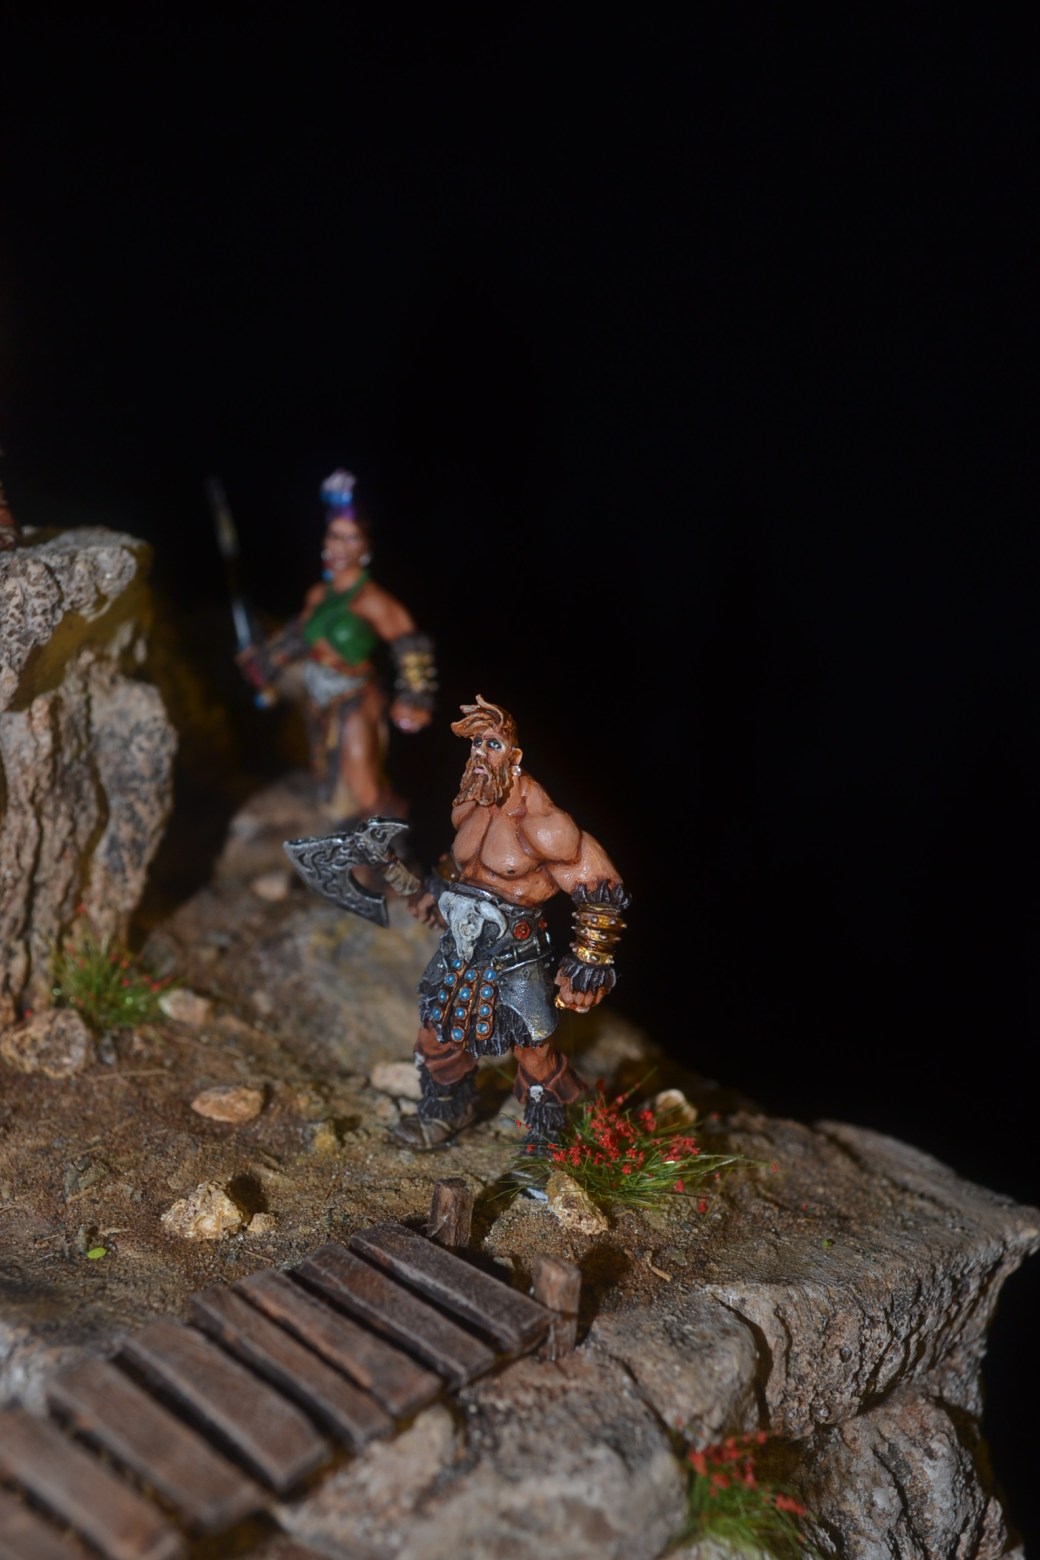
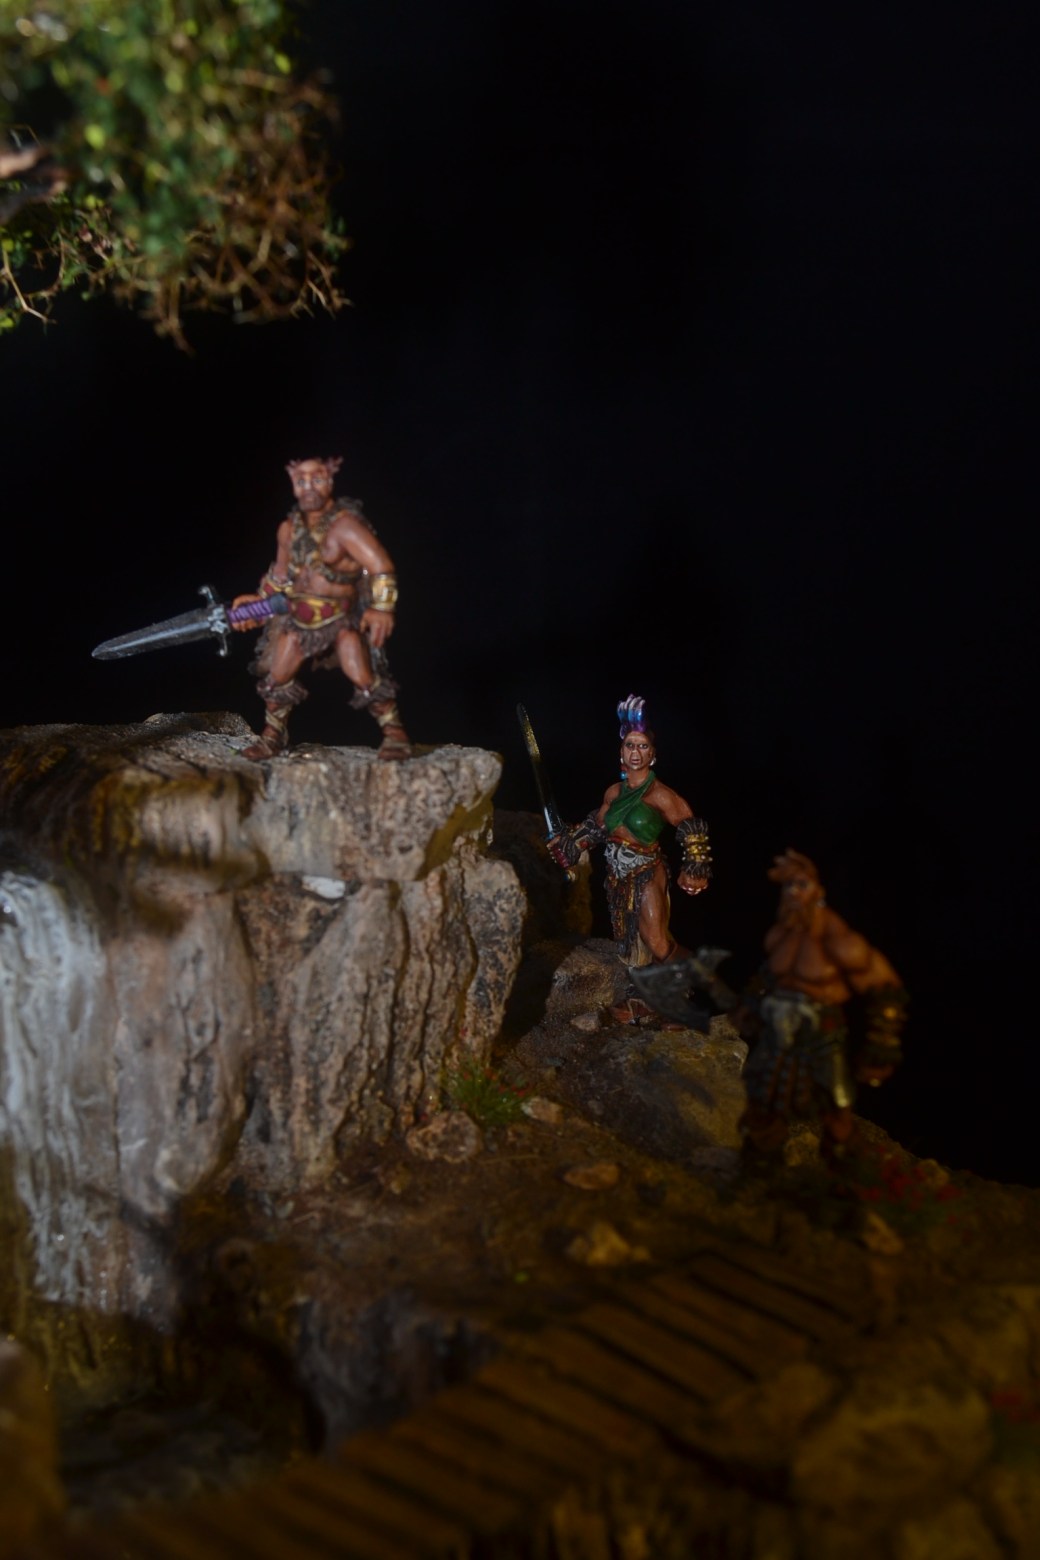
The final figure got painted and positioned. Another fine figure from Hasslefree which goes by the name of “Jholkar of Bolverk”. Other than a little tidying up and some little bits of vegetation the model was complete.
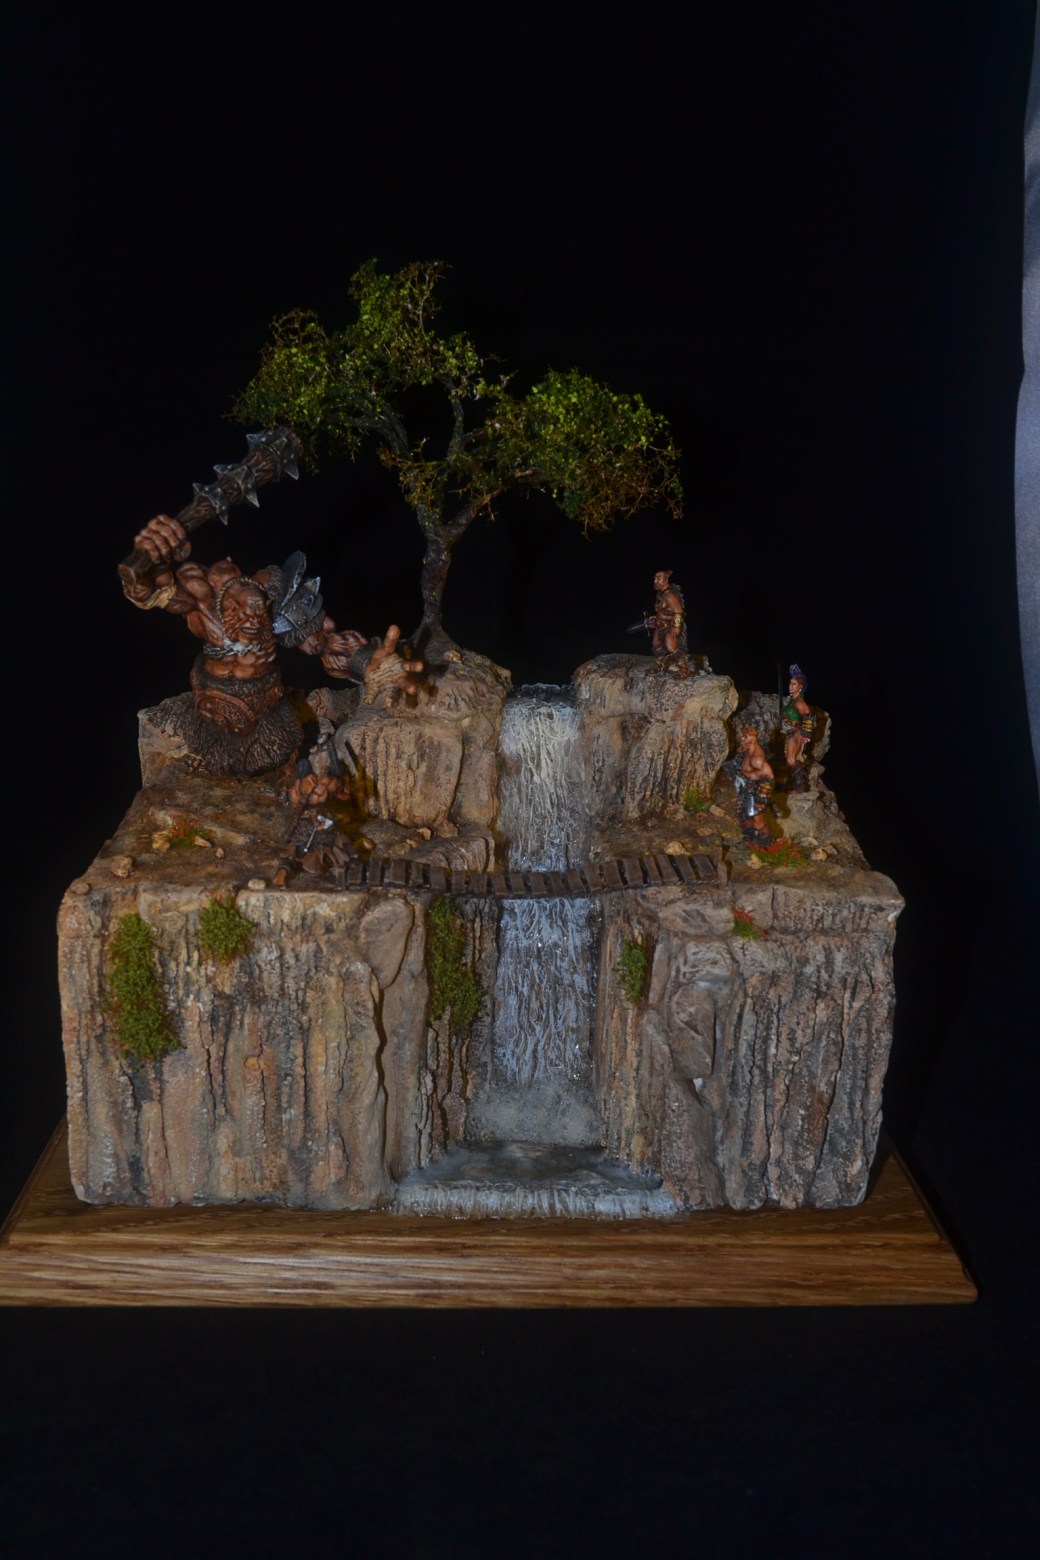
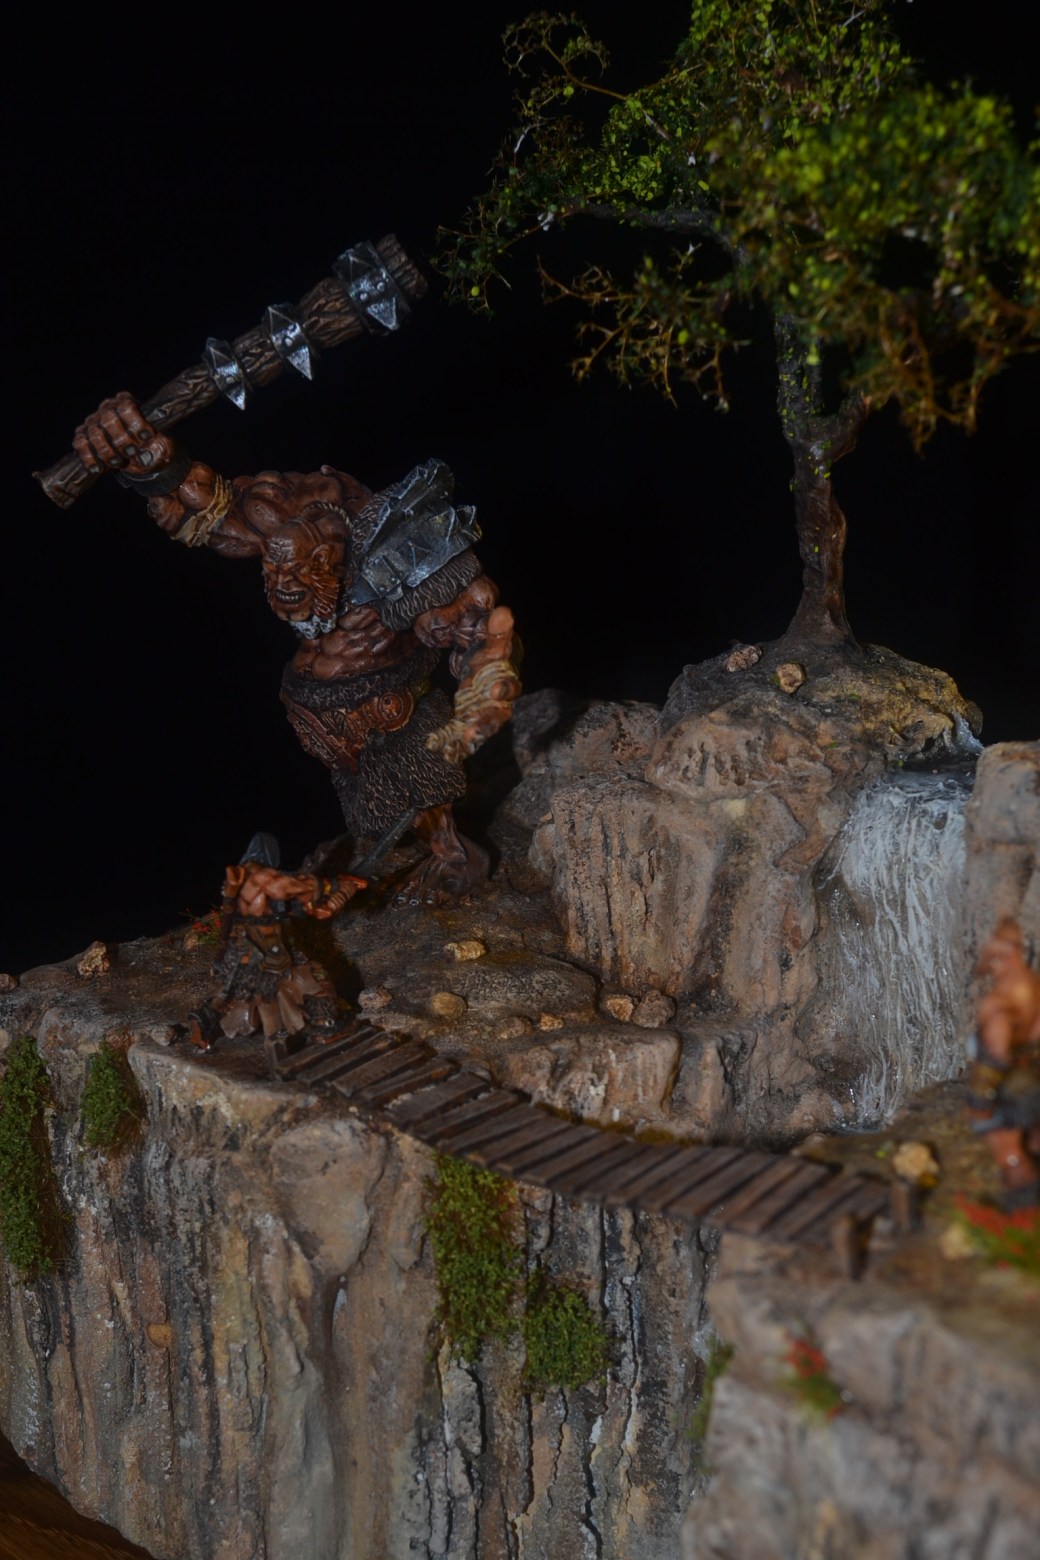
Below are images of the completed diorama. At the end I have also included an image of the model in its early stages where I was playing around with the pieces and how it would in theory go together. I thought it might be of interest to see how the basic design played out.
This model is destined for Telford unless I come up with something better in the meanwhile or the show does not go ahead in light of the prevailing circumstances. Also I haven’t as yet come up with a better title than “Oh My God!” If anyone has any ideas please let me know.
Now it is time to move on to something new. Maybe I will give some of the ideas you guys came up with a go at some point in the future too.
Here’s hoping you like the end result. The images aren’t the greatest but unfortunatley rain prevented me taking some outside pictures.
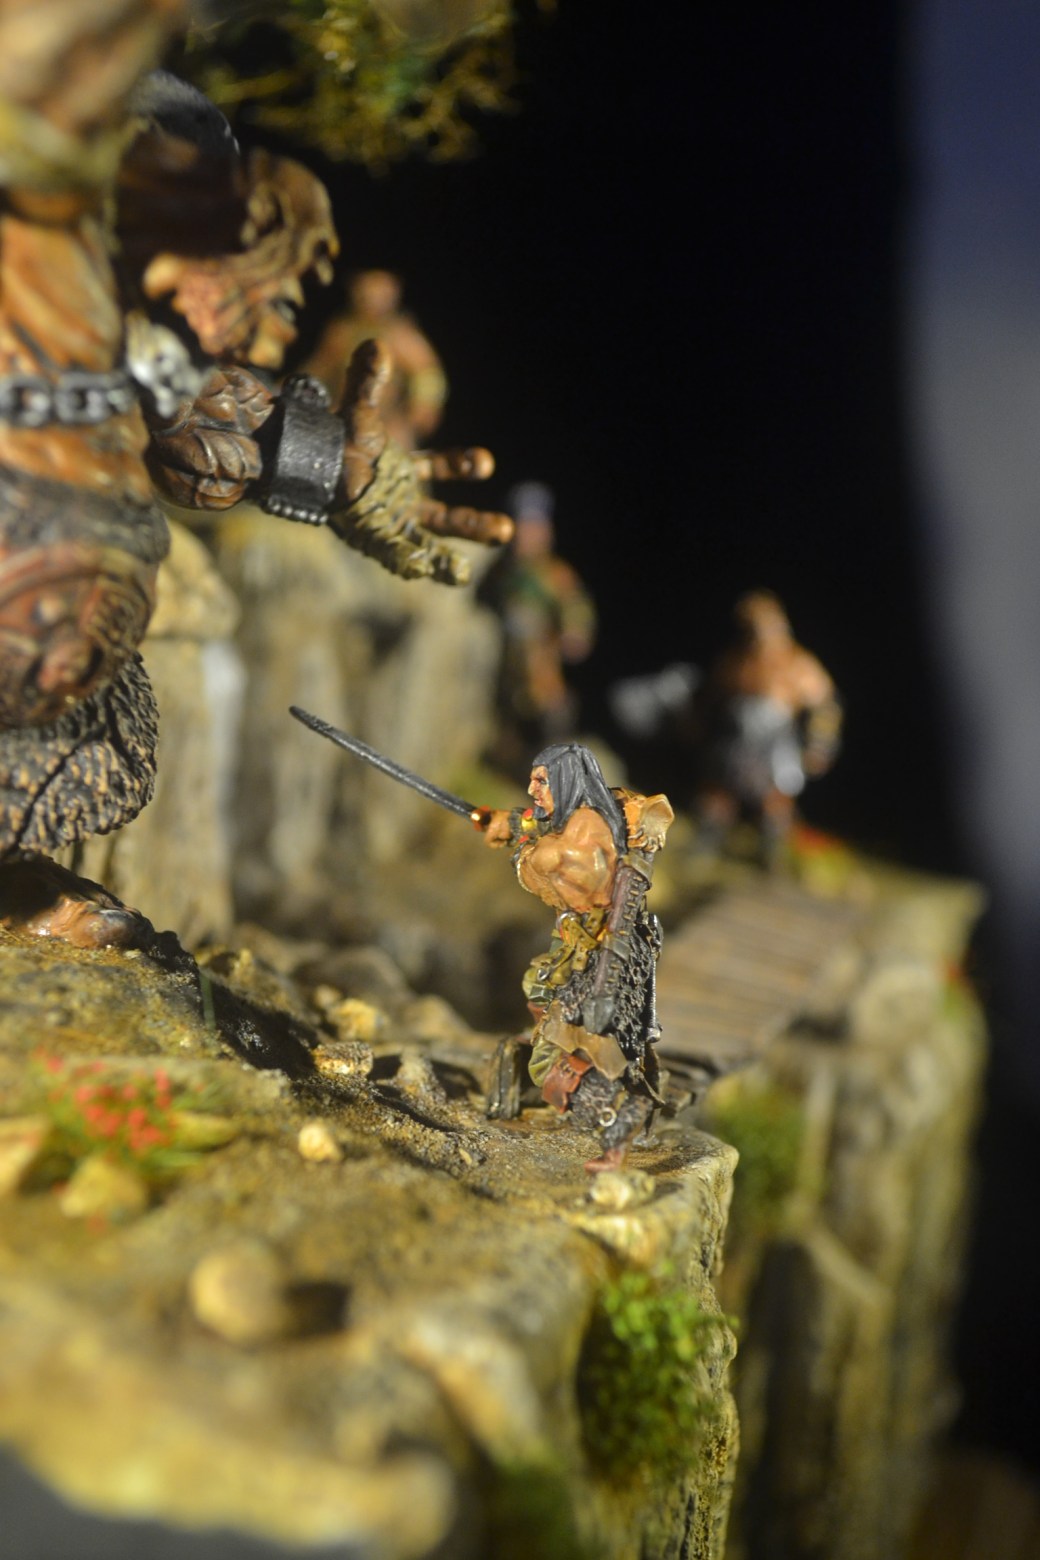
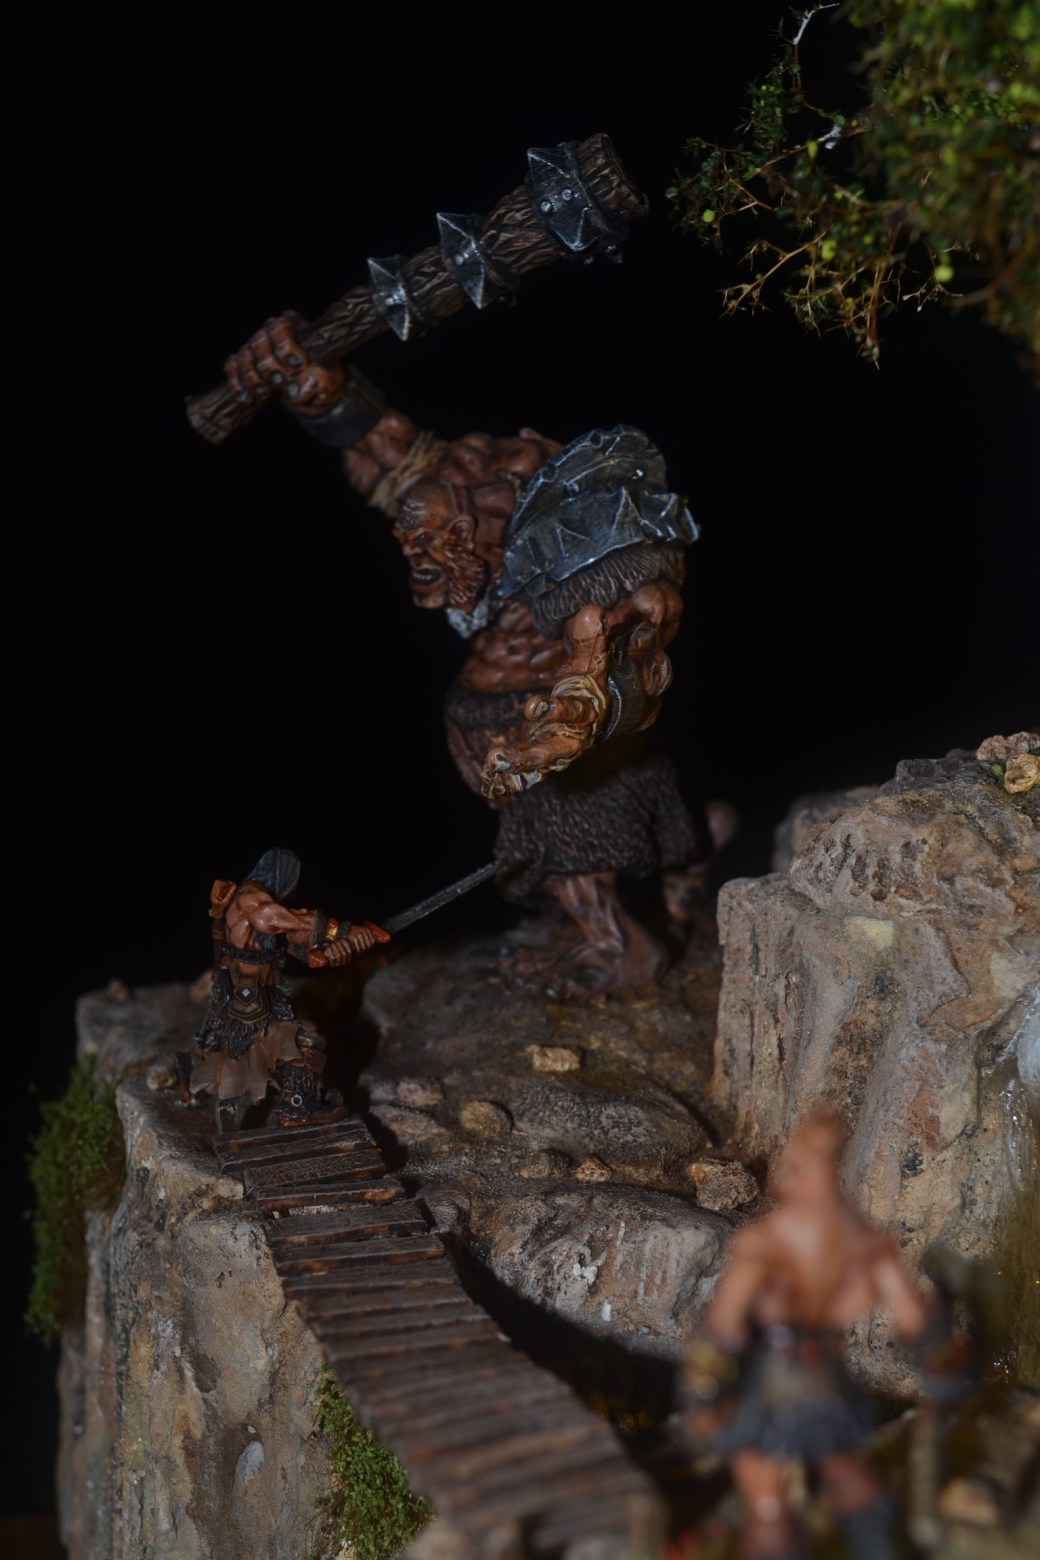
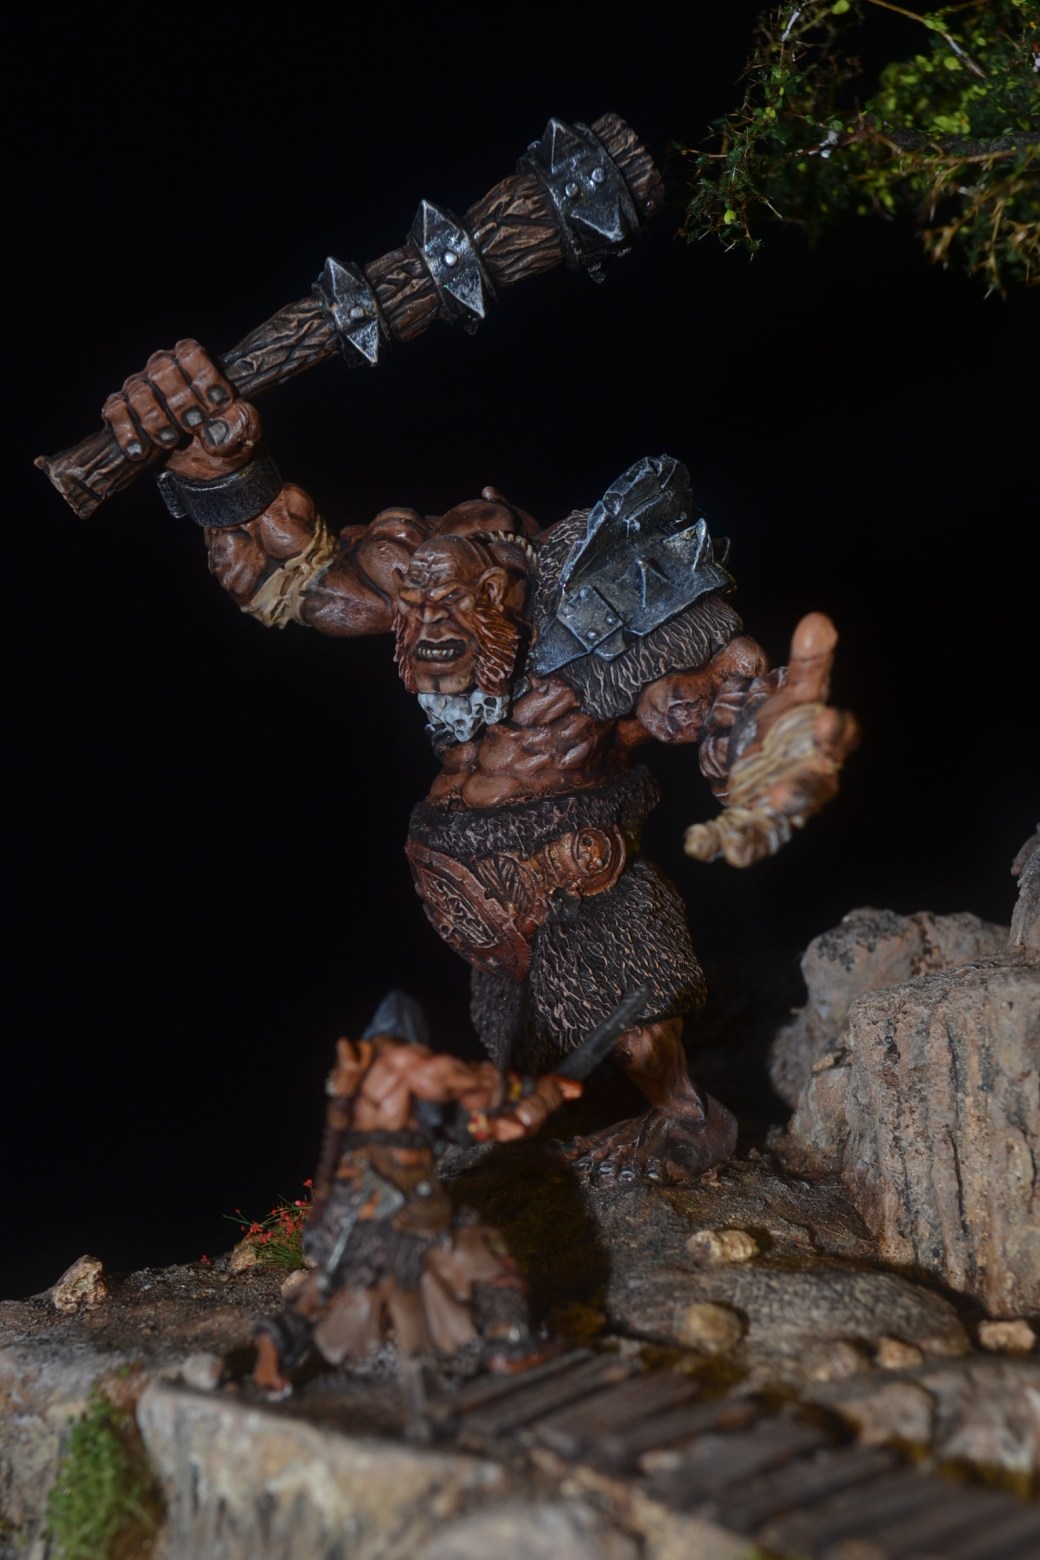
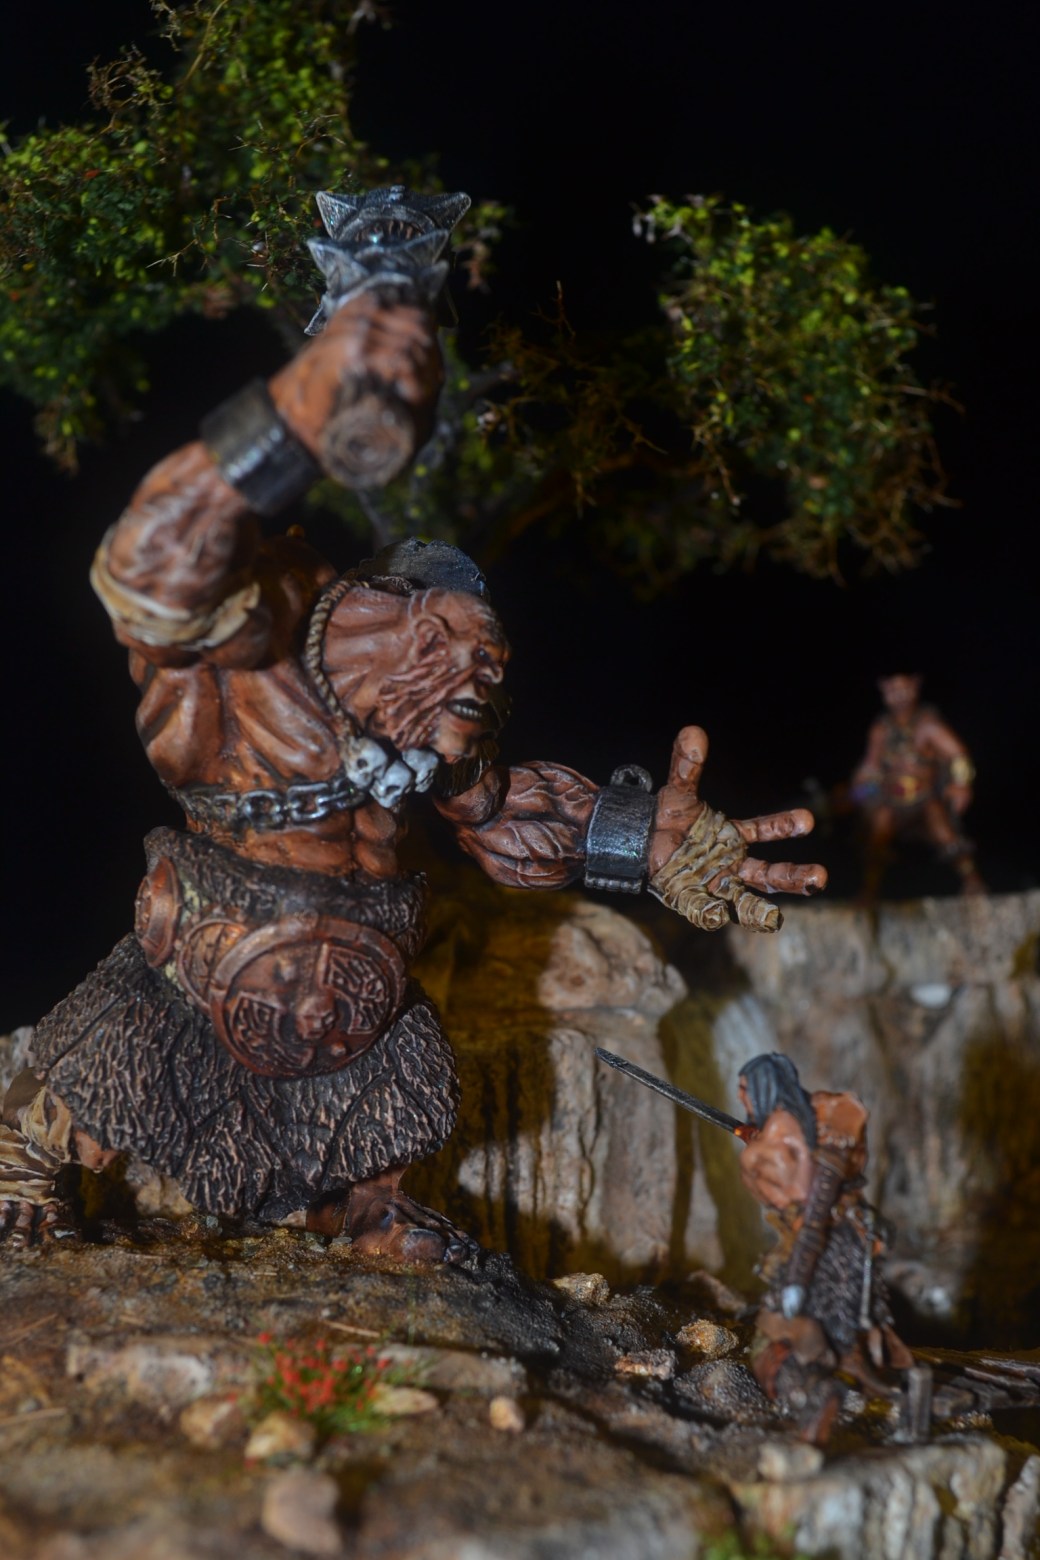
This week has all been about getting one figure painted. The figure as you will now be able to work out is the OMG element of the diroama. Sorry it isn’t a dragon or the other things some of you guessed at and I hope you aren’t too disappointed. Well done to Bogenwald though, he rightly guessed a giant following last weeks post.
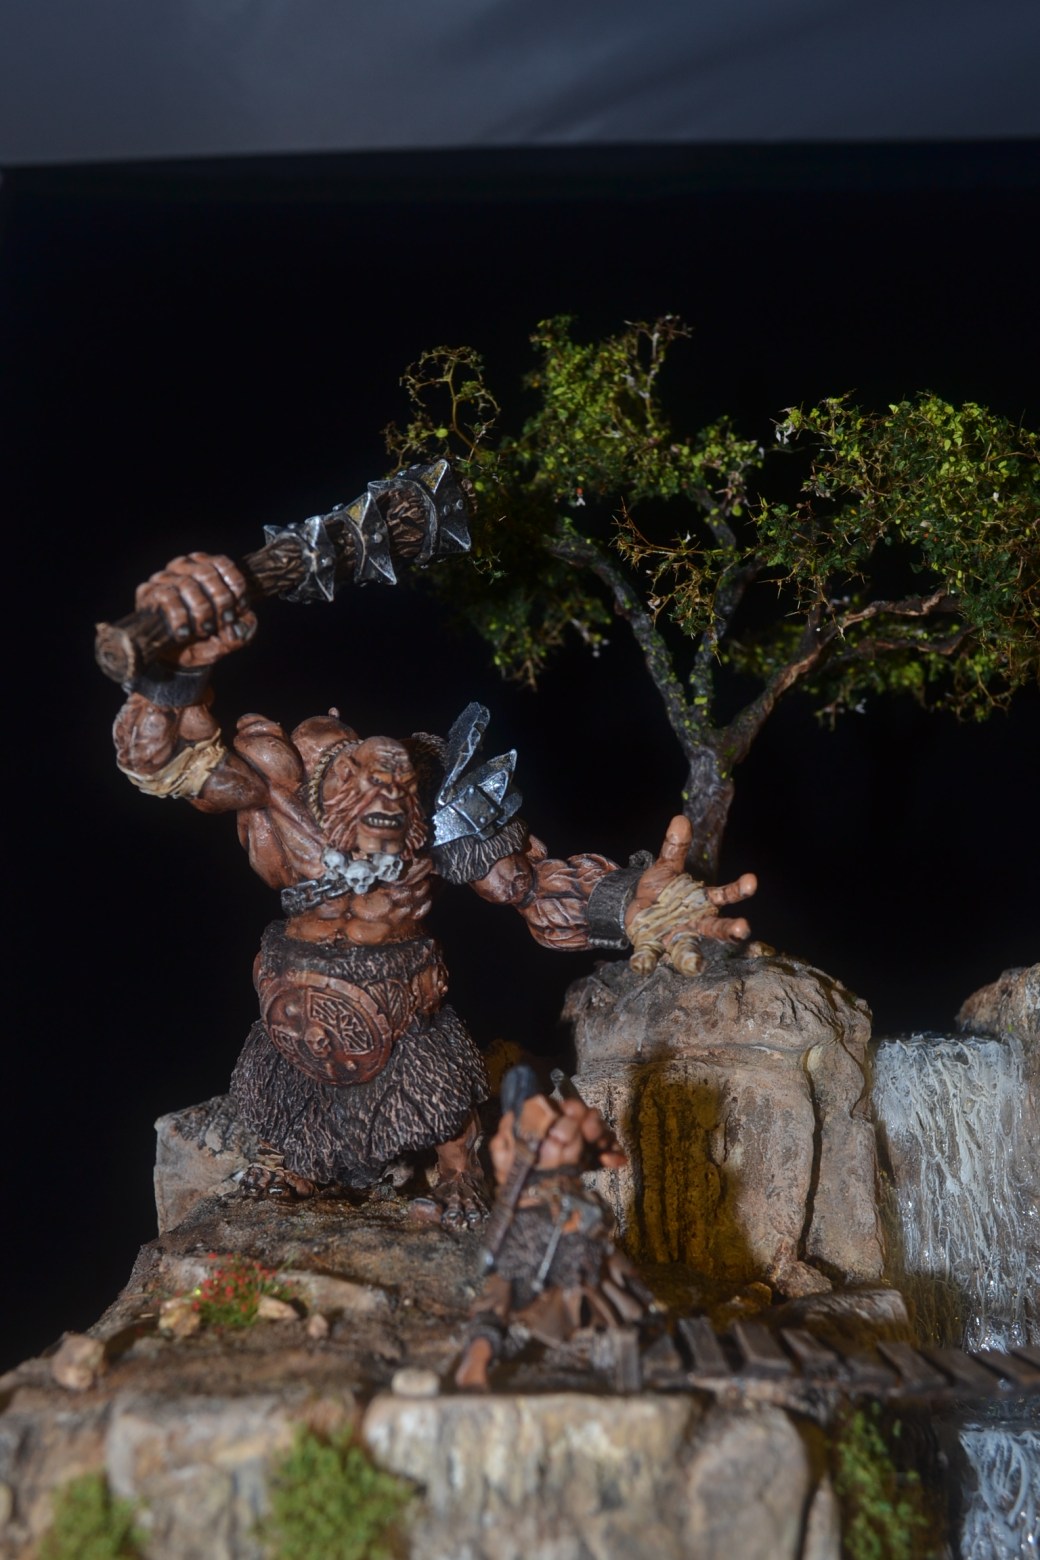
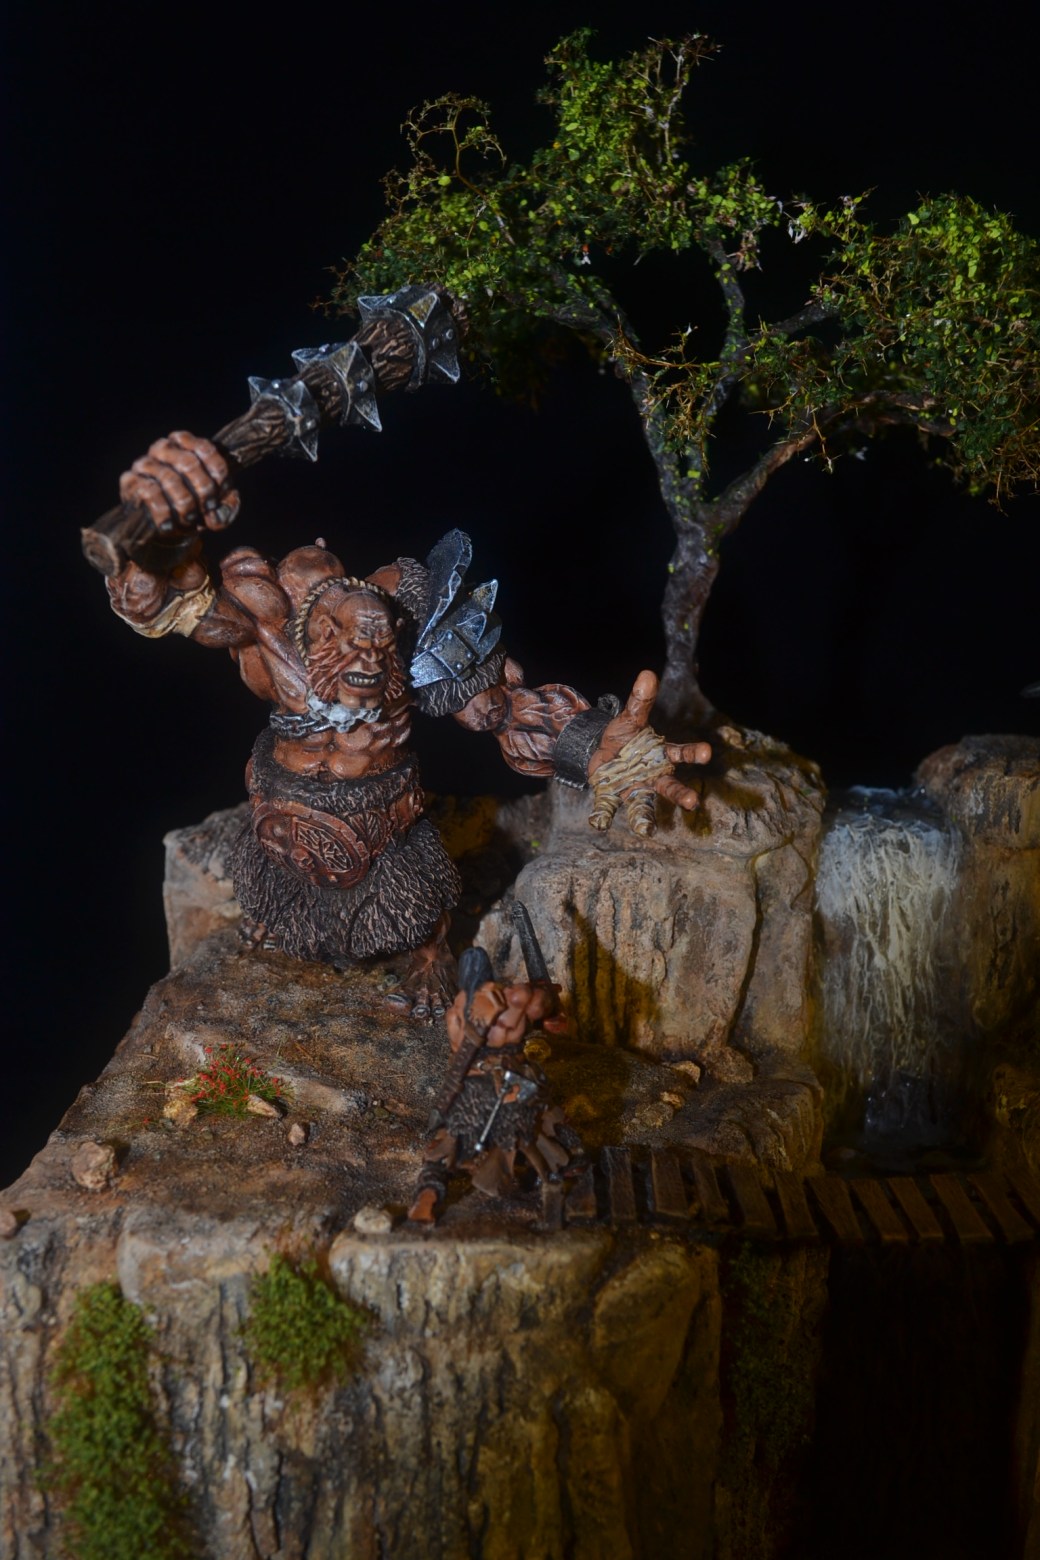
The figure in question is from Reaper and is a Hill Giant which goes by the name of “Krug”. He is a very big chap, solid metal and weighing a ton. Well OK not a ton but very heavy for a figure. So heavy that fixing his arms and head which were all seperate castings into place proved a challenge. Fortunately I go there in the end and once fully assembled the painting could begin. Given the weight, holding the “miniature” and keeping it steady proved difficult at times and painting in instalments became necessary.
Below are various photos of the figure including a couple where he has been positioned on the base and some of the ground work has been done. This coming week will see the fifth and final figure painted and positioned. All being well there will then only be little bit to tidy up so I should get it completed. With the diorama complete you will hopefully be able to get the perspective on this chap relative to the others.
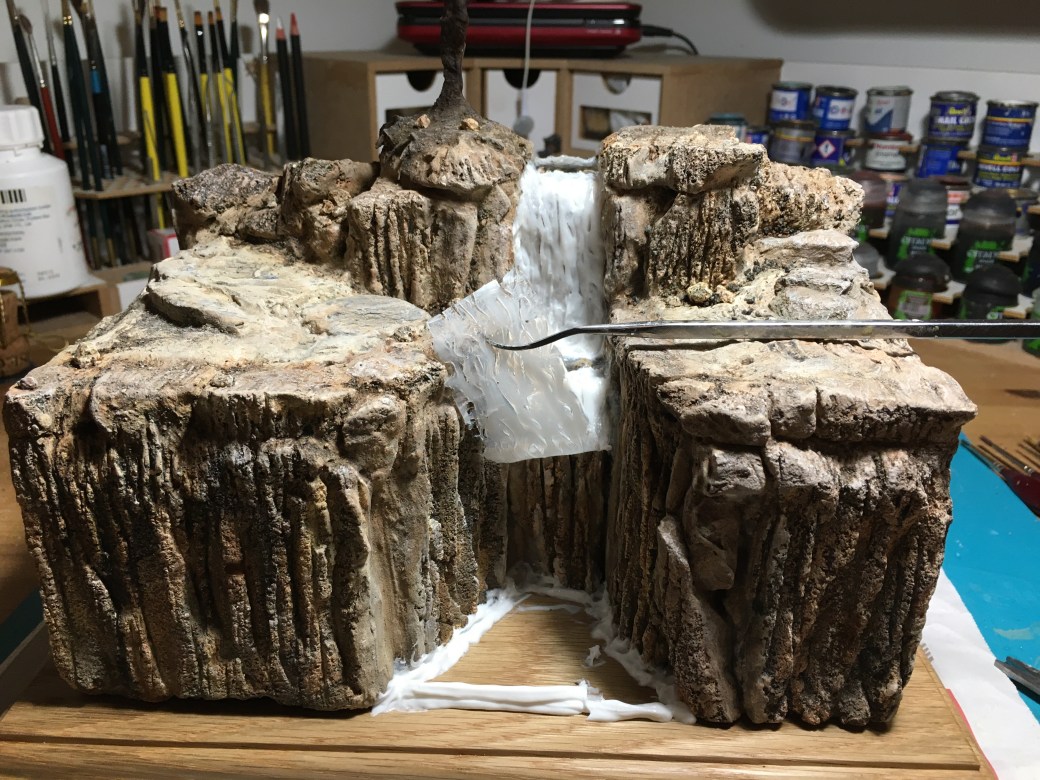
Since my last post, OMG Part 2, I have managed to more or less complete the waterfall and most of the base work. Once all the figures have been put in place some minor additional ground work will need to be done, including some vegetation to add a little bit of colour, but that will come later.
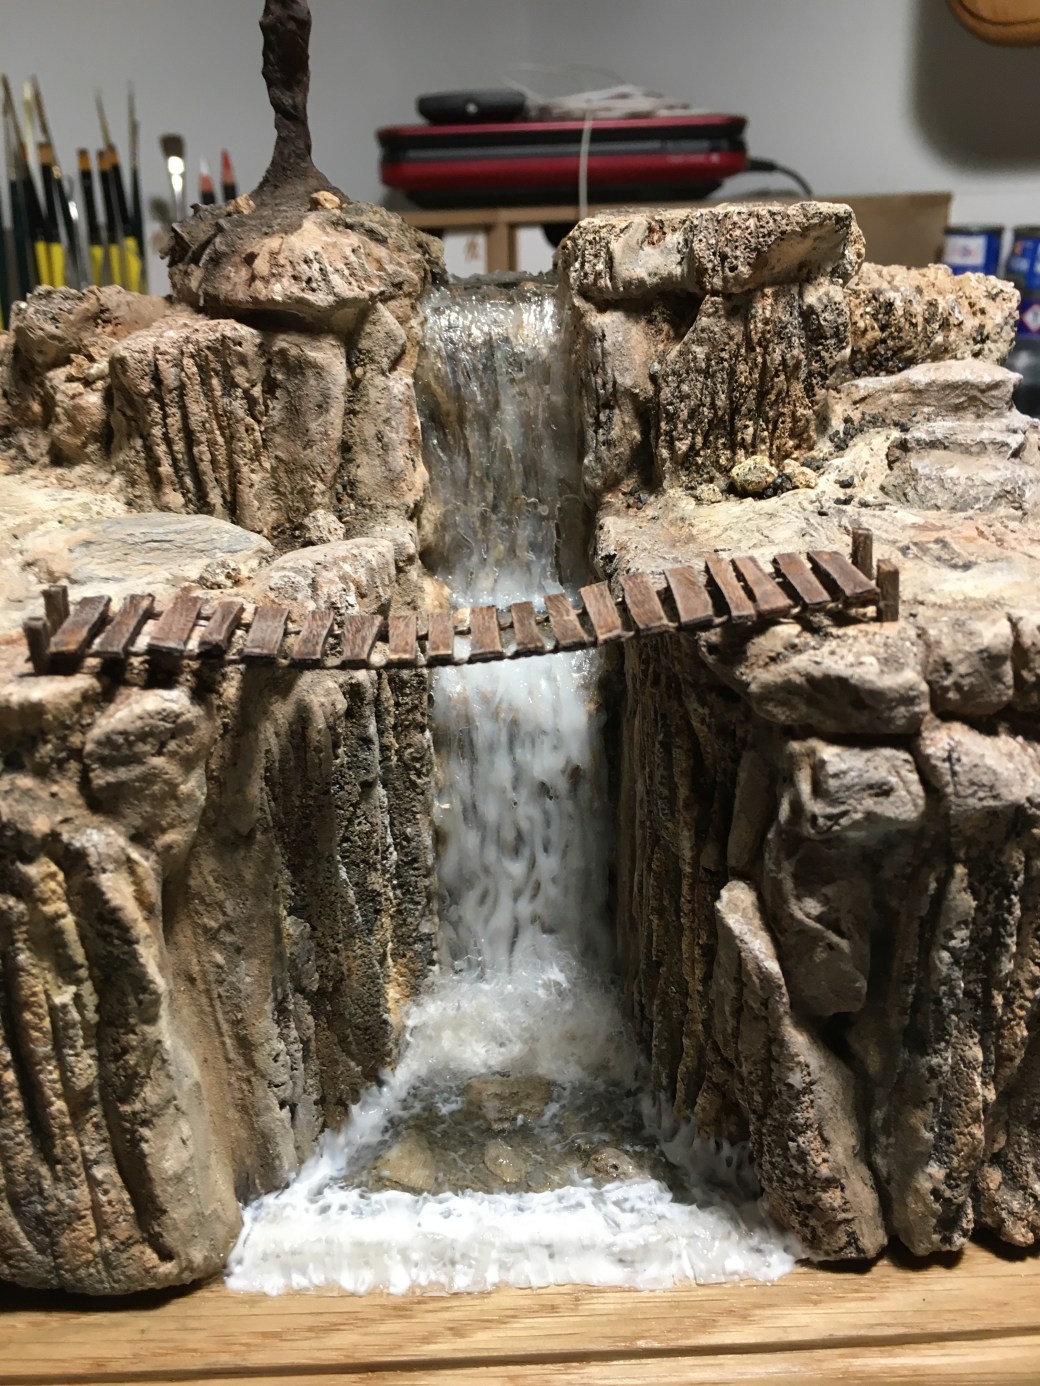
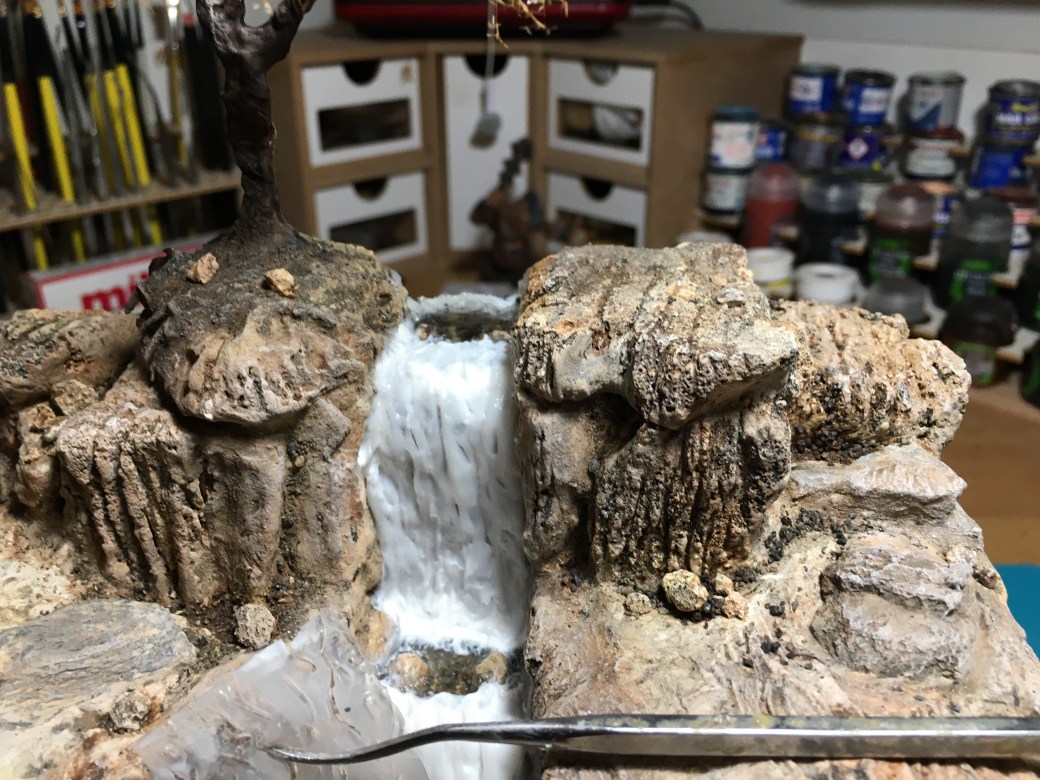
The first two pictures below show the waterfall still drying out. You can now see that the top part has gone clear while the bottom part still has a little way to go. I have also added some mist/water spray to the bottom of the fall. This was done using some type of fabric stuffing that She Who Must Be Obeyed had laying around. The bridge has still not been glued down yet as access to the fall is still required.
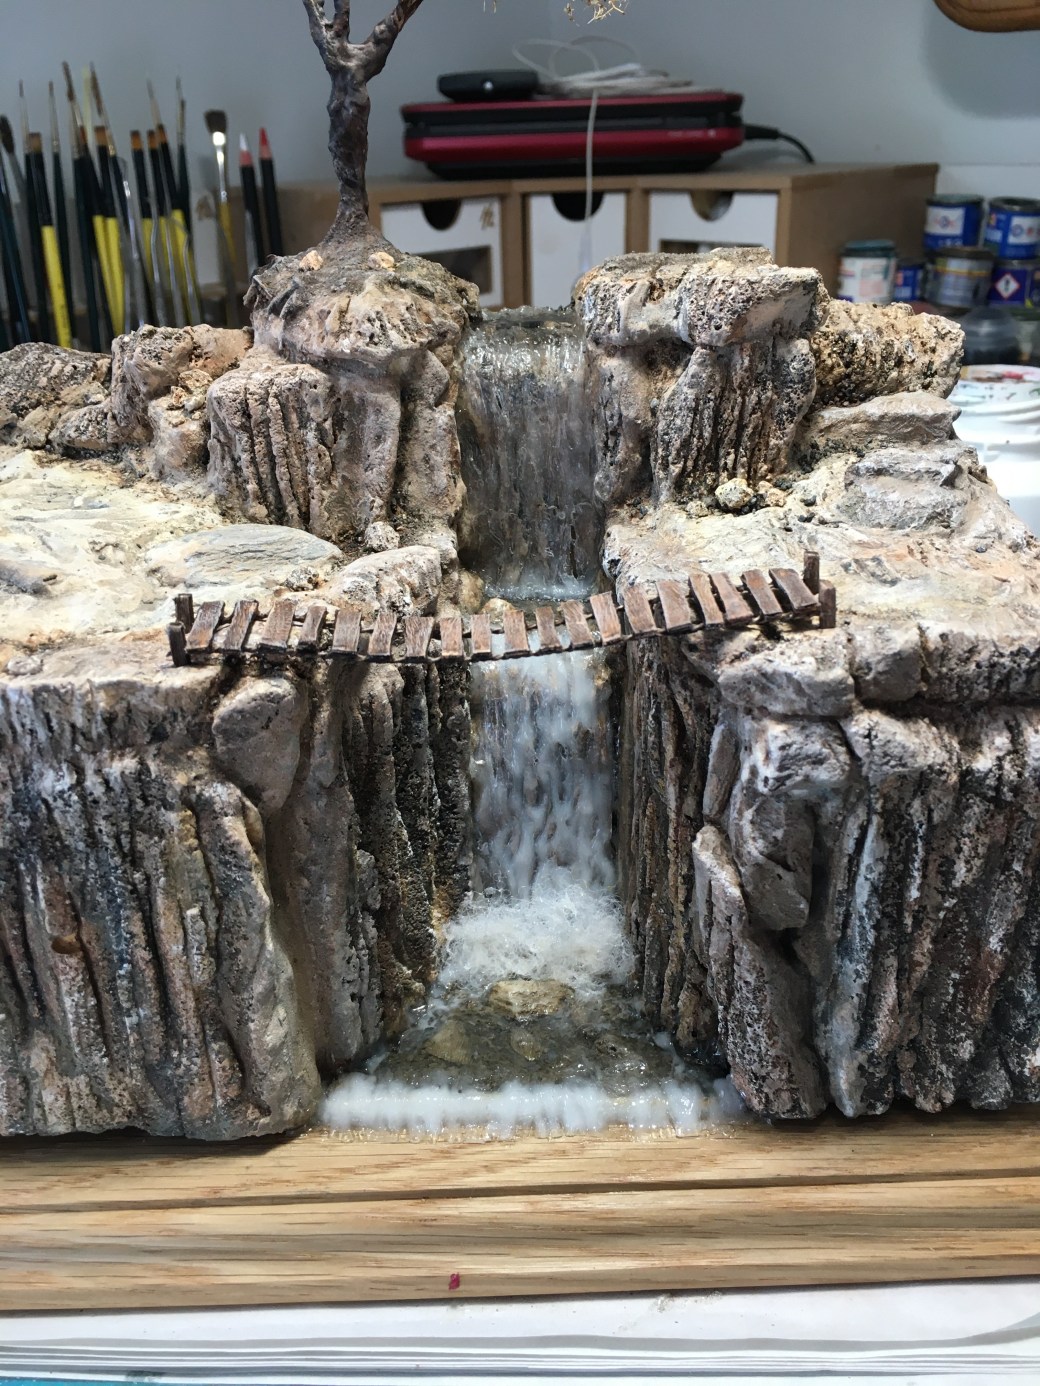
With the bridge taken out again and the waterfall dry it was time to take some white paint and dry brush some highlights to simulate the cascade and hopefully bring the fall to life.
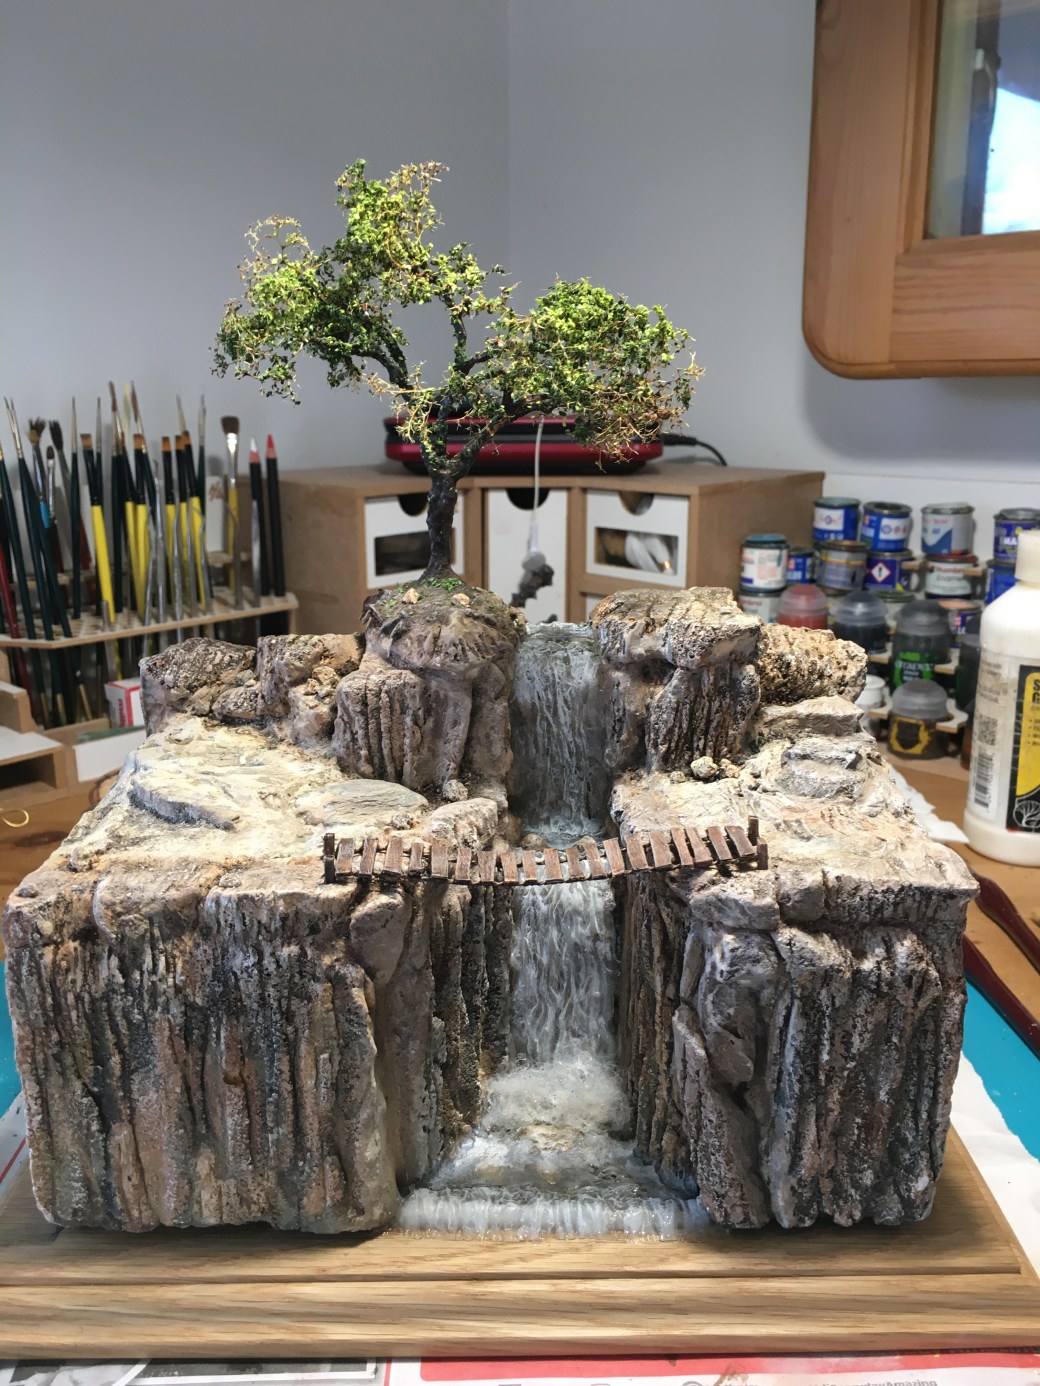
Time now to get the tree leaves on and start work on painting the figures. Until they are done, one in particular, it wont be possible to do all the further work on the base.
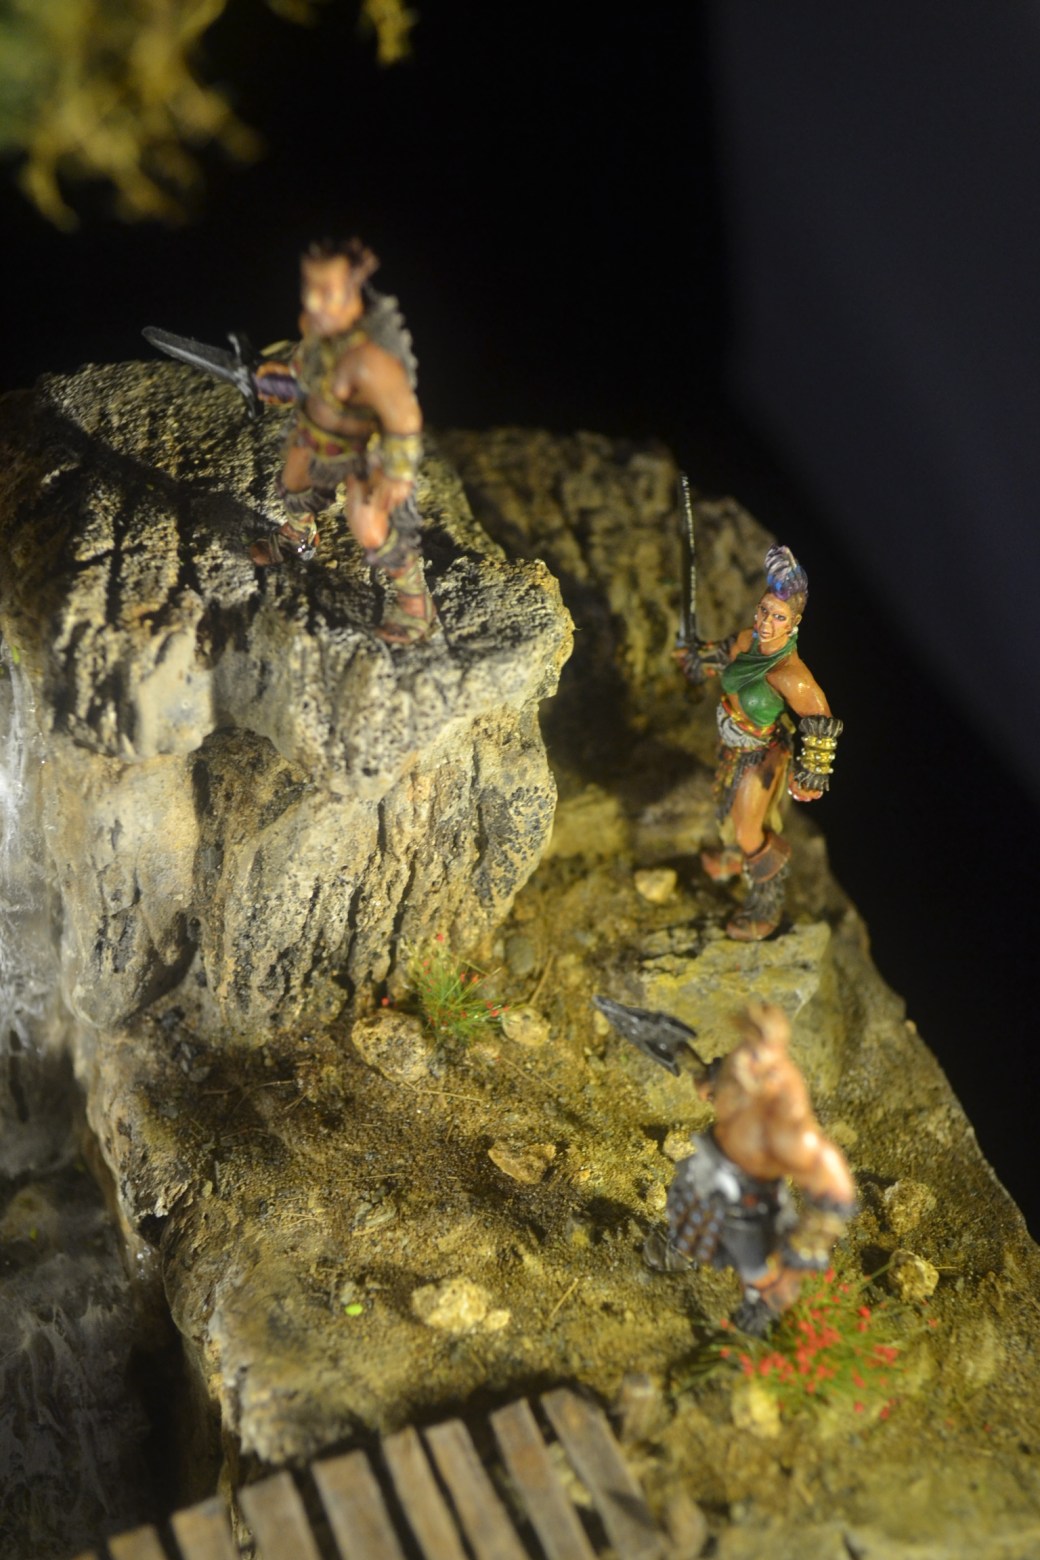
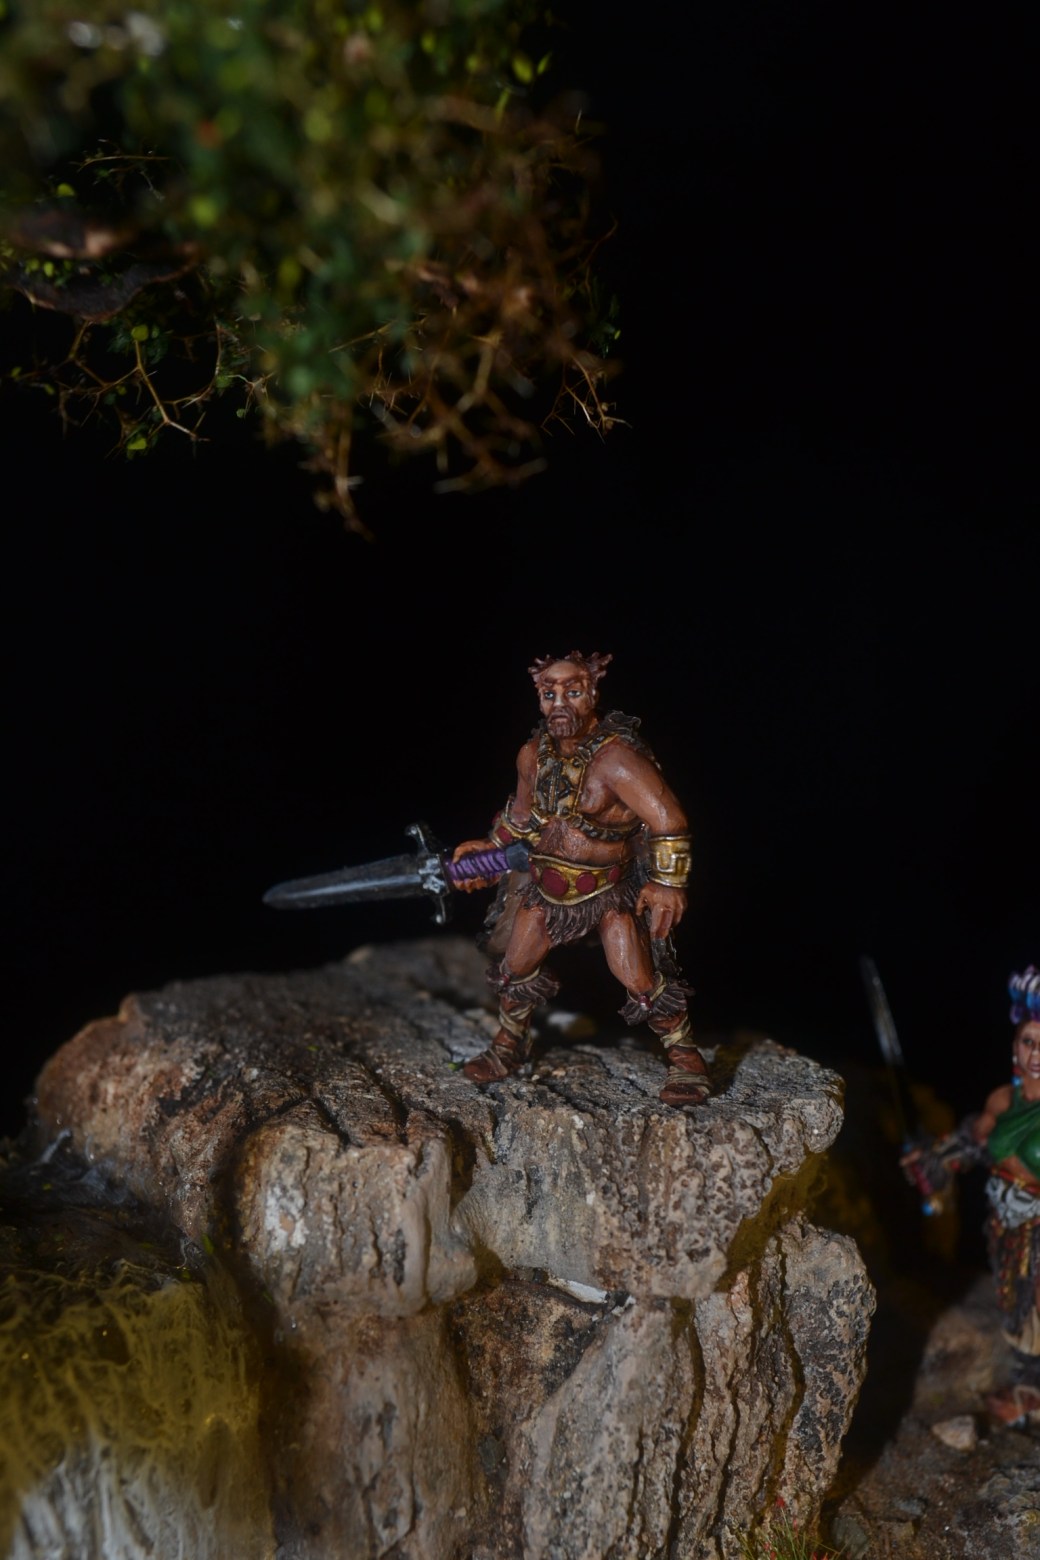
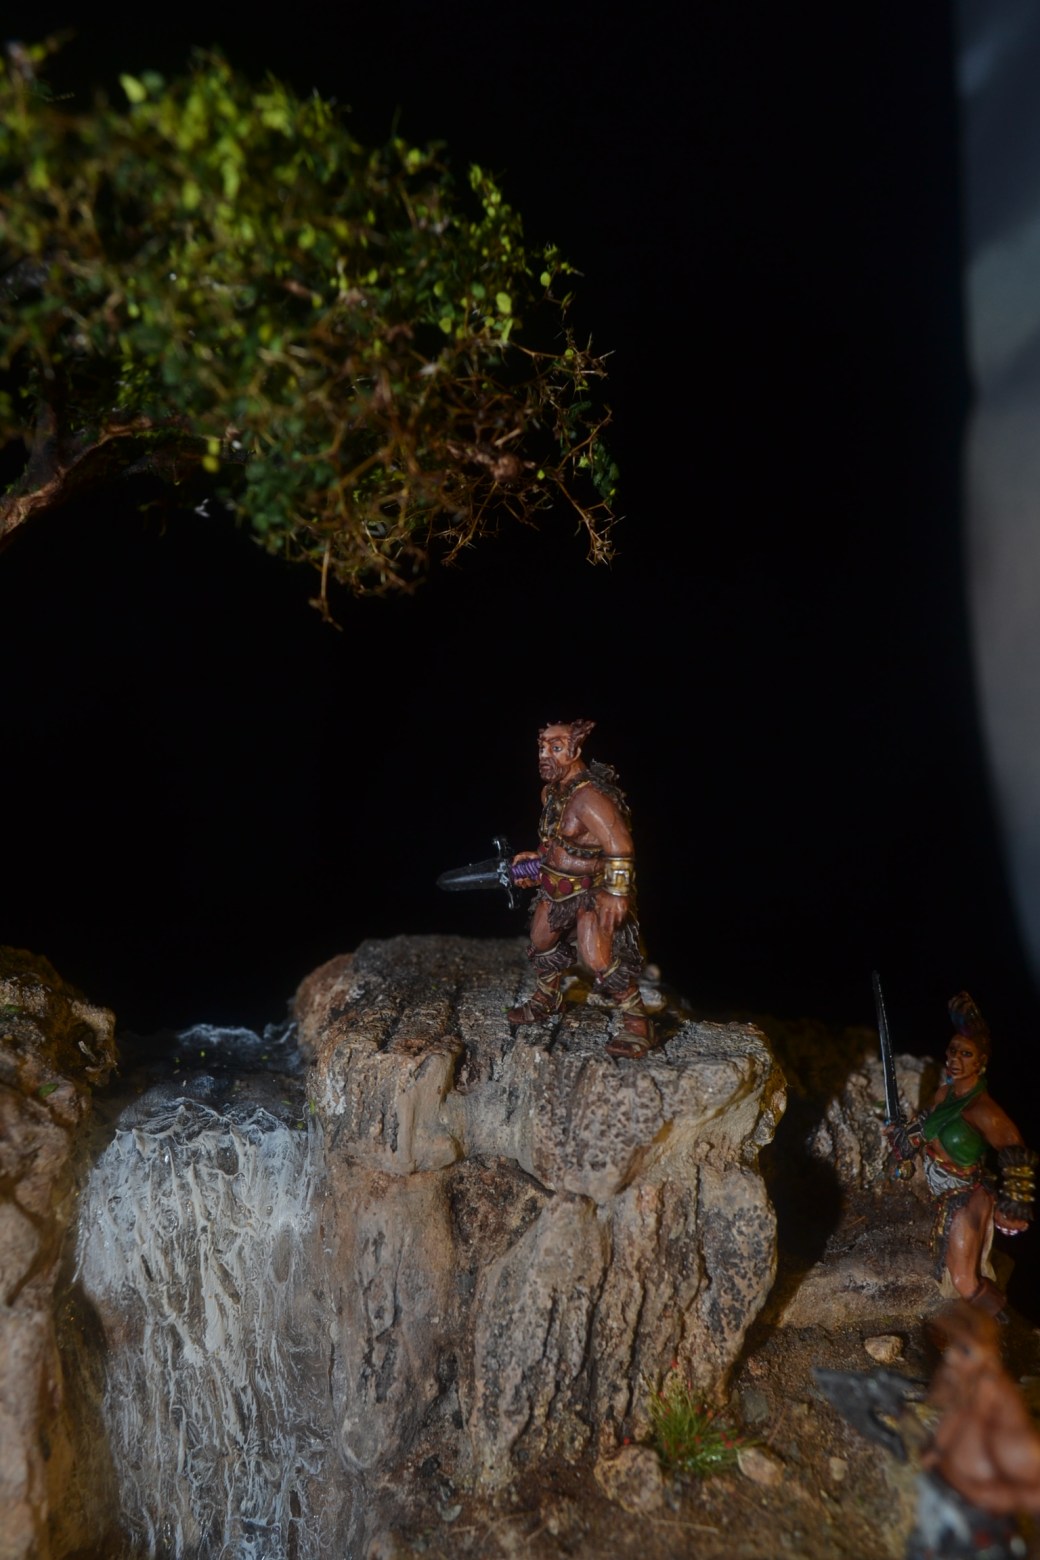
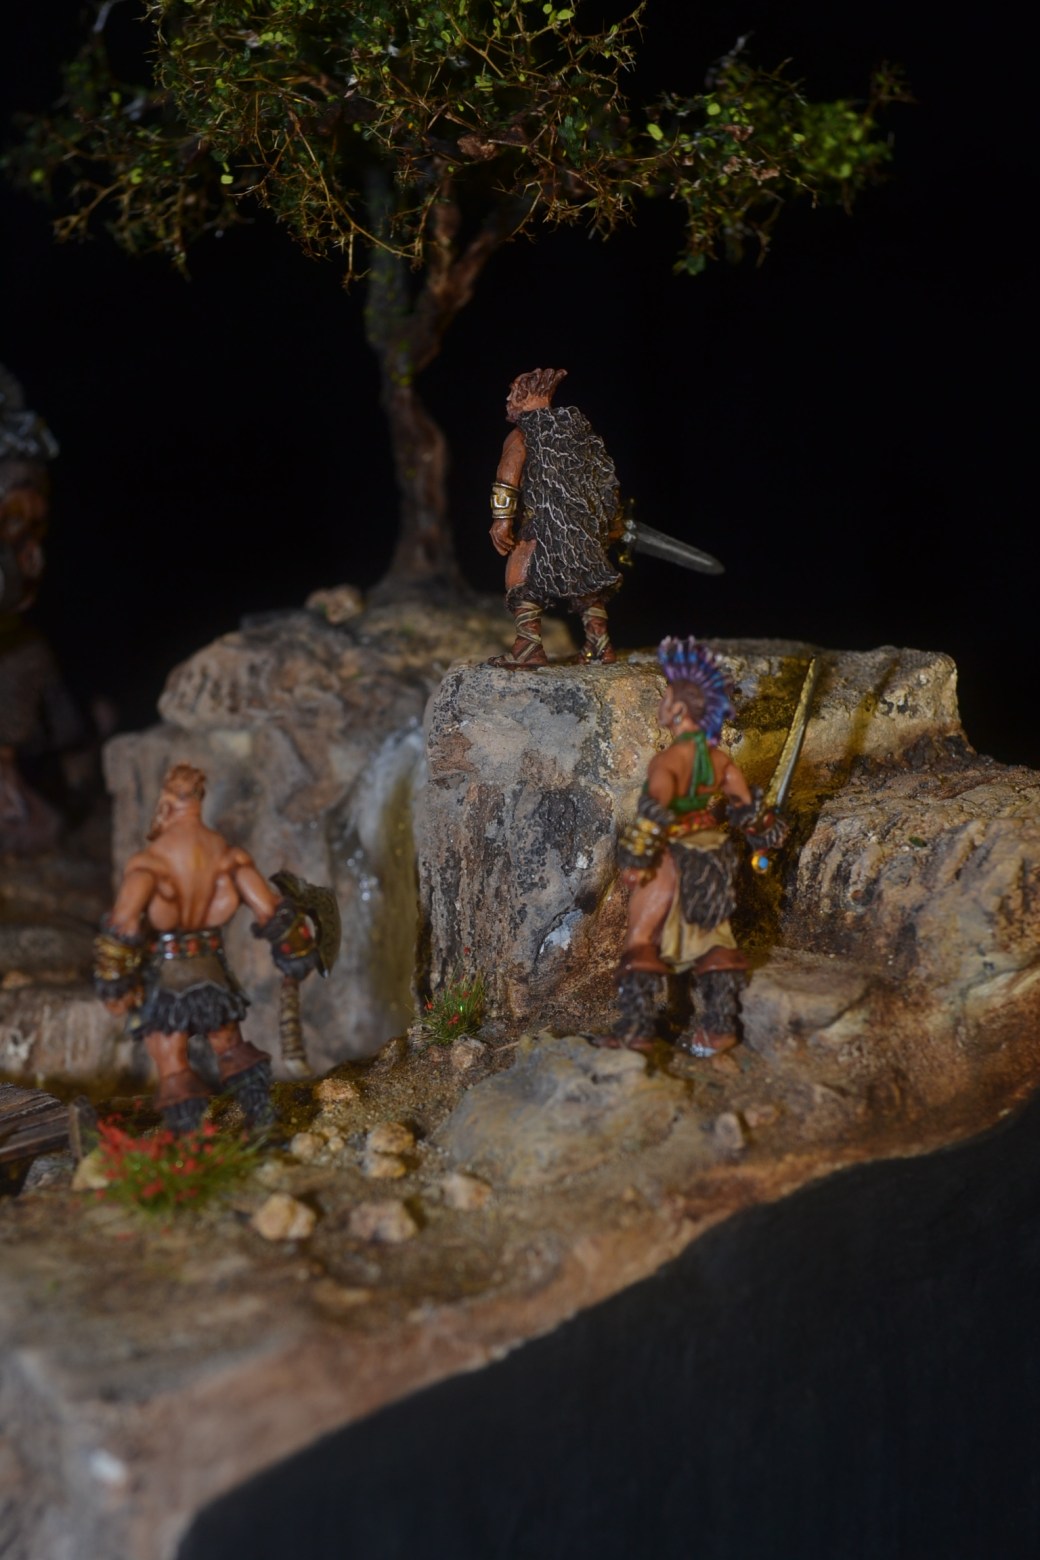
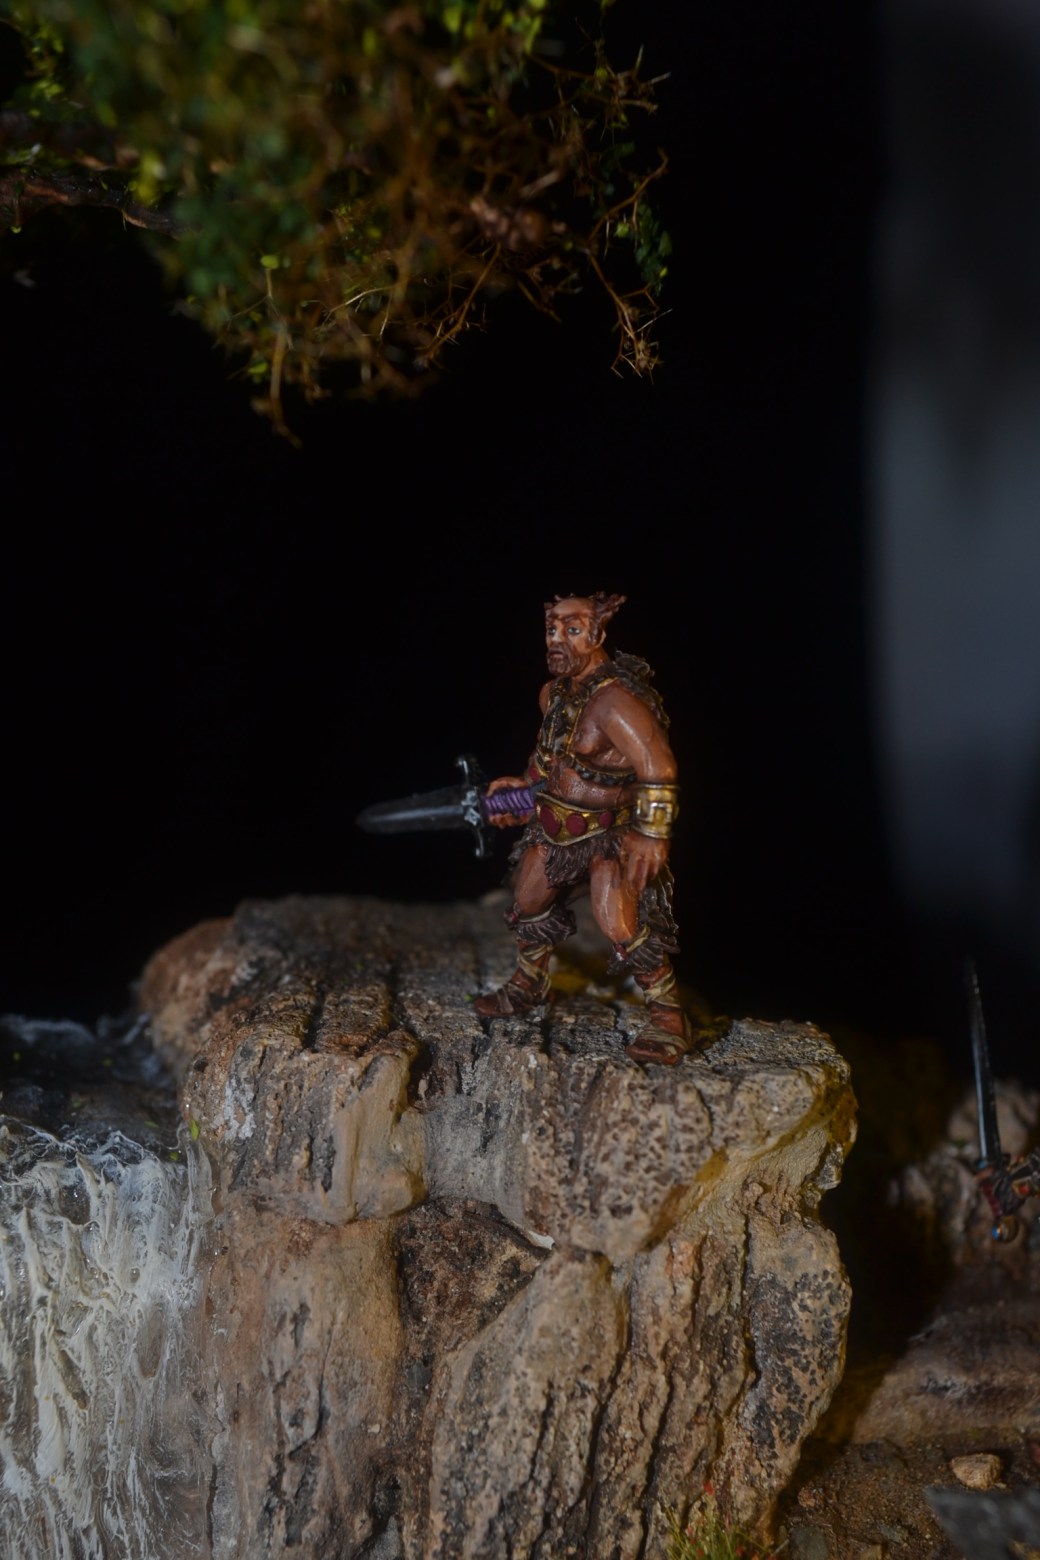
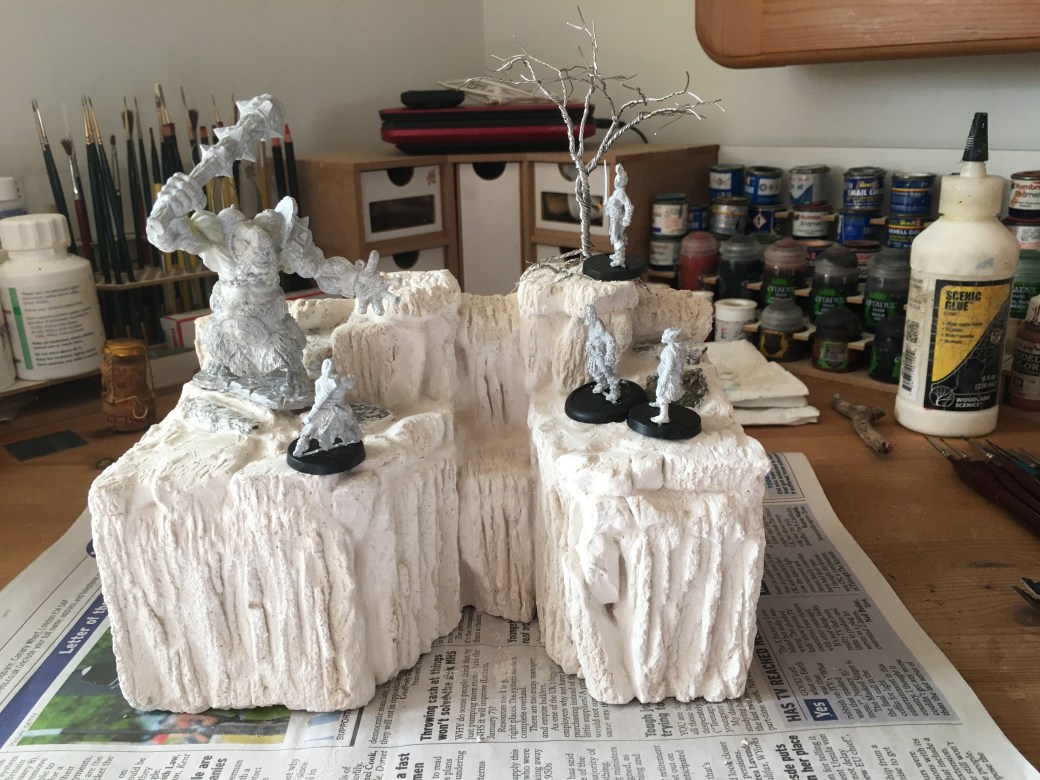
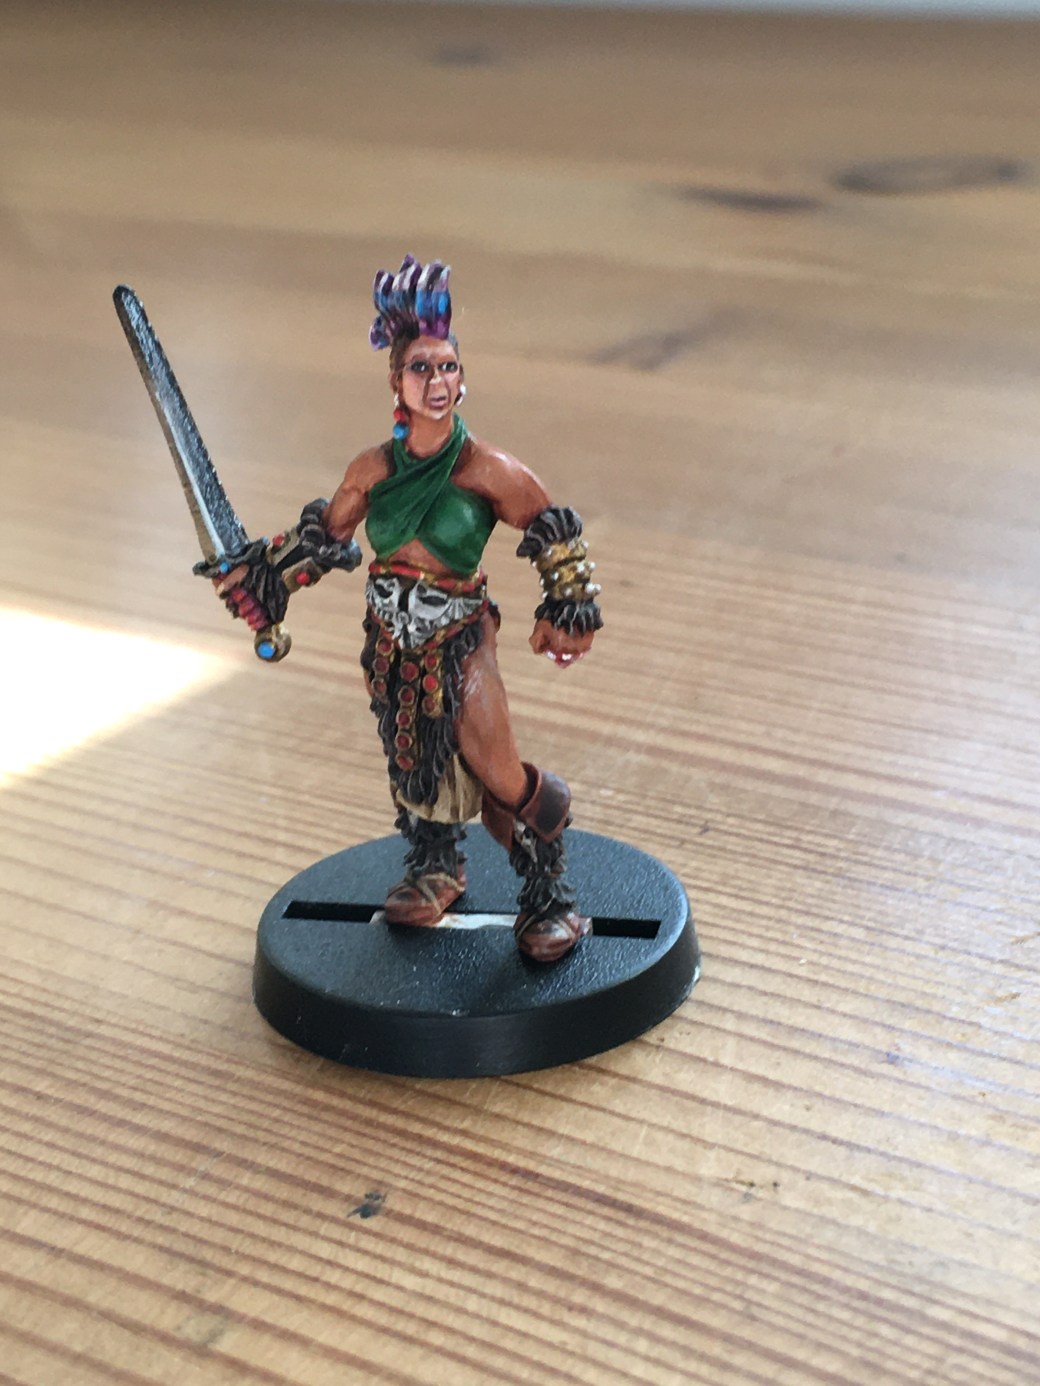
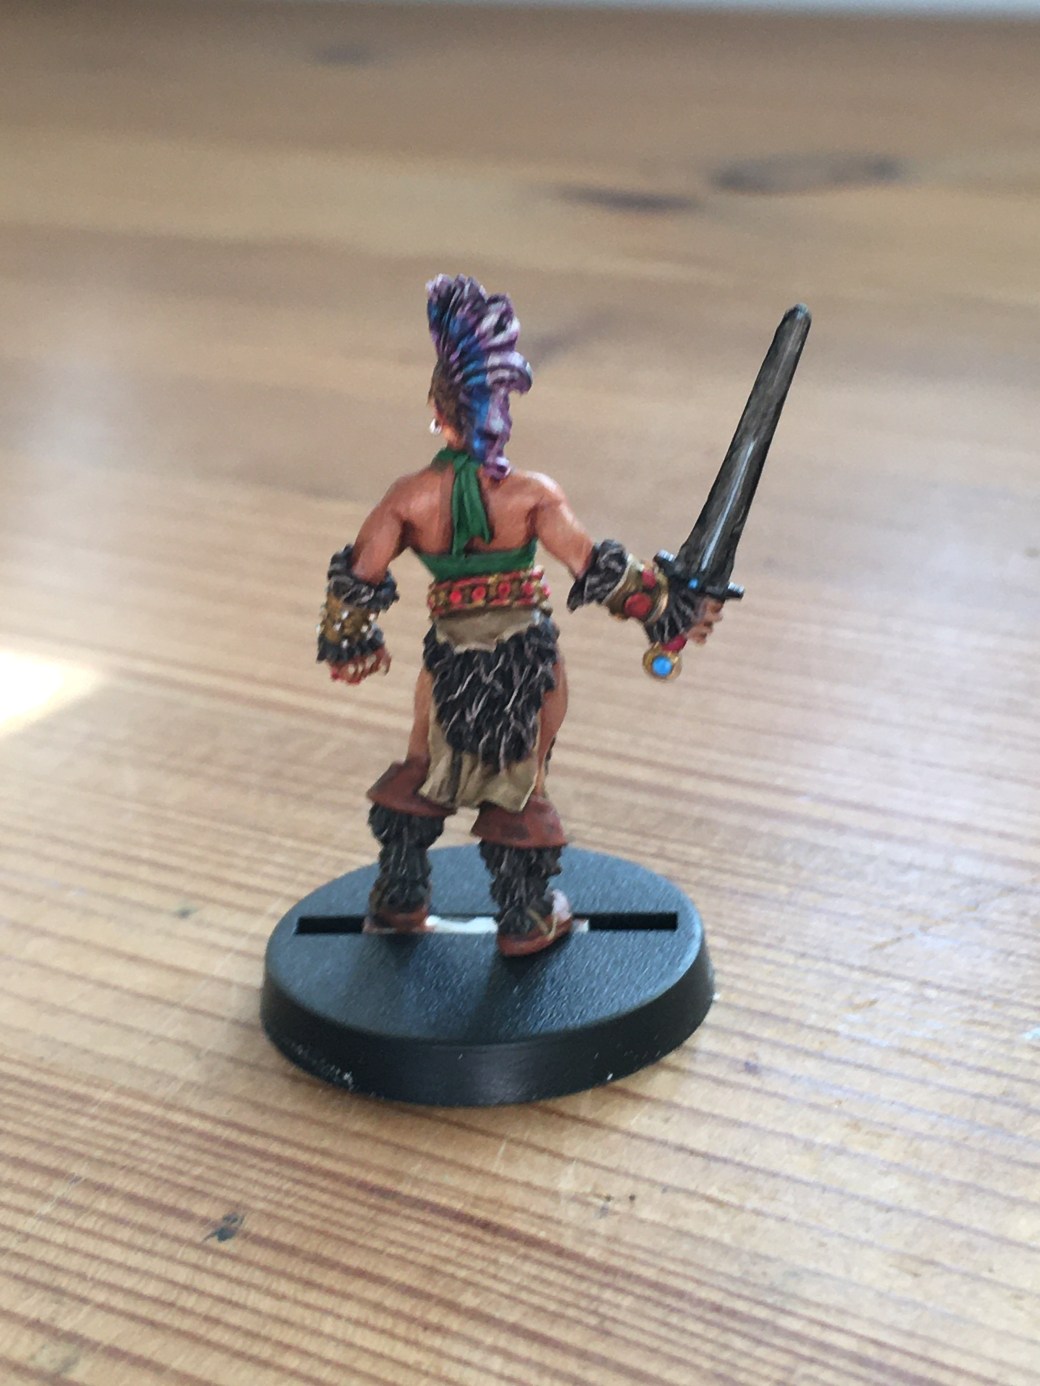
Next we have the first of three figures. In total there will be five. The eyes on these figures were very important. They needed to appear to be looking up for reasons which will become obvious either in the next part or when the diorma is complete. The plastic bases are temporary and purely for keeping the figures upright while taking photos. All three of these figures are from Hasslefree. This figure goes by the name of “Jakevim the Swine”.
This young lady is called “Morwenna”.
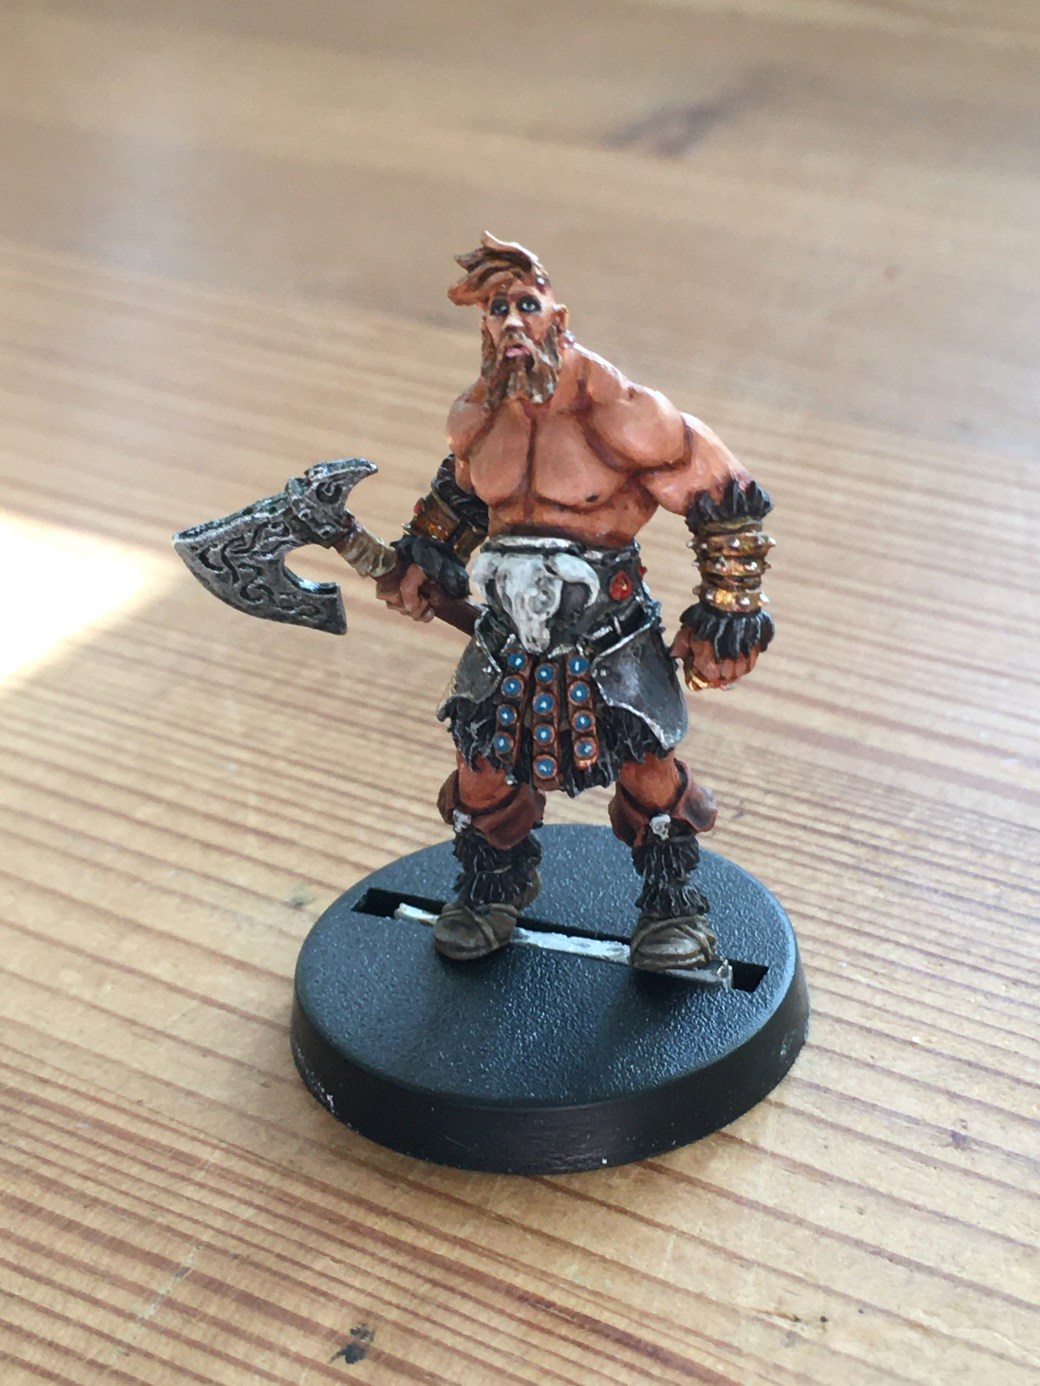
And this guy is called “Hurin”.
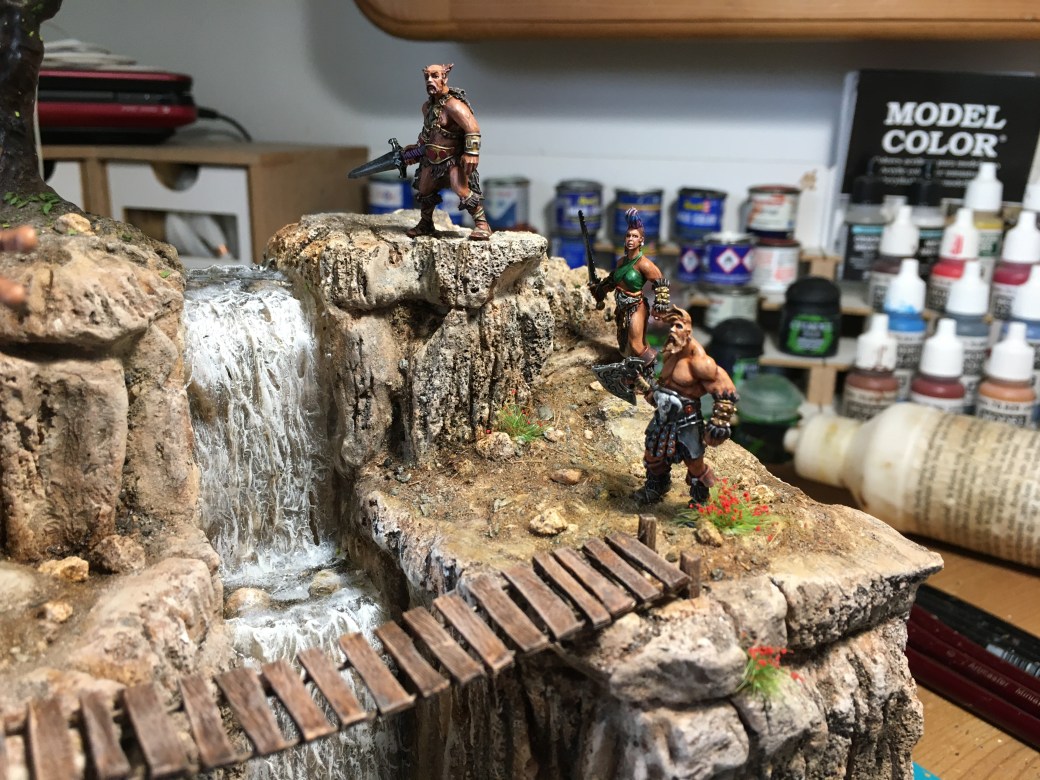
Here we have all three in their final positions. The final layer of ground work on this side of the diorama has now been completed and a splash of colour added with a few plants. I decided to go with more is less and chose red as I felt it stood out.
That’s it for this post folks. Part 4 should see work on the fourth figure and probably the key element of the whole diorama. At that point you will get a very clear image of just what is going on. All being well I should be able to wrap the whole thing up in part 5.
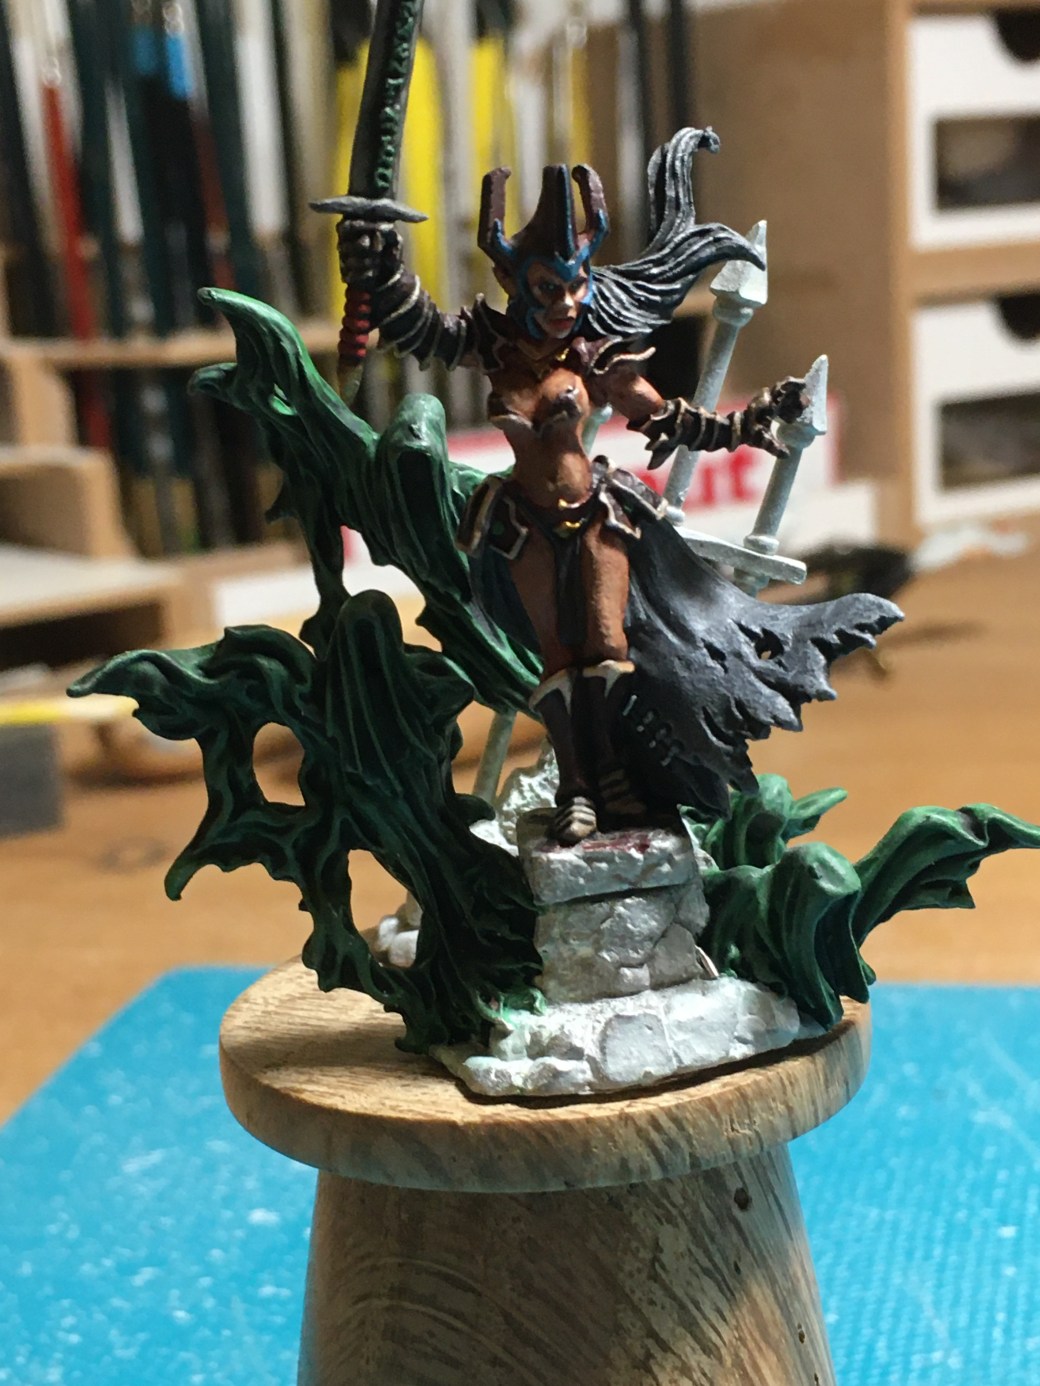
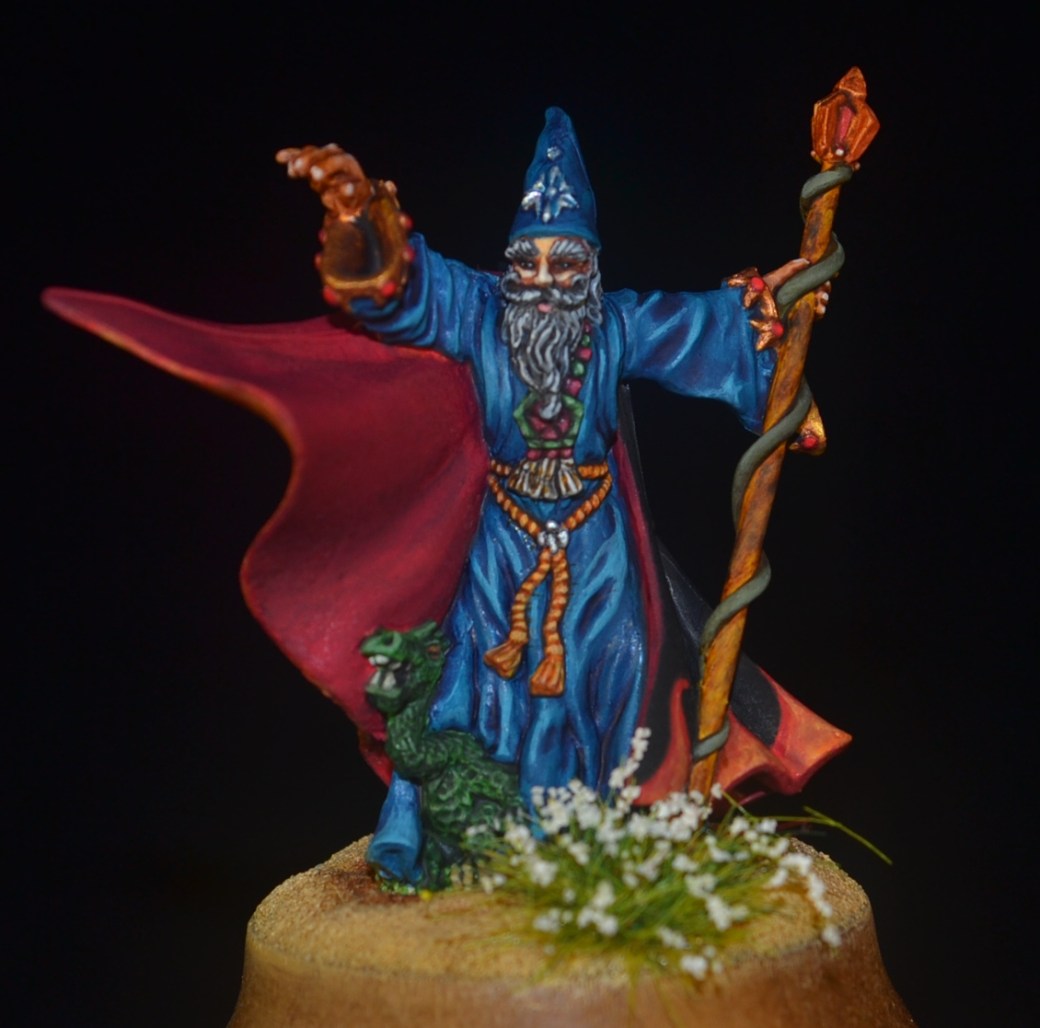
A break this week from OMG! as I promised Ann that I would take part in her challenge. I enjoy painting all sorts of figures but none more so than the occasional wizard, so I didn’t need much encouragement to enter her challenge. The brief was “March Might & Magic” and magic doesn’t come much better than a wizard. I am sure there are other manufactures out there and before too long I will have to check some of them out but for now nobody does a wizard sculpt better than Reaper in my opinion. The figures and the detail in them are to my mind simply stunning. As you can probably guess I am a fan!
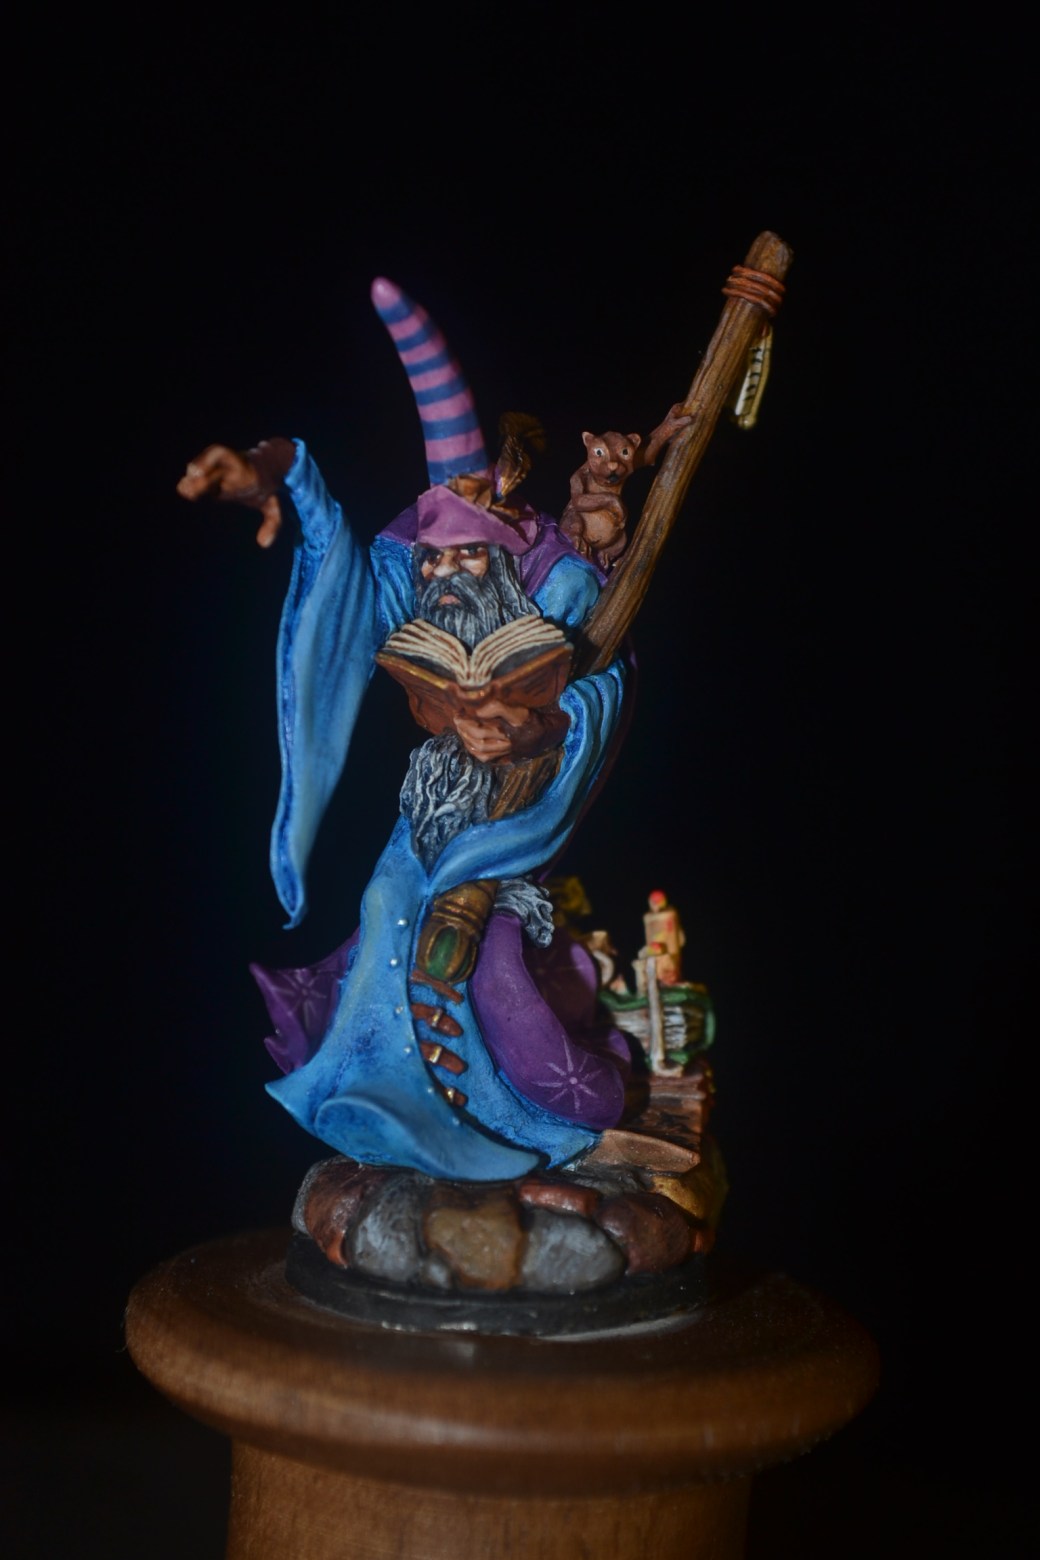
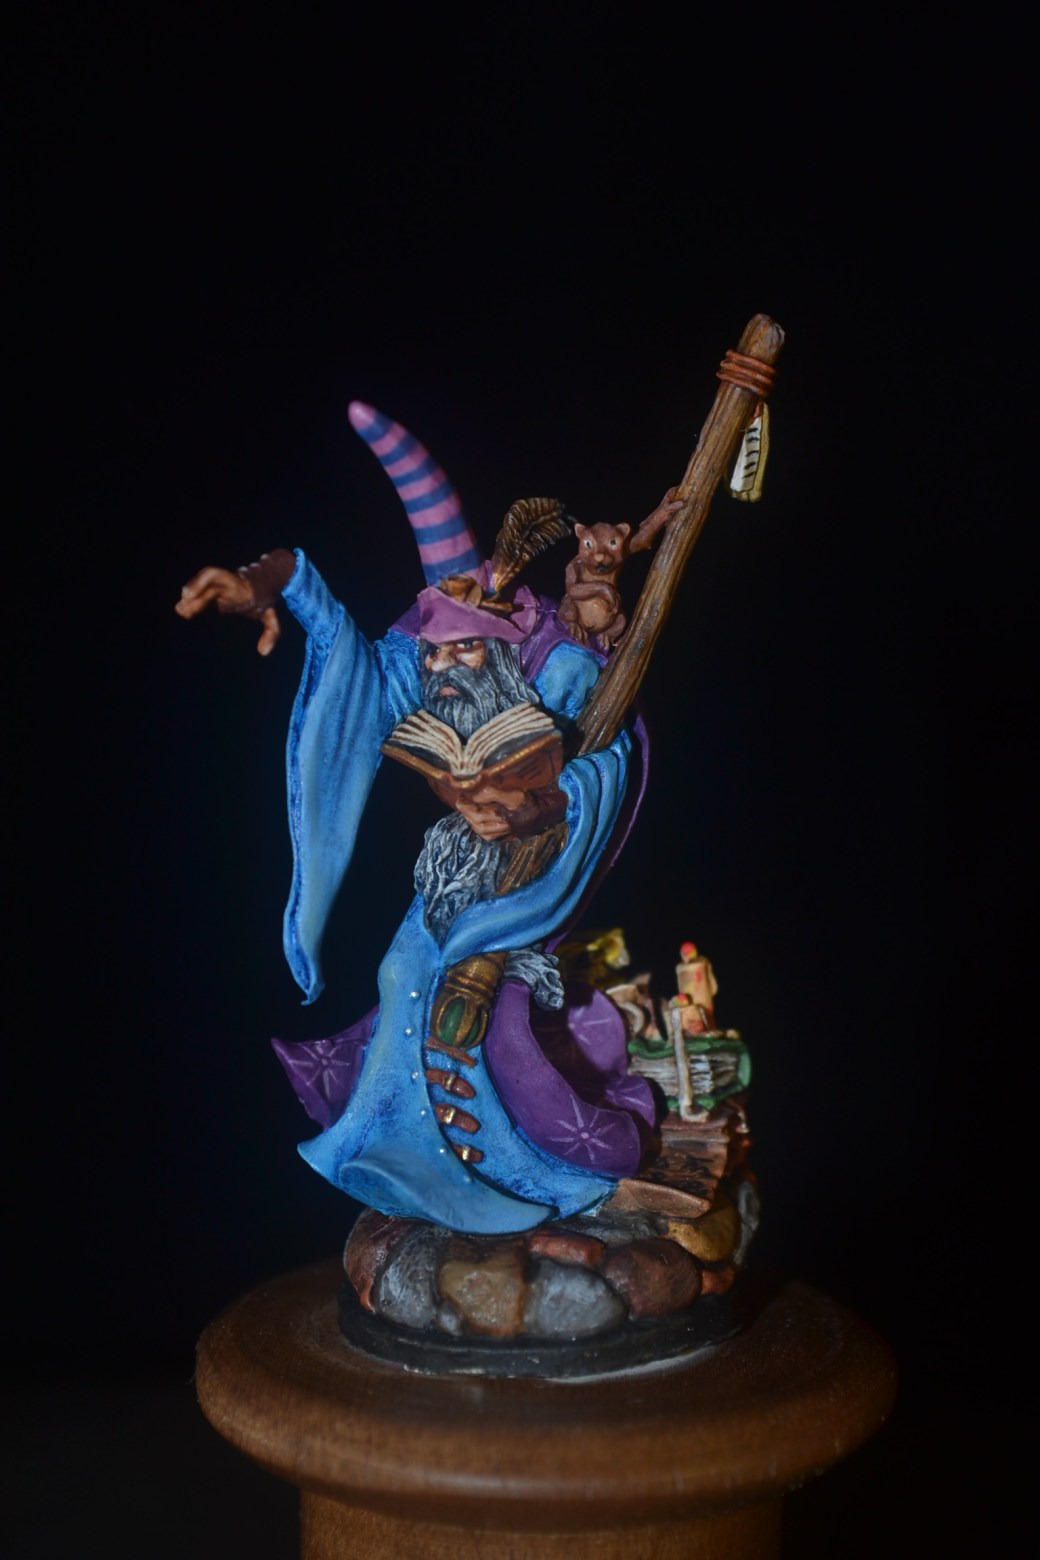
What we have here is “Viharis Tenspire”. A lovely mini which I decided to simply base on one of my neighbours wood turned bases he so kindly does for me. As with most of the wizards their clothing provides plenty of opportunity for free hand painting.
As required by the challenge a picture of the figure in the box followed by the end end result. One of my personal favourites.
Earlier this week it was pointed out to me by “Badktothehammer” that the WordPress phone app had an image on it of the near completed gorge. How this came to be is a complete mystery to me. Whilst I was constructing this post in parrallel with build progress of the model I posted nothing so cannot understand how that came to pass. We will put it down to Gremlins and my incompetence. In any event the image if you did see it is among those you will see below in this post.
Without further ado and putting all the behind us let’s get started.
Firstly a reminder of where I ended up in Part 1.
This week saw the base and figures arrive as anticipated. First though it was time to continue with the build. With the blocks clad and everything dried out it was time to use some good old filler to fill the various gaps and to build up the upper base work.
The next few images, all very unexciting it must be said, show the base being turned up and down while filler is being added. This is a slightly tedious task but an important one and slowly the outline of the base is coming together.
As the filler dries some more carving was needed to blend with the plaster board. So far looking good and I am pleased with the way it is shaping up.
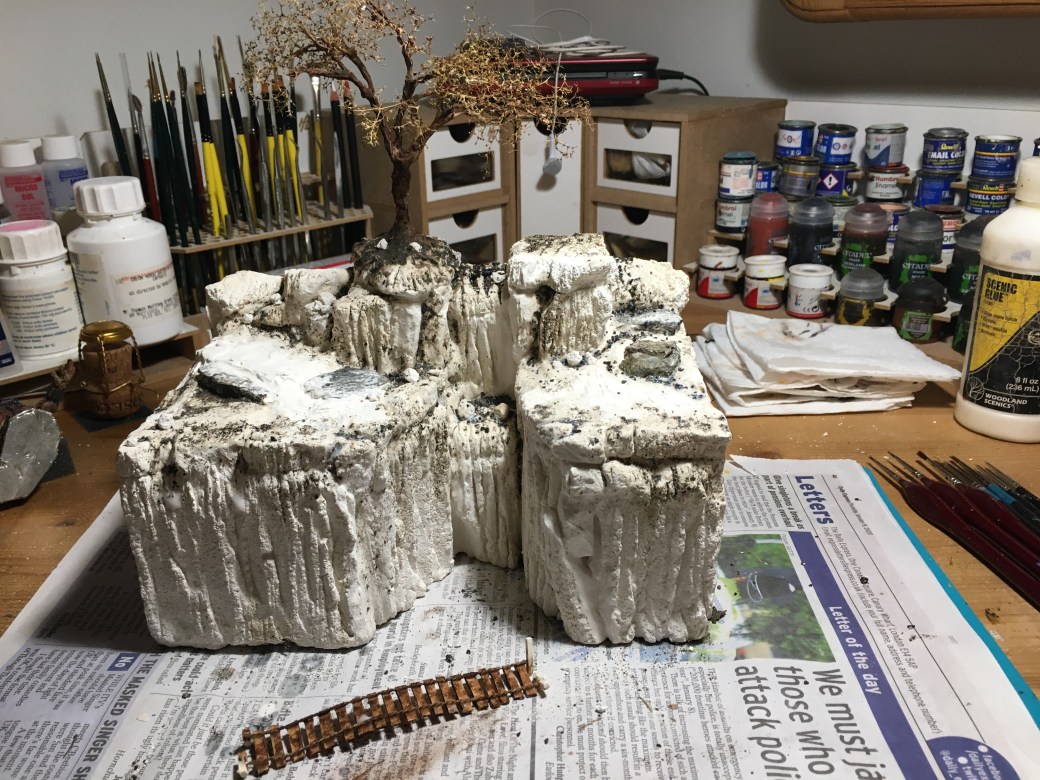
Time now to set things to one side and allow to properly cure and dry out. In the meanwhile time to start working on the tree and where I plan to put it. I wont go in to detail on how the tree is built because I have covered this before and only recently I posted a two part tutorial in TIM’S Memory Monday. The image below shows the wire armature constructed and initially positioned.
Another feature of the base is a wooden bridge across the gorge. The reason for this will become more obvious when the figures get to be placed into position. The bridge was made using twisted wire and wooden coffee stirrer pieces. It will be fixed into place later once it has been painted and more ground work has been done. I did wonder about giving it side supports but decided against it as I want to avoid it blocking out too much of the waterfall.
Next we have an image showing the tree put in place using some Milliput and the finer branches added.
Next work started on adding some finer ground work and doing some painting. More groundwork will be needed but will only be done once the figures have been painted and can be positioned on the base. As well as painting the base the tree was also painted along with the bridge.
The next two images below show the tree and bridge being painted and some additional ground work.
Next up it was time to paint the gorge. This was done using a variety of colours – Burnt Umber, Yellow Ochre, Burnt Sienna, Black and White. I used some Woodland Scenic paints as the base colours but then moved to oils diluted with white spirit. The nice thing about plaster board is the paint soaks in and produces natural highlights.
After some painting I began to start the waterfall. The first step was to lay down the top three edges using Woodland Scenics Water Effects. This stuff is thick and does not run. It goes on white but after time, quite a lot of time if it is applied thickly like here, it eventually dries clear. Behind these will be added Realistic Water, in this instance produced by Green Stuff World as their UV product can be dried in seconds using a UV torch.
The next step was to create the waterfalls using Woodland Scenics Water Effects once again. This is done by simply putting down the effect in strips and once dried applying it to the model. Woodland Scenics have YouTube articles on how to use their stuff so rather than me attempt to explain how to use them you would be better to watch the videos they have on offer. Link below.
The next image shows the second waterfall being added with the first having already been done above it. Despite its white appearence it will all dry clear and then it can be highlighted. As you can also see my wooden base has arrived and the gorge has now been glued to it. The water effects has also been added to the bottom of the base to seal the connection between gorge and base. Realistic Water will be added to this and if not sealed will leak everywhere.
Next a test picture showing the bridge in situ. Not permanently fixed yet and nor will it be for a little while but I wanted to make sure I was happy with it. So far so good as far as I am concerned.
Now a couple of images of the lower pool area being worked on. Firstly with the ground work primed and then with it painted. Notice the top waterfall cascade is starting to turn from white to clear. Only taken 48 hours so far!
Happy with the progress being made but much, much more to be done. Figures not even started (there will be five of them in total), more ground work to be done, tree to be “leafed” and waterfall to be finished to name but a few. We will see how things go as I also need to do a figure for Ann’s challenge too!
In my recent Miniatures and Musings post I made reference to a new project – OMG! – a working title which may or may not change in due course. To those of you of an older generation OMG! is short for Oh My God! I’m sure most of you were well aware of that but I will hold my hand up and say most of these text abreviations have had to be explained to me by my lazy kids who cannot be arsed to type something out properly.
At this stage I cannot be certain how many posts this project will run into, best guess would be half a dozen at most. It isn’t the biggest project by any means but the nature of the build will require a fair bit of drying time which may well stretch things out. What that will allow me to do though is run a few other things in parrallel while I am having to wait. I know some of you like Work In Progress posts so the aim here is to work bottom up and end with the finished model. At this stage I don’t want to give too much away, partly because all to often there is a need to adapt things part way through due to unforseen circumstances. However, start we must and here is the first post.
The base I am aiming to create is essentially a gorge. I want cliff edges left and right with a waterfall slightly off centre and a tree somewhere on it too. The tree and the gorge are intended for scale which will become more obvious I hope when the model is completed. Having said that it wont be really true to scale as to do so would require an enormous base but the illusion is all I am looking for and hoping to achieve.
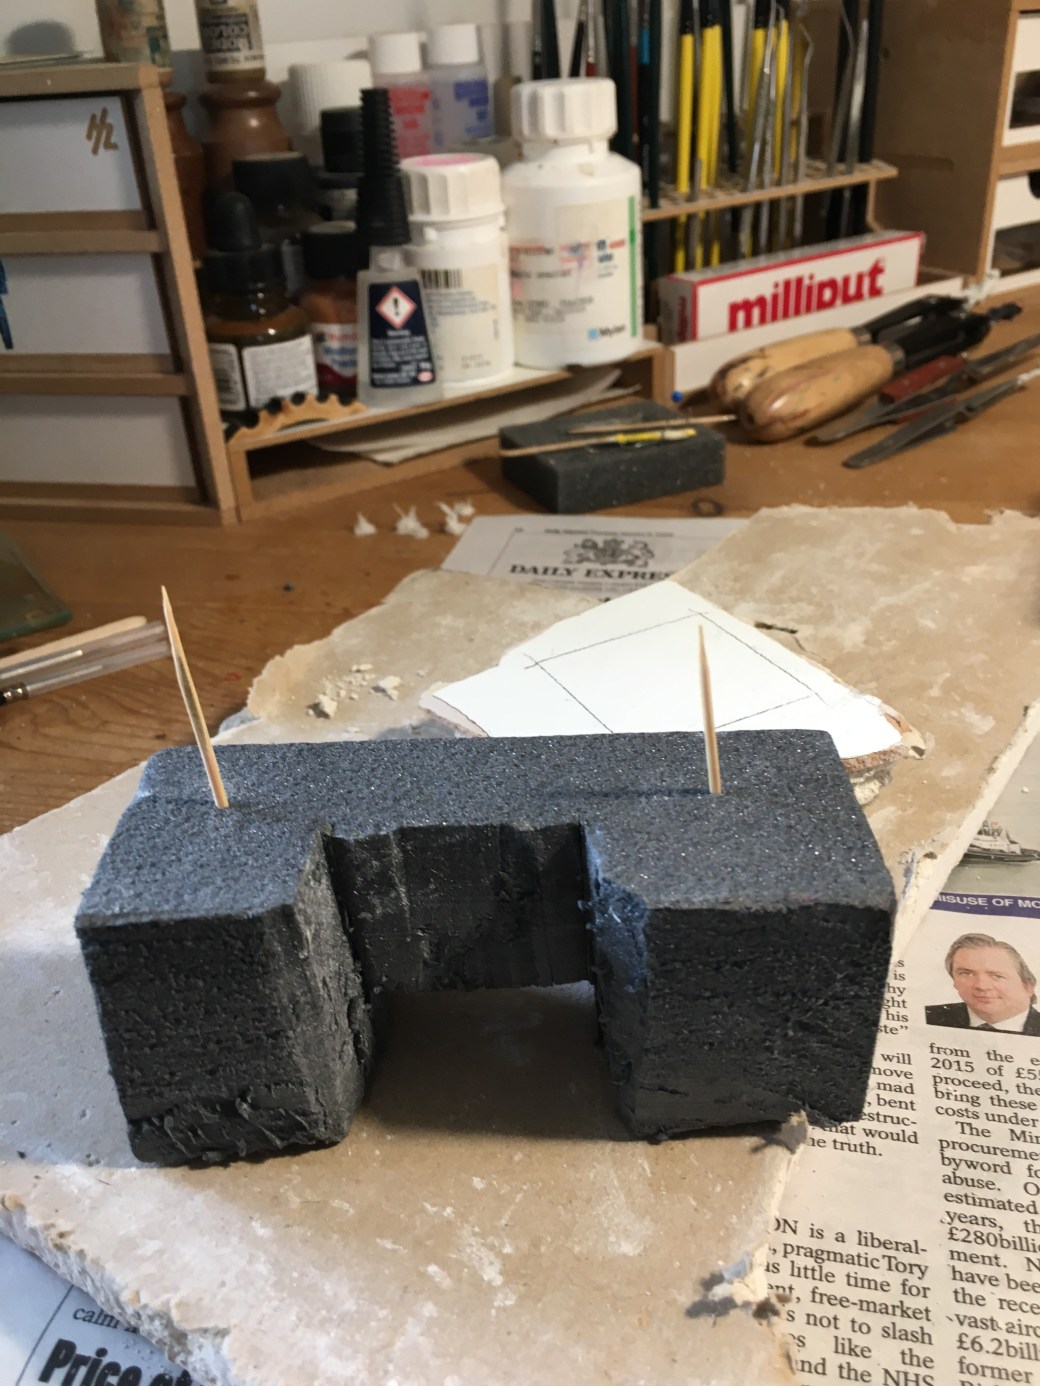
I decided that I didn’t want a big base but it did need to be dramatic. I managed to find a nice wooden base on ebay from a guy I have bought from before which had the dimensions 255mm x 155mm. It is now on order and should come within the next week or so. I didn’t need the base to get started so my first job was to dig out some styrofoam blocks from my modelling boxes stored in the garage. I also dug out some plaster board while I was there too.
As I have mentioned to a couple of people recently, plaster board is in my opinion great stuff to work with. In this instances I wanted it to clad the styrofoam blocks. The image below is of two base blocks glued together having first been shaped to outline the gorge. An elastic band was used to pull them together and cocktail sticks were used at the edges to stop the elastic bands from biting into the styrofoam.
As I wanted the build to go higher I set about working on the next level while the first was drying. Cocktail sticks would be used along with PVA glue to eventually attach the upper build to the lower build.
A rough outline of the gorge in styrofoam was completed. Time now to start on the cladding.
Sections of plaster board were bit by bit glued to the styrofoam blocks. Each was roughly carved to create the cliff like appearance that I wanted to achieve. Gaps between the pieces at this stage is not important as they will all get filled in due course
Piece followed piece followed piece until eventually the blocks were covered to the extent that they needed to be.
Now it was time to set everything to one side so it could all properly dry out. The base and figures I ordered are due to arrive next week which means I can work on them as I wait for future parts of the build to dry. For now though it is time to go off and do something else while I wait.
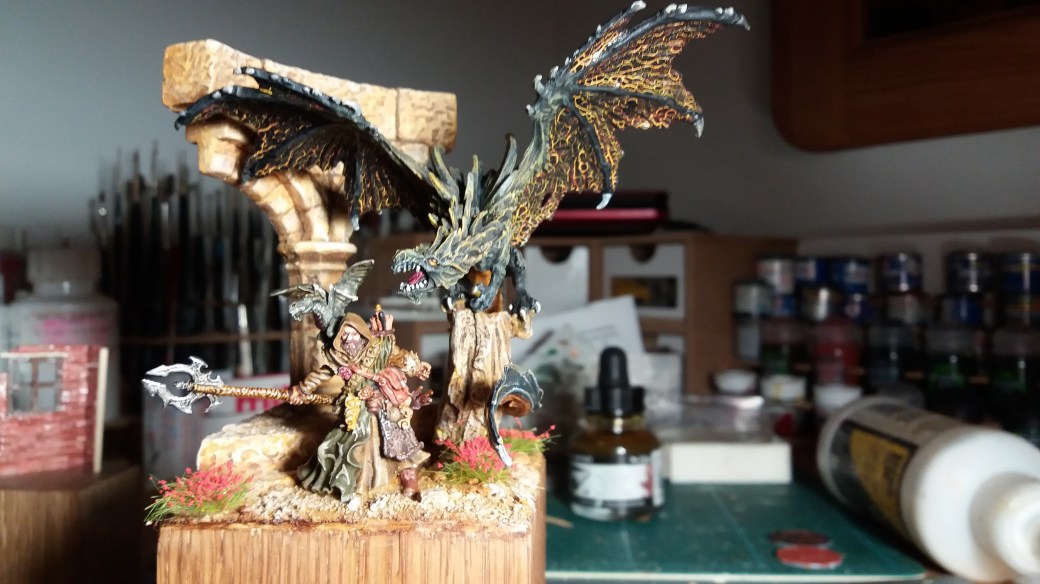
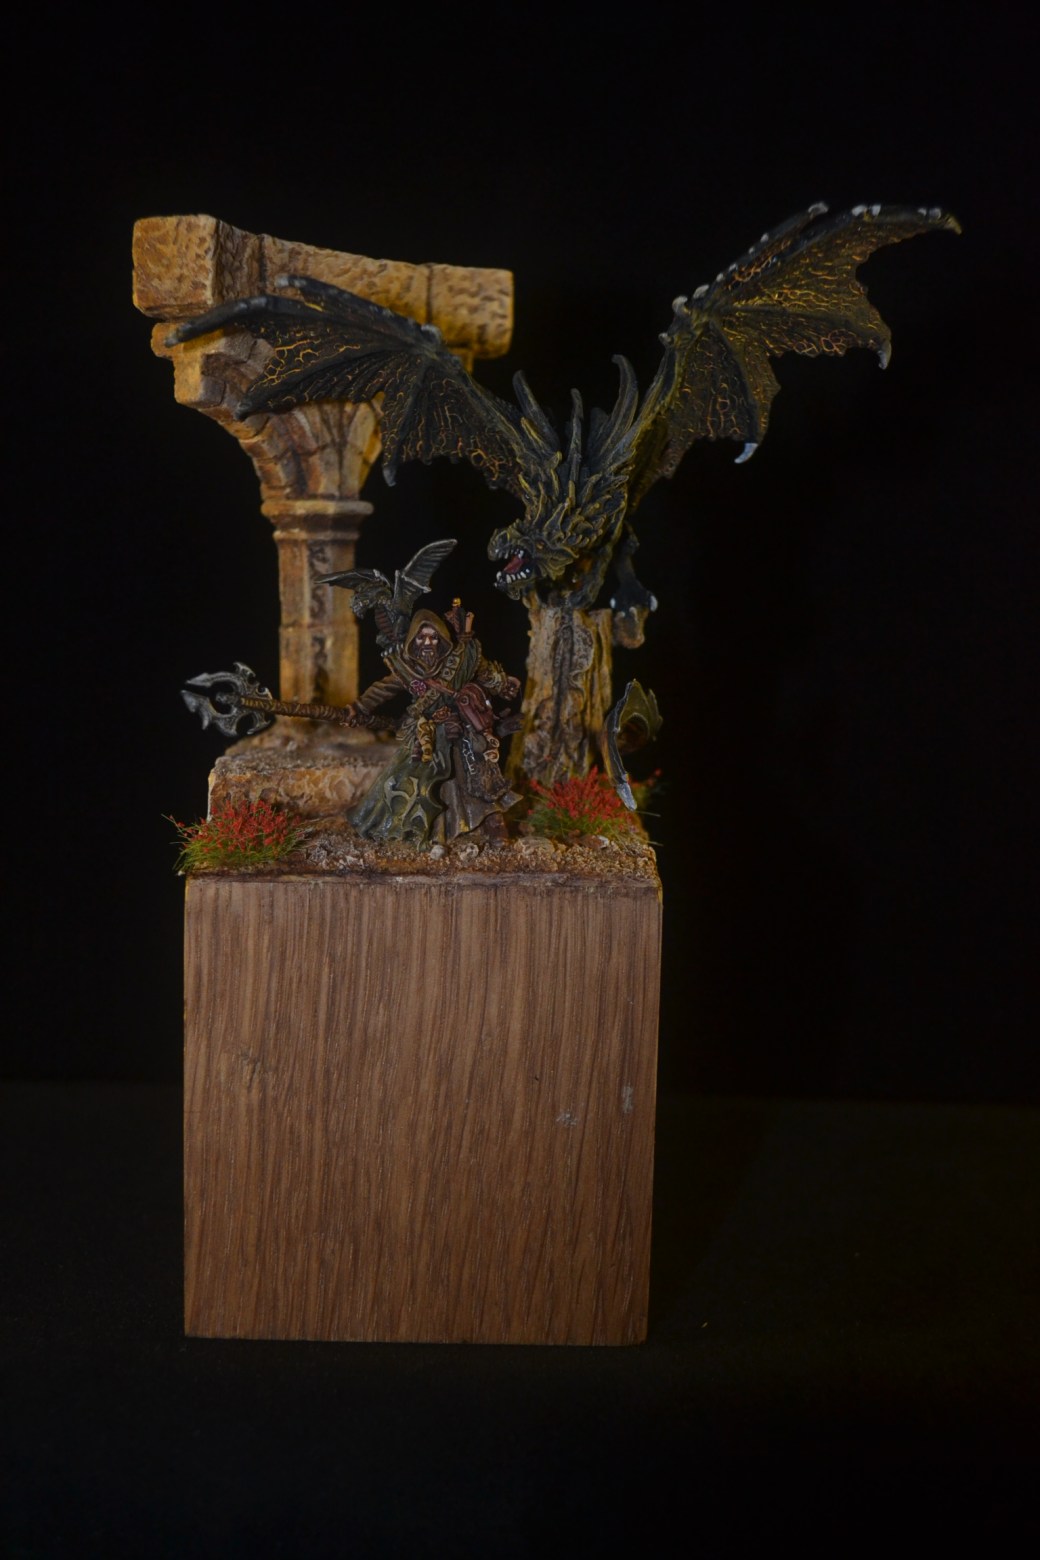
This weeks post is the background to how “The Dragon Master” was built. Here is a little reminder of the finished Diorama.
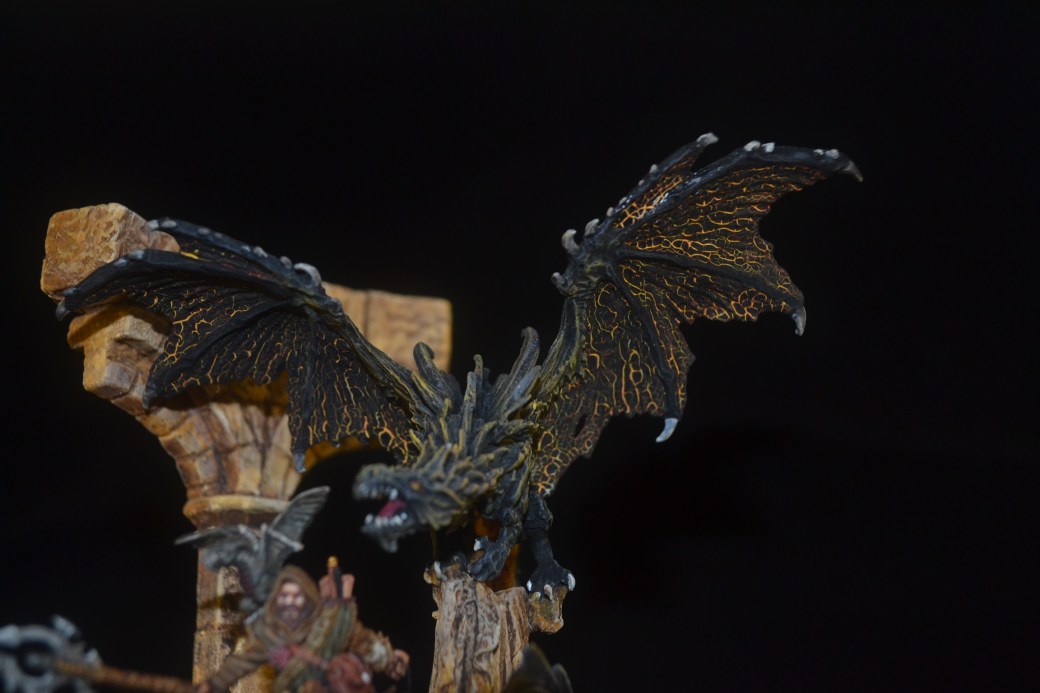
For the most part it was a straight forward diorama, the key element being the textured wings. To start with though I will deal with the basics.
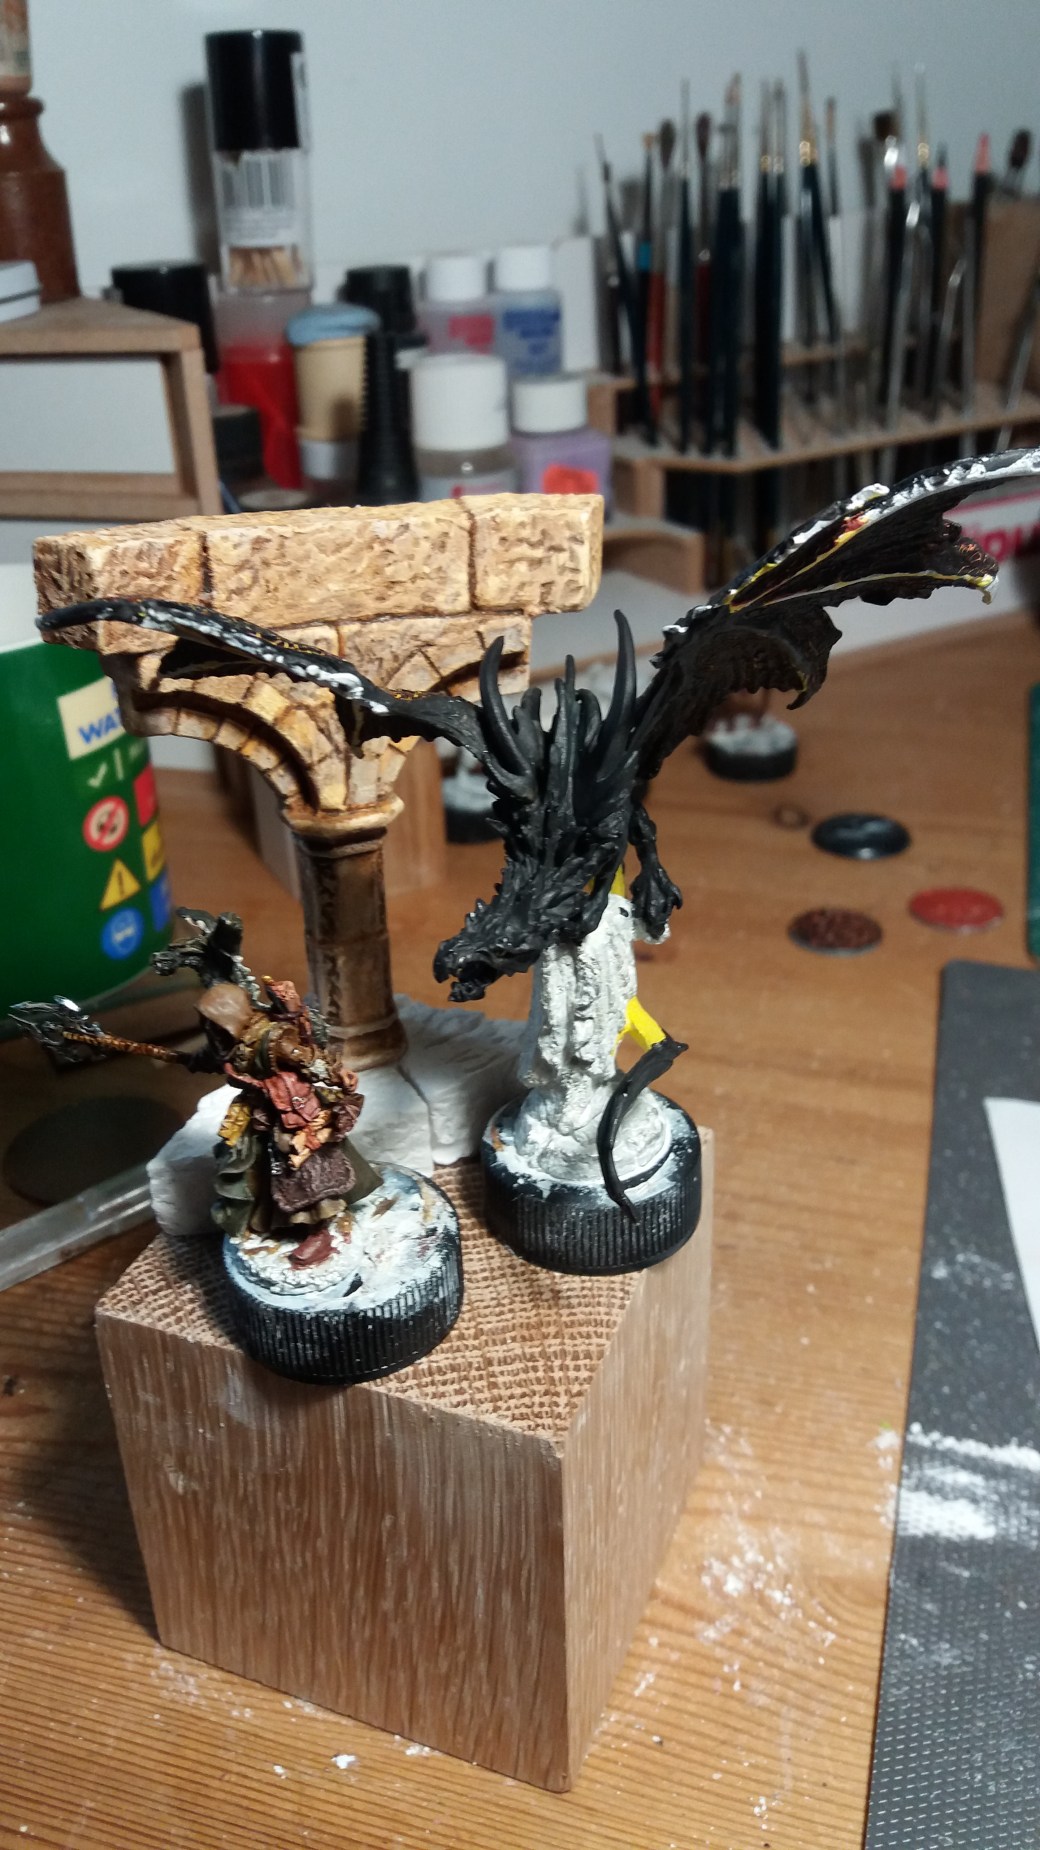
Both the dragon and the figure are both white metal items from Reaper. The figure goes by the name of “Trathus Varr”, a nice little wizard and an ideal choice for the model given the baby dragon perched like a parrot on his shoulder. The dragon is a “Temple Dragon” mounted on a pillar.
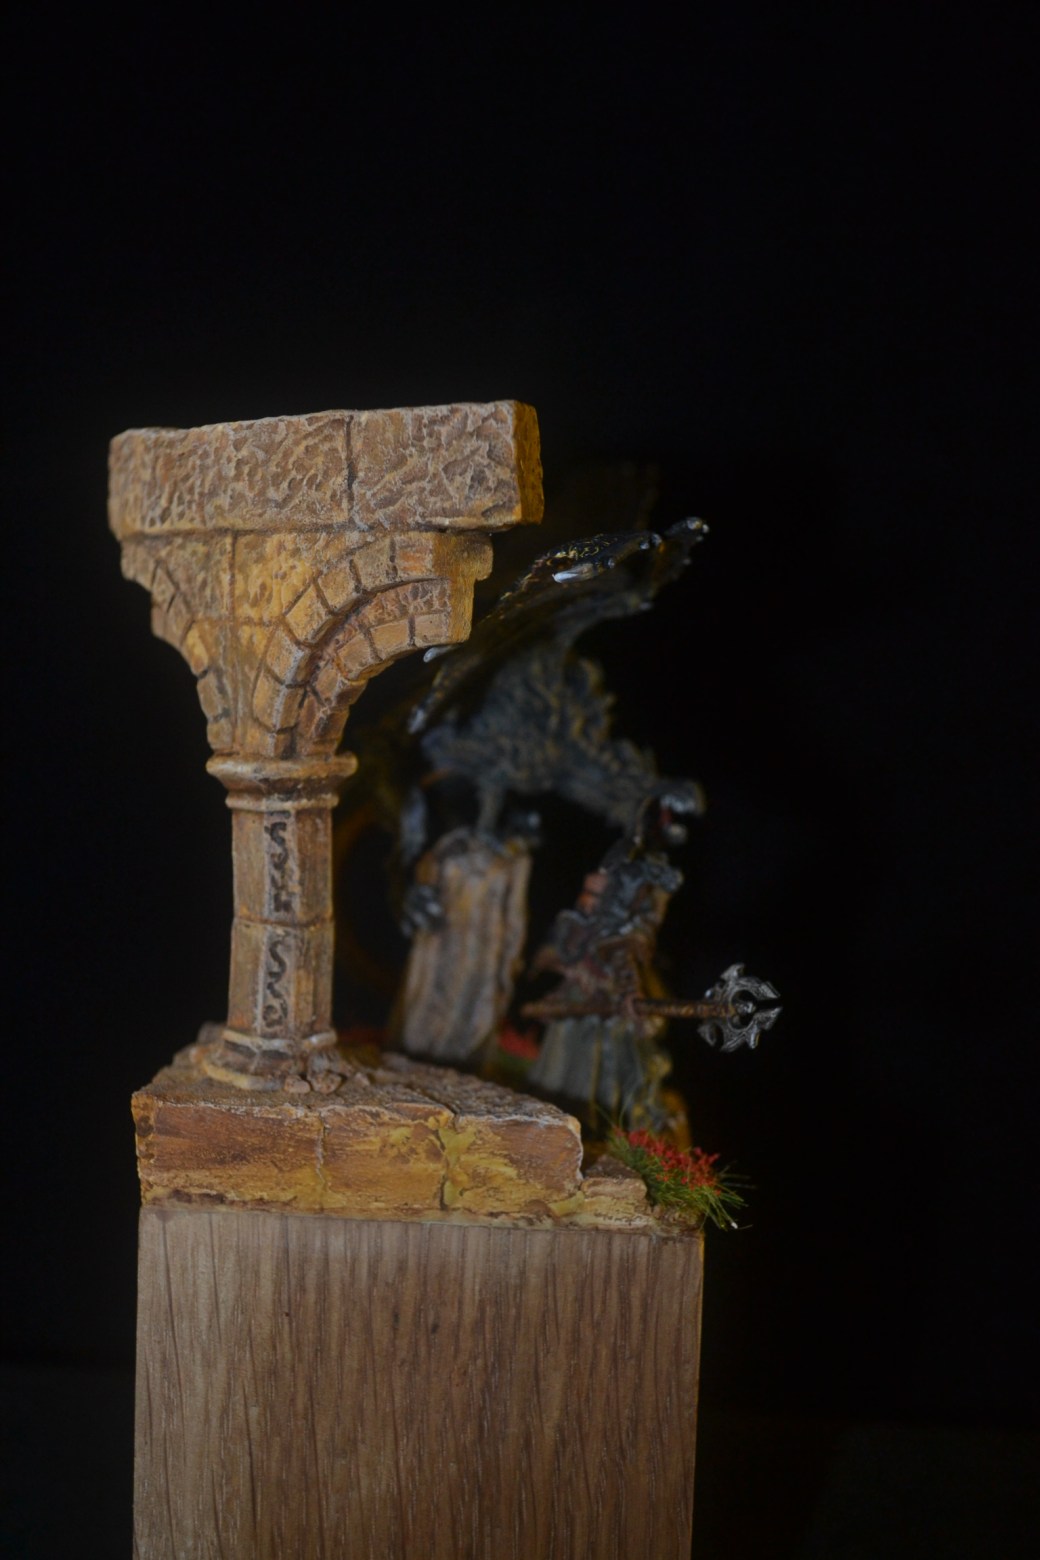
As the dragon was already on a pillar I decided on a sort of “Game of Thrones” type setting and so I cast a few pillars and arches using a “Hurst” mold which I had purchased a while ago but rarely used. The plaster absorbs watered down acrylics nicely and for the most part produced natural shading and highlights. The wizard was a straight forward paint job but he has a fair bit of detail and was fun to do. He was painted entirely in acrylics.
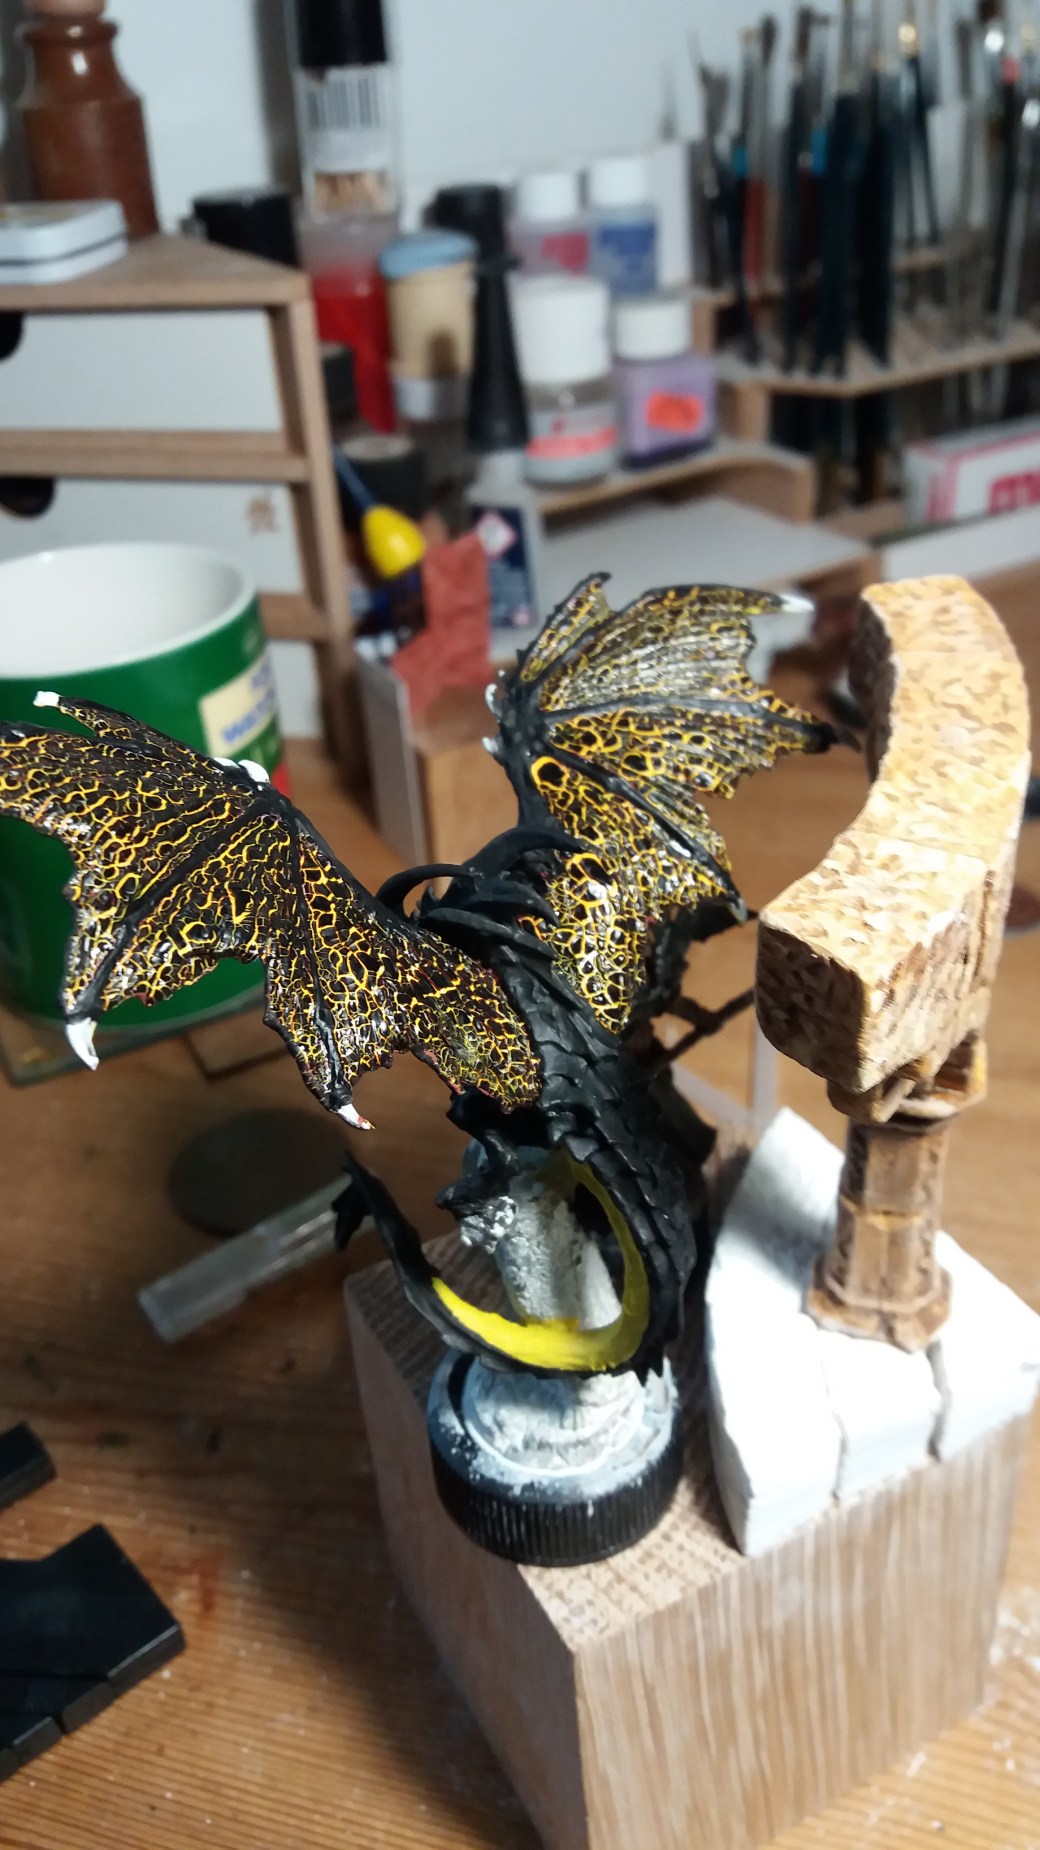
On to the dragon wings. This was not something I had ever done before so it was always going to be a bit of a risk but I had done a couple of small samples using Citadel Textured paints and could see no reason why it wouldn’t work. Alas it didn’t prove to be quite as straight forward as I had hoped.
Attempt No: 1
For my first attempt I painted the upper wings yellow, allowed it to dry and then applied a coat of “Citadel Mordant Earth” textured paint which was then left to fully dry over night. Come the following morning it was clear under a magnifying glass that the textured paint had shrunk but the lines revealing the yellow paint underneath were so fine they were barley visible with the naked eye. Nothing for it but to strip it down and start again!
Attempt No: 2
I concluded that I needed to put the textured paint on much thicker. After re-priming I once again undercoated with yellow and set about putting a thicker coat of “Mordant Earth” on a section of the wing rather than the whole lot. This time if it didn’t work out I would have less to clean up. We live and learn!
Left overnight to dry once again the result was an improvement but only in places. I wasn’t entirely sure why it hadn’t worked but concluded that the level of thickness might have been uneven and hence the patchy result. Nothing for it but to strip it down again and try something else.
Attempt No: 3
Third time lucky?
Not sure where I was going to go after this attempt but I decided to have one more shot at it.
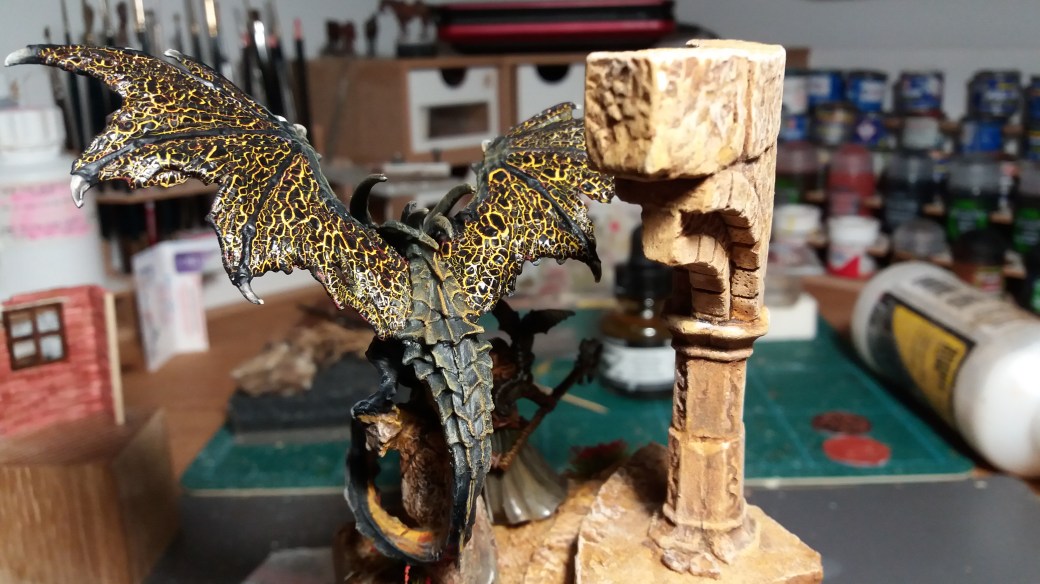
Once again I undercoated in yellow only this time I put down a textured coat of “Citadel Martian Ironearth” first. I followed this immediately by putting “Mordant Earth” directly on top. This way I could be more certain mthat I had built up a decent and even thickness. Once again it was left to dry overnight.
Come the morning it was looking pretty good and I was pleased with the result. There was, however, a problem. As part of the shrinking some of the newly formed dragon scales had started to lift. Bollocks! I quickly mixed some diluted PVA and washed it over the top and much to my amazement it all settled down.
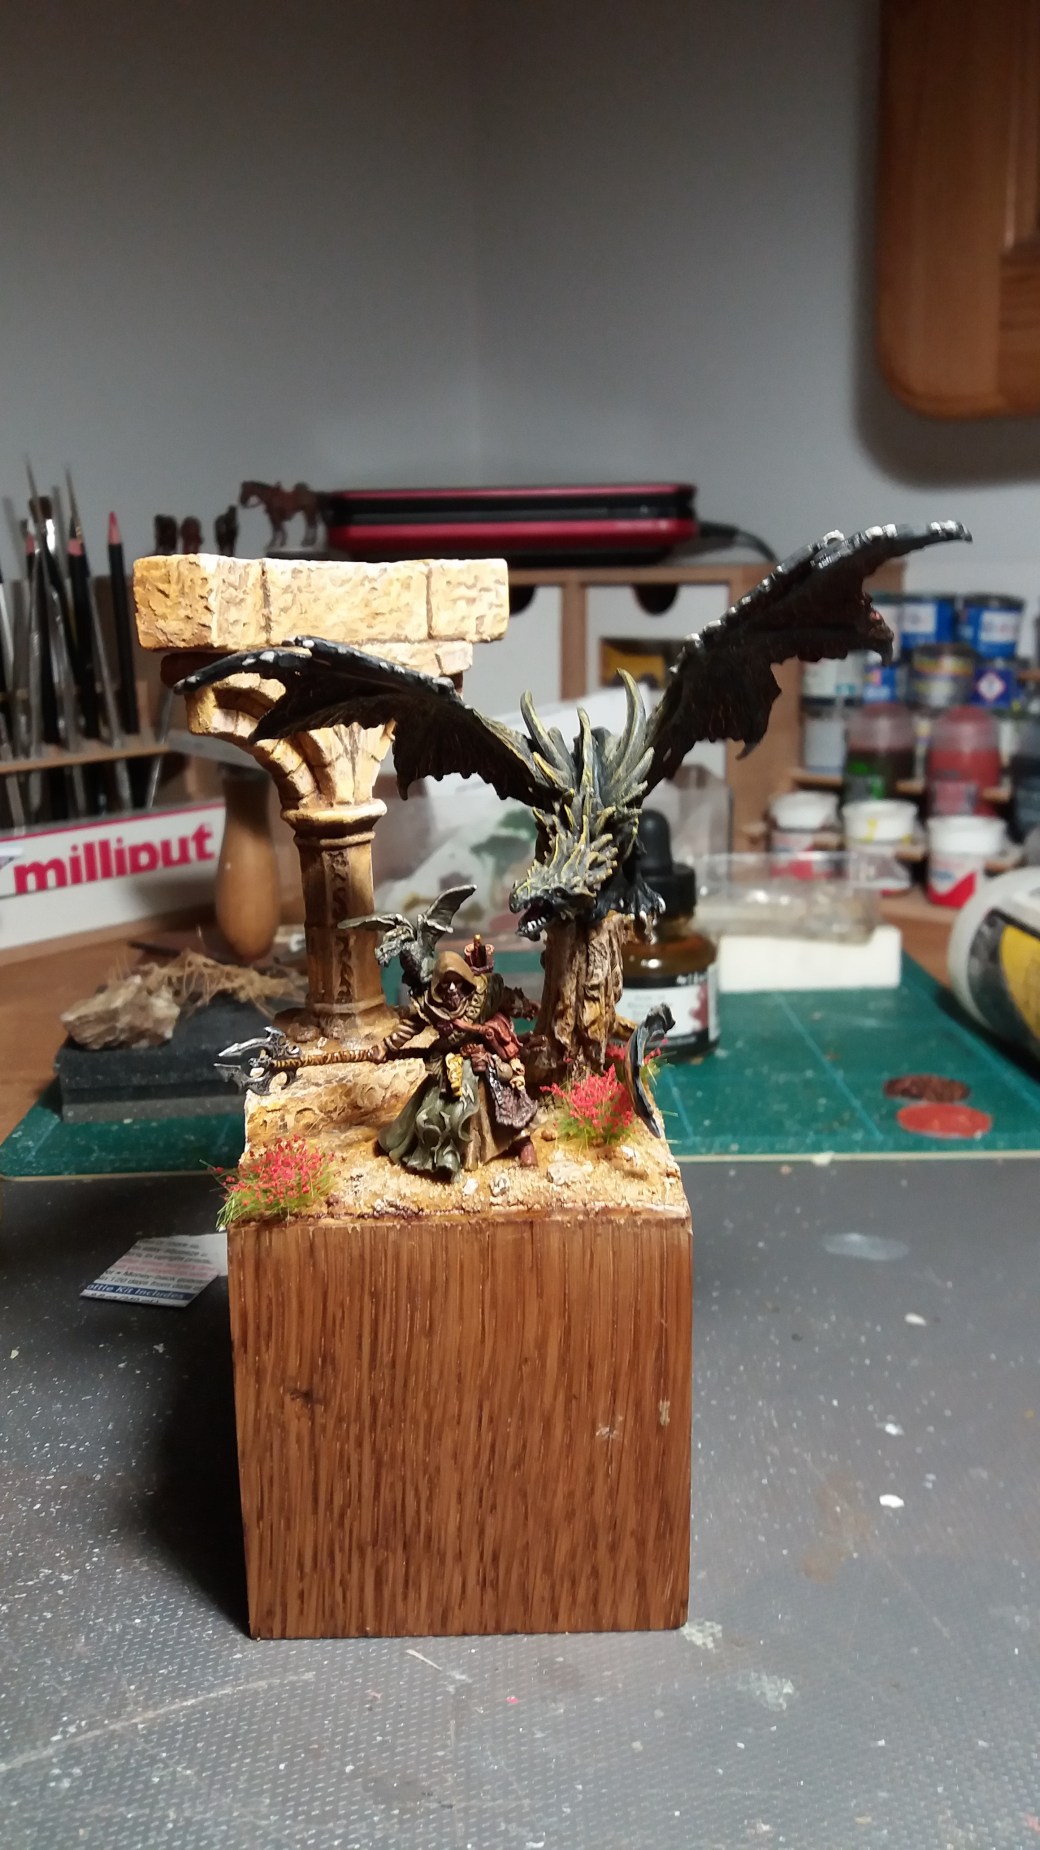
All in all I felt I had cracked it (please excuse the deliberate pun!). Here on it it was a case of repeating the process on the reminder of the upper wings and then again below. Relatively plane sailing after that. Finish painting the dragon, assemble the base, fill any gaps and apply highlights etc, etc. and then good to go.
Below are a few work in progress images taken in relation to Attempt No: 3 followed by a few more images of the completed diorama.
You may recall that I mentioned in a previous post that I had an idea of how I might use my recently acquired Citadel Textured paints. Some interesting ideas were received in response to my invite to guess what I might be up to and they have given me some ideas for other things I might do further down the line. However, what you see here, which hopefully has come out OK in the images, is the use of these paints on the wings of the Dragon.
This week I will leave you with the end result and next week or the week after I will post a “Making Of” article for those of you who might be interested. For now though some photo’s of the completed diorama.
In Wednesdays’s post I made reference to a bronze medal I won at Telford for a figure I had yet to post on my blog as I only just got it done in time for the show. To put matters right here is the figure along with a couple of photos.
The figure is a 28mm Reaper Dark Legends wizard that goes by the name of Tom Goldentome. A reasonable amount of freehand on this one which is why I thought I would stick my neck out and enter it in the “Fantasy Figure Under 60mm” category. Not much else to say other than it was painted entirely in acrylics