The Last Of The Mohicans – 28mm Diorama – Part 2

A succesful week, helped considerably by the stay in doors weather, which has seen the completion of this model and also of one of my outstanding WW1 vignettes, the subject of a separate post to follow this one.

Not a great deal to say on this one.  The fir trees were completed with a couple of applications of static grass, the water effects were applied but need to dry a little further and the figures were painted and fixed in position.

The figures are in my opinion nicely designed but they aren’t the greatest of castings and they lack the crispness of other models that I have painted.  As a consequence they aren’t the best but perhaps I’m just getting my excuses in early!

The last photo was taken with the Magua model placed behind this diorama (my brothers idea, credit where it’s due).  The idea was to see how dramatic, if at all, the backdrop would look.  I think  a combination of both bits of landscaping could make for an interesting diorama, I just need to get my head around what figures to use.  There is no rush however as right now I’ve got more than enough lined up!

Photo’s below.

TIM

DSC_0808DSC_0810DSC_0811DSC_0813DSC_0814

20180226_132301

The News at TIM – Mid Week Musings (No: 1)

When I issued my recent post on my trip to the Bovington Tank Museum it occured to me that from time to time there are perhaps somethings to say which are model or modelling related but which don’t necessarily relate to a specific model that I am working on at the time.  With this in mind I thought it might be a good idea (you may think differently!) to occasionaly share these musings as a seperate suplementary mid week post.  In any event I have decided to give it ago and if it holds no interest either for me or you the reader then I can simply drop it.  In short, nothing to lose by trying.  So welcome to the first, and quite possibly the last, of The News at TIM!

—ooo—

Is creativity is a dangerous thing?

Until I started this blog, incredible to think that was almost a year ago now, I was pretty diciplined, which is to say I generally worked on one model at a time.  Now for the first time I find myself working on at least six different projects, mostly small items it must be said, with an ideas bank of at least another couple of dozen or more.  The danger is that either I will rush what I am doing in order to start the next idea or, possibly worse still, fail to complete some or all of my current projects.

Now judging by my fellow enthuiasts this is not something peculiar to me alone.  Some, for example, Steinberg Shed Space, have adopted the approach of creating a plan and awarding himself positive points for when he ticks something off the list and negative ones when he goes off track.  So far he’s on +9 and all is well.  Others, Azazel I think I am right in saying, have been wonderfully creative in establishing monthly challenges aimed at encouraging participants to revisit and complete unfinished works.

Doubtless there are other schemes which can be adopted too that will rekindle interest in forgotten and set aside projects but what dear reader is right for me?  Truth is I do not know but I fear I am on a slippery slope.  I have therefore decided to do the modelling equivalent of going cold turkey.  In short I have set myself the objective that next weekend I will complete and outstanding WW1 model.  More than that I will complete another outstanding WW1 model for the week after!  After that I’m not so sure but for now something has to give.  To infinity and beyond!

—000—

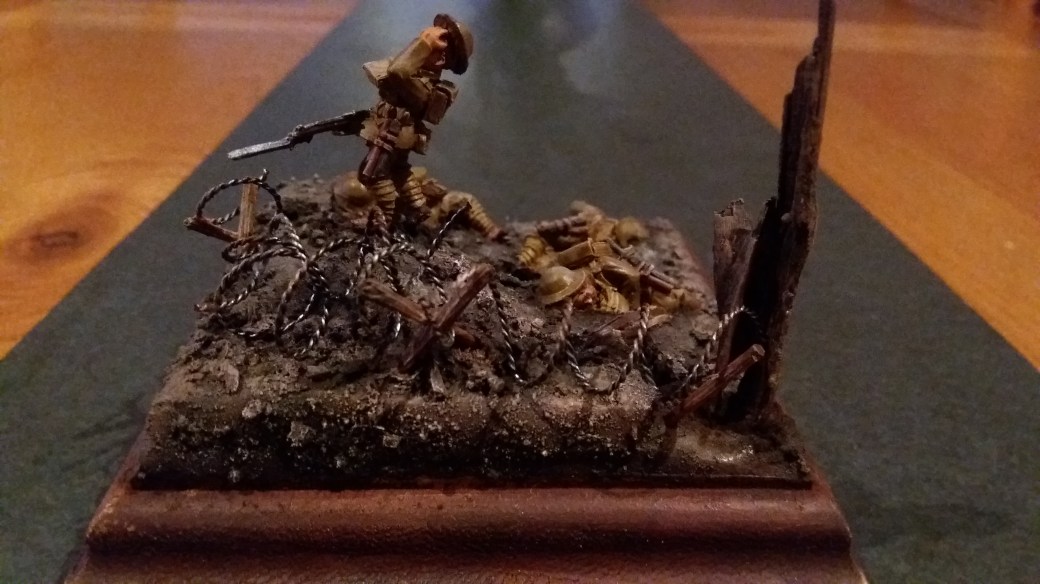
To base or not to base that is the question!

Should tanks, vehicles and the such like be presented on a base with groundwork?

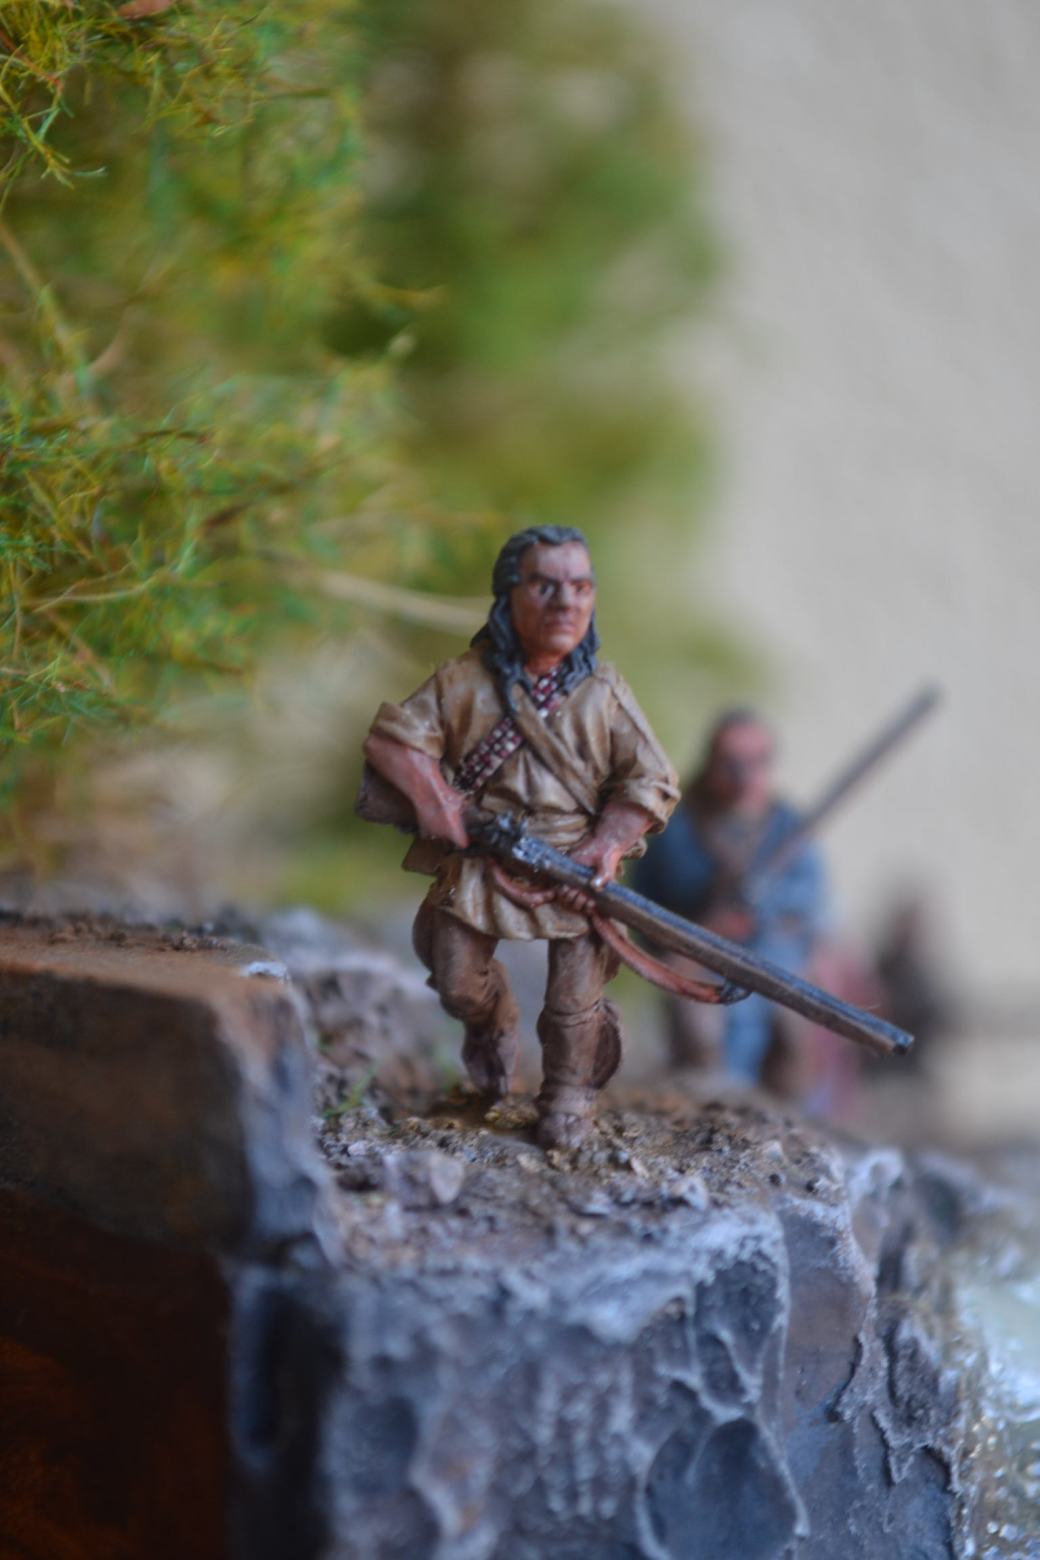
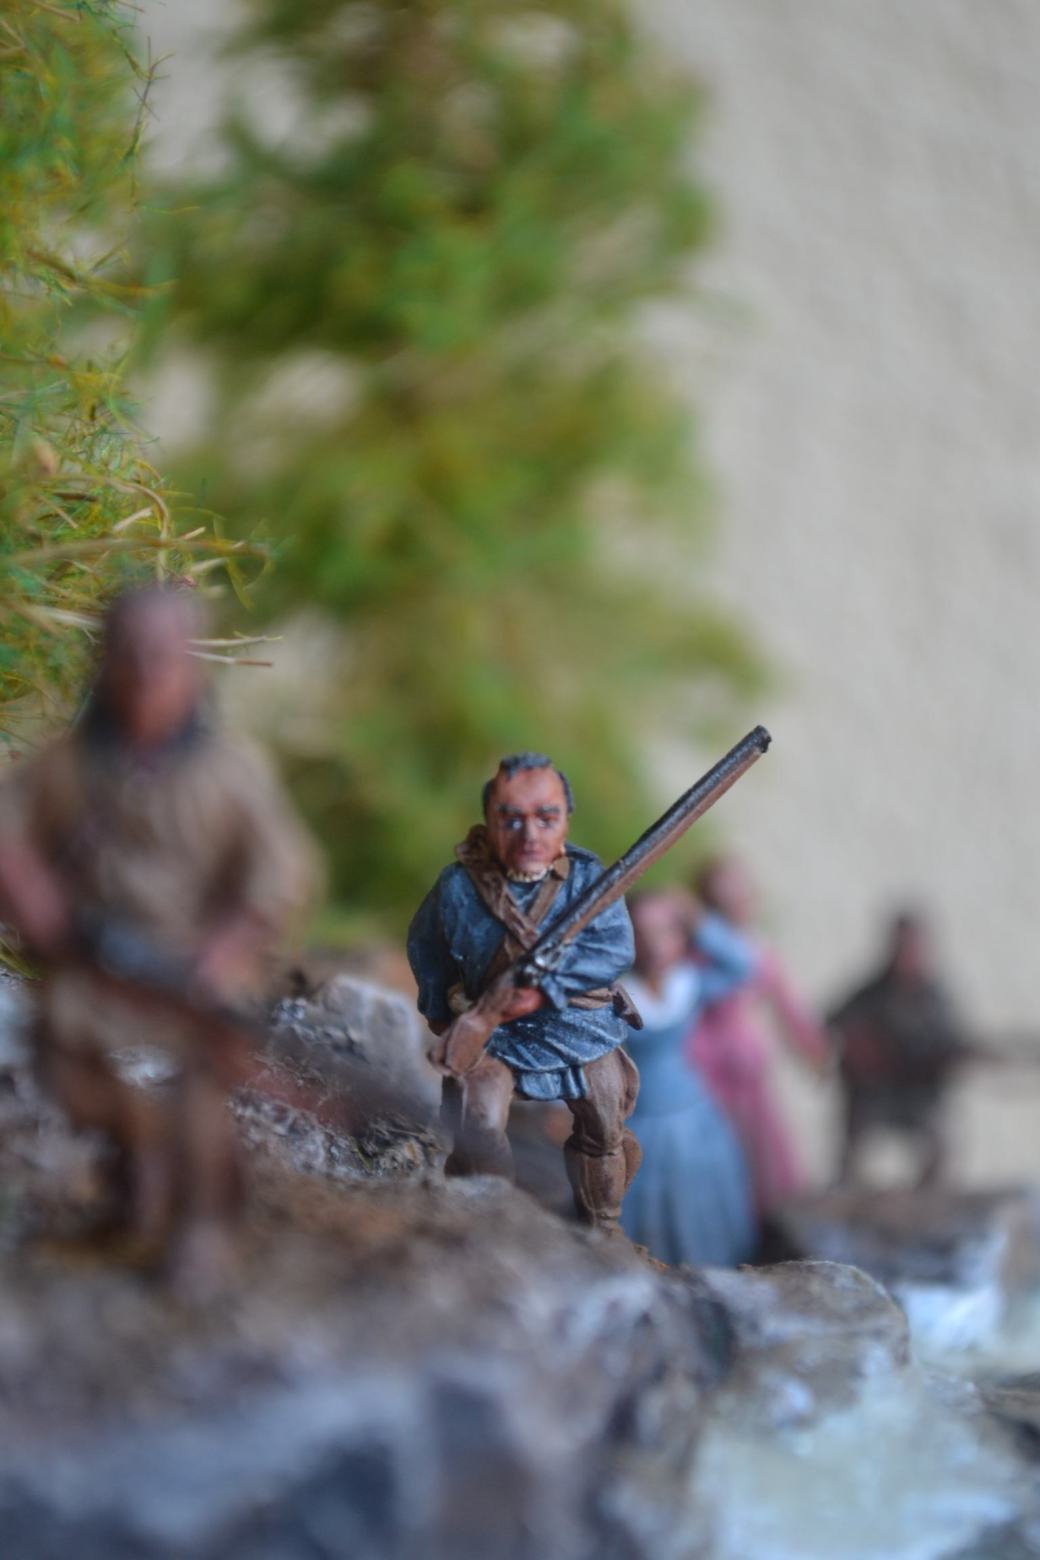
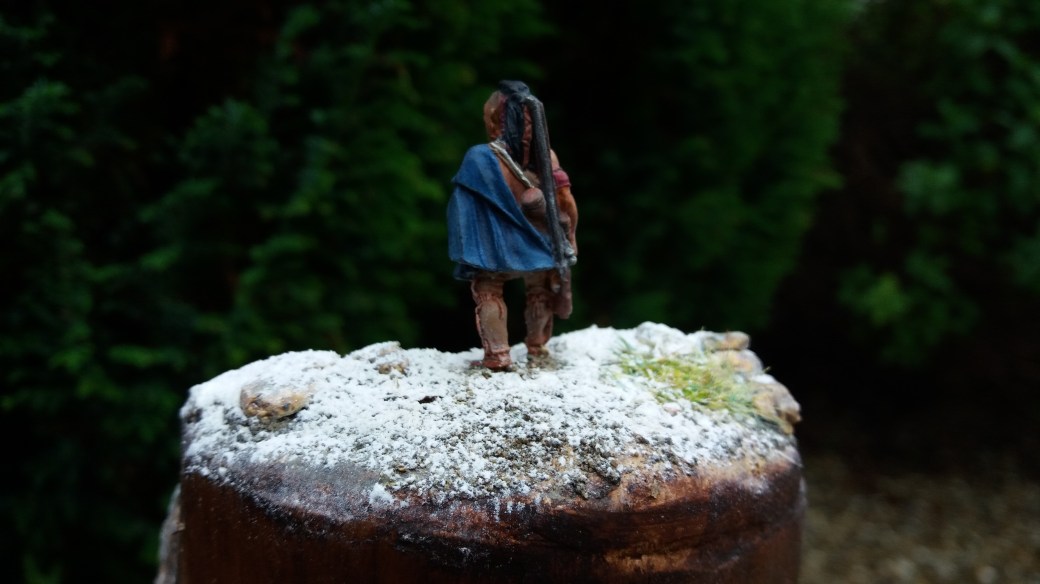
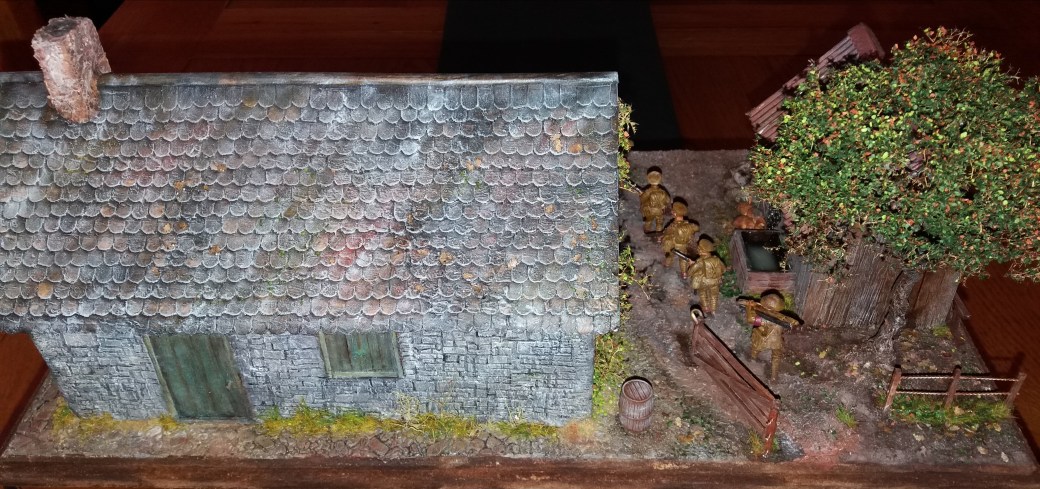
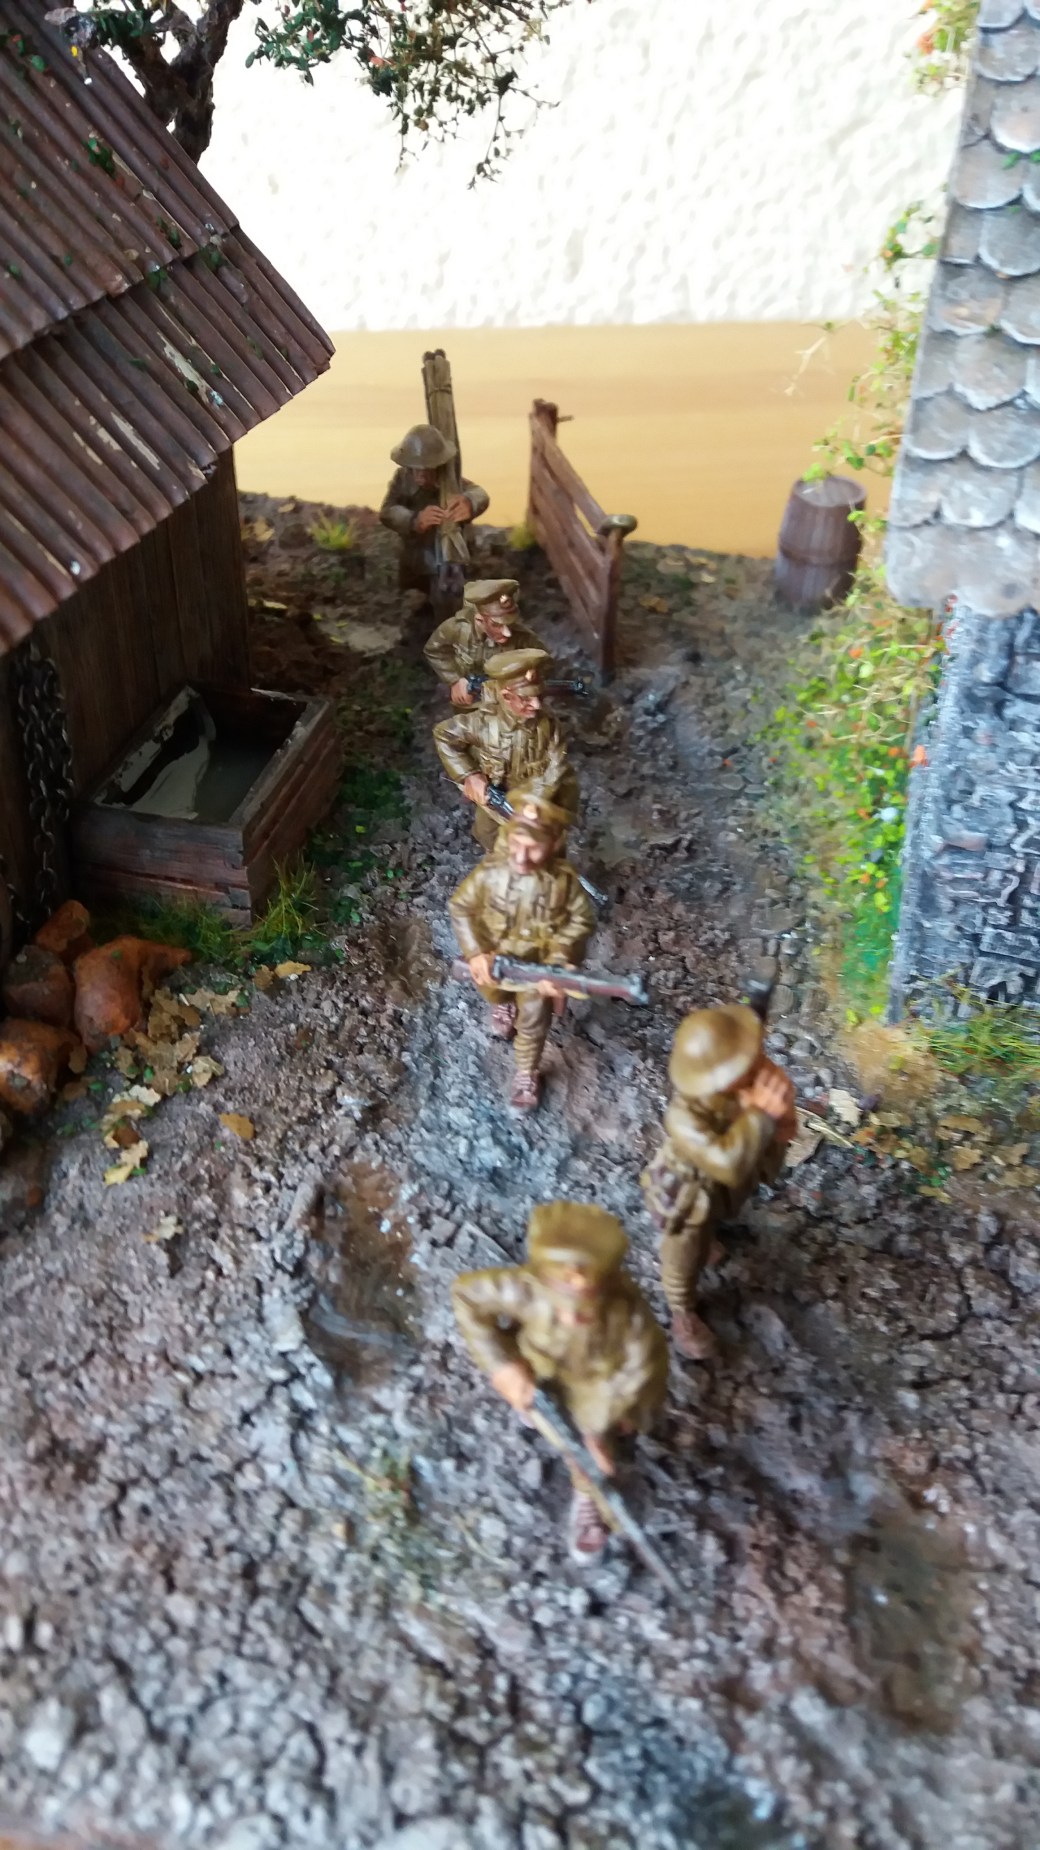
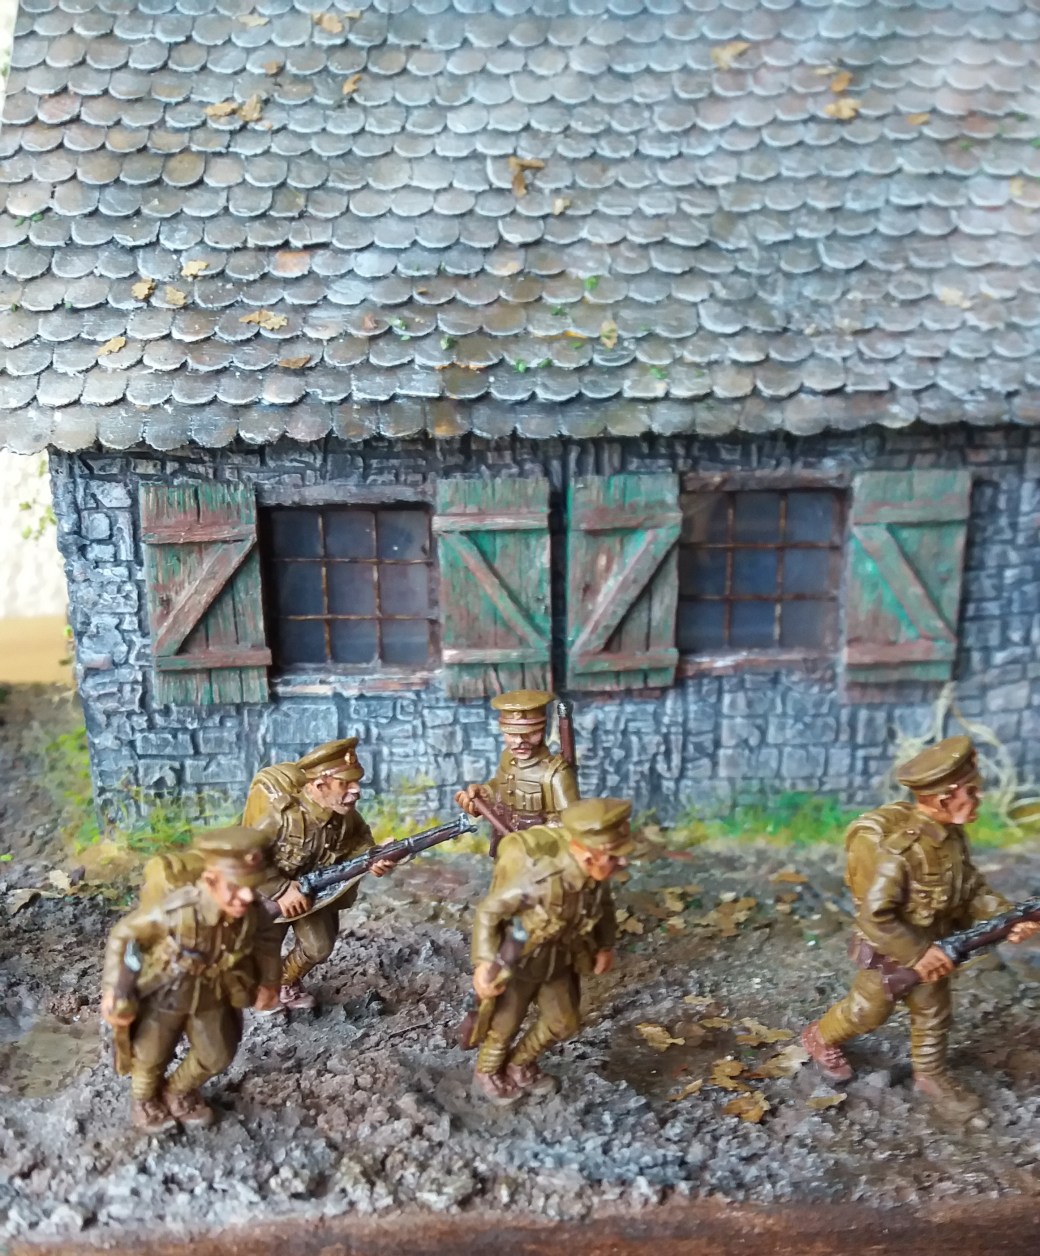
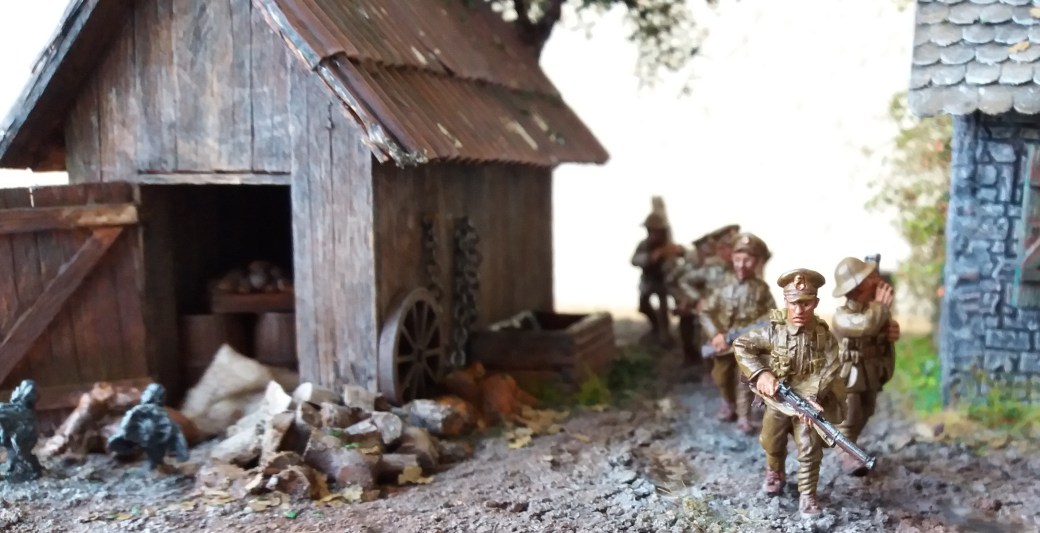
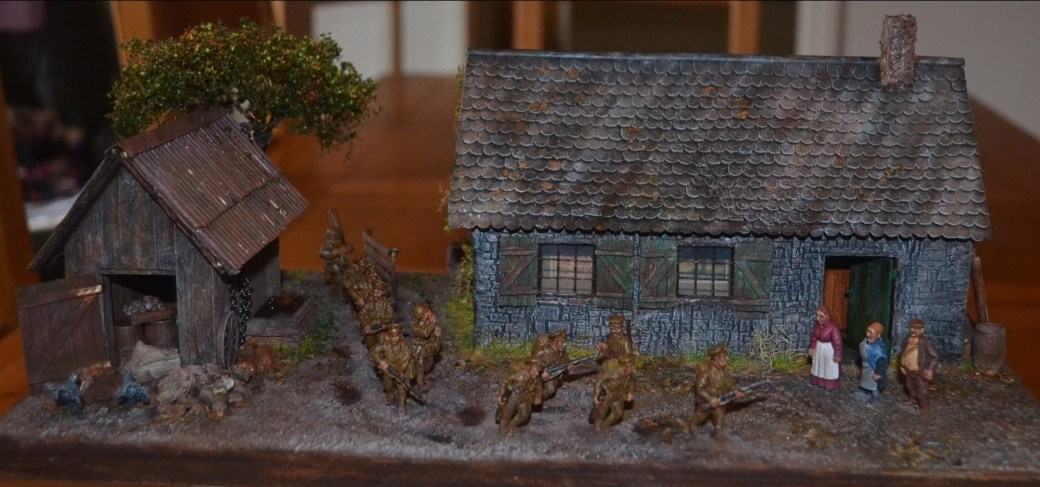
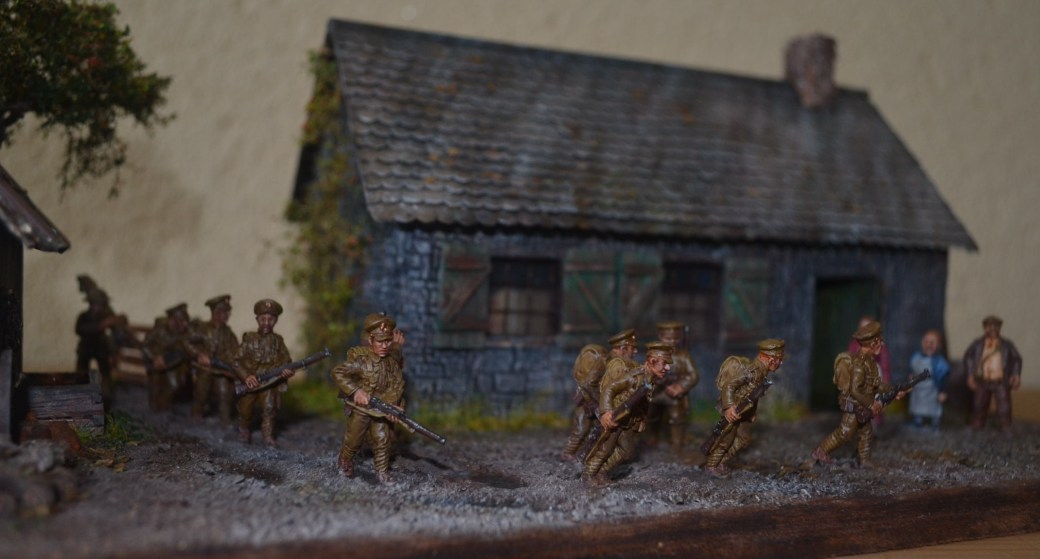
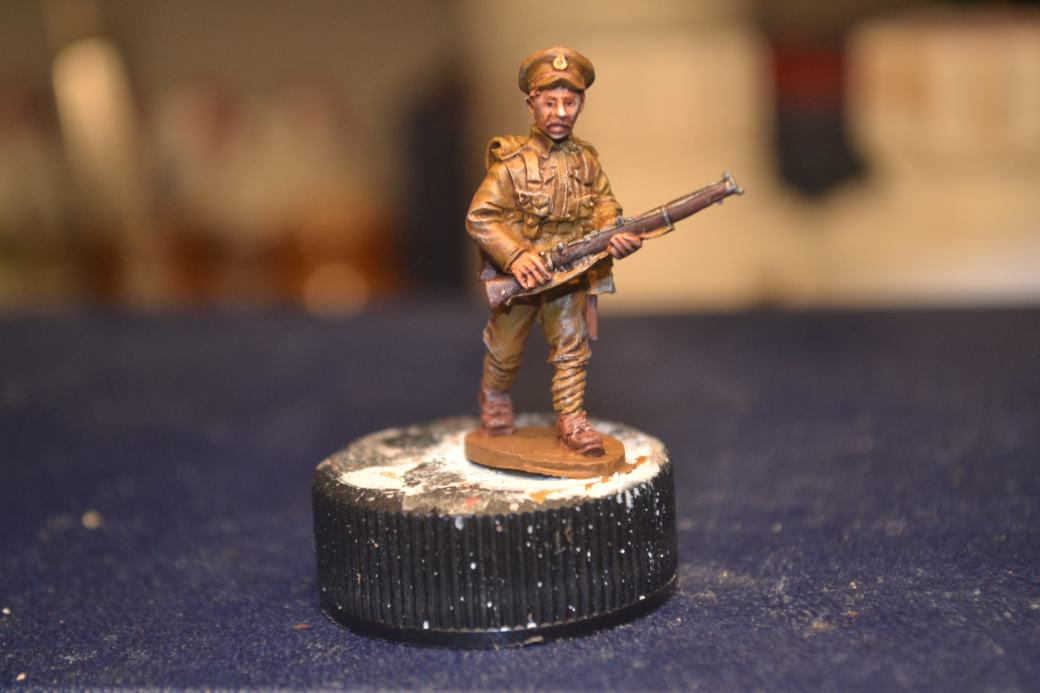
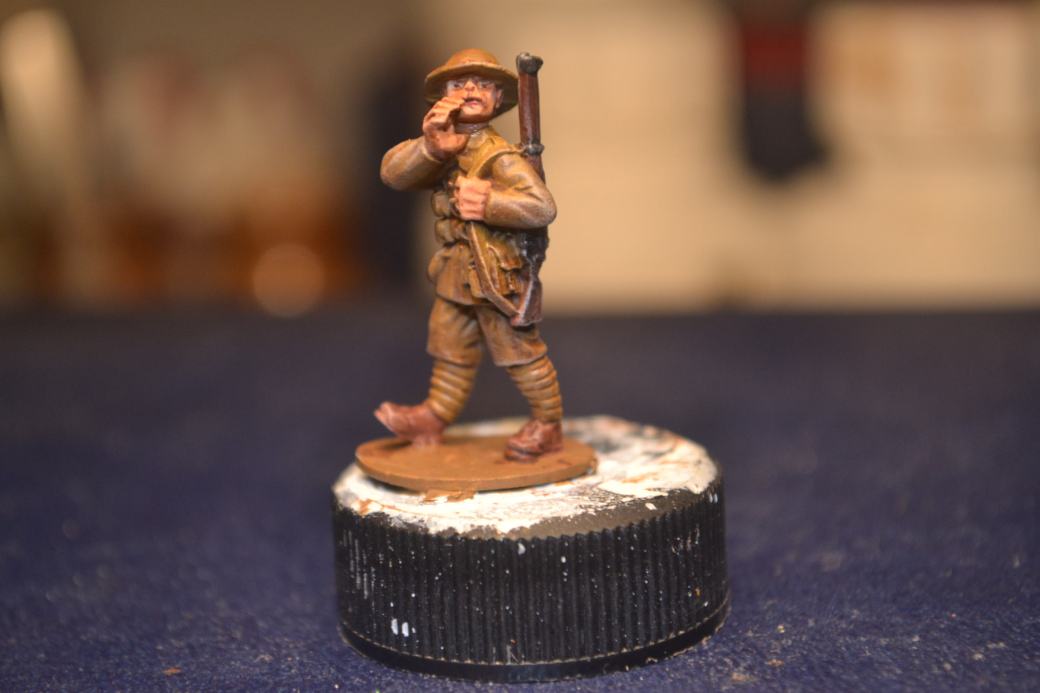
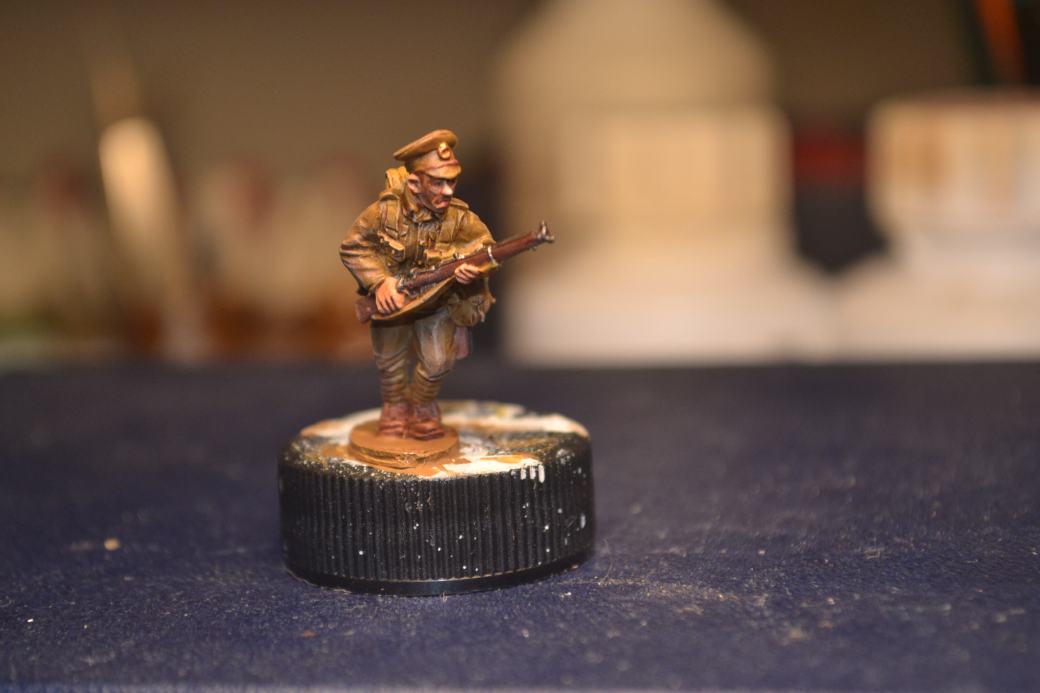
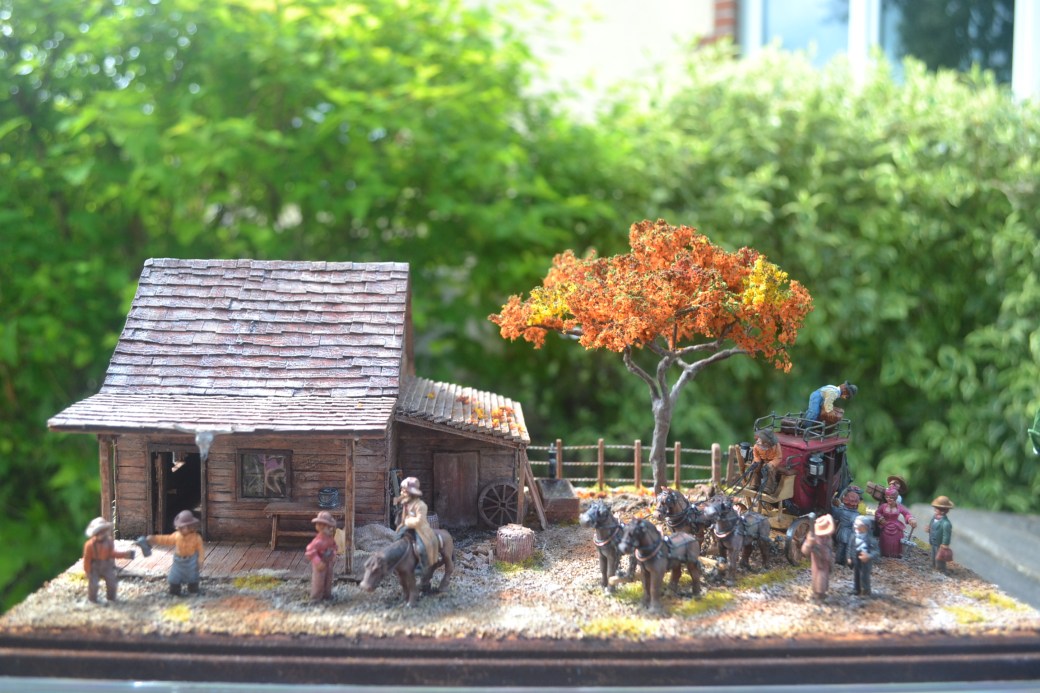
As some of you may know I am not particularly into vehicles of any kind, I’m strictly a figure guy and in all forms be it modelling or the female form.  That’s not to say I don’t like vehicles because I do.  I also have the utmost respect for those that make and paint them, they posses skills I do not have.  The truth is kits need glue and glue and I do not get on.  The last time I did a kit I must have been about 11 or 12 and when I had completed it the ratio of plastic kit to glue must have been in the region of 3:1 in favour of the glue.

OK it was a long time ago and it’s partly because of this that I have just purchased a Rubicon 28mm Willys Jeep which also includes 4 US army figures.  There is another reason for doing it too.

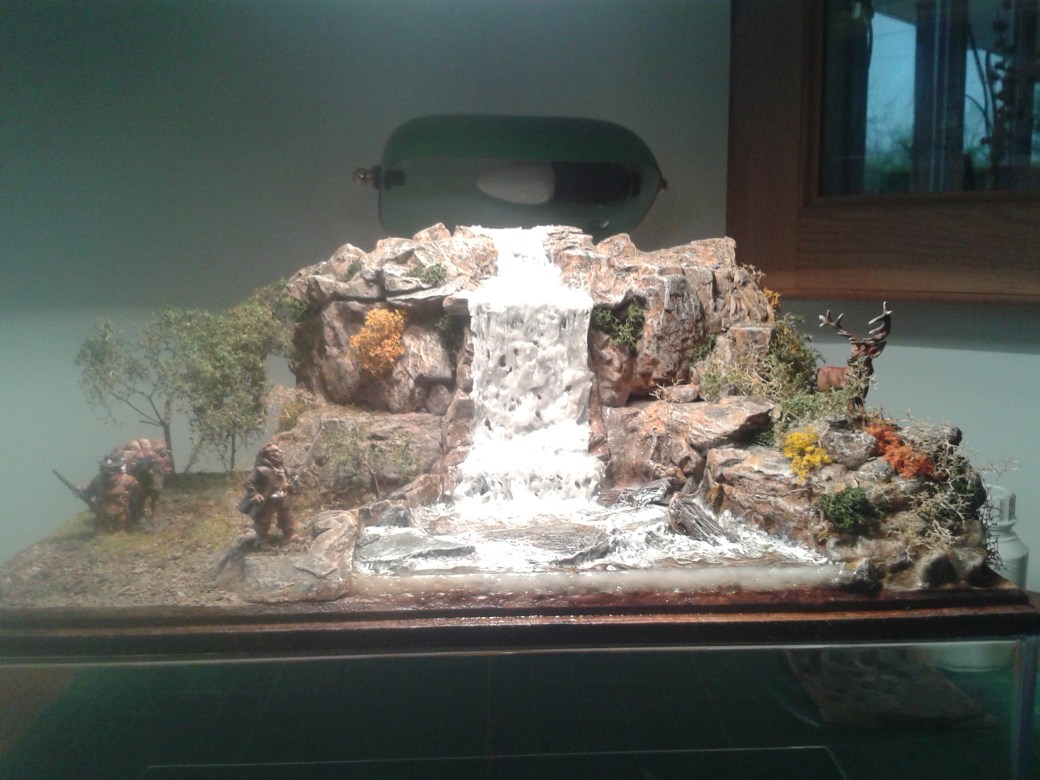
At the model club I go to a number of the members produce some fantastically well made tanks, planes and other vehicles but they do not present them on a base with some ground work of any kind.  They are just a free standing kit.  Perfectly made but to my mind they just don’t look finished.  Is it just me that thinks this?  Now I get it when some of the war gamers don’t base their vehicles as they need to move the pieces about but even then their vehicles are positioned on base boards which are often works of art in their own right.  But when its sole purpose is just to sit there wouldn’t it look better in a more natural type of setting befitting its period?

Of course at the end of the day it’s all a matter of personal preference and I respect that.  However, I’m on a mini crusade and thus have decided to take a journey over to the dark side.  My Willys Jeep will be built, the excess glue will be weathered and made to blend in with a small amount of base work and then it will be taken to the club for comment.  I expect it to be derided but in any event I will keep you in formed.

—000—

You don’t know what you don’t know but somethings are bleeding obvious!

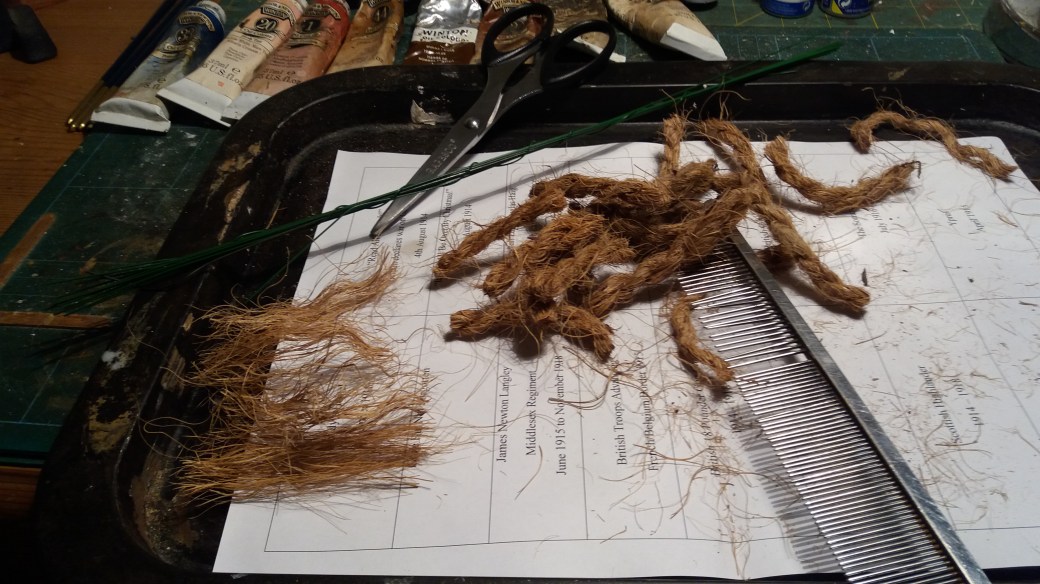
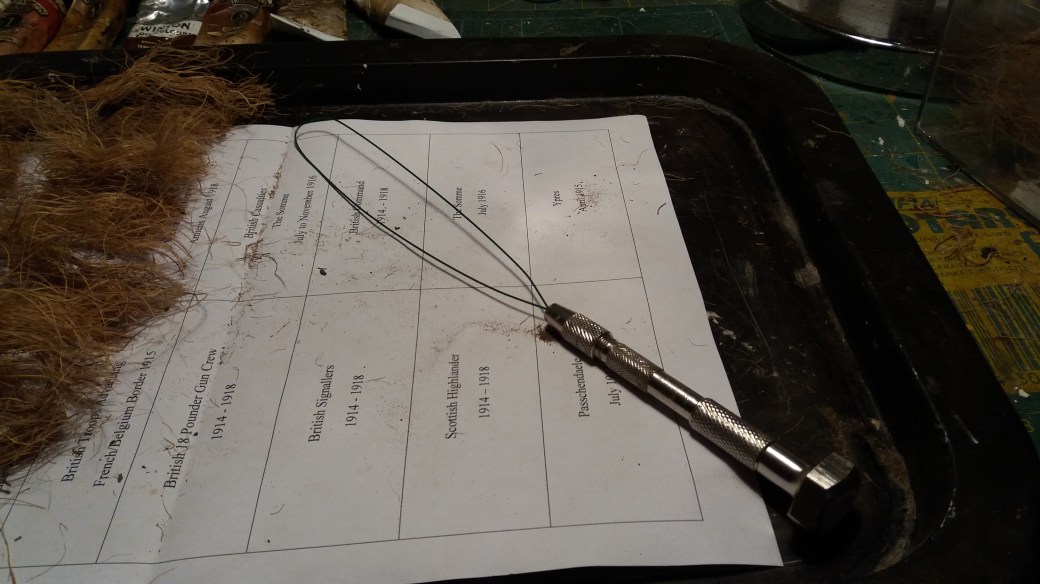
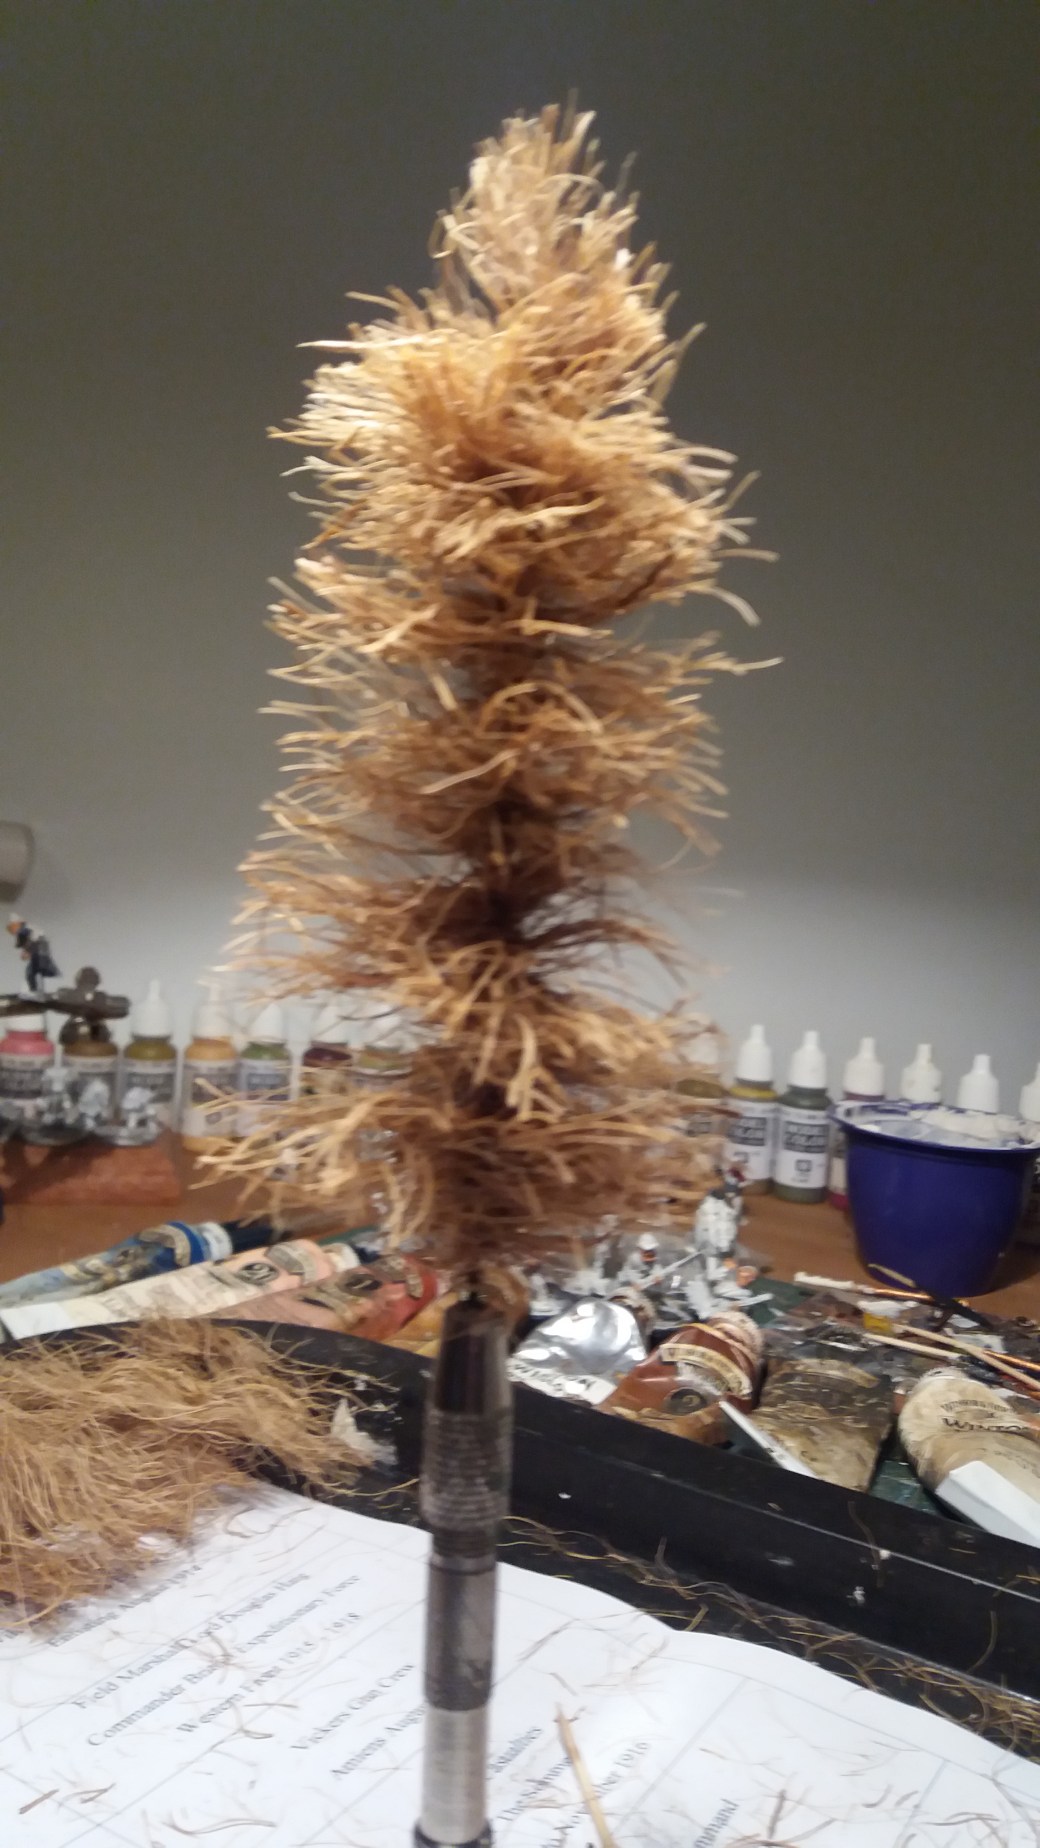
Having recently posted an article on How to Build Fir Trees Azazel kindly commented with a link to a fellow modeller and blogger who amongst other things was also into scenery making including trees.  If you check out the comments on that article you will also be able to follow the link.

As it turns out one of his methods was largely known to me and I had in fact produced a similar post of my own some while ago.  Having said that the method employed was a little different to the one I had been using, the stand out difference being that filler was applied once Sea-foam had been attached to the wire armature thus covering up the join.  This step was missing from my approach, I applied filler to the armature first then attached the Sea-foam after.  The more I think about it the more I can’t believe I missed the bloody obvious!

Now I appreciate if you are not familiar with making your own trees that this may not mean a great deal to you but that is not really the point of my raising the subject.  The real point is that we don’t know what we don’t know until someone points it out to us either directly or indirectly as was the case here.  The truth is since starting this blog I think I can say I have learnt something from everyone I have engaged with and I have no doubt that I will continue to learn from you all in the future too.

Constructive comment and shared knowledge is a great thing.  Thank you!

—000—

Further musings for another day?  Let’s wait and see!

All the best.

TIM


The Last Of The Mohicans – 28mm Diorama – Part 1

I wasn’t intending for this to be my post for this weekend but my recent posts on How To Make Fir Trees along with my Magua Model seemed to go down well so I thought I would keep with the “Last Of The Mohicans” theme while it felt topical.

As mentioned previously, the Last of the Mohican figures I bought comprised a set of six of the films characters.  Having already used the Magua figure the aim of this little diorama is to feature the other five.

Before deciding bow best to present the five figures I thought it would be best to sit down and watch the film once again.  It was a struggle but in the interest of research I put aside a number of chores that She Who Must Be Obeyed had left on a list for me to do as I figured these could wait.  Besides, most of the list consisted of “domestic” jobs and I’m strictly “maintenance”.

I decided that the most fitting theme would be to portray the figures walking in line along the side of a river against a back drop of rocks and trees.  There is a scene along these lines in the film although it also features Major Duncan Heyward who isn’t included in the set of figures.  I suspect I could have found a suitable figure if I searched hard enough but as my diorama wasn’t intended to be a wholly accurate portrayal I thought better of it.

The base was built up using foam board to provide height which was then clad using slate chippings from my garden drive. Similar chippings along with smaller stones and grit were used to construct the river bed.  The fir trees still need to be dressed and have therefore not yet been permanently fixed in place yet.

Next up will be working on the figures, completing the trees, painting the base work and applying the water effects.  All being well part 2 of this project will see the model in its completed state and hopefully I will get to post images of it next weekend.

In the meanwhile some progress pictures below.

TIM

20180124_15595420180125_13015220180128_11573720180126_16585620180128_20425120180128_161932

The Last Of The Mohicans – 28mm Magua Figure

My third and final post for this weekend and the background to the first post on “How to Make Fir Trees”.

One of my favourite films is The Last Of The Mohicans staring Daniel Day-Lewis and Wes Studi.  I love the story, the cinematography and the sound track.  A winning combination all round.  Truth is from a very young age I have always had a soft spot for the Indians.  There is a reason for this and it is a true story.  Allow me to enlighten you.

My Grandfather on my mother’s side had three older sisters and back in the time of the Great War 1914 – 1918 the family lived in Windsor.  During the war the Canadians sent over an expeditionary force who were billeted in Windsor Great Park.  Many of these men were lumber jacks and native indians who were brought over to chop down trees to supply some of the timber used in making trenches.  Two of my Grandfathers sisters met and later married two Canadian service men and went to live in Canada when the war ended.  In the case of my Great Aunt Rose she married a man by the name Pete Commanda, a native north American Indian.  They spent their lives living on the indian reservation in a log  cabin on the shores of Lake Temagami, Ontario.  A story which has fascinated me from an early age.  For interest a couple of pictures below.

So, whilst trawling the Warlord Games web site some while ago I discovered a set of six figures based on the movie.  I couldn’t resist the temptation to buy them.  I decided they would make two models.  One, this one, would feature Magua on his own.  The other five figures would feature as the basis for a separate diorama.

One of my favourite sequences in the film is at the end when all the main characters are high up on the mountains.  Somehow I wanted to create a mountain scene, albeit with a degree of poetic licence. I wanted height, I wanted rock faces, I wanted fir trees and to aid the impression of altitude I wanted snow (the poetic licence bit as none featured in the film!).  I wasn’t sure how I was going to achieve this and even if I could I wasn’t sure how good a single 28mm figure would appear dominated by a 30 cm high base.  As a consequence the idea sat on my to do list.  Then I got some inspiration on how to make fir trees.  I still wasn’t sure how the overall model would look but then decided to hell with it, let’s give it ago!

The first step was to sift through my outdoor log pile for a suitable log.  This was followed by some saw work to cut away sections which would house the trees and the rocks.  The photo’s below show some of the stages in that sequence.  I then cast some rocks using Woodland Scenics molds.  While various things were drying and doing their stuff I painted the Magua figure.  The Trees were made following the “How To Make Fir Trees” article that I recently published.

Everything painted and dried it was then all about assembly, more painting and then applying the snow.  My overall impression is that it came out looking OK.  I think I achieved the depth of scale I wanted and if nothing else then it’s a little different.

Now to deal with the other five figures!

TIM

DSC_0809DSC_0819DSC_0824DSC_082320180121_12312720180121_12285120180121_12125120180121_12052020180121_121340DSC_0852

Bovington Musings – February 2018

I had intended to publish two posts this weekend but this has since grown to three of which this is the second.  An update on my first ever trip to Bovington grew beyond a brief paragraph into a separate article which may or may not be of interest, particularly to anyone who may wish to attend a future event.  The next one is scheduled for the 13th and 14th October 2018.

Bovington for those who do not know is a Tank Museum.  We’re talking real tanks and loads of them.  I don’t know if it’s the biggest tank museum in the country, or else where for that matter, but I’d be very surprised if even the biggest tank enthusiast didn’t leave tanked out by the end of their visit.  There was also an excellent WW1 display but whether this was permanent or temporary I do not know.

The first thing to mention is this was the first time the event was held over two days.  In the past the model show has just taken place on one day with exhibitors and stall holders in attendance.  The aim this year was to have people stay over for both days and I’m not sure this proved a success.  I was only there on the Saturday and the event was very well attended although not by that many stall holders.  By contrast I’ve been given to understand that Sunday was generally poor.  It may take time for the revised concept to get off of the ground but my advice to anyone thinking of going in October would be to go on the Saturday.

Now I wouldn’t describe myself as a tank person but seeing these things in the flesh was pretty impressive.  Up close and personal and you get a sense of the scale.  This was particularly true of the Tiger tank display.  I have seen a few tanks in the flesh over the years but never a Tiger.  To be perfectly honest with you I normally associate the word Tiger with either large cats or prawns.  Both particularly deadly as far as I am concerned owing to the fact that my dad carries an Epipen for his sea food allergy.

In searching for the right words to describe Tiger tanks I decided to settle on the less than subtle “they’re f***ing enormous!”  I’m not sure I would describe myself as brave nor would I say I was a coward but I take my hat off to anyone who came up against one of these in action who didn’t foul their pants.  Everything else by comparison looked rather pathetic and left me wondering how the allies ever won the war.

If tanks are your thing then I would recommend Bovington.  I would also recommend going when there is a model show on.  You don’t pay extra on the admission price and it adds a lot to the day.  Personally I enjoyed wandering around seeing what other people had painted and built, a great source for inspiration if any is needed.  It was also an opportunity to pick up some tips.

As an exhibitor with the Plymouth Club I decided in modelling terms the general public fell into three categories.  Those that were only interested in tanks and planes and the like, those who prefered figures and dioramas and finally those that were intrigued by all that was on display.  On numerous occasions people simply passed my figures and dioramas by without so much as a glance but every now and then someone would show a genuine interest and engage in conversation.  I enjoyed the chats with the folks that I had but a couple of times I got stuck with people who I can only describe as a complete nerds.  Now I know that to most people we are all nerds in our own right but I’m guessing (let’s make that hoping!) that all of us draw a line at some point.  In my case the following conversation defines my line.

Member of the General Public (MGP) – “I’m doing a figure similar to that one myself”

Me – “Are you?  How are you getting on with it?”

MGP – “OK but I’m struggling to find the right Pantone colour for the trousers.  I’m looking for a brown mahogany shade but the Vallejo colour is to dark and others I have found are to light.  What colour did you go for?”

Me – “Burnt Umber”

MGP – “Oh, are you sure that was the right shade?”

Me – “No but it’s the only colour I had and it was good enough for me”

Nice chap as he was his interest in accuracy went far deeper than mine.  Nothing wrong with that but to me paining well is more important.  I don’t go out of my way to do the wrong colours but unless you really know your stuff then who takes that much notice?  Not me.

For those of you who like pictures a couple of Tigers, not big cats, not prawns but tanks!

TIM

20180210_10565820180210_10572320180210_10565120180210_110028

How to Make a Model Fir Tree

Why fir trees?

I think it is fair to say that modelling in all its forms is a creative subject.  The problem with creativity is it can be expensive and it can also be frustrating.  The frustration coming from having an idea of what you want to create but having no idea of how to bring it to fruition.  I’m sure I’m not the only one who has had an idea but lacked a solution and sometimes had a solution – something you’ve wanted to try – but unable to think how best to do so.  In this instance fir trees and how to make them became the solution to a couple of dioramas I wanted to do build but couldn’t get my head around how to make the relevant trees – until now!

The dioramas I had in mind both feature 28mm figures from the Last of the Mohicans.  I had a clear idea of how I wanted them composed but was struggling with the scenic side of things.  The first of these models is now complete and the second is not far behind.  I will post details of the first one over the weekend but in the meanwhile I thought I would initially share with you the making of these trees.

I’m sure for many of you this is not something new.  Little things please little minds and in this instance my little mind was impressed by the fact that this technique, as well as being a simple one, doesn’t even involve any glue!

I guess the best place to start is with an image of the end result, that way you can switch off now if you don’t like it or continue if you do.  So, immediately below a couple of finished trees.  These were my first trees.  They’re not perfect but they were simple and affective and with a bit more practice I’m sure I can achieve better results.

20180206_201935

So now onto how they are made.  To begin with you will require a few basic tools (pliers or small hand vice, a cocktail stick or similar, scissors a metal comb although you might get away with a plastic one depending the string used), some coarse string, the type that can be thinned out, some wire, hair spray and some static grass.

Step one

Cut off lengths of string about three inches in length.  The trees I made were for using with 28mm scale figures.  Depending the scale you use you may wish to cut shorter or longer lengths.  Having said that trees come in all sizes through their development so I guess you go with what you think looks best for you.  How many lengths you cut will be determined by how tall you want your tree to be.  I cut about 15 to 20 lengths in this instance.

20180126_201235

Step Two

Using the metal comb separate the fibres of the string for each cut piece (see to the left of the image above).

Step Three

Cut a length of wire, I used wire with a thickness of 0.5mm cut to a length of approximately 14 inches.  Fold the wire in half and place the two ends into the vice, I used a small hand vice but you could use pliers or something similar.

20180126_203032

Step Four

Take the combed lengths of string and spread them out between the looped wire.

20180126_203223

Step Five

Take the cocktail stick or similar and place it at the looped end of the wire (see below).

20180126_203319

Step Six

Holding the cocktail stick in one hand and the hand vice in the other start turning and rotating the hand vice and don’t stop until the wire loop where the cocktail stick is has become tight to the cocktail stick (see above).

Step Seven

Remove the cocktail stick and cut off the small looped bit of wire.

Step Eight

Using the scissors cut the string to shape the tree.  Fir trees are essentially triangular so you need to cut the string so that the top of the tree is narrow/pointed at the top and wider at the bottom.  If you want to thin out from top to bottom to get more of a Christmas tree shape between the branches you can.

20180126_204150

Step Nine (Optional)

Depending on the colour string used you may wish to paint it.  The string I used was a great colour so I didn’t bother.

Step Ten

Spray the tree with hair spray, any cheap strong hold spray will do, you could use sprayed PVA too if you wanted to I suspect.  Then sprinkle the static grass on.  You may need to do a few applications until you are happy with what you have done.  I would also suggest that you turn the tree upside down and do the underside first.  I also used a darker static grass for the underneath and a lighter one on the up side.

20180206_201935

Step Eleven (Optional)

If you want to have a lot of bark showing then strip back the string at the lower end of the tree and apply some filler or Milliput to create a tree trunk.  Alternatively you can just have the tree branches closer to the ground.

—000—

Hopefully this all made sense!

As I said earlier, these were my first trees so certainly room for improvement.

TIM

28mm Building Project No: 7 – WW1 Farmhouse Diorama

Off the Work bench!

This week was all about assembling the various bits and pieces to complete the diorama.  All in all it went together pretty well after some careful thought as to what should be placed into position first.  It wouldn’t have been the first time I’ve boxed myself into a corner but on this occasion I managed to avoid any such dilemmas.

Not a great deal to add in terms of narrative as I think I covered most aspects of the build in previous “On The Work Bench” posts.  Will be interesting to see what, if any, feedback I receive when it receives its first public outing.  If nothing else my mum likes it and thats good enough for me!

The aim of the diorama, as mentioned in the first post of this sequence, was to depict a small group of British soldiers making their way through the French/Belgium farming countryside.  Hopefully I managed to convey that.

Now on to the next project(s).  Still have a few WW1 items to do to complete the series but think I need a change of period in the coming weeks too so still deciding what next is on the agenda.

Pictures of the completed diorama below.

TIM

20180206_10131320180206_15550520180206_15560520180206_15581220180206_10463120180206_16243620180206_16033720180206_16115120180206_11002720180206_16234720180206_16143720180206_10595920180206_16084320180206_15475220180206_110052

20180206_15451020180206_16100220180206_160601DSC_0796


On The Work Bench – Building Project No: 7 – Part 5

This week was all about finishing various scenic bits and pieces but mainly completing the figure painting.  I had hoped to complete the diorama assembly too but alas life caught up with me and so that will have to wait until next week.  All being well this is the penultimate post for this diorama.

The figures were all painted in Vallejo acrylics with oil paint washes. The figures were from Empress Miniatures, Great War Miniatures, Gripping Beast – The Woodbine series and from a company in Belgium who supplied the rural types.

This coming Saturday I’m off to my first show of the year being held at the Bovington Tank Museum in Poole , Dorset and am hoping to take the completed model with me so whatever happens I do need to get it finished! I doubt anyone who reads this is likely to be at Bovington but if you are then please come and say hello!

In the meanwhile some photos of the finished figures.

TIM

DSC_0799DSC_0791DSC_0800DSC_0794DSC_0802DSC_0798DSC_0803DSC_0793DSC_0795DSC_0796DSC_0797DSC_0792DSC_0801DSC_0790

If At First You Don’t Succeed, Try, Try, Try Again!

I have mentioned on more than one occasion in recent posts that the Plymouth Modelling Club which I joined back in April/May of last year hold an annual club competition at the end of every January.  Well this years event took place on Monday and proved to be yet another whole new experience for me.  Before going into the competition night in greater detail I thought I would first share with you some personal information.

I am a competitive person.  I am also an unsuccessful competitive person.  Allow me to elaborate.  As a kid and as an adult I was sports mad.  I played just about every sport going but at best I was a jack of all trades and a master of none.  I won matches but never reached finals.  I was ambitious at work but was often overlooked for promotions I felt I deserved.  I’ve never won a raffle and gave up playing the lottery years ago.  If I gamble I lose.  I’m not depressed but I am a realist, I’ve simply learnt to live with the shit the fan of life throws at us all from time to time.  I have a lot to be grateful for, not least of all the fact that I am part of fantastic family, have a great home and live in a wonderful part of the country.

The simple truth is there are winners and losers but in reality most of us fluctuate between the two.  In the past, like most of us I guess, I’ve been asked if I am a glass half full type of person or a glass half empty person?  I tend to reply with the line “there is nothing in my glass at all” just to piss them off!  So why mention any of this?  Well on Monday I came first in the categories for best single figure and best diorama and am on course, so I’ve been told, to become the clubs Modeller of the Year too.

At this point I’m sure there are some of you who are thinking this is all about blowing my own trumpet but you could not be more wrong.  I am of course pleased to have won, particularly having won nothing of any nature in the past but this post is more than that, for me it’s more about my journey as a modeller and coming out of my modelling shell.  Since joining the club, exhibiting at a few events and, perhaps the most important of all, starting this blog, I have gained so much more.  I had no idea if my work was good or if anyone had the slightest interest in anything I do but it seems that there are a few people out there who are interested and to each of them, thank you.

In the big scheme of things the Plymouth Model Club is small-scale (pun intended).  As a group it comprises of no more than 25 people so my achievement needs to be very much kept within this context.  However, these people, along with those who are kind enough to follow my blog and comment on my posts are my peers and that in itself is significant.  The next question is how does my work rate outside of the club itself?  Truth is I have no idea but what I do know is I have the confidence to now to try to find out.  I’m not under any illusion, there are way better modellers and painters out there than me and I am in awe of much of the work I see being produced by fellow bloggers and club members.  The important thing is not to give up.  As a kid my parents always said “if at first you don’t succeed, try, try, try again” and that’s the real message of this post.

Below are the photographs of the models I submitted for judging under the single figure and diorama categories.  Only one model counted, the one which gained the highest score, in other words you could come first but not second as well.  The RAF pilot won the best single figure but in my opinion the Mexican is the better figure and was certainly the tougher paint job.  The Mountain Deer Hunt won the best diorama but there was much more work that went into the Wells Fargo Way Station.  I would have scored both the other way around but who am I to judge!

TIM

DSC_0734DSC_095920141214_135210DSC_0018

WW1 – “The Somme” – 28mm Scale

Those of you kind enough to follow my blog will know that I have been trying to put together a WW1 Timeline for an exhibition to be held in June to mark the centenary of the ending of the Great War.  The event itself will be held in Plymouth on Armed Forces Day.

When I first set about my contribution I drew up a list of key events with the aim of trying to produce a figure, vignette or diorama to mark each incident.  Not surprisingly the battle of the Somme appeared on my list.  For inspiration on how to depict this event I did a quick Google search for ideas.  The only thing which came to mind was “death”.

On the first day of the battle which took place on the 1st July 1916 the British lost over 60,000 soldiers (killed or seriously injured).  By the end of the campaign in November of the same year that figure had risen to 420,000.  An almighty loss for a land gain of 25 miles!  Incredible.

The model itself features figures by Great War Miniatures.  The mud is real mud!  A little earth together with some potting soil, paint and PVA was mixed together and allowed to dry before dry brushing some highlights.

My little vignette is dedicated to the 420,000 brave souls.

TIM

20171129_19295520171129_19311320171129_19310320180127_08250120180127_08261120180127_08264920180127_08263620180127_08271020180127_082619