Dio-Bolical Monday No: 32 – “Death & Taxes: The Earls Visit – Part 10”

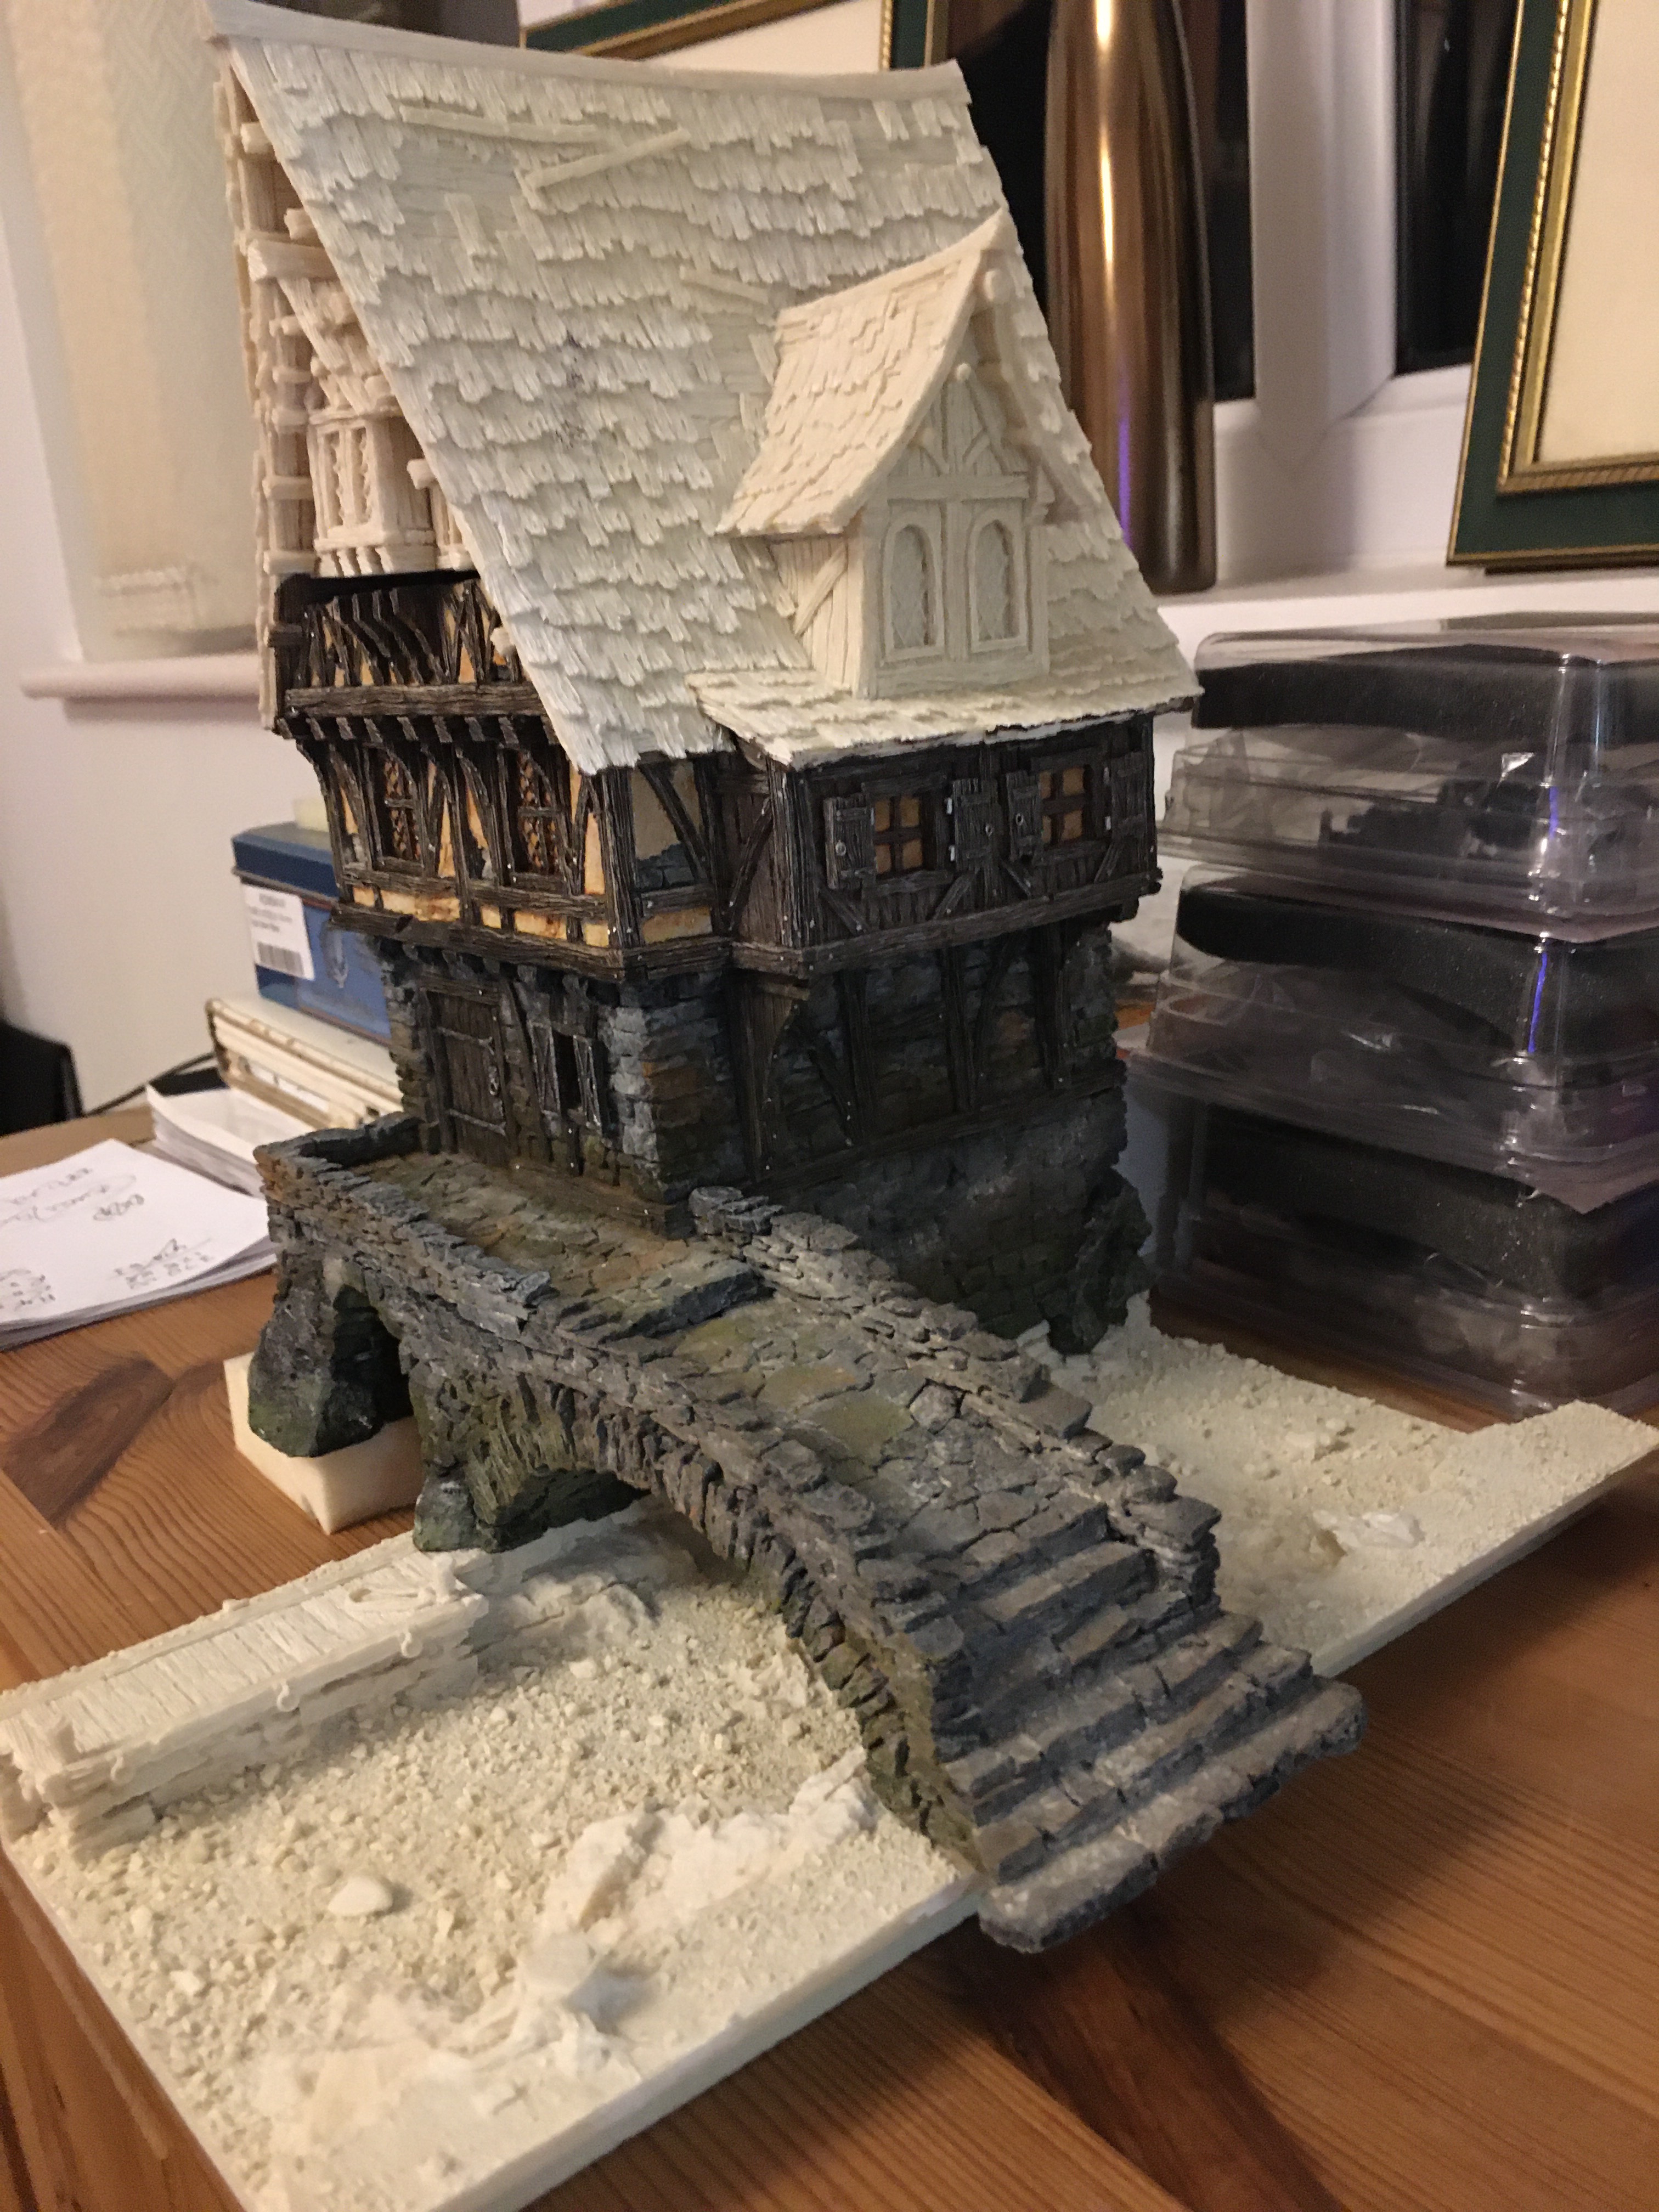
Last week I ended by saying I might work on the Blacksmiths building or make a tree.  I decided to make a tree.

Although the Mill is a tall building it is based to the left and I felt height and colour were needed to the right of the base for balance.  I figured the only way to determine this would be to make a tree and then take a view on things once the Blacksmiths and Barn buildings are in situ.  I figured the worst that could happen is I’d make a tree I either didn’t like or wouldn’t use.  The thing is I was in the mood to make one and the nice bit about dioramas is you can flit from one thing to another and still be making progress.

First up was making the wire aperture for which I used florist wire bought on eBay.  There are plenty of YouTube tutorials on how to make trees and I’ve even done a blog post of my own on the subject way back so I won’t go into all the details on how to bend and twist the wire.  However, if anybody plans to make one of their own and wants links to relevant articles just drop me a comment and I will duly oblige.

img_1724

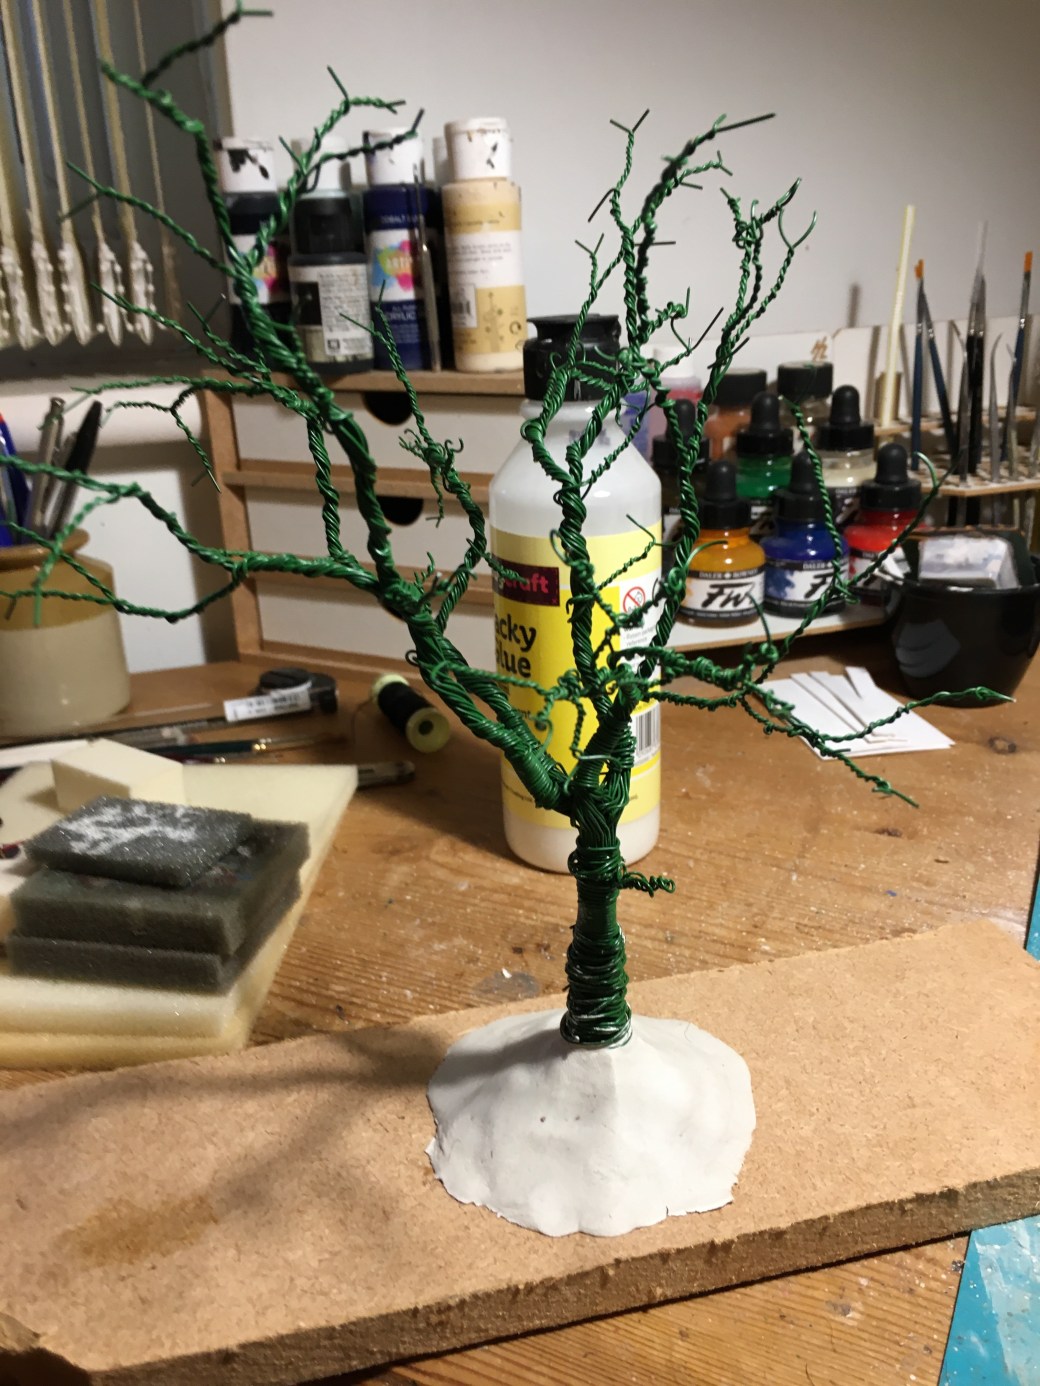
Having created the wire framework and shaped it into something I liked the look of I then set about covering the thicker branches and trunk in Milliput which, once dried I began to scratch up for texture.  Normally I would have wire tree roots too but on this occasion decided to just fix the tree to a very basic base for stability and add roots later when it is properly based.

img_1725

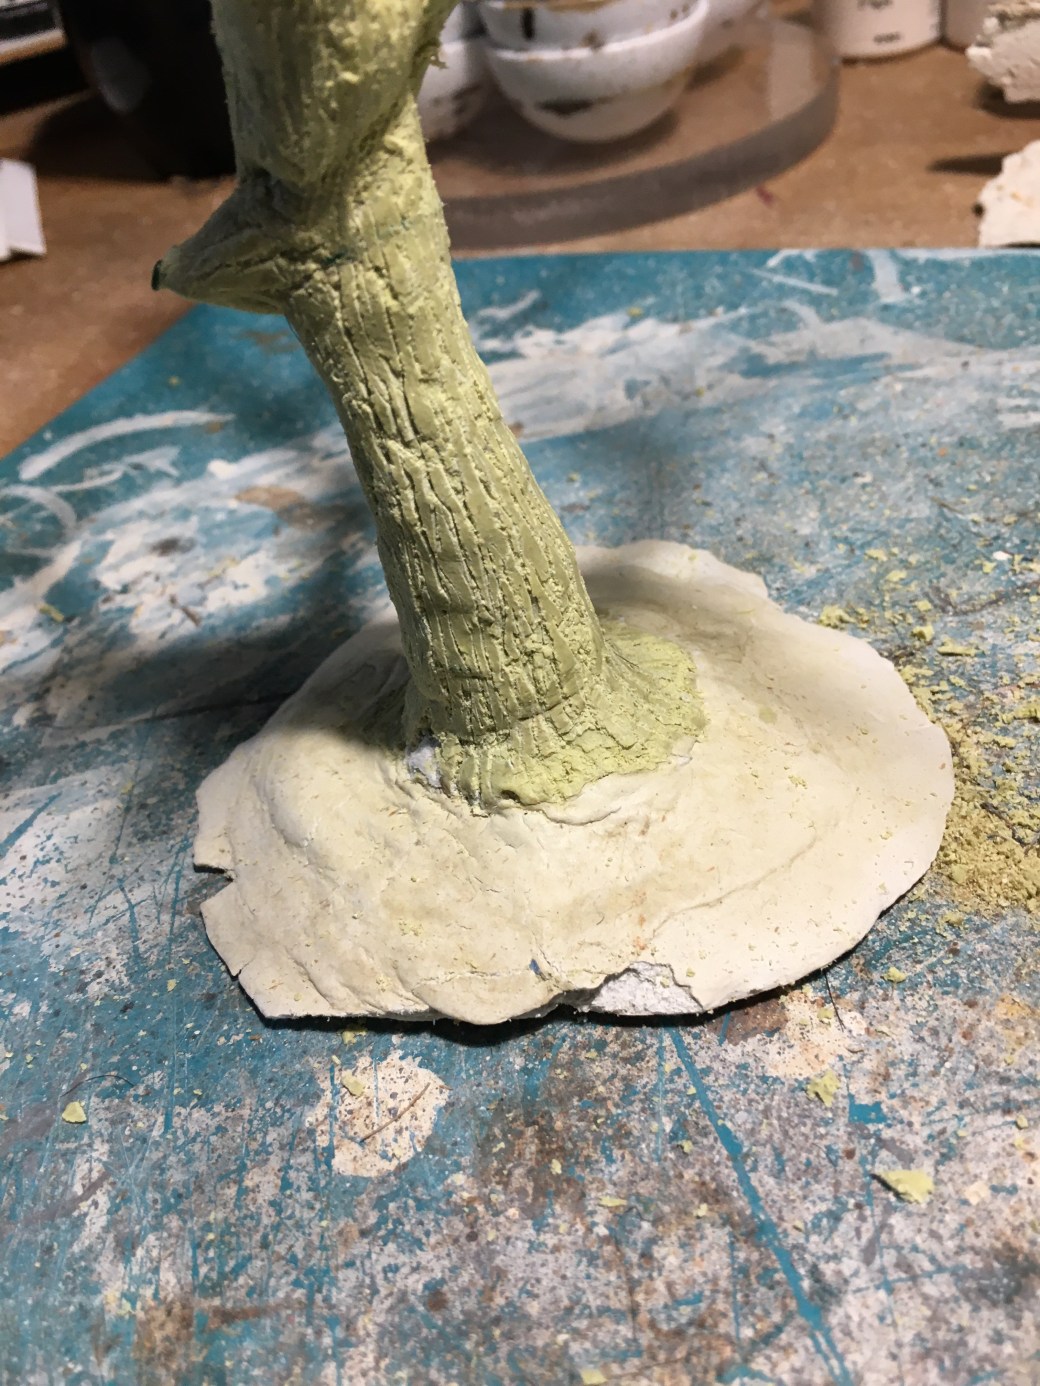
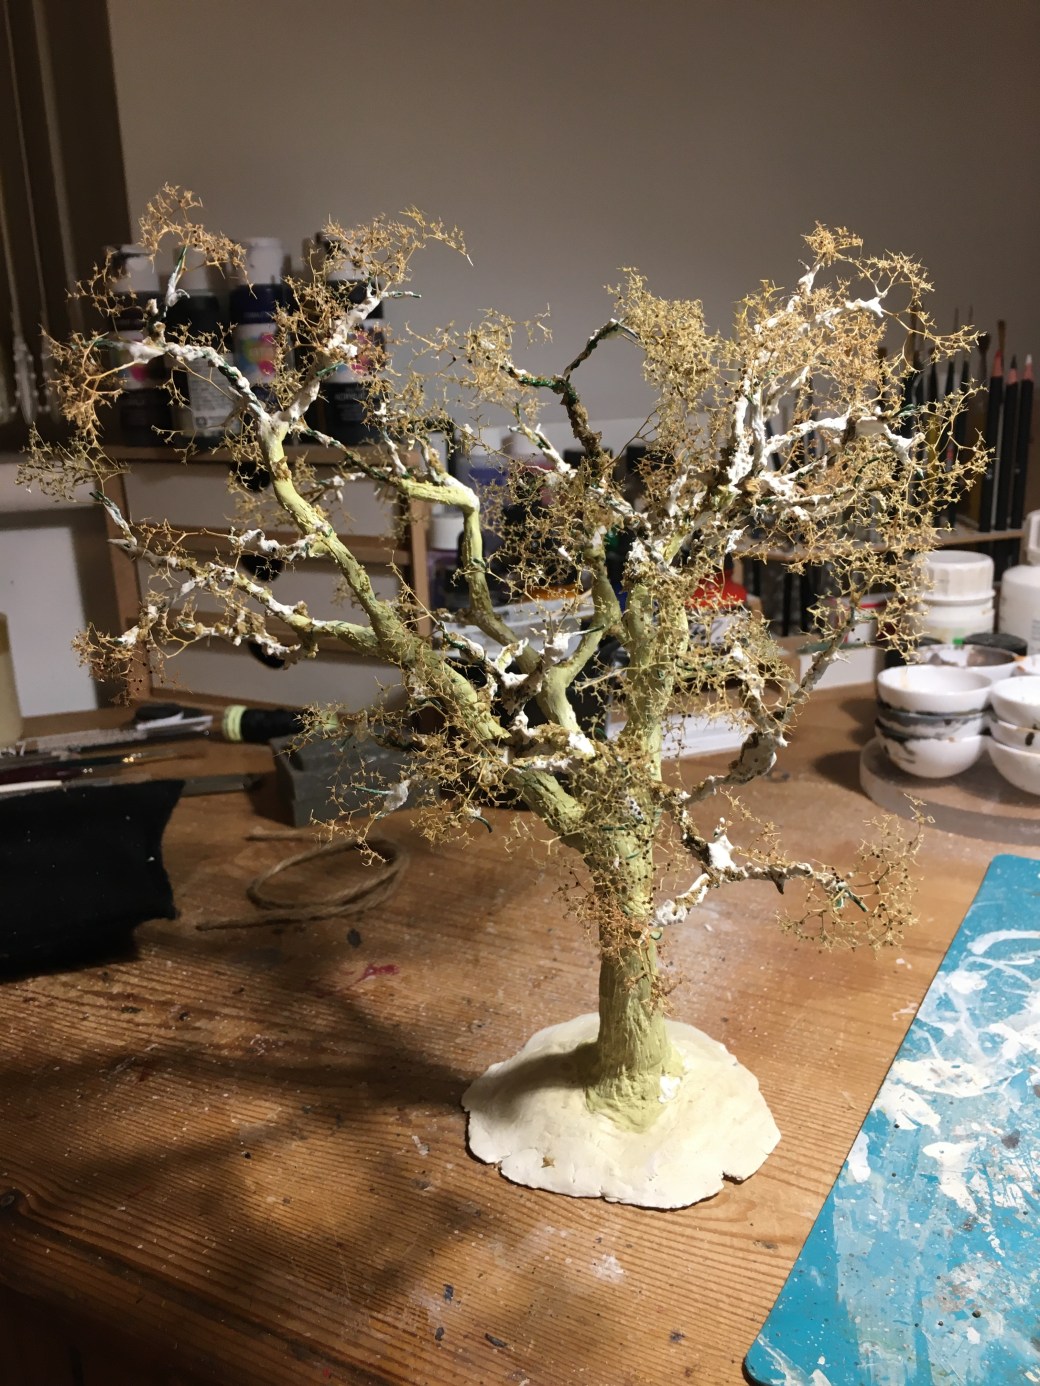
Next up was adding smaller branches for which I used Seafoam stuck to the various parts of the tree using superglue.  The joints were then hidden using filler which is the white you can see in the image below.

img_1731

Once dried I then began to get the base layer painting done for which I used Burnt Umber acrylic.  Apologise for the blurred image below but I’m sure you get the gist.

img_1736

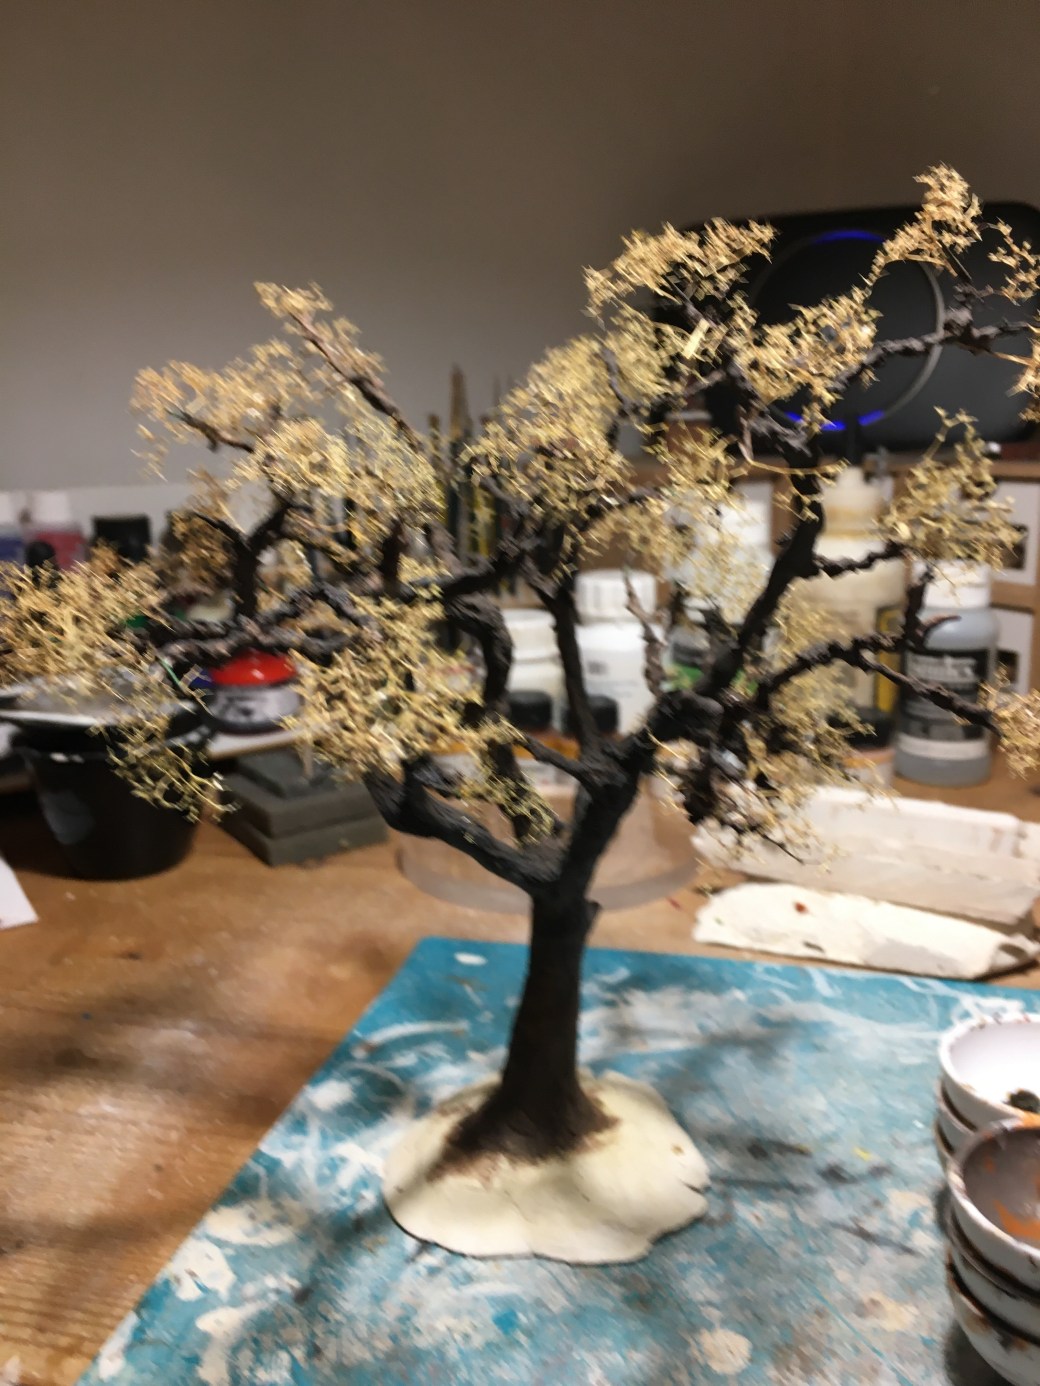
Base layer paint applied it was then about applying washes, for which I once again turned to oil paints, followed by dry brushing.

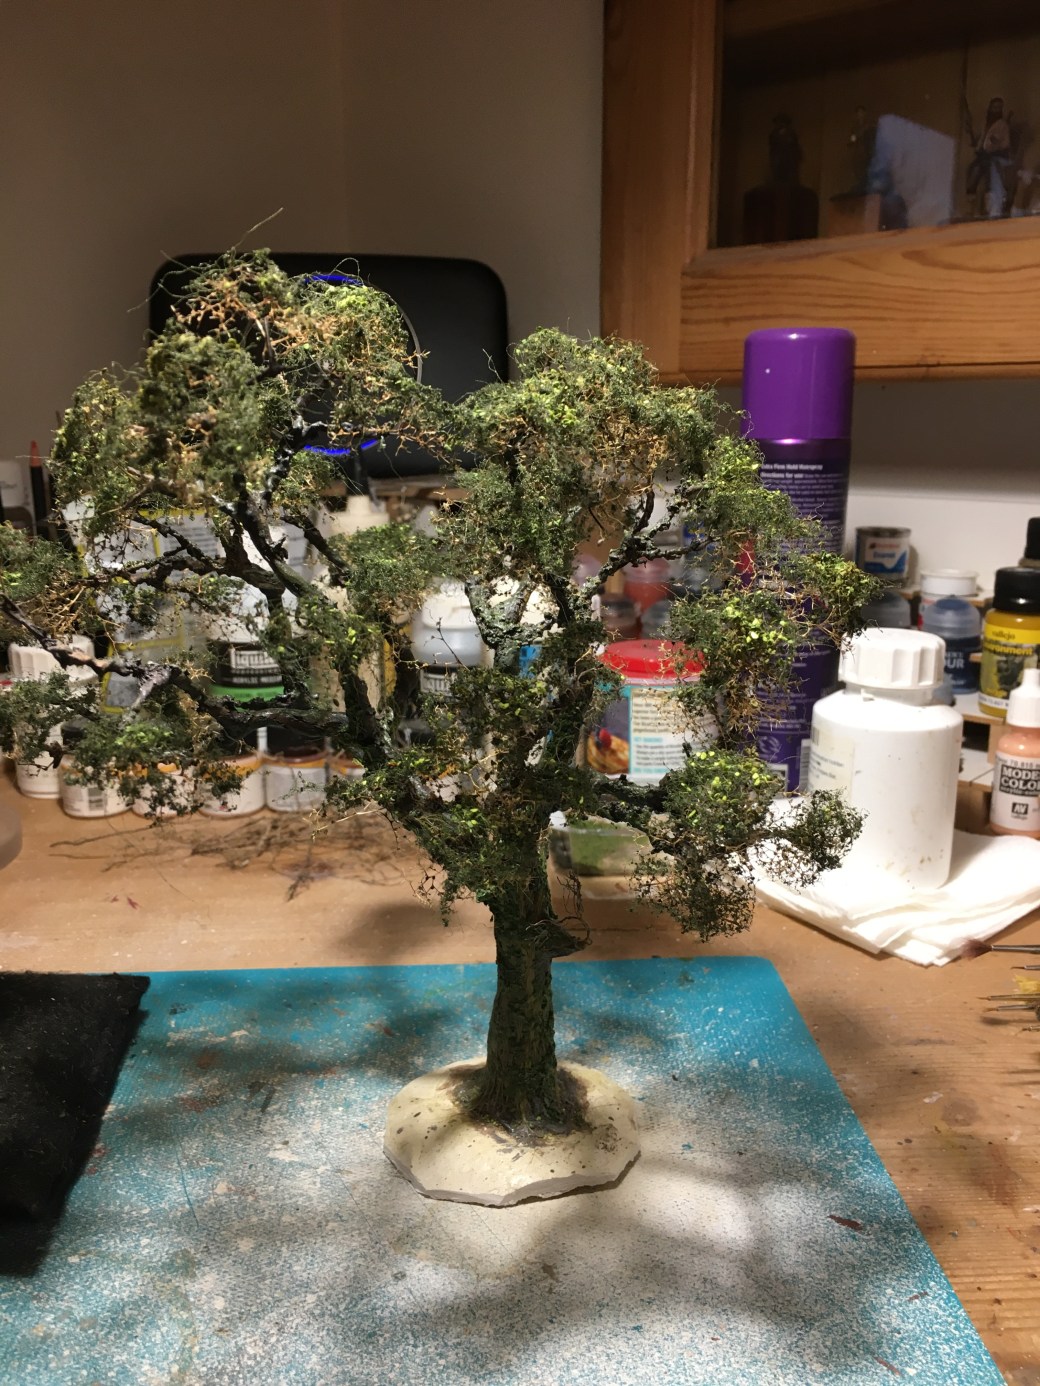
The tree I am trying to recreate is an English Oak.  In colour terms they tend to lean towards grey rather than brown and they invariably have ivy all over the trunks into the branches.  I wanted to create that look and used teased out twine and flock to simulate that as best I could.  This was followed by applying flock to the Seafoam branches.

img_1750

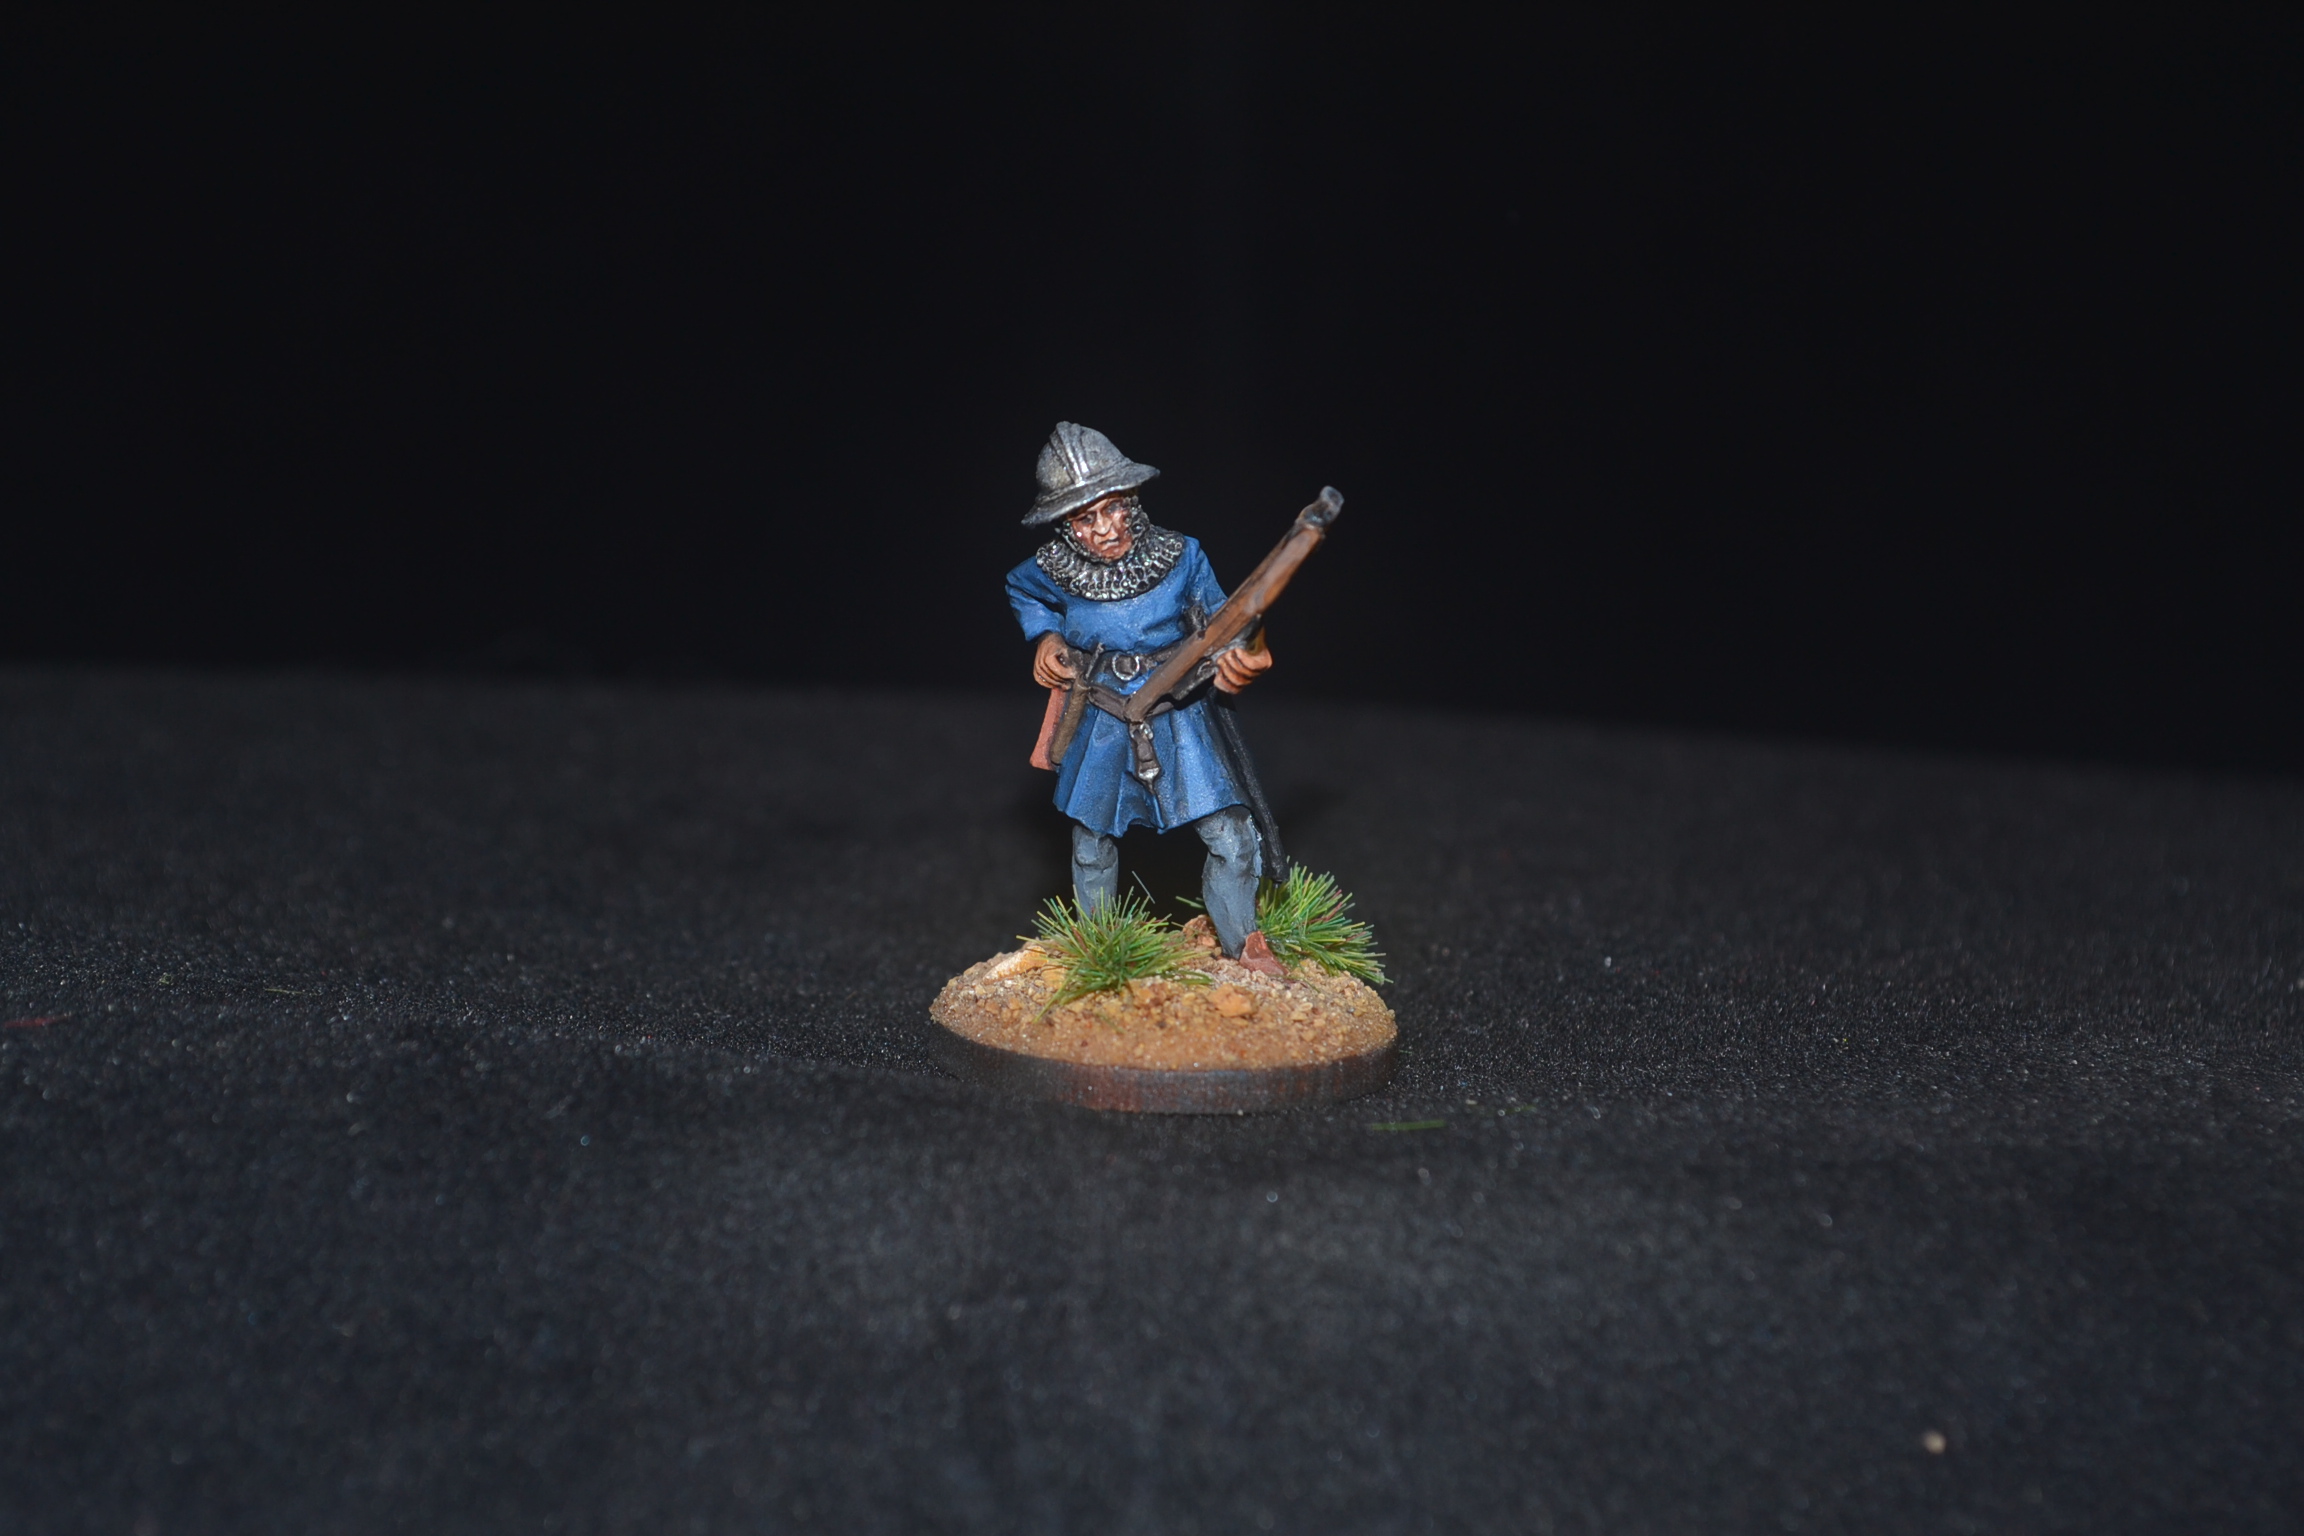
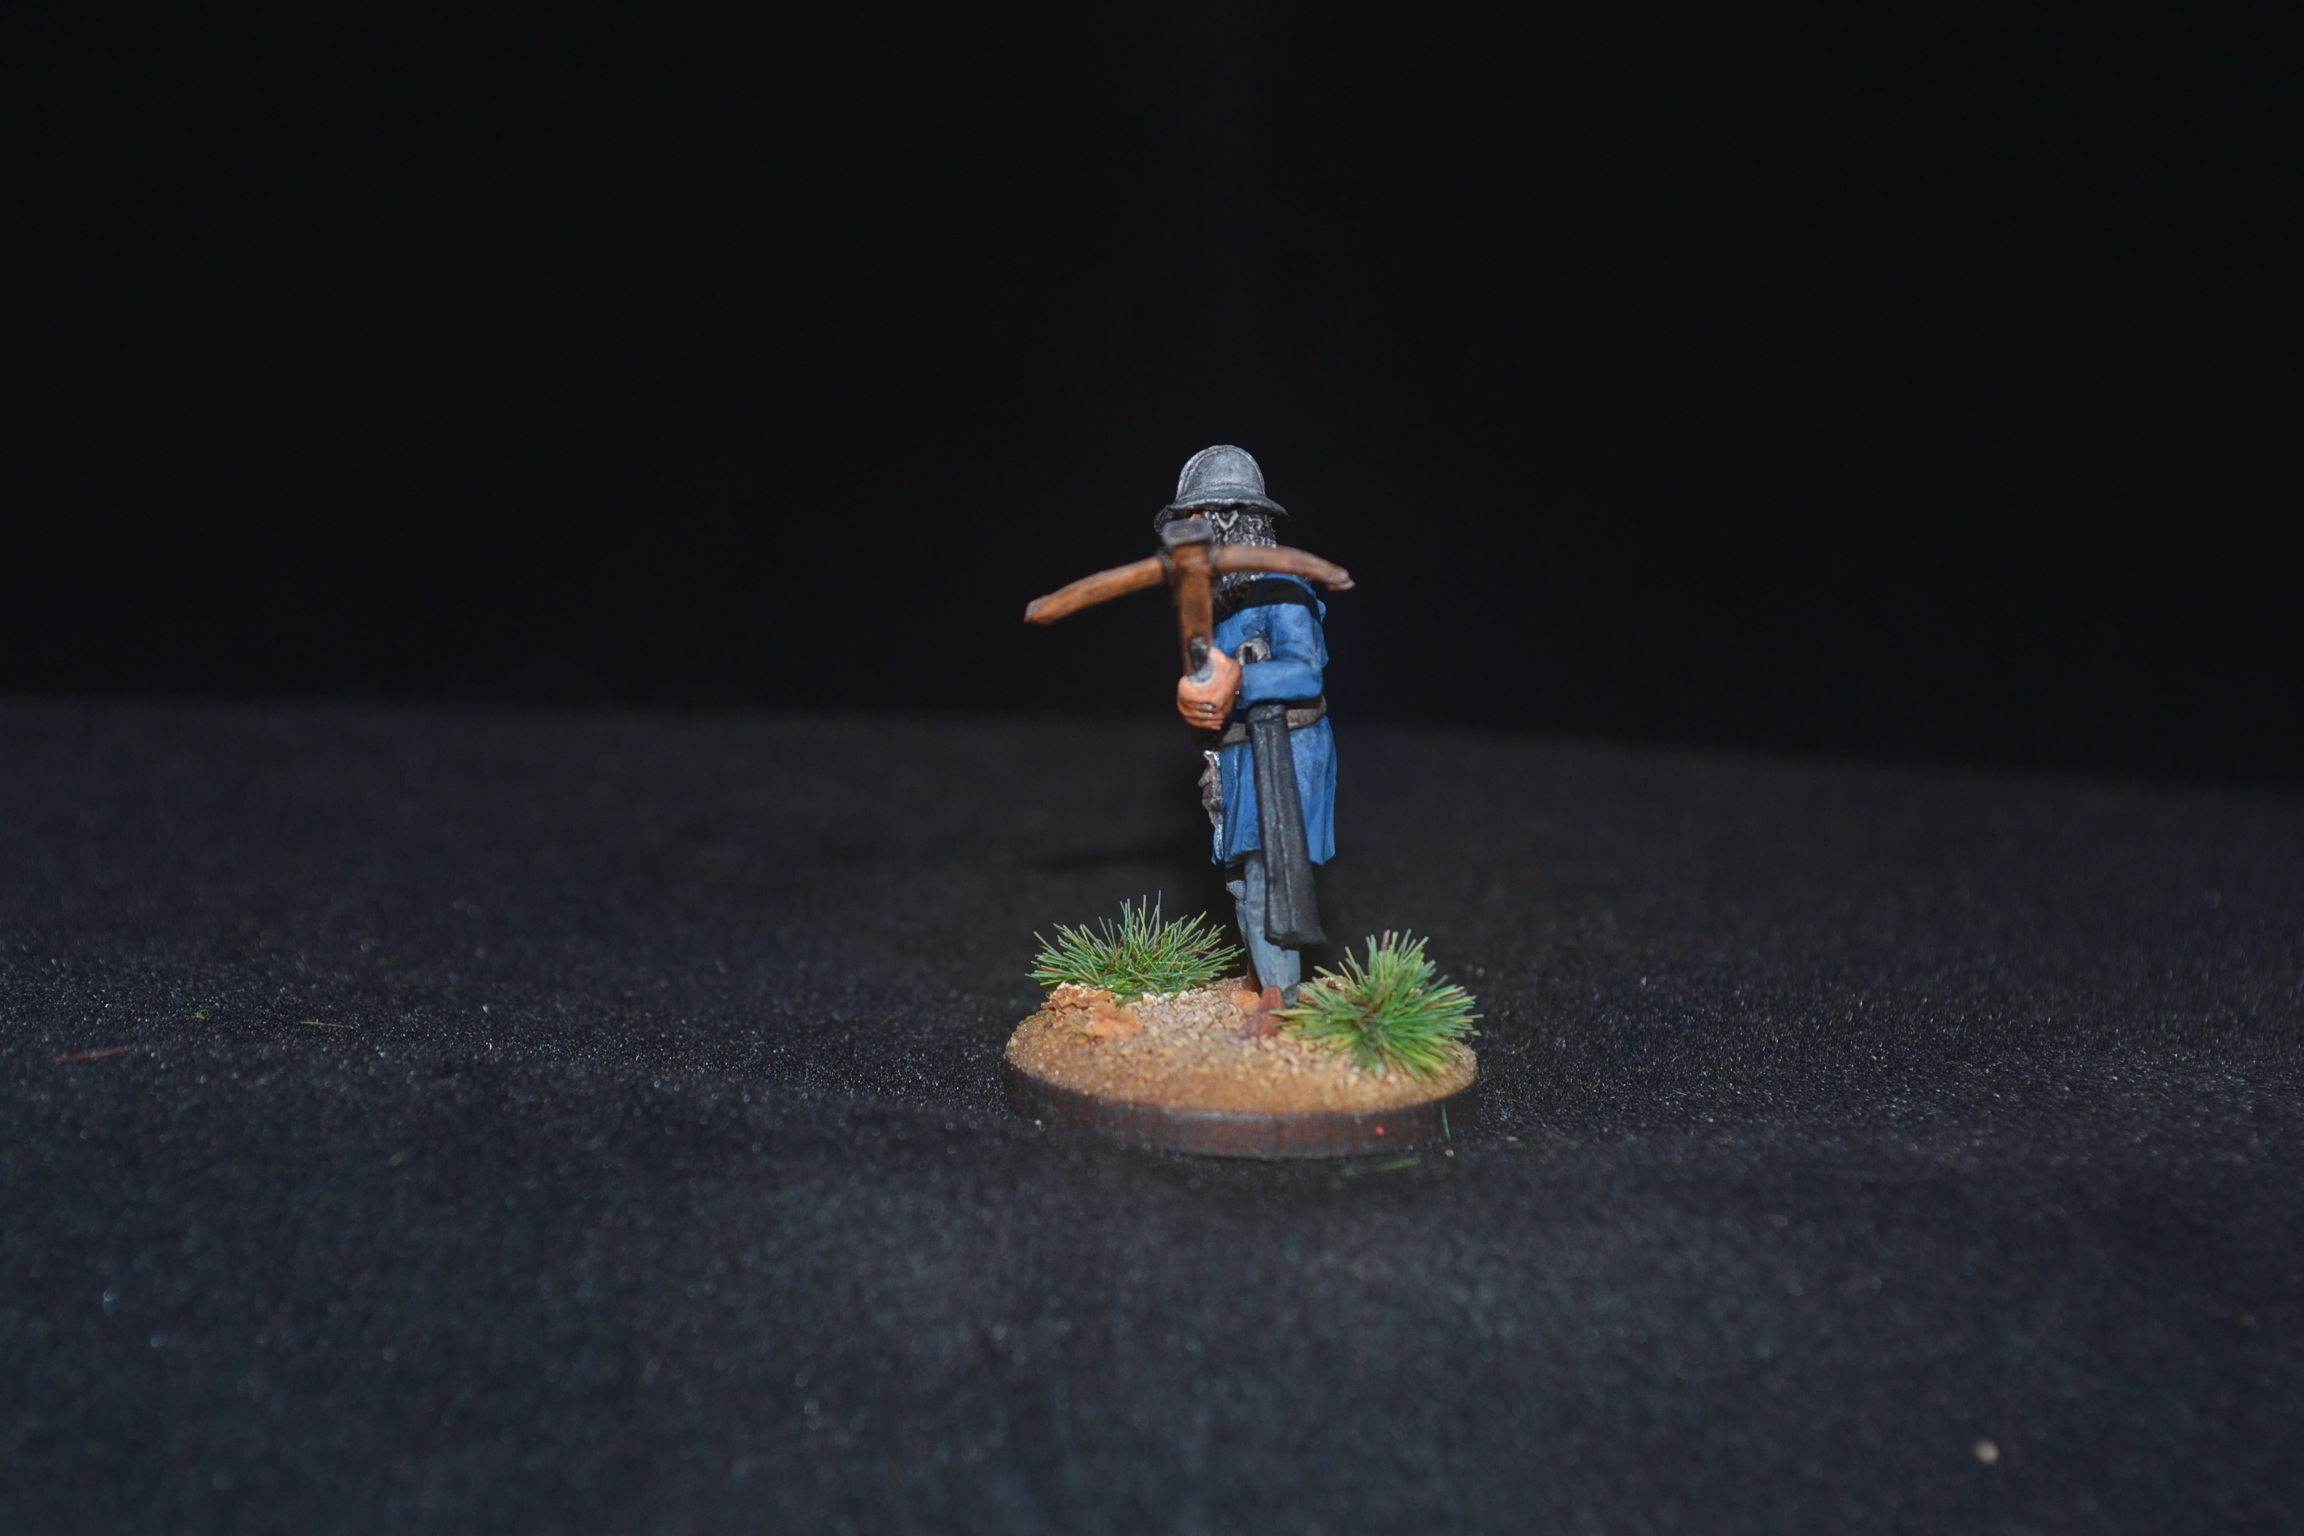
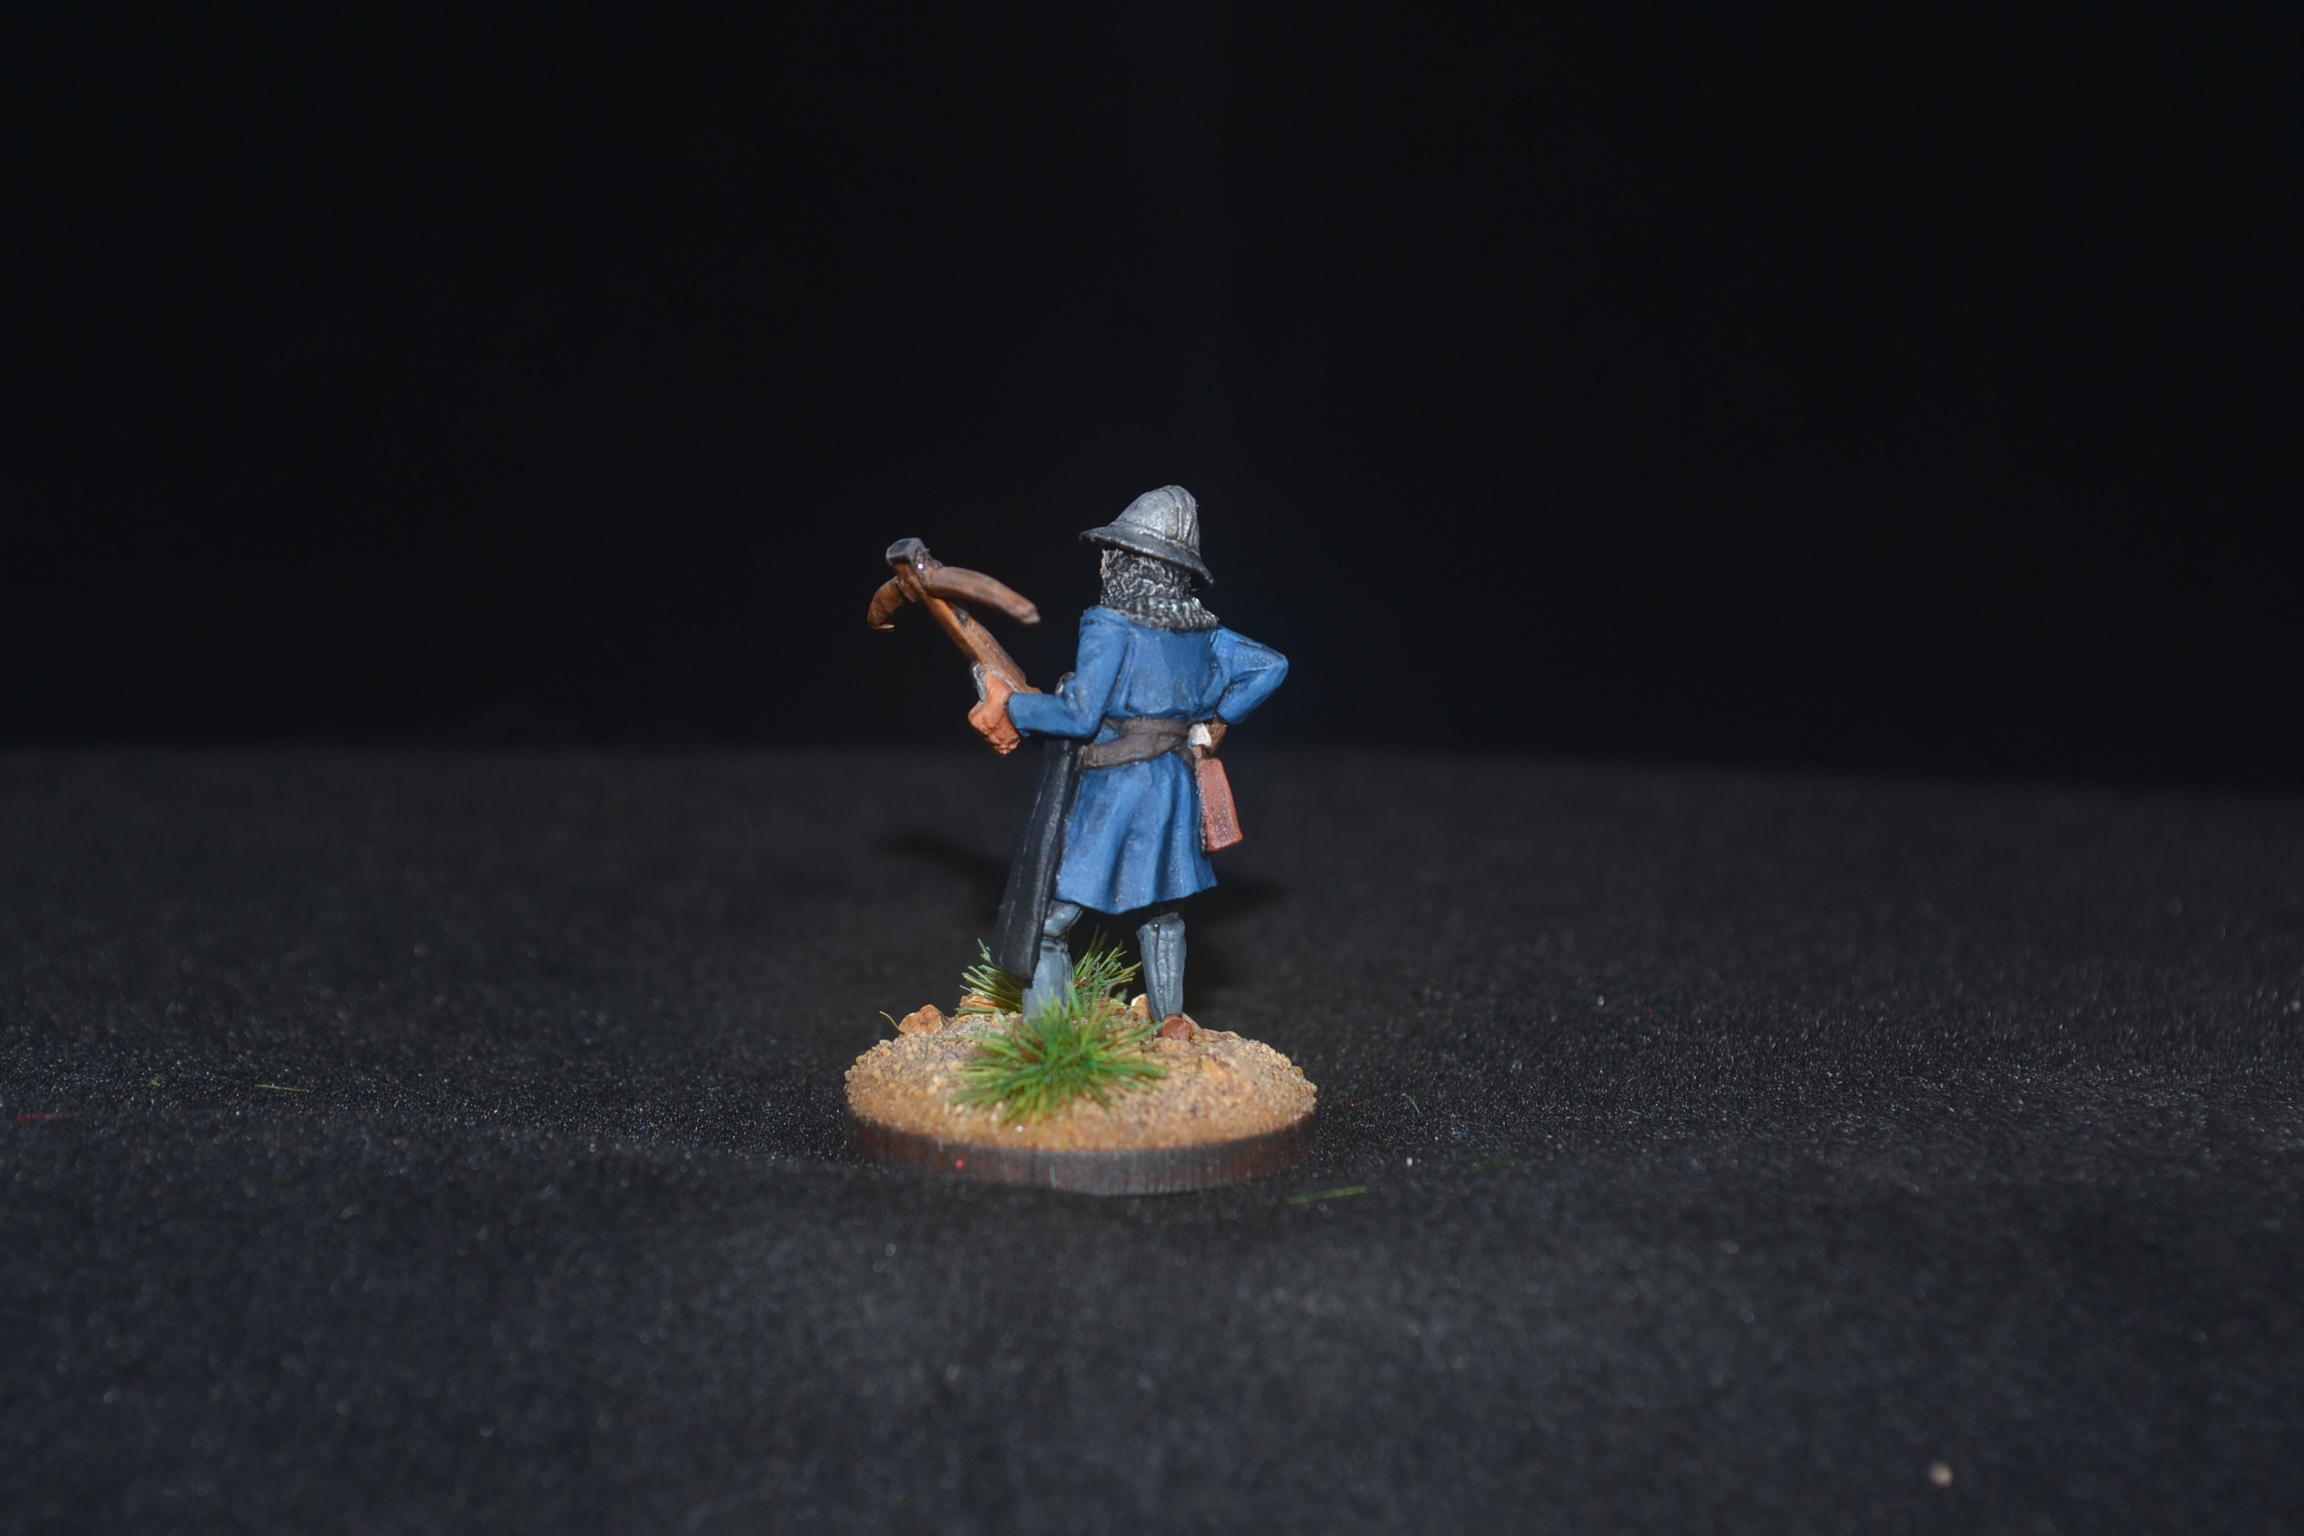
The below images are where I am at the moment.  In truth I’m not sure if I am happy with it.  I need to think things through and might be able to make adjustments to the point where I am more satisfied.  Then again I might just start again and hopefully make a better one.  Worst case scenario I’ve wasted a weeks work but the thing with dioramas and modelling generally is, with or without experience, not everything goes quite according to plan at the first time of asking.

img_1832img_1831img_1833

For now I’ll give further thought to the tree and while I’m doing that I’ll start painting the Balcksmiths building.

TIM

Dio-Bolical Monday No: 31 – “Death & Taxes: The Earls Visit – Part 9”

Last week with the Mill building almost done, I started on the base section and the area surrounding the Mill which included the river section.  Having applied some more filler, added some additional slate chippings from the garden and applied further fine dirt and gravel it was time to start painting and thinking about the position of the next building, the Blacksmiths.

In the two images below you can see that I have added some MDF to add a little height.  I decided that the Blacksmiths building looked better in a slightly elevated position.  Decision made and MDF stuck down I pondered how to fill the gap between the two buildings.  I settled on the idea of a Marsh area and laid down some more slate chippings from the garden.  You can also see that I’ve added some Marsh Marigolds and a couple of grass tufts.  More would be added but I was keen to get a basic impression before I got to carried away.

The second image shows where I’ve filled the gap with more filler and chippings and started to paint.  The rocks were basic greys and various shades for dry brushing and I used inks for the appearance of moss and lichen.

img_1743img_1748

With more tufts, grass, Marrigolds and a splash of mud added the boggy marsh area looked like this.

img_1749

Next I decided to divert my attention to the back section of the river.

The Mill wheel won’t turn without moving water so there was a need to simulate this.  For this I used Woodland Scenics Water Effects which starts white and dries clear.  A little white paint was added though to achieve what I hope will be a better look.

At the same time I started to add Woodland Scenics Realistic Water onto the river bed.  This is essentially a pre-mixed clear acrylic which must be built up in thin layers.  It takes an age to do as it takes many hours for it to cure before you can move on.  I leave it over night each time before adding the next layer.

img_1740img_1804img_1811

Next I decided to paint up the little boat which came with the kit as this needed to be placed on the river before the final layers of realistic water were poured in.  At the same time I started adding some water lilies and more Marsh Marrigolds.

One of the things I should mention is that Realistic Water will find any gap and leak if areas aren’t properly sealed.  The area at the rear where the faster flowing water is was built up so didn’t present a problem.  The area at the front however needed to be dealt with.  As I wanted the end to appear clear I used a bottle of acrylic which I purchased from Green Stuff World.  It is a gel which hardens in a matter of seconds with a UV light from a torch.  This gave me a solid edge and prevented the liquid water from running out at the front.  Using some cotton for a thin rope I tied the boat to the wooden jetty.

img_1810 
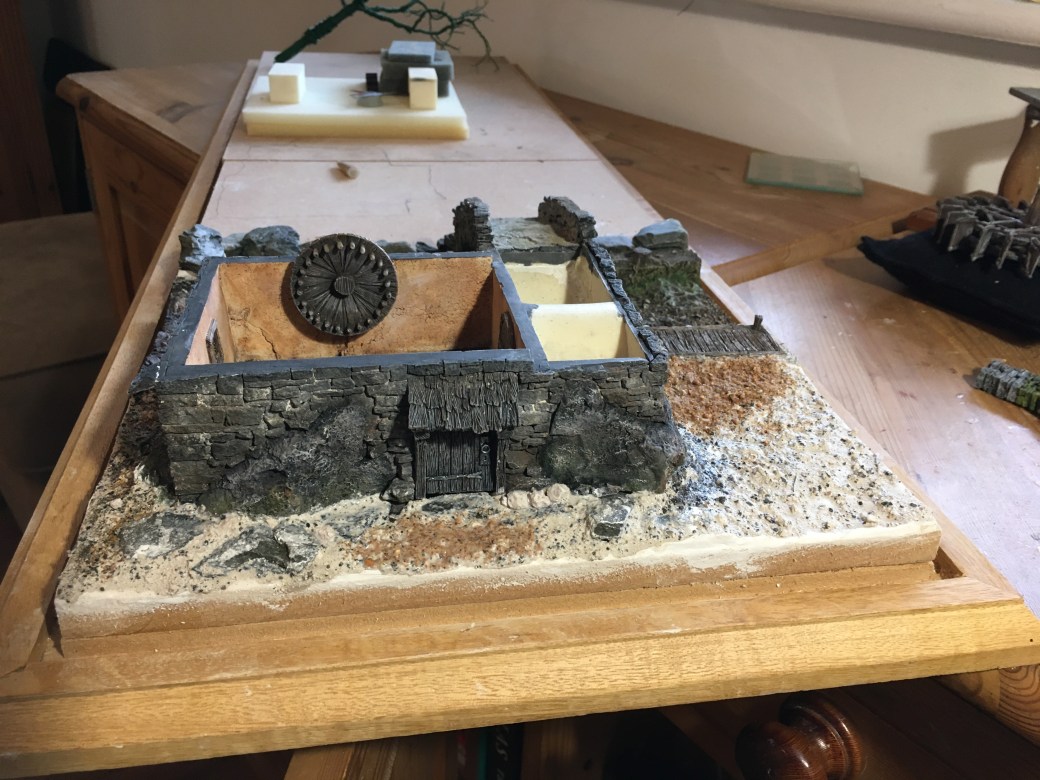
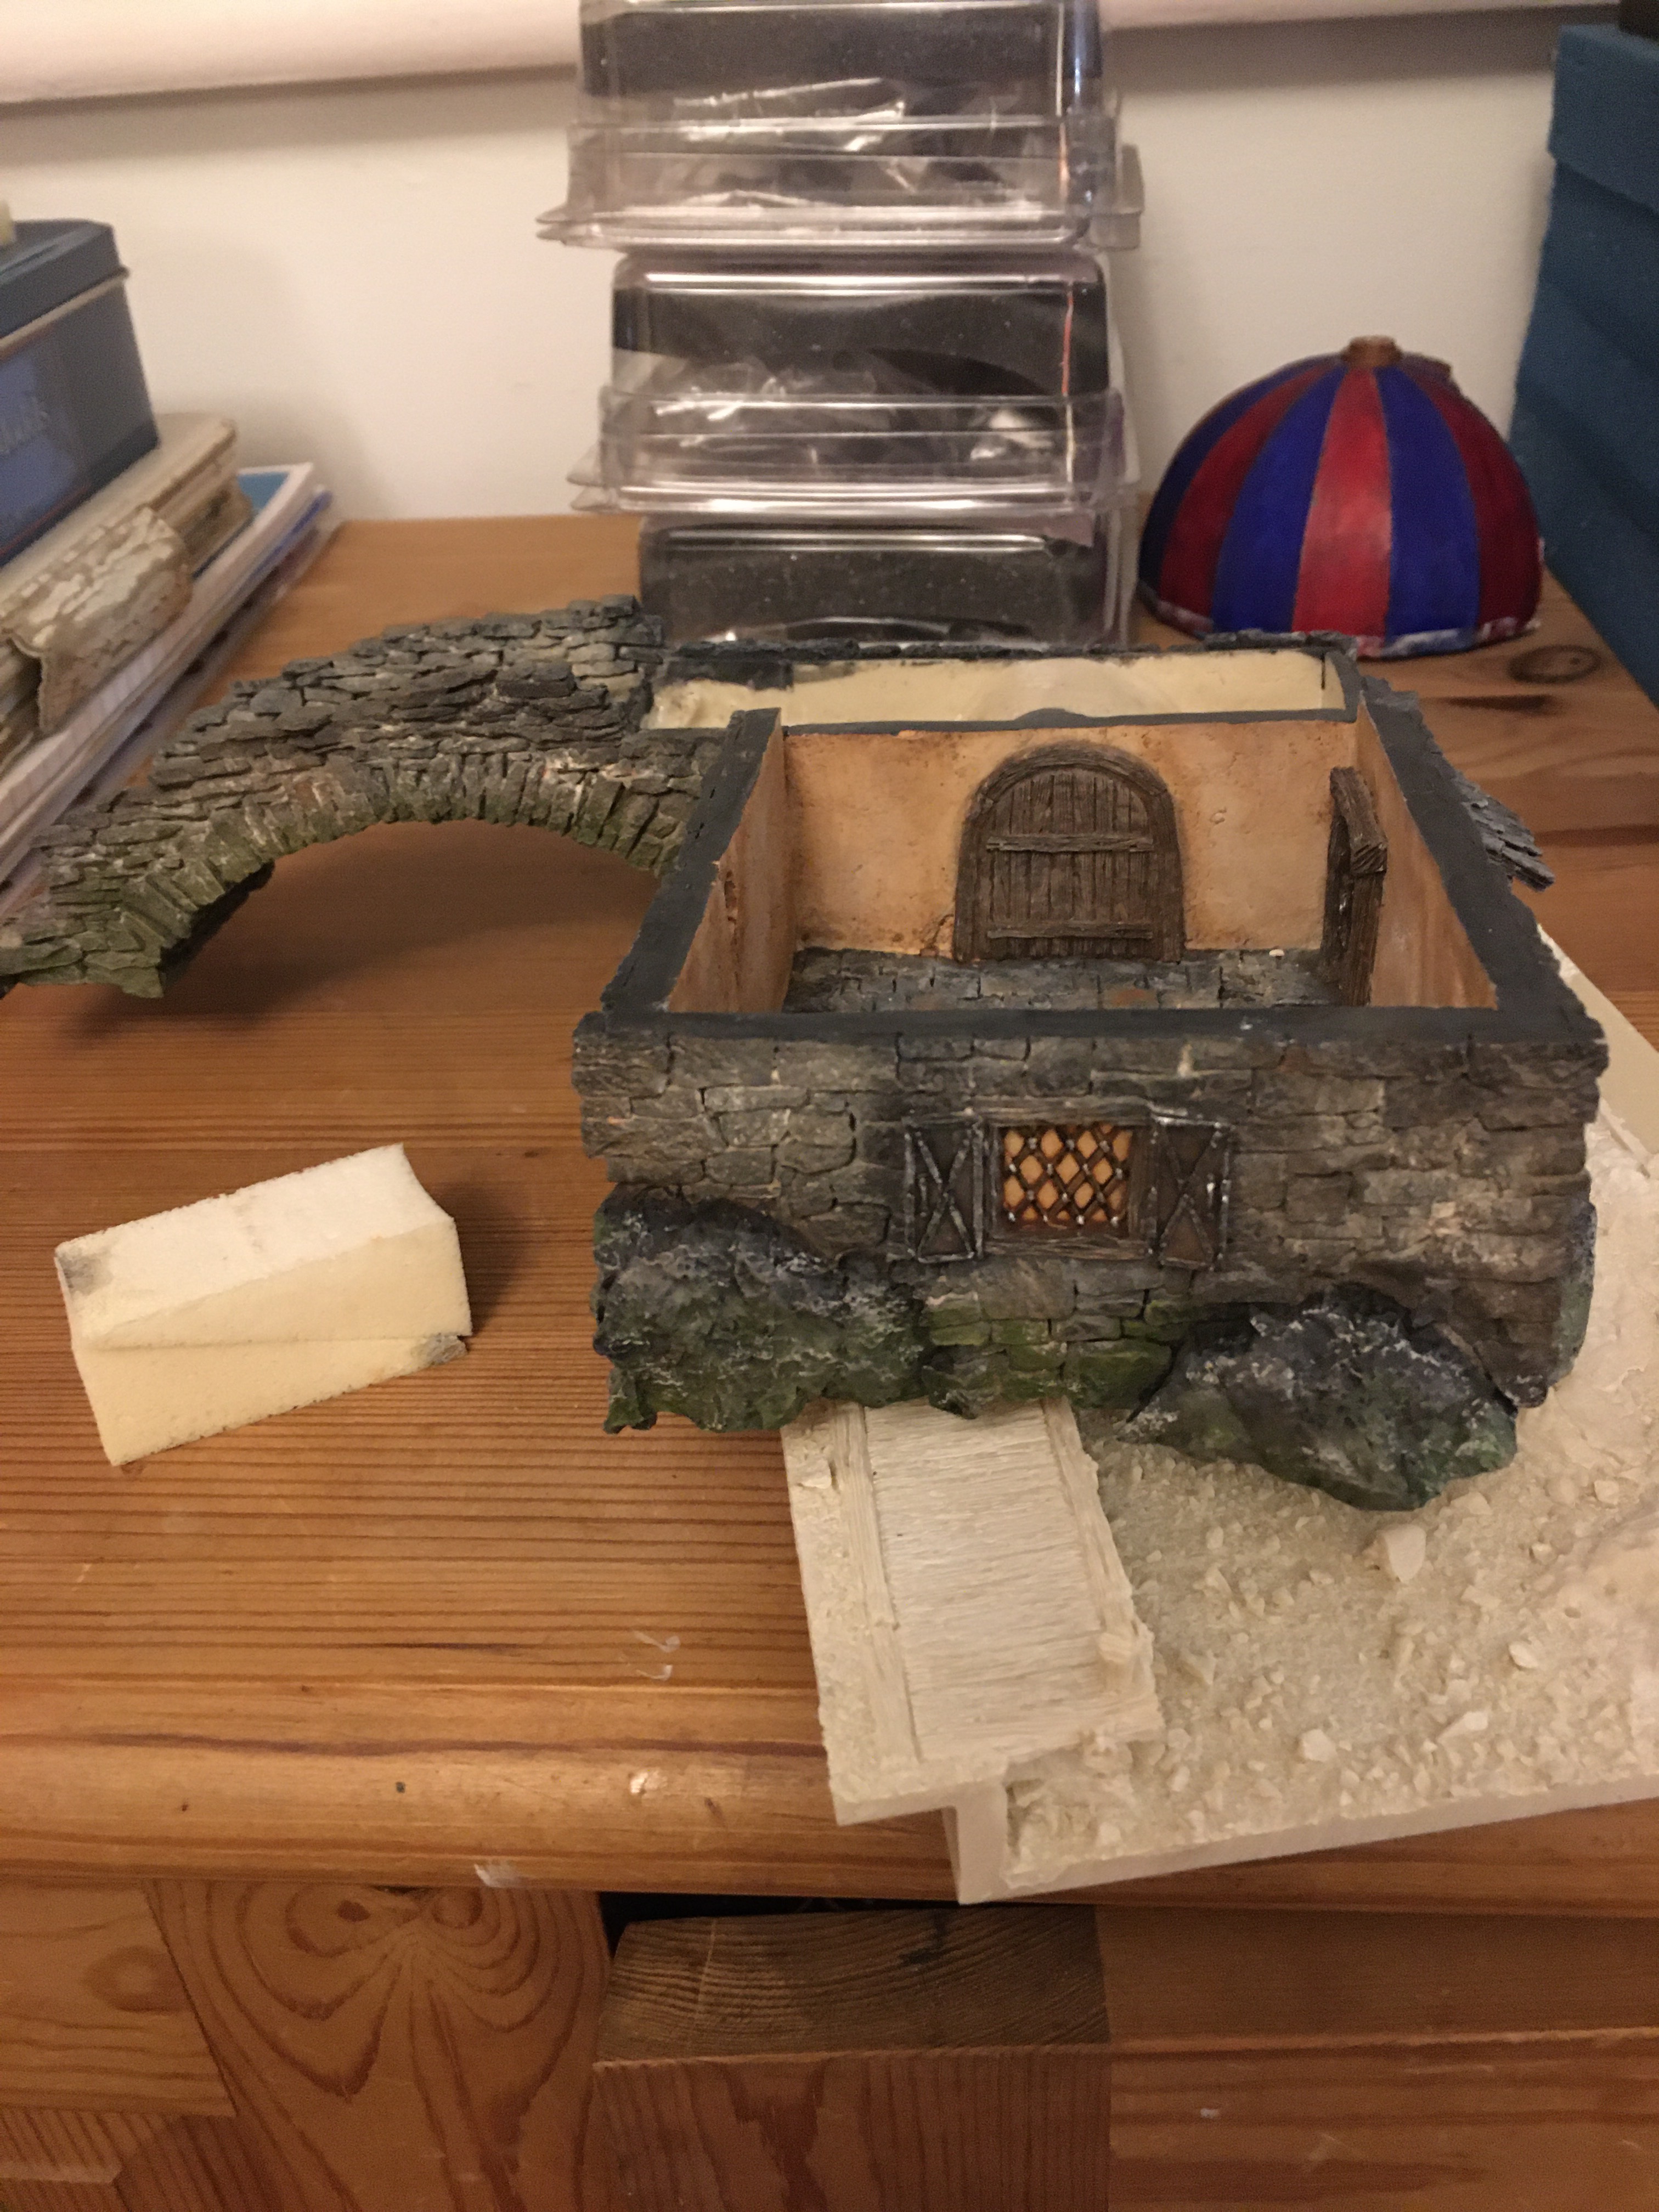
The final image for this week shows just where I am for now.

img_1812

I’m pleased with my progress so far and with the look of the base.  There is still more to be done in this area, not least of all adding a couple of figures in due course along with a few other bits and bobs.  I might also add more water yet too, I’ll see how it all fully dries out.

Next I think I’ll start work on the Blacksmiths, either the basing area or the building itself.  Then again I might make a tree!

TIM

Dio-Bolical Monday No: 30 – “Death & Taxes: The Earls Visit – Part 8”

This week I started work on the river section that the Mill sits on.  This is a piece that will take quite a while.  Not so much due to the painting but more to do with the drying time when later in the process I add layers of Woodland Scenics Realistic Water.

The first job was to get the section primed and then to get the areas of brick work which are aligned to the base section of the Mill building painted to match what I had already done.  In the image below you can see that I have started by painting the brick work with the basic grey colour I had used before.

img_1709

For my next step I painted the river bed with some burnt Umber and applied some early dry brushed highlights.  The three unpainted areas in the image below are where the Mill and the Wheel Support will be positioned later.

You might also notice that I have two problems to overcome.  Firstly, the river section isn’t as wide as the base the diorama is going on. It was therefore necessary to create an additional river piece section at the back and this I made from some plaster board which was then carved to blend in.  You can see the additional piece in its basic form at the top of the image.   It will be a little higher than the river section because I want to create an image of some faster flowing water in due course as this is what would make the wheel turn.

The second problem is one of leveling the base section of the Mill.  When placed on the river section the base is raised a little.  I used some old plastic slotter bases, the sort that come with figures you buy, as these proved to be the ideal height.  You can also see that I’ve started playing around with some slate chippings from my garden.

img_1714

The next step was to lay down some Daz air drying clay and to fix the base section of the Mill in place.

img_1716

With the base level in situ and no longer wobbling it was time to start building up the area  around the front, back and sides of the Mill and getting more colours and dry brushing added to the river bed.  Due to the drying time for the Daz clay this was a slow process but I did manage to make a start and also managed to add some fine grit between the rocks too.

img_1717img_1715img_1718img_1719img_1721img_1722img_1723

Generally base work is something which I enjoy but it isn’t something which can be rushed due to the time for things to dry and cure.  In it’s present state it all looks rather scruffy but all being well that will change when I get to start painting and blending the base work to complement the painted finish on the Mill.  As you might have guessed this will be my work for the coming week.

TIM

Dio-Bolical Monday No: 29 – “Death & Taxes: The Earls Visit – Part 7″

In last weeks post I mentioned that there were some internal workings which needed to be painted along with the actual water mill wheel itself.  Basically the pile of included parts looked like this.

img_1687

The tier two front door canopy and the chimney which you can both see in the top centre of the image have already been painted and assembled on to the main building.  All the pieces which make the wheel are on the right and in the foreground are the bits and pieces which make up the internal workings of the mill wheel as it turns.  Also included is a bag of bits (top left) comprising of boxes and sacks and to the right a small rowing boat and a pillar section which supports the wheel externally.

I wasn’t interested in painting things like boxes and sacks just yet but I did want to get the wheel assembled and painted along with the internal mechanism.  If they weren’t a perfect fit then these pieces would give me a problem further down the line so now was the time get them put together, painted and put into place. 

The first piece to be painted and installed was the internal wheel which can be seen in the image below and is located on tier 1, the ground level of the building.  This internal wheel is driven by the external water wheel which is turned by running water in real life, although not in this case because it is not a working model!      

img_1707

On the next level up, tier 2, the actual Mill Stone is turned by the internal wheel below and a series of cogs.  The cogs are supported by a large wooden beam and a box with a chute feeds the grain to the Mill Stone for grinding.  Hopefully you can see all this in the image below.

img_1771

Next up was the assembly and painting of the main external wheel.  

img_1688img_1773

The external wheel is complete but I will not be attaching it until later.  To do so now will hinder my access to the river section which I intend to start on this coming week.  If all goes well I’ll begin some base work too.

As I have said before, the detail on these buildings, both inside and out, is incredible.  Sadly, despite the effort I’m putting in I suspect that the internal work will go largely unnoticed but the thought of not painting the inside just doesn’t sit well with me.  The thing with dioramas is it is hard to know what is and what isn’t visible until it is complete.  By then of course it can be to late so things have to be done now even if further down the line it is proven unnecessary. 

TIM

Dio-Bolical Monday No: 28 – “Death & Taxes: The Earls Visit – Part 6”

This week saw the completion of the roof but not of the entire water mill itself.  There are some internal bits to be prepped and painted plus the actual water wheel itself.  All being well these will receive my attention next.

As to the roof itself this turned out to be more straight forward than I anticipated.  It is the size of these pieces that take a while along with drying time after oil washes have been applied.

There isn’t a great deal to say about what I have done this week as much, if not all, of it is just a continuation of the work I had done on the previous tiers of the building.  The basic roof colour, inside and outside, was Artiste Burnt Umber and once dried everything was given a Winsor and Newton Lamp Black oil wash. Thereafter it was all about various shades of dry brushing. Mostly lighter browns, a little sand and some white used sparingly.  The windows were painted in the same way as previously posted.

As far as the Mill building goes l would say it is about 90% done.  As mentioned above there are some internal workings to be done along with the wheel.  These will be done before I then start on more base work and begin the river section.  Further down the line a couple of figures will appear as well as bits and bobs like boxes, bags and sacks.

What I did manage to add was a canopy which sits over the front door of tier two of the building.  This was a seperate piece which needed to be glued into position but the painting of it was very much along the lines of the roof.

For now just a few images of the roof and the building as it currently looks overall.

TIM

img_1792img_1684img_1685img_1778img_1686

Dio-Bolical Monday No: 27 – “Death & Taxes: The Earls Visit – Part 5”

Unsurprisingly what time I had this week was spent painting the third tier of the water mill.  Only one element required any thought as the rest of the colour scheme had already been determined by tiers one and two.

I completed the inside first as it’s easier to hold and isn’t detrimental to any external painting.  The outside differed only in so much as the walls are rendered with some exposed stone work.  I decided on a colour scheme of Artiste Sand for the render with a Winsor and Newton Burnt Sienna oil wash applied over the top once dried.  When the wash was dry I applied a little dry brushing of Artiste Sand and Winsor and Newton Titanium White oil paint.

The images below show the inside and outside.  I’ve also included an image of the three tiers assembled on top of each other and a couple with the roof on which has still to be painted.  I’ll probably start on that next

TIM

img_1673img_1678img_1679img_1651img_1650

TIM’s Miniatures & Musings (No: 133)

Welcome to this weeks Miniatures & Musings!

—000—

This weeks miniature is another Crossbow Man and more importantly another step towards completing the foot figures for my Baron’s War army.  I’ve pretty much run out of things to say regarding this project but come the New Year I really must decide where I plan to go with it.  I certainly aim to finish the project but what to do with it after that is another matter altogether.

DSC_0009 (1)DSC_0010 (1)DSC_0011 (1)DSC_0012 (1)

—000—

Well It Made Me Laugh

ddc7c371f0a44b51e415b5b3631f0846

—000—

Christmas Is Over!

Hard to believe that Christmas is over already for another year.  Ours was another very quiet affair.  With SWMBO and I suffering very badly from either a bad cold or mild flu the decision was taken, along with further fears of a UK Covid Lockdown, to not share the festivities with my very elderly parents.  In addition my son and daughter spent most of their time with their respective girlfriends and boyfriends families which suited us just fine.

After a difficult year we were more than happy after walking the dog to light the log burner, open the wine and get slowly pissed as we over indulged on all the foodstuffs guaranteed not to improve your cholesterol!  After a successful dummy run I now feel fully prepared for the New Year although a bit more drinking practice wouldn’t go a miss.

—000—

Give Me Five

As it is, or was, the season for Christmas Crackers I thought I would list five of the worst jokes I’ve found inside them.  Christmas Cracker jokes are about as bad as it gets but please feel free to contribute by adding more dire humour!  In no particular order, not least of all because they are all atrocious, I give you:

  1. What do you call blackbirds that stick together? – Vel-crows;
  2. What do you call a soldier who survived mustard gas and pepper spray? – A seasoned veteran;
  3. What do you call an M&M that went to college? – A smarty;
  4. What do you call a sad coffee? – Depresso;
  5. What do you call a horse that likes arts and crafts? – A hobby horse.

—000—

This week TIM has been listening to …

“Stay With Me” by Lorraine Ellison.  Inspired by a classic moment from the film “The Boat That Rocked”, the relevant clip of which I have included too.  A great film and sound track.   If you’ve never seen it then it is well worth a watch in my opinion.

—000—

This week TIM has been watching …

“News Of The World” starring Tom Hanks.  The Western genre is not one typically associated with Tom Hanks but this turned out to be a good watch.

MV5BMDNlNmVlNDItMjE3Yi00ZTA3LWIyOTktNDhhMGFlZjk5ZDQ0XkEyXkFqcGdeQXVyMDM2NDM2MQ@@._V1_

—000—

Remember …

When you see rich, snooty looking women at the supermarket, pretend you need something and say “excuse me, do you work here?” just to help keep things real.

—000—

TIM

Dio-Bolical Monday No: 26 – “Death & Taxes: The Earls Visit – Part 4”

I ended last weeks post (Part 3) by targeting myself to get tier 2 of The Mill done.  No small order as it turned out given that it was the week before Christmas and included Christmas Day and Boxing Day in it.  As it turned out I had more free time on my hands than I could possibly have anticipated and I managed it with a minimum of fuss.  Knowing the colour schemes helped greatly.  I just needed to sit down, mix paints, put something on to watch or listen to and start painting.  Oh, and make sure the 2nd tier when put on top of the first blended well from a colour perspective.

As promised I don’t intend to bore you by repeating everything about the colours, technique or paints used as that was all covered in a previous post and there was nothing different on this level so we can just jump to the images.  The photo’s also include some of the second level on top of the base level.

You can see from the photo’s that the colour scheme is pretty dark.  This is deliberate for two reasons.  Firstly, the era is the Dark Ages and therefore it feels appropriate to reflect that.  Secondly, my hope is that when the figures are painted, especially the mounted knights, they will look all the more vibrant.  Of course only time will tell if any of this works but at least it’s a plan.

TIM

img_1633img_1634img_1664img_1666img_1665img_1667img_1668img_1694img_1669img_1693img_1697img_1698

Dio-Bolical Monday No: 25 – “Death & Taxes: The Earls Visit – Part 3”

The main objective for this week was to get the external paint work done on the base section of the Mill.  Looking ahead there will be some refinements to what I have done as once the section is fixed into position it will need to be blended with the surrounding base work, more on that though further down the line.

As with the inside of this section I needed to make a note of how I painted the outside to stand a better chance of consistency when I paint the other three layers which make the completed building.

The base colours were all straight forward,  The wood work was Artiste “Brown Umber” and the brick and stone work was Artiste “Black” mixed with Artiste “Sand” to obtain a grey colour.  Once the base colours were laid down and dry they were given a Lamp Black oil wash.  The result is shown in the first two images below.

img_1630img_1631

After setting aside to dry it was time to start dry brushing.  The initial phase was to simply take the initial grey mix and brush over the top.  The initial mix then had some more “sand” colour added to lighten it and then this was dry brushed again.  Another couple of lighter mixes were added after that.  In the image below you can see that I also started brushing on some of the Vallejo pigment that I had used on the inside flooring.

img_1632

As well as the Vallejo pigment I also used some Humbrol Earth and Rust pigment to add colour variety.  On the lower sections where the Mill would attract the damp I added green and yellow inks to hopefully give the impression of lichen and moss.  These are areas witch will also be looked at again once the section has been properly based.  For now though the current end result can be seen in the images below.

img_1692img_1691img_1689img_1690

The windows were painted using Vallejo Model Color Iraqi Sand which was then given a wash of Citadel Reikland Fleshshade.  The lattice work was then painted using Vallejo Gun Metal and Silver.

With the internal and external painting methods determined and noted down they will be used again as applicable throughout the rest of this building.  The good news is I won’t need to repeat these methods in future posts where I have used them, I can just post photo’s.

This week I also received the orders I had placed with Other World Miniatures and Mirliton in Italy.  Both look good and I couldn’t believe just how quickly the Italian order came, less than 48 hours!  Incredible.  As to the figures themselves I’ll be introducing those to you bit by bit as they get painted.

Next step unsurprisingly is to work on the next tier starting with the inside once again.

TIM

Dio-Bolical Monday No: 24 – “Death & Taxes: The Earls Visit – Part 2”

In “Part 1” I ended by saying that this week I would start some painting and making some lists.  Both were minor goals but more importantly both were achieved which means the project is very much now underway.  First thing on the painting table is the Mill building, shown again in the image below on the left.

img_1616

As mentioned last week, I intend to build this diorama from left to right.  I believe this way I am less likely to box myself in.  This means starting on the Mill first because it includes a separate river section which needs to be done so I can move across the base.

There are many parts to the Mill and these I will get to do further down the line but for now my concentration is on the four separate levels (shown below although I can’t see how to rotate the image!) which sit on top of one another to create the completed building.

This last week I began on the base section, see below.

img_1619

The first job of course was to prime everything which took an age.  I’m not one for an airbrush or rattle cans so this was all done using a brush in order to get into all the nooks and crannies.  For primer I always use Humbrol white matt enamel thinned with white spirit.  It may or may not be unorthodox but it has served me well for 50 years or so.

As well as being highly detailed on the outside these buildings are equally detailed on the inside.  Although I haven’t fully thought that far ahead yet my current thinking is to keep each of the buildings so that each tier or roof section can be removed to see the inside.  I might even think about fitting the insides out too with figures and furniture but for now that’s along way from my thinking.

Deciding (for now) that I wanted to look inside the buildings meant I needed to give proper consideration to how I was going to paint the area, especially as there are other internal levels which I will look to paint the same way.  As the walls are essentially cracked plaster in appearance I settled on the idea of a light acrylic paint over which I would apply oil washes and dry brushing.  The same would apply for the flooring and any wooden features such as doors and window frames.  Diluted oil pain really helps bring the detail out and is a much cheaper method than using washes from Citadel for example.

With the buildings being the size they are I had no intention of using my Vallejo paints on them for the bulk areas.  Instead I chose to use acrylic Artiste paints, a range of 80 or so colours, which come in 59ml bottles and can be bought in the UK for about £1.60 each.  I purchased mine from Ebay and although I’d never use them to paint figures with they are perfect for base coating the buildings.

img_1622

In the image above I have used “Sand” for the walls, “Sand & Black” mixed for the flooring and “Burnt Umber” on the door as the base coats.

img_1624

Once dried I then applied a “Burnt Umber” oil wash to the walls and a “Lamp Black” oil wash to the floor.  The wash is a simple affair in that the oil paint (you don’t need much) was just diluted with White Spirit.  As with most washes best to go light and build up if you aren’t to sure of the finish you are looking for.  Once dried I sparingly applied a “Burnt Sienna” wash to to the walls as well and also a little Daler & Rowney White Ink.  When the floor was dried I brushed it with some Vallejo Desert Dust Pigment for the flagstone grouting.

img_1629

The next step, shown partially above, was to do some dry brushing to add variety of colour and bring out the wood grain on the doors.  There is still a little more to do but that’s as far as the painting went for last week.  As well as some final finishing touches I have a window that needs to be done and some of the door furniture (handles and hinges) need to be picked out but that will be done in the coming week when I also plan to start on the external painting for this section.

My other aim for the week just gone was to start researching for, amongst other things, figures.  I found some very suitable ones on Other World Miniatures, a company I have used before, and on Mirliton, an Italian company who I haven’t.  Orders have been placed with both suppliers and when the goods arrive I’ll take you through what I have bought.

Until next week …

TIM