TIM’s Memory Monday (No: 4)

I learnt a great deal from my first two building projects and much to my own surprise was ready and feeling confident at having a go at a complete scratch build back in May 2017 when this post first appeared.

—000—

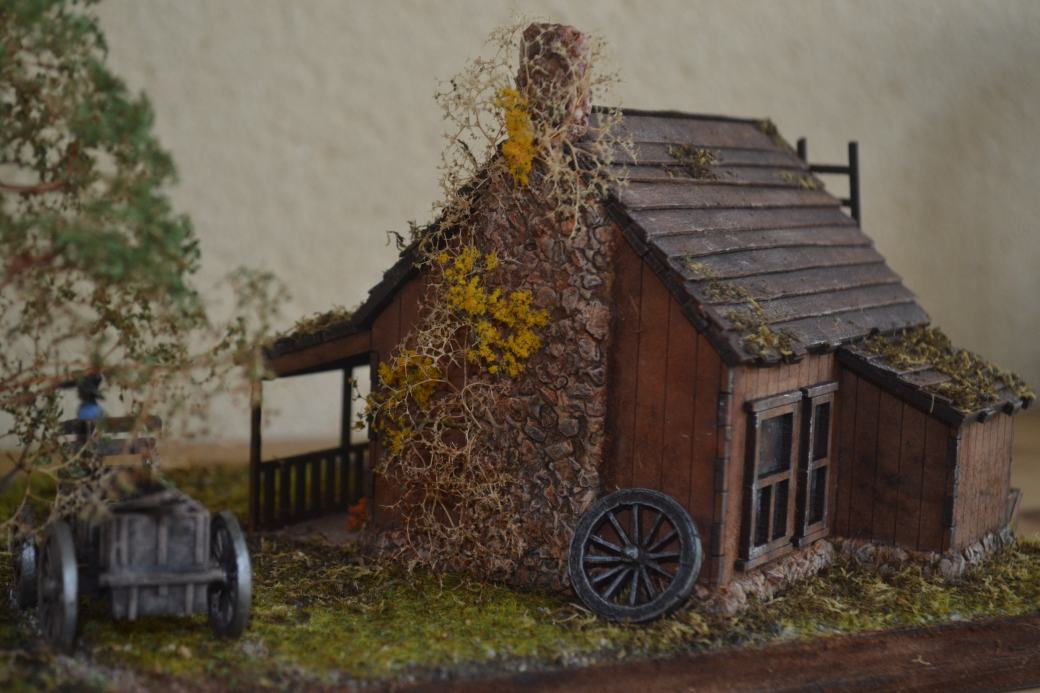
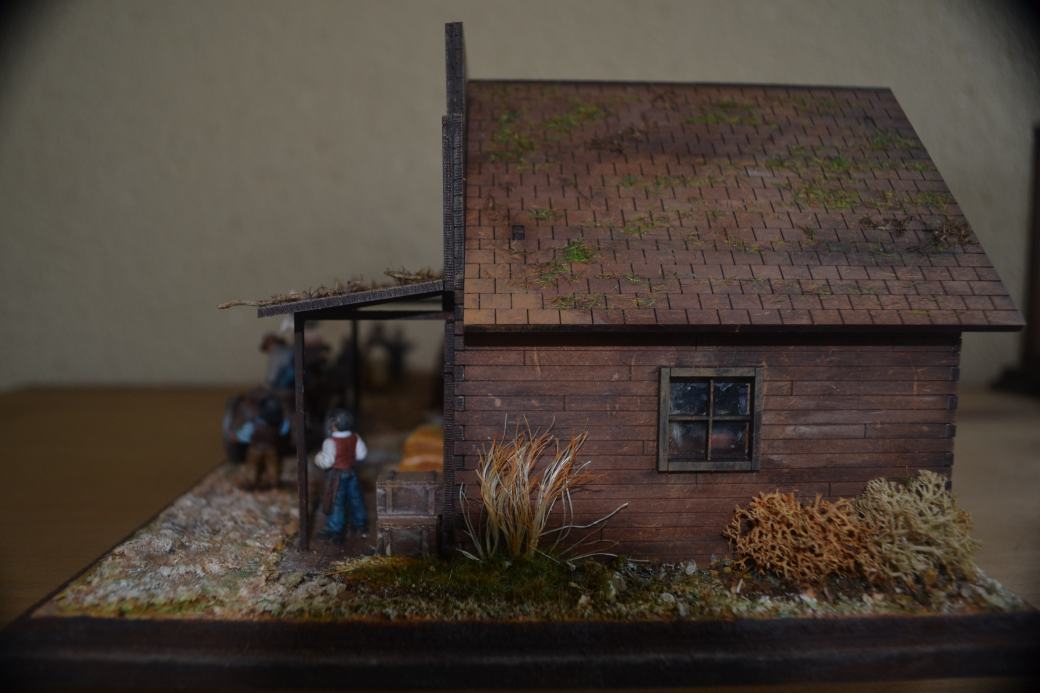
28mm Building Project No: 3 – Livery Stable

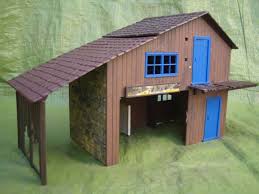
Having completed two building projects I was ready to have a go at scratch building one.  I already knew that I wanted to build a Livery Stable and had in mind a rough idea of how it would look when completed.  To be fair the idea was based upon an old Britain’s Livery Stable (see image below) which I used to play with as a kid.

download

My first step was to put my design down on paper.  Having taken account of the base size, and working to a scale of 28mm equals 6 feet (and therefore 5mm equals approximately 1 foot), I drew the outline on graph paper (front, back and sides). Coffee stirrers were then cut to shape and using pva glue were stuck to card.  I used thick card, the type they use for making picture frame mounts.

Outline graph paper drawings and coffee stirrers

As part of my design I intended to have a roof which could be removed in order to look inside, so coffee stirrers needed to be stuck to both sides of the cardboad. The one thing I had not accounted for was the contraction brought about by the pva drying.  As a consequence the dried walls curled up a little rather than lay flat. Had I weighted the sides down while drying things might have been better.  The problem wasn’t insurmountable but it became clear that I needed to redesign the inside slightly so that the sides could be braced and pulled together when assembled and glued.

Early internal images showing the upper flooring and stable posts which were used to brace the sides at assembly

You will notice from the images above that the inside was also painted at this stage as it was much easier to man handle the model and gain access to all internal areas. My next steps were to add the door frames, construct the winch system, build the doors and begin the roof.  Coffee stirrers were again used and cut to size.

20160414_12054820160413_19034120160414_12053920160414_12060620160416_13350520160416_151301

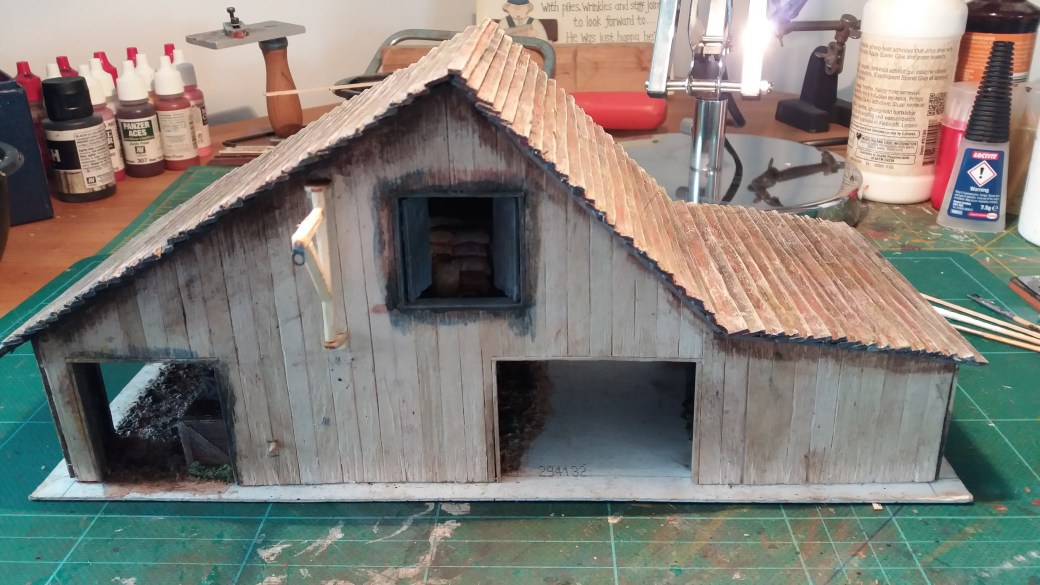
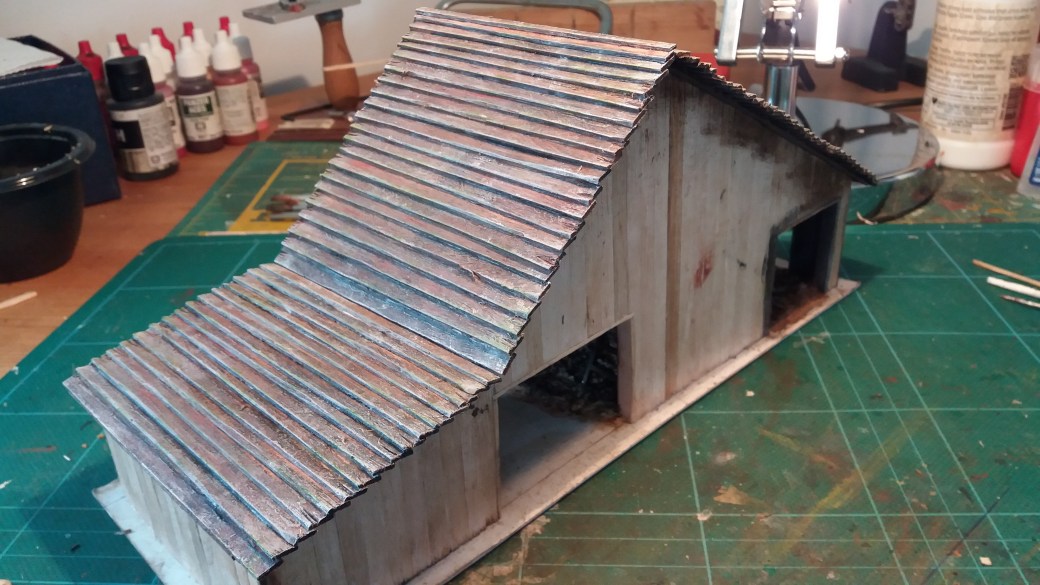
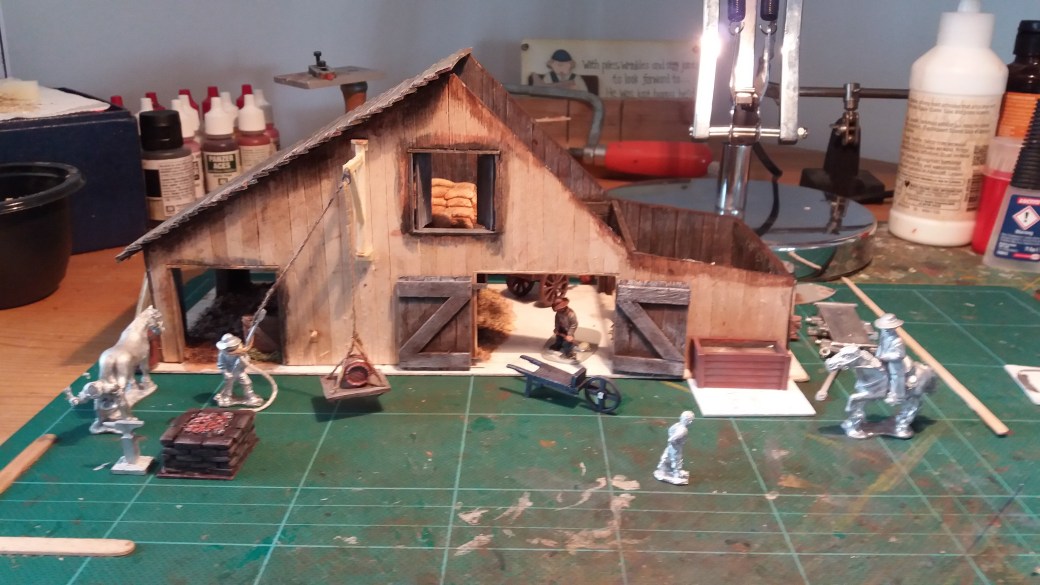
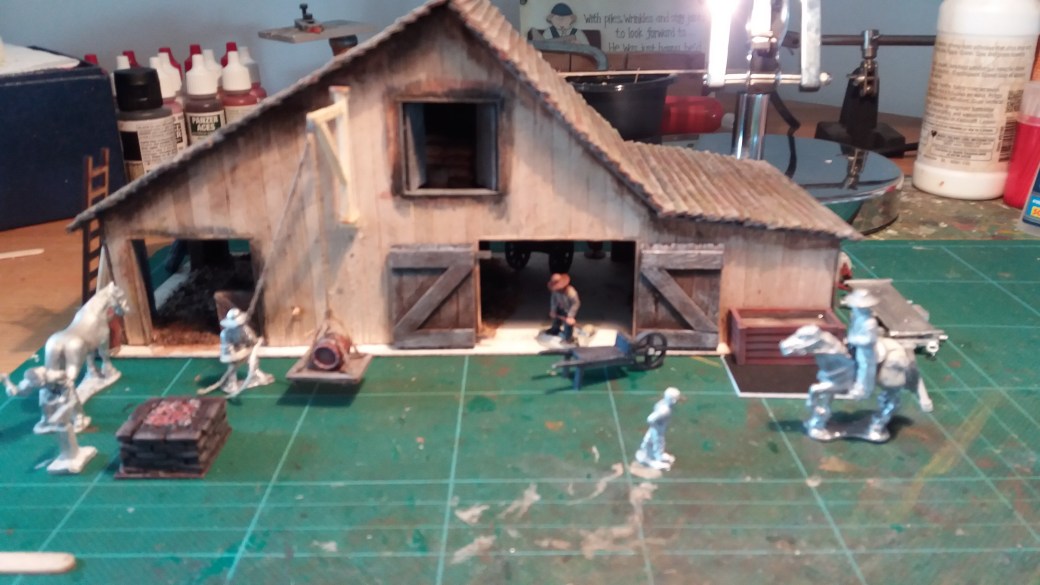
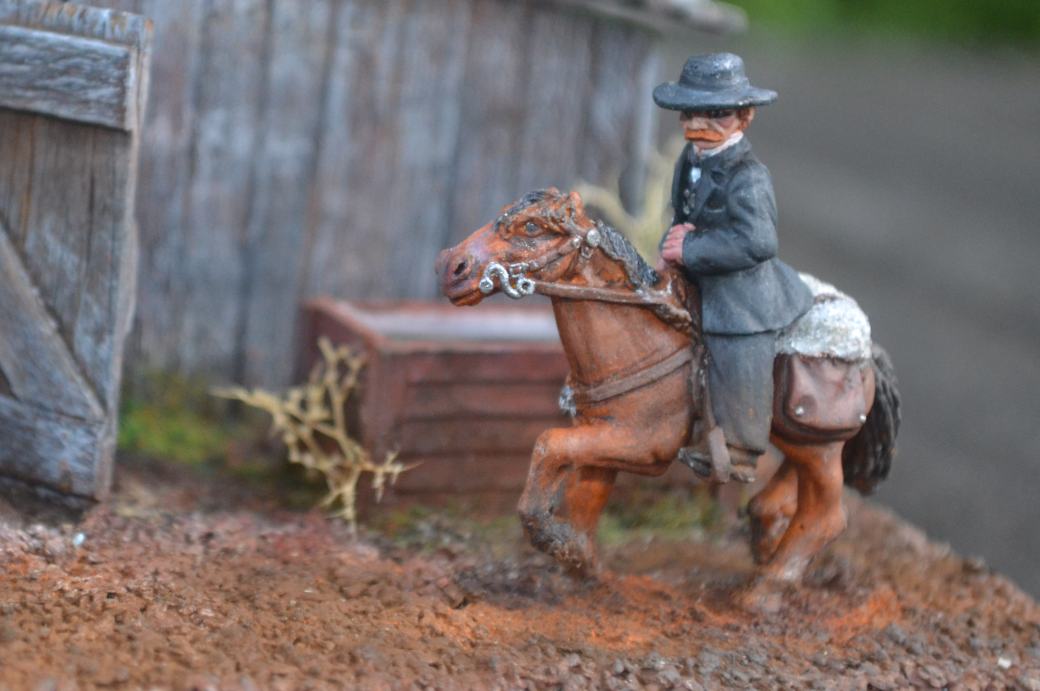
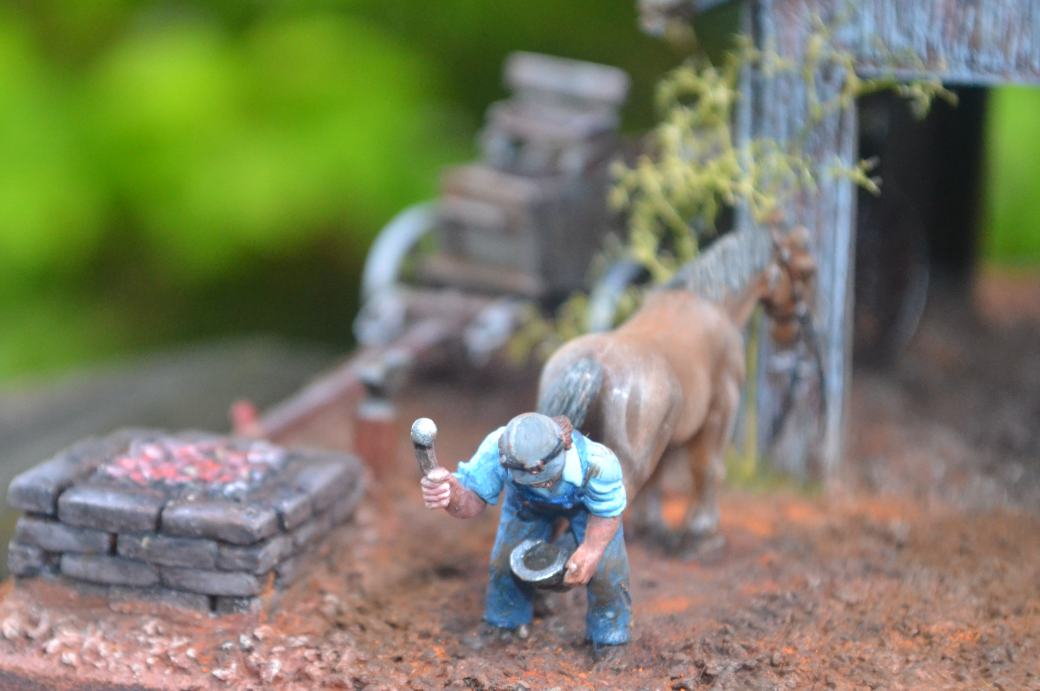
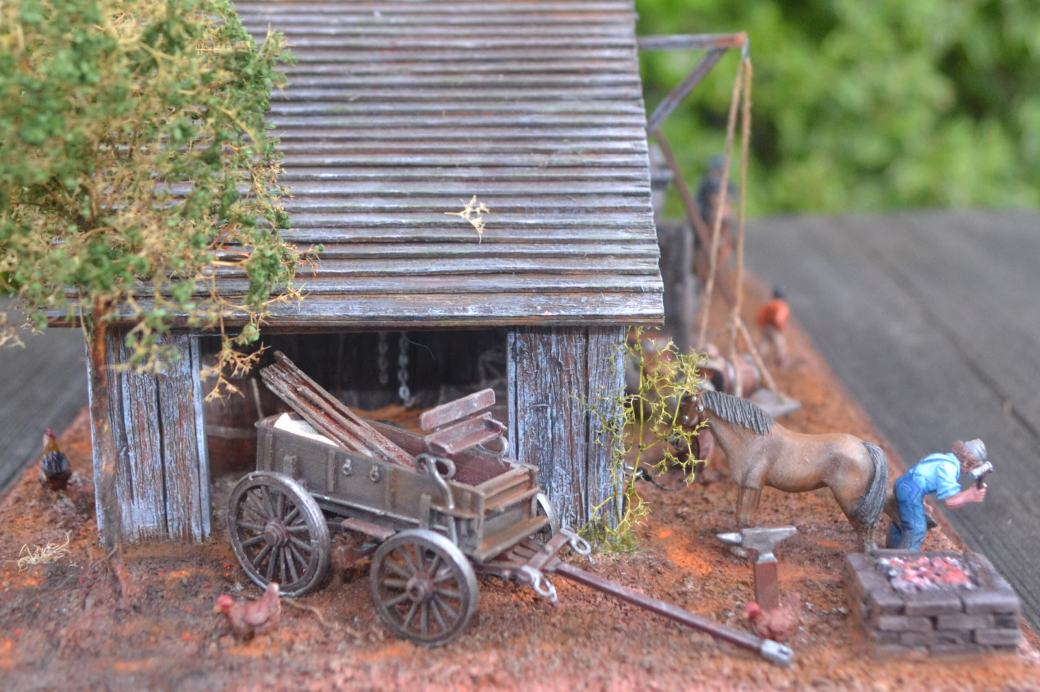
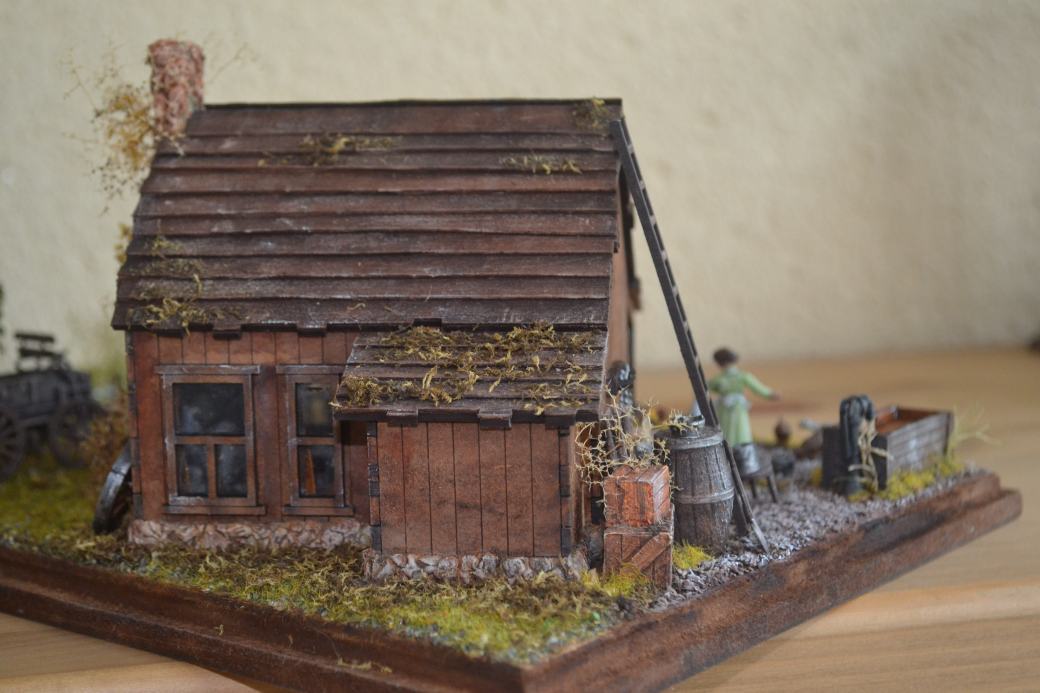
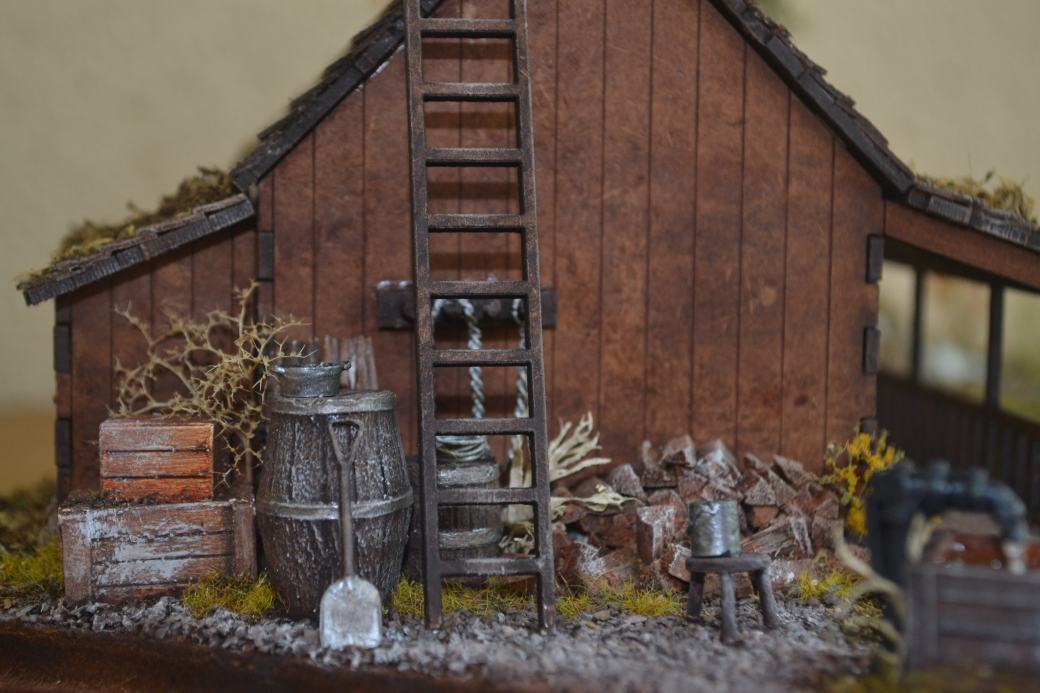
Various images of the outside and roof as the model began to come together and the figures started to be included

The right hand side of the roof as viewed in the above image was made to be removable while the left hand side was fixed.

The next stage was to paint the outside of the building but before doing so the wooden stirrers were roughed up using a wire brush and a modelling knife to add character which would become more obvious when the painting and dry brushing was done.  For painting I used a variety of different colour washes.  The washes were all created using various oil paints thinned out using white spirit.  I’m sure the purists would be horrified at the use of white spirit but I think the medium is great and use it all the time to thin and matt down oil paints.  The great thing about using real wooden coffee stirrers is the paint washes soak into the wood and in my opinion produce a nice finish.

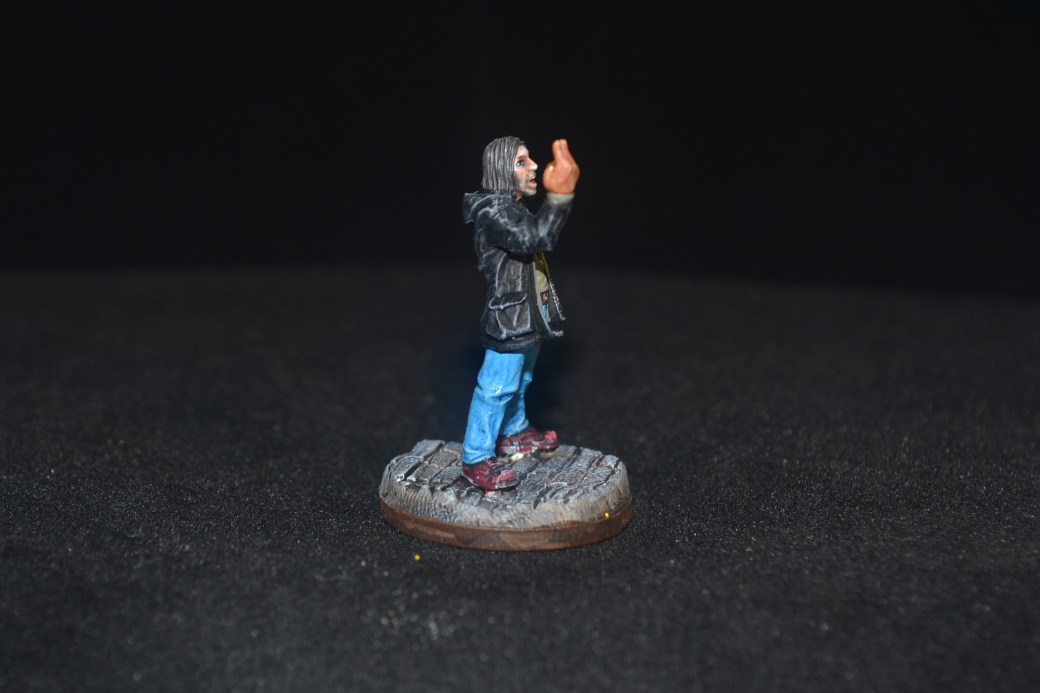
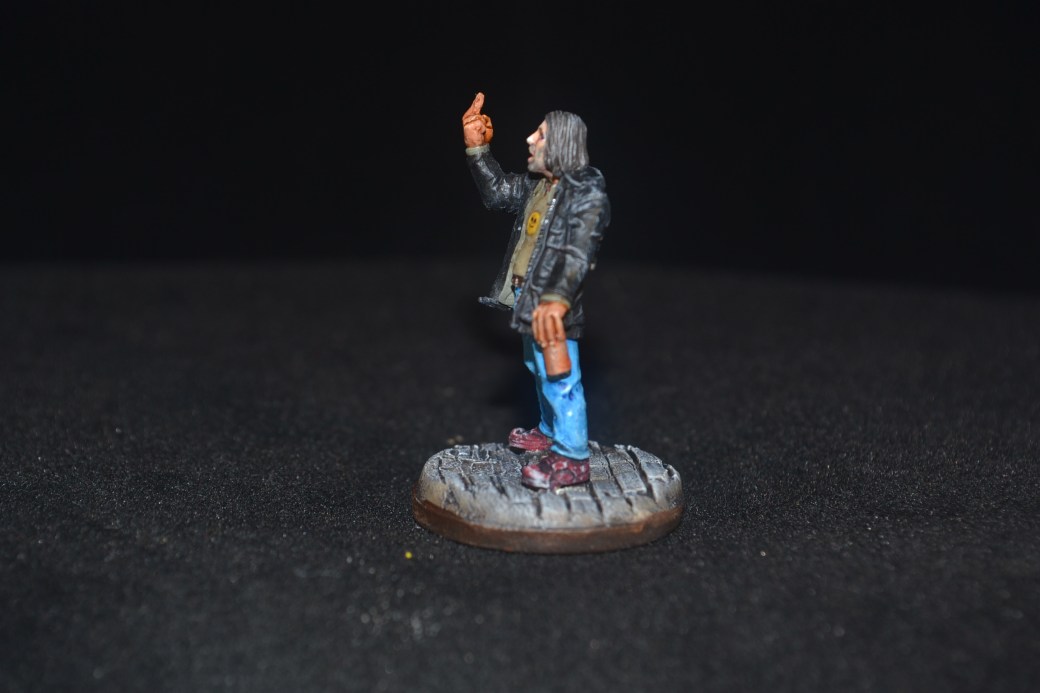
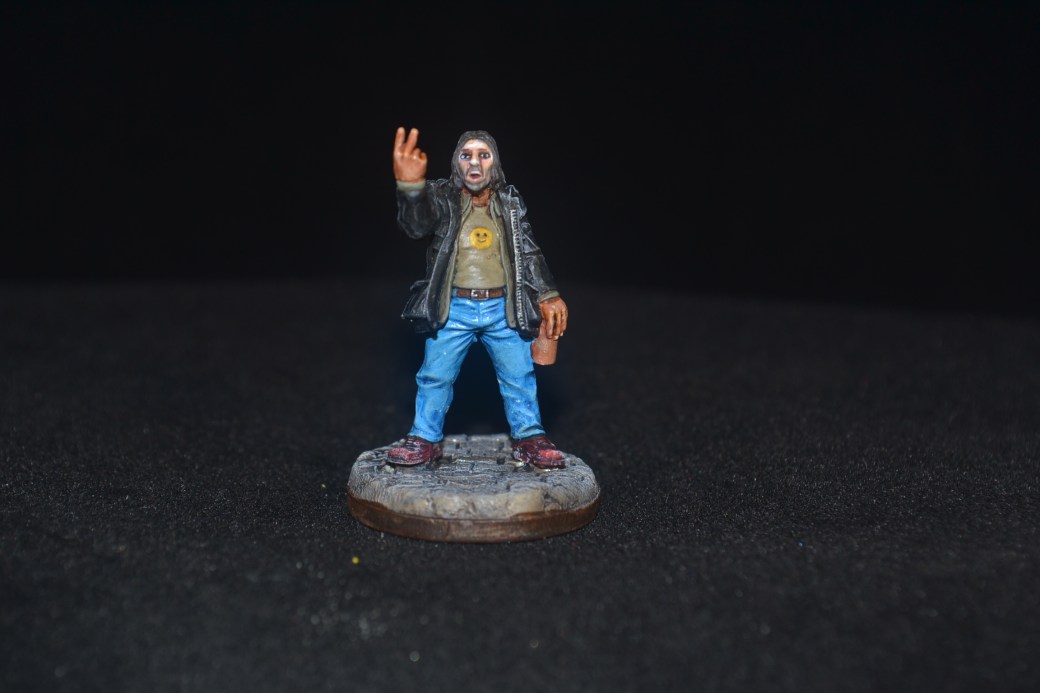
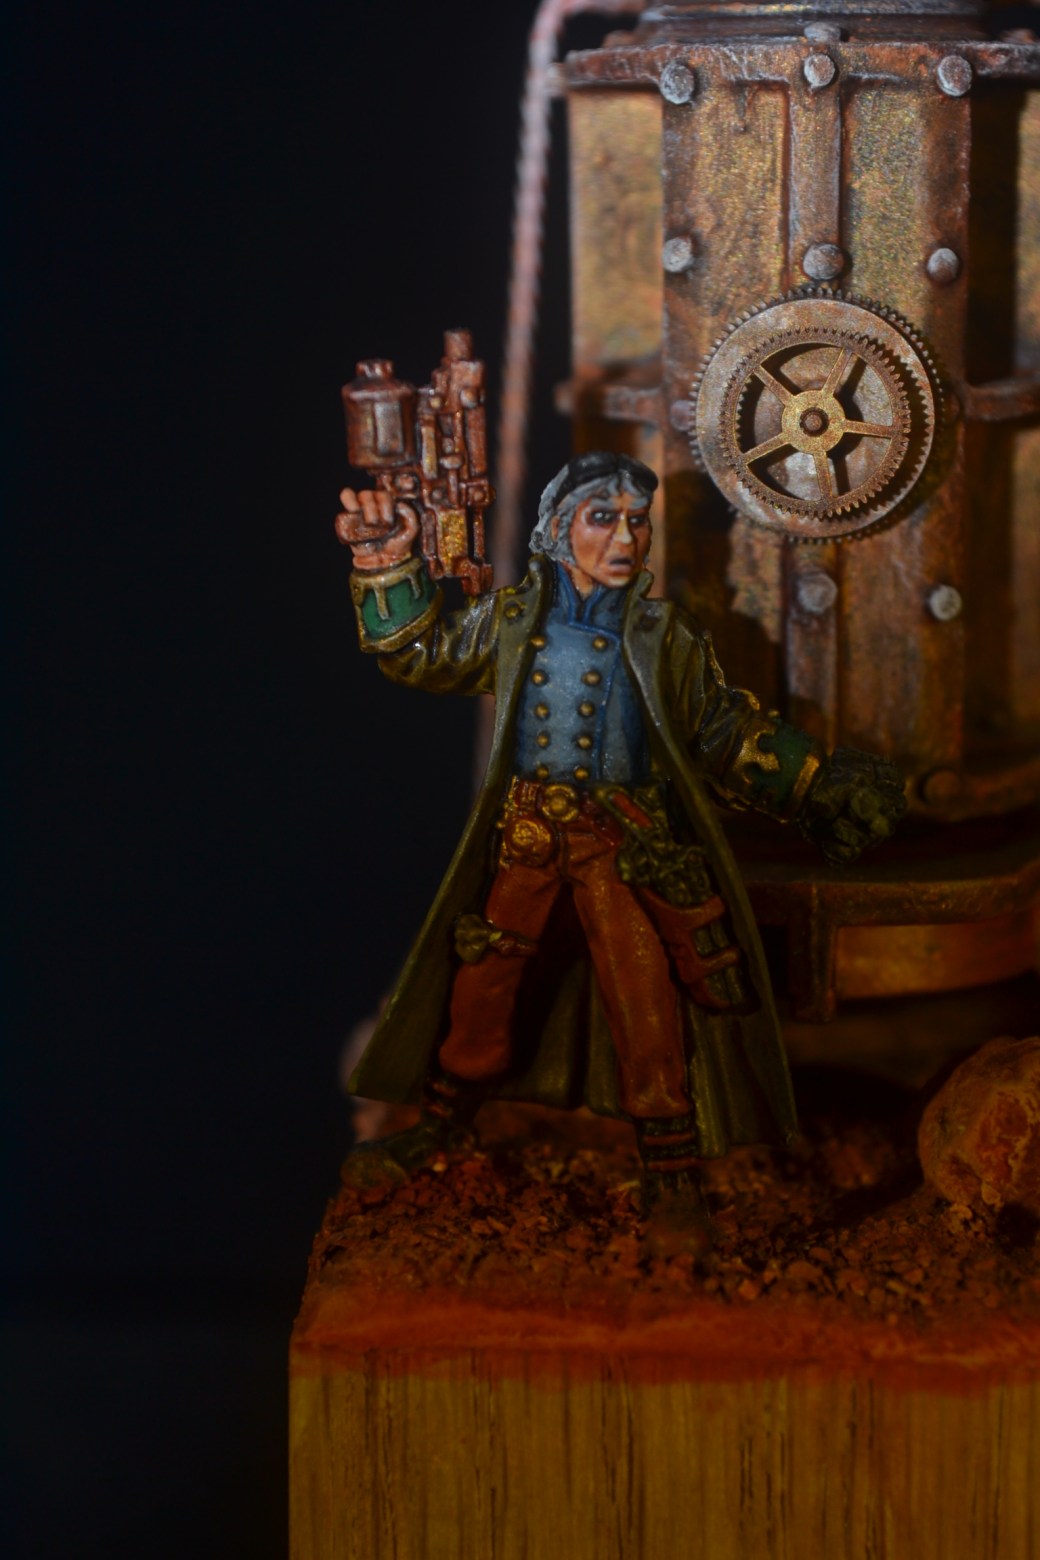
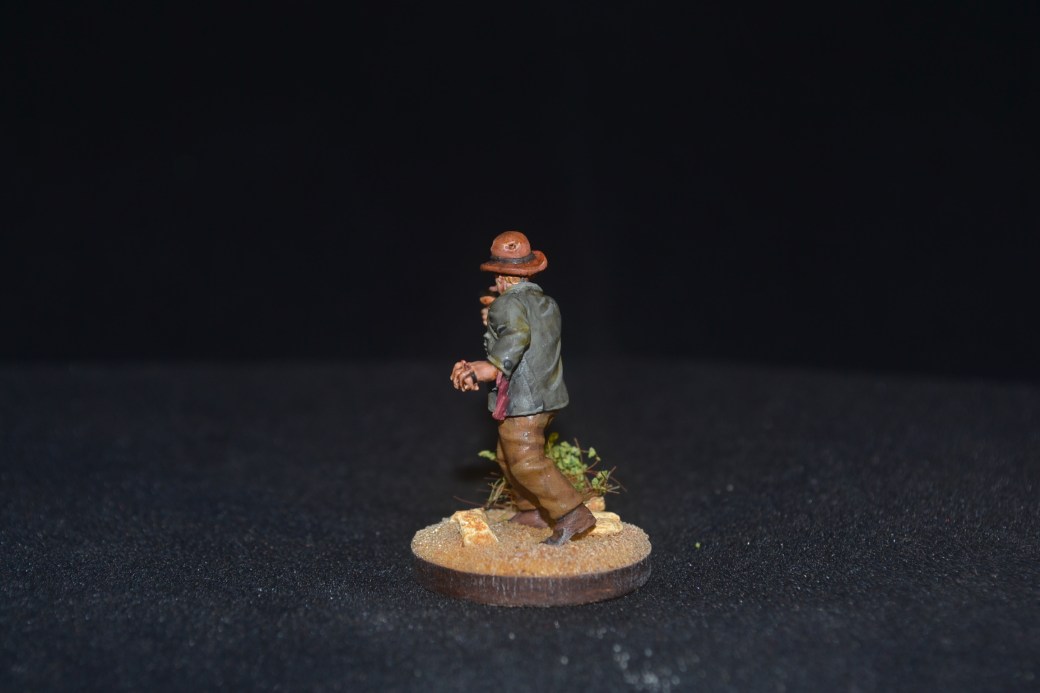
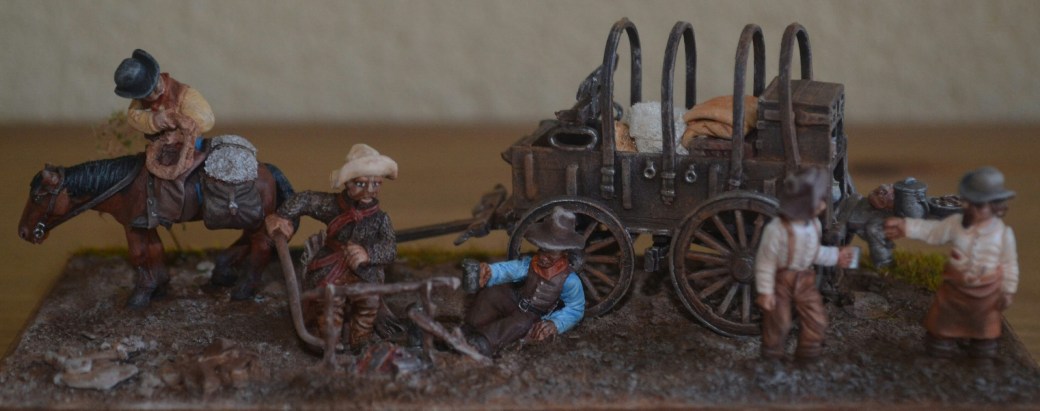
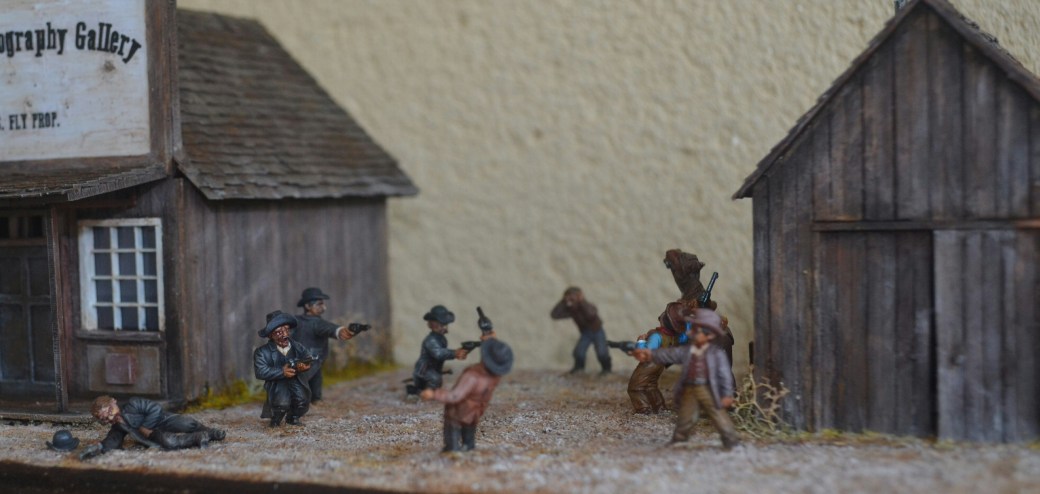
With the building essentially complete attention was now directed to the figures and internal detailing.  The figures were mostly from http://www.dixon-minis.com – their Old West and American Civil War series.  Minor conversions were made to an artillery figure which was adjusted to pull the rope and the riden horse had saddle bags and a blanket added.

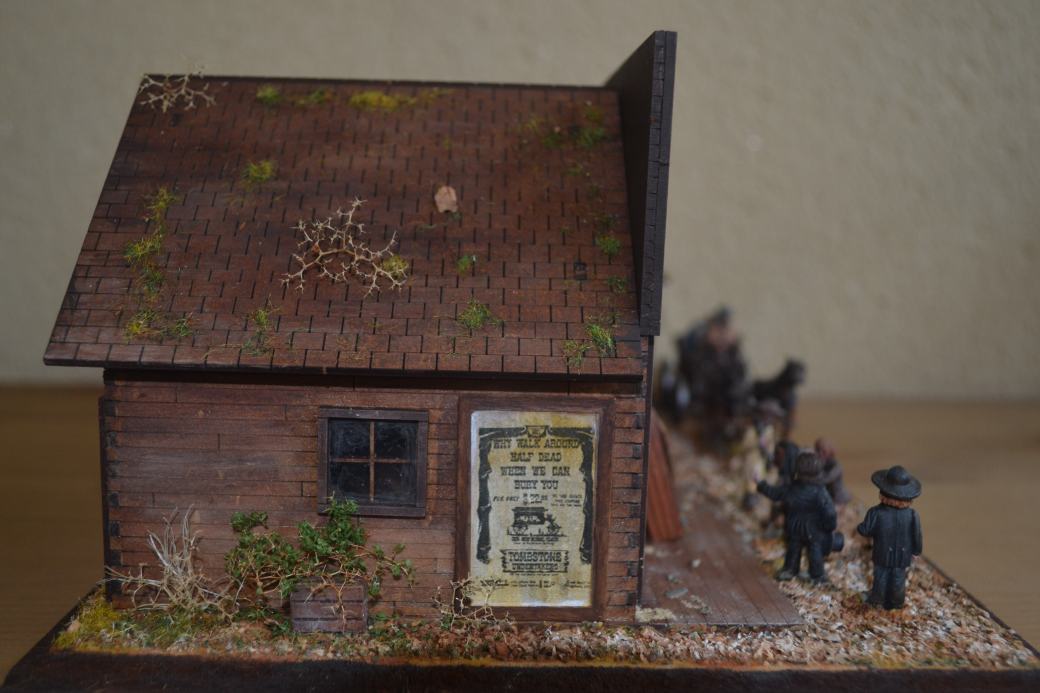
Ground work was essentially grit swept from the curb side and the greenery comprises of static grass, taller grass made from string and Seafoam Trees purchased from http://www.gaugemaster.com.  These trees are aimed at railway modellers but they are ideal for 28mm scale either as trees, bushes or climbing plants.  They are best painted with a diluted paint and then dressed with leaf materials applied using hair spray.

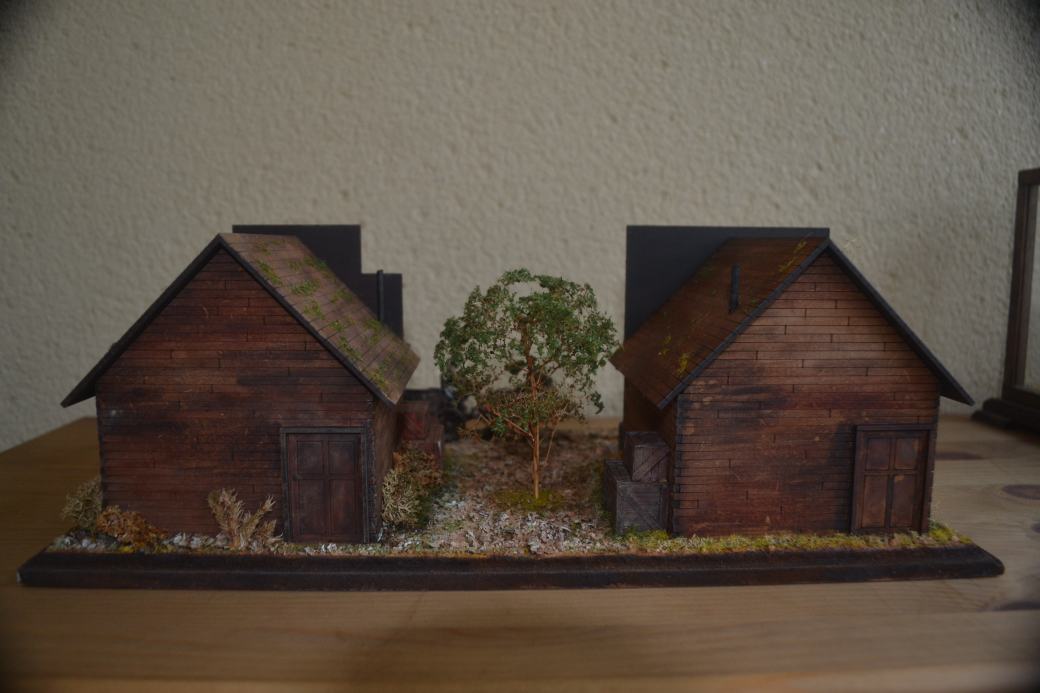
Images of the completed model appear below.

It was only after I had completed this model that I saw some images of roofs made of wooden shingles and thought they looked much better.  I decided that shingle roofs would be the next step towards improving my scratch built buildings.  More on this when I get round to publishing Building Project No: 4.

CSC_0899DSC_0886CSC_0896CSC_0894CSC_0895CSC_0893CSC_0892CSC_0891CSC_0890CSC_0889DSC_0887

Rowena Von Graaf – 28mm Reaper Chronoscope (Part 1)

This week I started on another Reaper Chronoscope Steampunk figure, Rowena Von Graaf.  You will have to wait until next week to see her painted as my time thus far has been spent working on the base.  I have downloaded an online unpainted image of her so you can at least see what the figure looks like.

post-8239-0-56101700-1462036400

As I say this week has been spent working on the base.  I decided I wanted to create a small wall, a pillar and some railings.  I also wanted to add a lamp to the top of the pillar.  First up was the need to make an “L” shape using a couple of pieces of plaster board.  This stuff is so versatile and easy to cut and use.

90EA9110-3145-4325-9F18-B0D2A2AEAC39

Once dried the next step was to clad the “L” in bricks.

AA884532-5F28-4EE8-994B-10D90FC2760D

If you follow my blog you will know I bought some Victorian lamps off of Ebay which I used in a previous model a couple of weeks ago.  I used another one here, or to be more precise the top of one.  For the railings I used some galvanised metal mesh.  I also used a couple of small tiles which I bought from the same place I purchased the bricks.  These needed to be drilled to take the mesh.  Some Milliput was used for the rest of the base and holes positioned to take Rowena once she is painted and ready for adding to the base.

E029B0CF-343E-4DDF-9442-AF5B88F7D573FE6AF3B9-002A-490B-B73A-2AF0921B8767

Finally some grit was added and once the PVA had dried it was time to start the painting and whethering.  As a final touch some flowers were added to provide a little more colour and interest.

A141F68C-9557-4B8F-823D-154664D3FCB8B6CA466C-FE67-4AE1-AE3D-4F78E02981CD

All simple enough but time consuming, particulalry in terms of allowing tbings to dry.  Time now to paint the lady herself.

TIM

TIM’s Miniatures & Musings (No: 35)

Welcome to this weeks Miniatures & Musings!

—000—

TIM’s Mid Week Miniature

Every now and then along comes a figure that I think should not only be in my collection but in everyone else’s too.  Such a figure is Frank”, a 28mm figure produced by Hasslefree.  I decided  to give him a smiley face T-Shirt, it some how seemed appropriate.

I painted this figure on behalf of my uncle and am dedicating it to the Dail Mail newspaper.  You will understand why when you read the article further below called Korea, The Forgotten War.

DSC_0608DSC_0607DSC_0606DSC_0605DSC_0604

—000—

Well It Made Me Laugh …

It might interest you to know that She who Must Be Obeyed is part Irish!

667c2396516cfee826f7cd7985fdb90f

—000—

Korea, The Forgotten War

For a change a serious article.

My fathers brother and my undle, Edgar Green, is the National Secretary for the British Korean war Veterans Association.  He went to Korea with the Middlesex Regiment, 27th Brigade.  He is 88 years old, 5 years younger than my dad and they are both still alive and kicking.

Edgar, on behalf of his Association and its ever dwindling numbers, wrote to the Daily Mail to see if they would publish the below letter in their newspaper given the 70th Anniversary of the Korean War.  They didn’t want to know.  Despite the rather limted audience his words will receive I nevertheless thought I would publish it here.

—000—

The Forgotten Veterans of the Forgotten War

This year of 2020 marks the 70th Anniversary since British Land Forces were sent to Korea.  During the three years that we were involved around 100,000 young men served there of which 1,078 paid the supreme price and remain in that land so far from their homes.

Going through the records of those that paid the price they were 50% National Service men and 50% Regulars.  We have always been known as the Forgotten Veterans of the Forgotten War.  On Remembrance Sunday you never hear a word about us in the BBC coverage.  It is through this that so many of us don’t march as a group but do so with our own Regiments.

Is it not possible for one of your writers to do something for all of those that remain in the Far Off Land?  Or will they wait until the last of us have passed on to the Green Fields.

This Poem say’s it all for us.

Korea

We didn’t do much talking

We didn’t make a fuss

But Korea really happened

So Please Remember Us

——

We all just did our duty

But didn’t win or lose

A victory was denied of us

But we never got to choose

—-

We all roasted in the Summer

In the Winter damn near force

Walking back from the Yalu

With our blacken toes

—–

Like the Surf, the enemy kept coming

With their bugles in the night

And we fired into their masses

Praying for the light

——

All of us just had to be there

And so many of us died

But now were all but half forgotten

No one remember how we tried

———

We grow fewer with the years now

And still don’t raise a fuss

But Korea really happened

So Please

REMEMBER US

—000—

This week TIM has been listening to …

“Teenage Kicks” by the Undertones.

—000—

This week TIM has been watching …

“Tremors” – Starring Kevin Bacon.  This film was released on the 19th January 1990, hard to believe it is 30 years old.

Tremors_official_theatrical_poster

—000—

Remember …

In case you had forgotten, a reminder that tomorrow is Jamaican Hair Style Day, personally I’m dreading it.

—000—

Until next time.

TIM

TIM’s Memory Monday (No: 3)

Welcome to TIM’s Memory Monday.

This post first appeard on the 21st May 2017 and it represents my second ever building project.

The original post has now been added to my archive site TIM Gone By.

TIM

—000—

28mm Building Project No: 2 – Pioneers Cabin

For this diorama I wanted to try to improve upon my first building project.  As a theme I decided to go with a pioneers cabin set in the middle of nowhere and where the early settlers would have had a non violent relationship with the local tribal indians.  The completed result appears below.

DSC_0863

The building itself is another kit from Sarrisa (North American series) which has had some modifications.  As mentioned in my earlier Building Project No: 1 post, I wanted to add some depth to my next building and decided to use coffee stirrer’s to help achieve this.  I wasn’t bold enough to clad the building walls but did alter the roof.  Overall I was pleased with the outcome and with hindsight wished I had done something with the walls after all!

The building also featured a stone chimney.  Being laser etched the chimney looked very flat and so along with doing alterations to the roof I decided to build a new chimney using cat litter and filler.  Picture below.

DSC_0870

Another first in this dioram was the introduction of “water”.  Woodland Scenics “Realistic Water” was used in the water trough and for creating the small waterfall and stream.  See below.

As with most things done for the first time there is a learning curve.  “Realistic Water” is like real water in that it runs everywhere and will escape all over the base unless it is properly contained.  If you want to add water to anything you do this stuff is great and there are some excellent tutorials on Youtube which can tell you how to use this stuff far better than I can.

The figures and wagon are all 28mm Dixon Miniatures.

A few more photo’s of this diorama are below.

DSC_0869DSC_0866DSC_0865DSC_0871DSC_0868DSC_0863

For my next building project I decided I would try my hand at constructing a building completely from scratch.  More on that to follow.  In the meaanwhile I need to work on my photography skills as these images aren’t that great!

TIM


Andre Durand, Time Chaser – 28mm Reaper Chronoscope (Part 2)

This week saw the completion of Andrea Durand, Time chaser and his “Krups Machine”.

What does the machine do?

Ideally it is for time travel but I am more inclined to go with John’s (of Just Needs Varnish) idea that it is a coffee maker.  Either way it hopefully looks better now it has been painted up.  Andre himself has been finished as well and the two items are now assembled and based.

Images below.

TIM

DSC_0635DSC_0645DSC_0644DSC_0640DSC_0639DSC_0636DSC_0642DSC_0637DSC_0641DSC_0638

TIM’s Miniatures & Musings (No: 34)

Welcome to this weeks Miniatures & Musings!

—000—

TIM’s Mid Week Miniature

This week we have yet another Knuckleduster miniature, this one goes by the name of  Johnny Deuce.  I still have quite a few more in my to do pile but as I have a number of others figures as well I have primed some of them in the hope that next week I can treat you to something different.

DSC_0596DSC_0595DSC_0594DSC_0593

—000—

Well It Made Me Laugh …

5e290f84740c42a1af1edab05b3e703a

—000—

Great Film Lines

I’m not in need of new modelling ideas at the moment, I’ve got more than enough to keep me busy for years as things currently stand but I had an idea.  Now it’s far from an original one but I got to thinking that great film lines would provide an excellent source for diorama ideas, always assuming you can find the right fìgure(s) that is.  So I got to thinking about great movie lines and came up with the following inspirational short list:

  • “I’ll be back” – Terminator
  • “Go ahead, make my day” – Dirty Harry, Sudden Impact
  • “We rob banks” – Bonnie and Clyde
  • “I see dead people” – The 6th Sense
  • “It’s alive!  It’s alive!” – Frankenstein
  • “I feel the need  – the need for speed” – Top Gun
  • “Say hello to my little friend” – Scarface
  • “Yippie-ki-yay mother fucker” – Die Hard
  • “Why so serious?” – The Dark Knight
  • “You talkin’ to me?” – Taxi Driver

Obviously the potential is limitless so as and when I come up with others I will refine the list accordingly.

Feel free to make suggestions.

—000—

This week TIM has been listening to …

“Pinball Wizard” by The Who.

—000—

This week TIM has been watching …

“Jerry Maguire” starring Tom Cruise.  Notwithstanding the height difference (I’m a fare bit taller) I’ve often been mistaken for Tom due to my winning smile and good looks, perhaps that’s why I like his films.  OK I just like his films!

MV5BYTM0ZWNmZTUtOTVkZS00MTZiLTg3M2QtZjA0Y2RmOWM1NWEyXkEyXkFqcGdeQXVyNjU0OTQ0OTY@._V1_

—000—

Remember …

No matter how far you push the envelope it remains stationery.

—000—

Until next time.

TIM

TIM’s Memory Monday (No: 2)

Welcome to TIM’s Memory Monday.

This week you get two back posts for the price of one.  The first post, Buildings – Introduction was first published back in March 2017 but as it didn’t have much to say (I was still finding my way around WordPress) I decided to add the post which followed it too – 28mm Building Project No: 1 – Undertakers & General Store.

Both are now on my archive site TIM Gone By.

TIM

—000—

Buildings – Introduction

As a kid I can remember Britains toys adding to their swoppet range by introducing western buildings and I can recall having been given the Bank, Jail, Hotel, Ranch House and Livery Stable as christmas and birthday presents.  I mention this only because it was these memories which inspired me to want to go beyond just painting figures to adding buildings to my modelling.

One of the first things to consider is the scale you want to build in.  As a modeller I had for the most part painted 54mm figures up to this point and as a consequence my initial idea was to build in this scale.  I soon realised that this presented two problems. Firstly, the constructed building would be quite large.  Secondly, how would I store or display it and keep it free of dust?

Pathetic as this sounds it took me a while to reach the obvious answer – build in a smaller scale!  I had only ever really considered 28mm to be a war gaming scale and as such had never properly looked at available figures and accessories. Needless to say a quick internet search opened up an entire new world and I haven’t looked back since.

I am by no means an expert on constructing buildings, if I were then I would would not be The Imperfect Modeller.  However, in a short period of time I have managed to move on from simply constructing and painting bought buildings to constructing my own frrom scratch, a most rewarding experience.

In this series of posts I will go through the evolution of my buildings.  In the meanwhile a picture below of a Livery Stable I constructed completely from scratch. It’s not without it’s faults (which I will highlight going forward) but it was only my third building ever.

20160508_205449

—000—

28mm Building Project No: 1 – Undertakers & General Store

As mentioned in my previous post, I decided that scaling down to 28mm was my best option if I wanted to include buildings within my dioramas.  Having reached that decision a quick internet search for 28mm old west Buildings led to my discovery of Sarissa Precission’s website (http://www.sarissa-precision.com).  Sarissa have a whole host of buildings covering various periods including the Old West and North America both of which were of interest to me.

Sarissa’s buildings are made of MDF with laser etched detail, fit together perfectly and look very good when made up.  They were just what I was looking for and so I purchased two of them for the model pictured below.  The building on the left is Old West model code SmallPLUS Building 1 and the building on the right is Old West model code SmallPLUS Building 4.  For both buildings I also purchased the optional apex roof (I’m no fan of the characterless flat roof that comes as standard).

20170324_141235

The aim of the diorama was to simply capture a moment in time on the street of a western town.  The buildings themselves were simply painted but, as can be seen from the additional photo’s below, I also chose to fit out the insides of both buildings. For reference all the figures in this diorama are from Dixon’s Miniatures (http://www.dixon-minis.comand the various internal accessories are mostly from Frontline Wargaming (http://www.frontlinewargaming.co.uk).

Inside the General Store

Inside the Undertakers

The only minor adjustments I made to both buildings was to add clear plastic glazing where appropriate to doors and windows, to make a hole in each roof for the chimney of the wood burning stoves and to add the main signage (this was done using Word together with a downloaded western font which was printed and given a light colour wash).  Overall I was pleased with the outcome of my first building but as is often the case we are often our own worst critic and so, on closer inspection I felt there were improvements which could be made next time around.

A better painter than me would have been able to add depth to the wood of the building and to the roof tiles.  That was beyond my skill set and so my overall impression was that the end result was rather flat and lacking in character and depth.  How I could improve upon this came to me in Burger King while I was stirring my coffee – use real wooden coffee stirrers for cladding!  Which leads nicely onto the subject of my next post, My Second Building.

DSC_0828DSC_0829DSC_0830DSC_0831DSC_0832DSC_0827

Andre Durand, Time Chaser – 28mm Reaper Chronoscope (Part 1)

Now I did warn you in a previous post that it would not always be possible to churn out a completed model every week and that a Work In Progress post would be required from time to time and so it has proved.  Next week I hope to post images of the completed model but for this week this is all I have to offer by way of progress.

The completed model will comprise of a single figure, in this case a Reaper figure which goes by the name of Andre Durand, Time Chaser.  The figure has been primed and work on the face has begun.  I always start with the face first because for me it is the most crucial part of any figure.  Get the face right and all being well the rest follows.  More to do but so far so good.

0E7232B7-E838-40C4-A241-7634CF647291

Now given that good old Andre is billed as a time chaser I figured he needed some form of transport.  At this point I should point out that I am working outside of my comfort zone.  Scratch built Steampunk machines couldn’t be further away from anything I have done in the past.  How to go about it?

A trip into the garage and a rummage through my bit drawers produced a few interesting finds.  The obvious question at this point is “why have you been hording this shit TIM?”  You might well ask.  Personally I am laying the blame squarely on the shoulders of She Who Must Be Obeyed.  Is that fair?  Yep.

After some experimentation the build begun to take shape.  Holes were drilled to insert pin heads.  If there is one thing I know about Steampunk the machines have rivets, lots or rivets.  Will it look decent once it has been painted up?  Good question but hopefully next week we will know the answer one way or another.

Some build progress images below.

TIM

170ACFB7-2D35-42E1-8027-D5D238B9125E

0869144D-C304-4800-91FD-D8539C84D135

A1709E10-7433-424C-A28D-948B1C145458

891F6B55-8547-4E74-9E14-2D7BE63F1F83

5A1CCB9E-E449-40A4-A9E7-7978966B4EDB

35736C63-6BEC-4BC8-AF9E-681513976F97

AD05286C-5763-414E-A2D3-7DD7D8AADD12

475B67DC-6B90-43AF-B544-1F41339ECEF5

TIM’s Miniatures & Musings (No: 33)

Welcome to this weeks Miniatures & Musings!

—000—

TIM’s Mid Week Miniature

Knuckleduster figures continue to dominate my backlog pile for now.  There are more to be done but progress is being made in parallel with other little projects that I am working on.  In fairness I do enjoy painting them and adding them to my collection so it is hardly a chore, just a simple desire to move a quality figure from the gloom of a cupboard to the light of day.  Latest to make the move to the display case is “Lucky Lou”.

DSC_0597 (1)DSC_0598 (1)DSC_0599 (1)DSC_0600 (1)

—000—

Well It Made Me Laugh …

30438fbff66d0655b20decef3d93d912

—000—

Salute 2020

Yesterday I bought my train ticket and entrance ticket for Salute 2020.  Looking forward to it and spending money on all those “essential” items.  The 18th April will come along quickly enough but for now I have time to sew extra pockets into my coat so I can smuggle my contraband passed She Who Must Be Obeyed when I get home.  The alternative is to simply man-up but the last time I did that I found myself cooking my own dinner!

I should also point out that SWMBO also has a wart on her hand.  Not one but two or three.  She is understandably self conscious of these and has investigated many remedies but so far without success.  I too am conscious of her warts.  Conscious to the point where I am more convinced than ever that she is a witch.  It cannot be a coincidence that I haven’t seen a newt or a toad in a while.  These are dangerous times in the house of TIM.

—000—

This week TIM has been listening to …

Paolo Nutini and “Pencil Full of Lead”.  There are plenty of jazz versions of this track but I prefer this one.

—000—

This week TIM has been watching …

“1917”.  A trip to the cinema to see this Oscar nominated film with my mate.  Enjoyable is never the right word to describe a war film, experience is probably more appropriate in these days where nothing is left to the imagination in a graphic portrayal.  All in all an excellent film and well worthy of seeing.  Not so sure about it being a potential Best Film winner but quite different from anything I have ever seen before in the way that is was filmed as one continuous sequence.

220x320_c70f8cbfb5db03e5230266e2413a37fd

—000—

“Do Not Touch!”

Probably one of the scariest things to read in braille!

—-000—

Until next time.

TIM

TIM’s Memory Monday (No: 1)

Welcome to TIM’s Memory Monday.

This is the beginning of a new weekly series of posts which will appear, oddly enough, each Monday!  As this is the first I will explain what is going and why.

Below you will find unedited the very first post I published on this blog.  It first went out on the 22nd March 2017.  Not surprisingly it was viewed by almost nobody but since then my blog has grown.  However, in my experience new readers and followers tend to read current content and move forward rather than look back.  With this in mind I thought it might be a good idea to repost my older content, excluding my Musings, to a wider audience.

In addition to the above, it is only a matter of time before I will be facing a WordPress memory problem.  I could of course simply upgrade my package but to be honest my blog isn’t a business portal so what’s the point?  Instead I have set up another site which I have called “TIM Gone By”.  It is an archive site and the post you see below has also been copied in its entirety to that site.

As we all know it is photographs and images which eat up our blog memory.  The same content of course enhances our blogs too.  The need therefore is to delete this media content and free up space.  With this in mind I will in six months time (I have put a note in my diary!) delete the photographs and images associated with the original post and this repost leaving only the written content.  Anyone wishing to see the complete post will be able to do so on “TIM Gone By”.  Thereafter it will be a rolling programme every week.

The big question of course is will this work and will it have an impact on this site in anyway?  Fucked if I know, let’s find out!

TIM

—000—

This post was first published by TIM on the 22nd March 2017.  Enjoy.

*****

Welcome to TIM – The Imperfect Modeller.

Most of my modelling is geared to the Old West but occasionally a figure comes along which catches my eye and I’m happy to give that a go.

In terms of scale I paint 28mm to 54mm figures although my dioramas tend to be exclusively 28mm due to size constraints.

As this is my first blog and my first post I thought it best to start with some images of my work. In future posts I will describe some of these and other models in greater detail and refer to techniques used  and also list materials and suppliers.

Please feel free to comment and ask any questions.

Thank you for looking.

*******

20170322_120536 20170322_115153

Left – Andrea Miniatures 54mm Cavalry Trooper; Right – Gringo 40s One Eyed Trail Boss

20170322_120223

Custer’s Last Stand – 54mm Andrea Miniatures


Andrea Miniatures 54mm Mountain Man

20170322_115336

Wargames Foundry 28mm Old West Men in the Wilderness (and below left)


Right – Dixon Miniatures 28mm Old West Figures

20170322_115719

Dixon Miniatures 28mm Old West figures and stage coach (above and below).  The building, which has been heavily modified, is by Sarissa Precision


20170322_115559

Above and below – Dixon Miniatures 28mm Old West figures featuring their Chuck Wagon.  Three of the figures have had minor conversions.

20170322_115624

20170322_115300

Gunfight at the OK Coral featuring Dixon Miniatures 28mm Old West figures with two minor conversions and scratch built buildings.

20170322_115452

Under Attack – Diorama featuring Dixon Miniatures Old West Indians and US Army 28mm figures.

20170322_120157

Diorama featuring Artizan 28mm Rail Worker figures, Sarissa Precision Old West Locomotive and scratch built Freight Depot.


Left – a break from the Old West but same era different continent!  Beneito Minjiatures 54mm Rorke’s Drift.  Right – Dixon Miniatures Confederate Soldier, the first figure in a new diorama.