“Feygin” – A Twisted Miniatures Figure

Suddenly I seem to have numerous things on the go.  My discipline of trying to do one thing at a time has gone out of the window.  I blame it on the weather and the need to work on something else while other bits are drying.  That’s my excuse and I am sticking to it!

What we have this week is another Twisted Miniatures steampunk figure, their version of Fagin from the Dickens book Oliver Twist.  Having done a couple of Twisted Minitaures figures now I cannot fault the quality.  I have a few more in the pipe line before I either need to buy some more or move on to doing something else.  I’m not short of ideas right now which is a good thing.  No danger of hitting the wall on the ideas front for the foreseeable future at least anyway.

Not a great deal to say about the figure itself.  It comes in a few parts and really needed to be fully assembled before painting.  Sometimes I find it best to paint some bits first and then attach, all depends how easy it is to access the completed figure with a brush afterwards.

Figure painted in acrylics only.  I seem to do less and less now using oils.  Simple base work with a few cogs added on.  Images below including a couple of WIP ones.

TIM

F5D18926-17D5-4F1A-A6A4-5283CC9CB7D9080A9FD5-9681-4496-9488-01C934A5D5D883A5AA6E-FB27-4D9F-83D7-41120055105EDSC_0607DSC_0601DSC_0603DSC_0602DSC_0604DSC_0600DSC_0605

“Chim Chiminey” – A Twisted Minatures Diorama (Part 2)

As very much predicted the weather this week has been dreadful.  Thank goodness for having an indoor hobby that I really enjoy.  Without it I think I would be suicidal.  All the time I was at work I cannot say I really noticed what was happening outside but after many years of retirement and the weather getting progressively worse year on year it has become significant to my well being.  If I could only convince She Who Must Be Obeyed to do so I would move to somehwere with a better climate.  Hey ho!  Still, on the positive side of things I managed to get this little model complete.

Having built the roof all I was really left with was painting and some minor assembly.  The tiled section was finished and stuck to the back and sides of the roof.  Using some galvanised mesh I created an ornamental top to the roof ridge.  The chimney stack was also glued into place.

579F5D84-E6C0-4C3D-8457-0A8563D35FB2068BA53B-640E-432E-9E7F-902B66941765

The next job was to prime and get a base colour onto the roof tiles.

5272C592-572F-4B2E-A2FF-6648FFDFE04E

Once dry it was time to start the actual painting.

715631D4-4B68-4F5E-9B39-6F30F20F210BCC12213B-D63D-48CB-81D9-BE693A34E8C8

With the roof as good as done attention was directed to the figures.  “Mary” was more done than I realised but I added a few more highlights, barely noticable from this photo but a little clearer on others, and fixed her umbrella before attaching her  to the chimney.

D1B62FCD-07AF-4D26-9185-317E4887E926BCD9A68A-928F-43CB-953B-85BA54569A6E

Then it was time to paint “Albert” and eventually add him to the base.

92529CAA-32CC-4092-A874-E6DA95715C5B603CDDA5-EB43-4842-9A35-FA8CD27D938C

All that was left to do was add a clock face to the base and take some final photo’s.  This wasn’t part of the original plan but I decided the front of the base need a lift and the clock added to the Steampunk image.

DSC_0609 (1)DSC_0584 (1)DSC_0610 (1)DSC_0612 (1)DSC_0611 (1)DSC_0608

So there you have it.  My first and I suspect last foray into the world of Disney.  Time now to take a look at my “To Do Pile” and decide what to tackle next.

TIM


“Chim Chiminey” – A Twisted Miniatures Diorama (Part 1)

As Monty Python would say – “and now for something completely different” … well different for me that is.

WARNING – If you are easily offended by sickly sweet Disney movie charachters this post (and more likley the second post when published) is not for you.

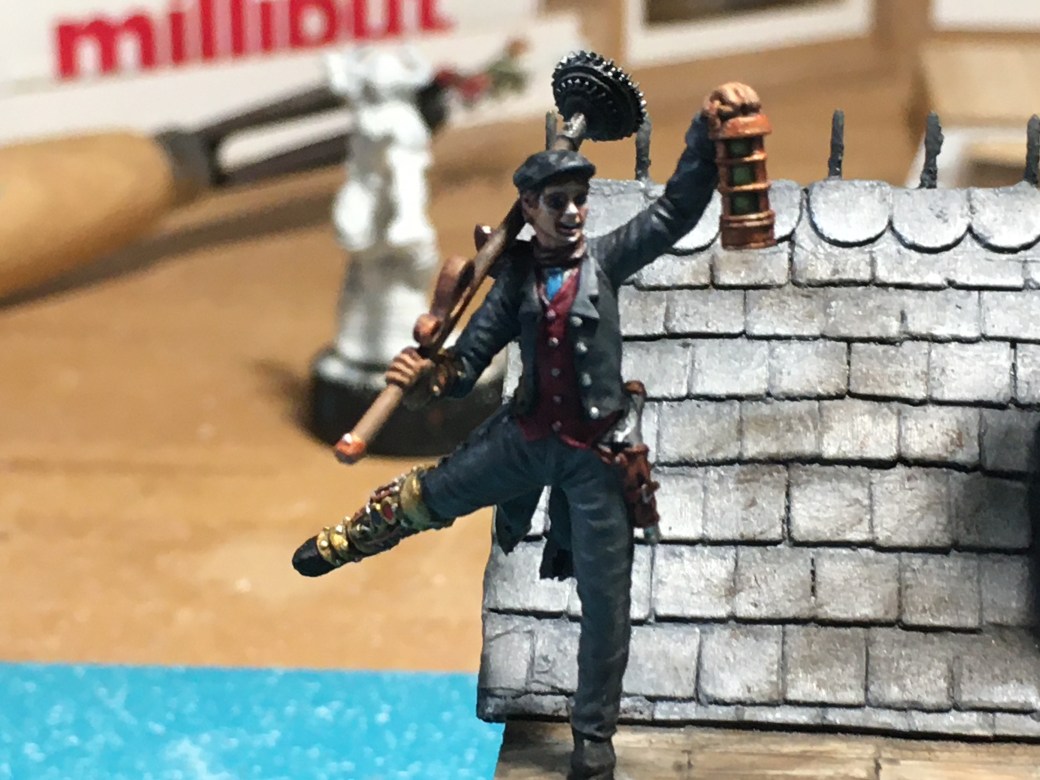
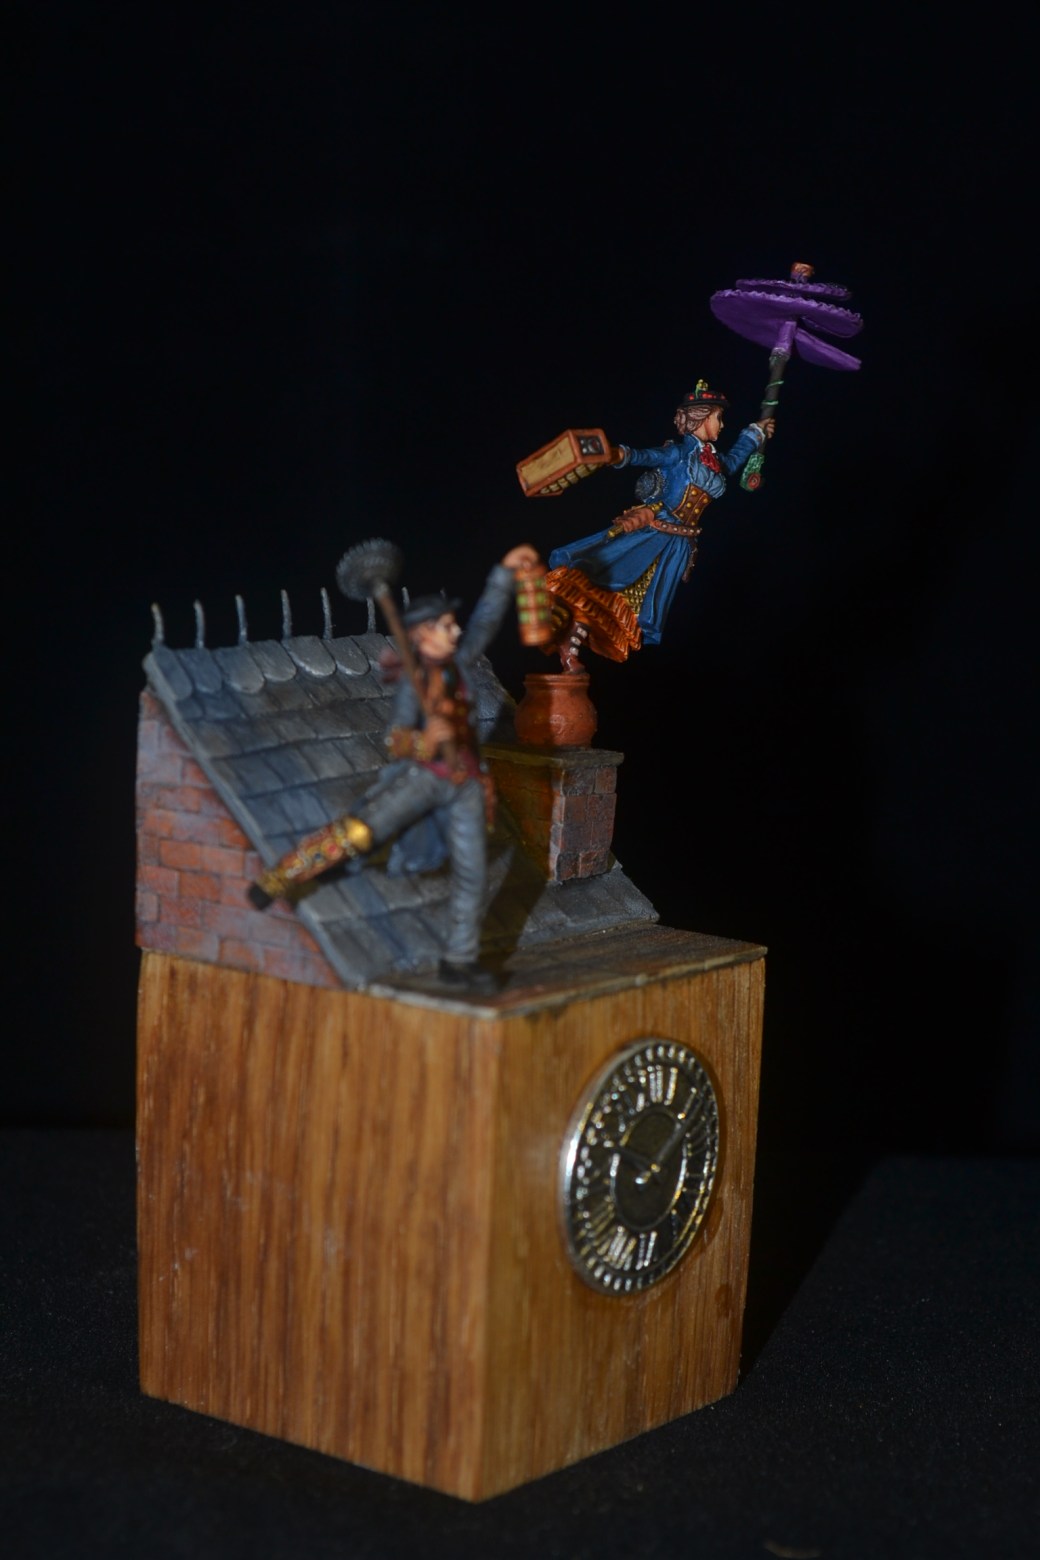
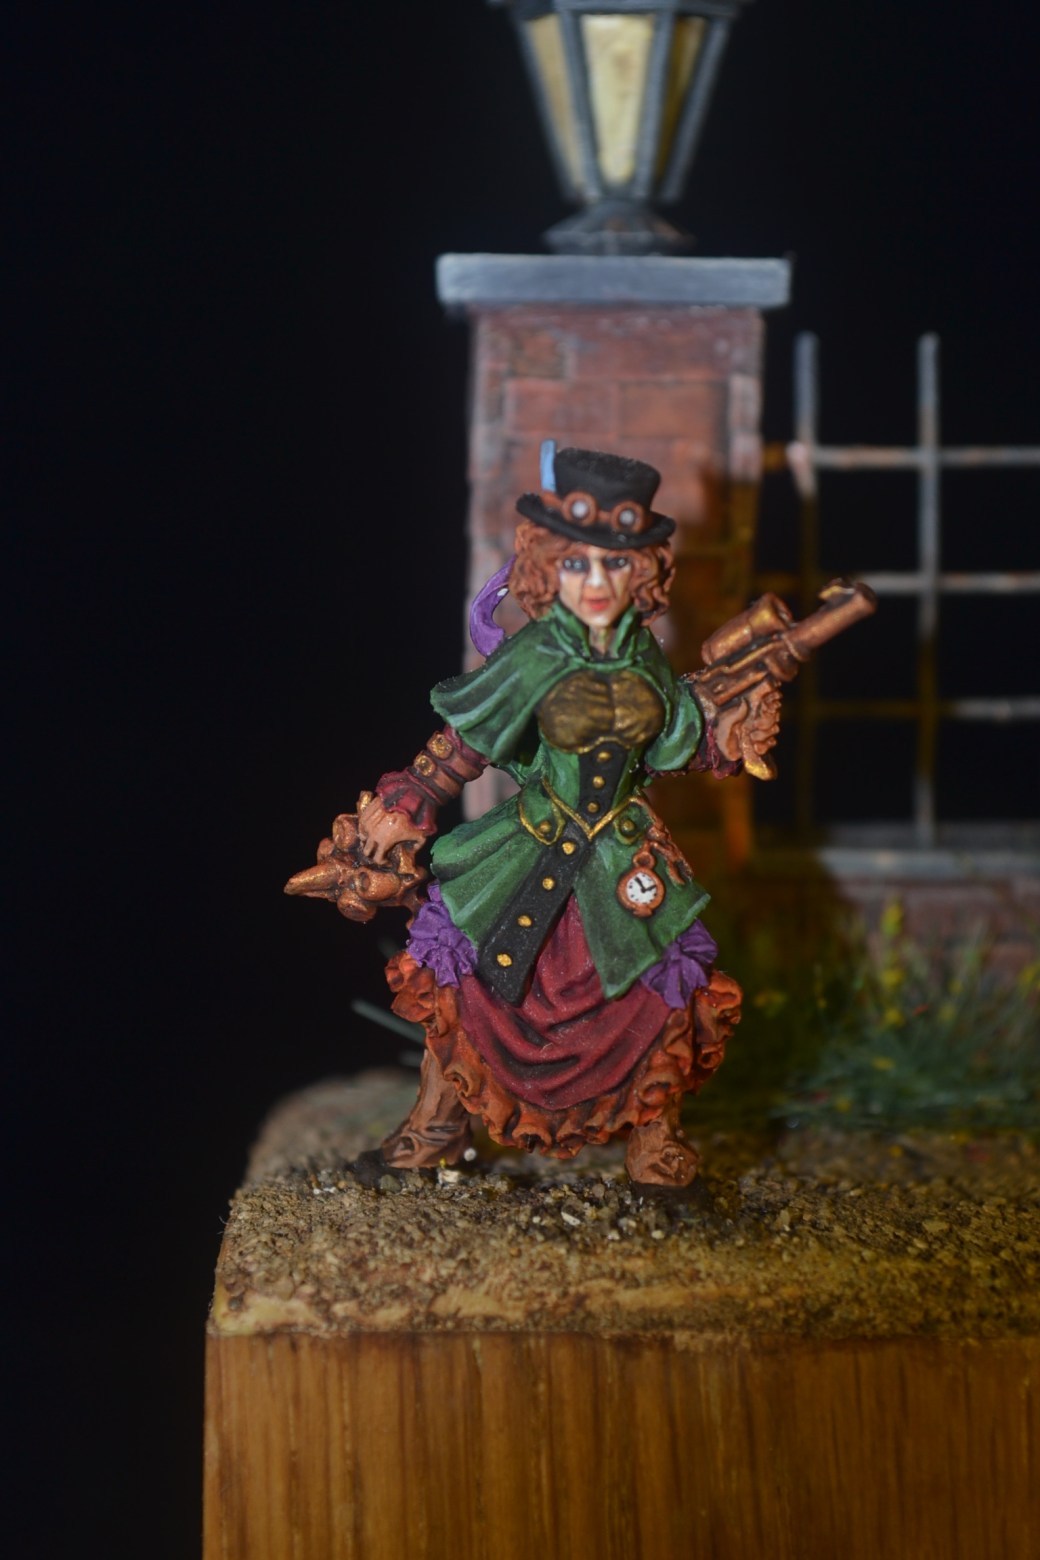
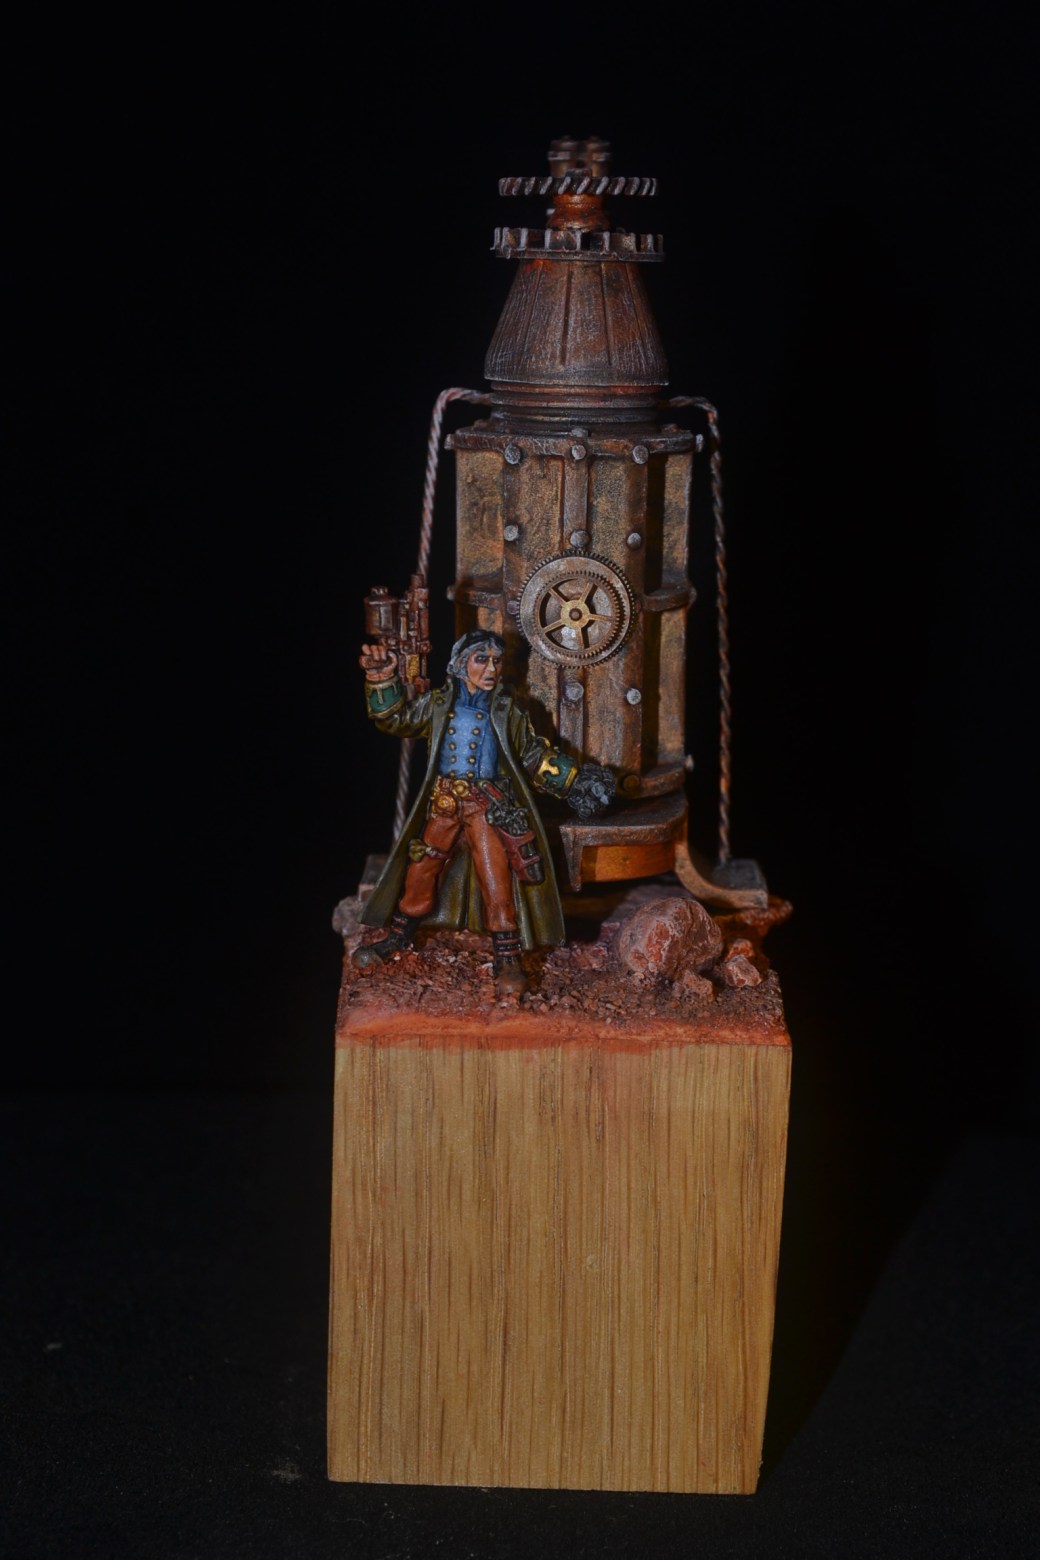
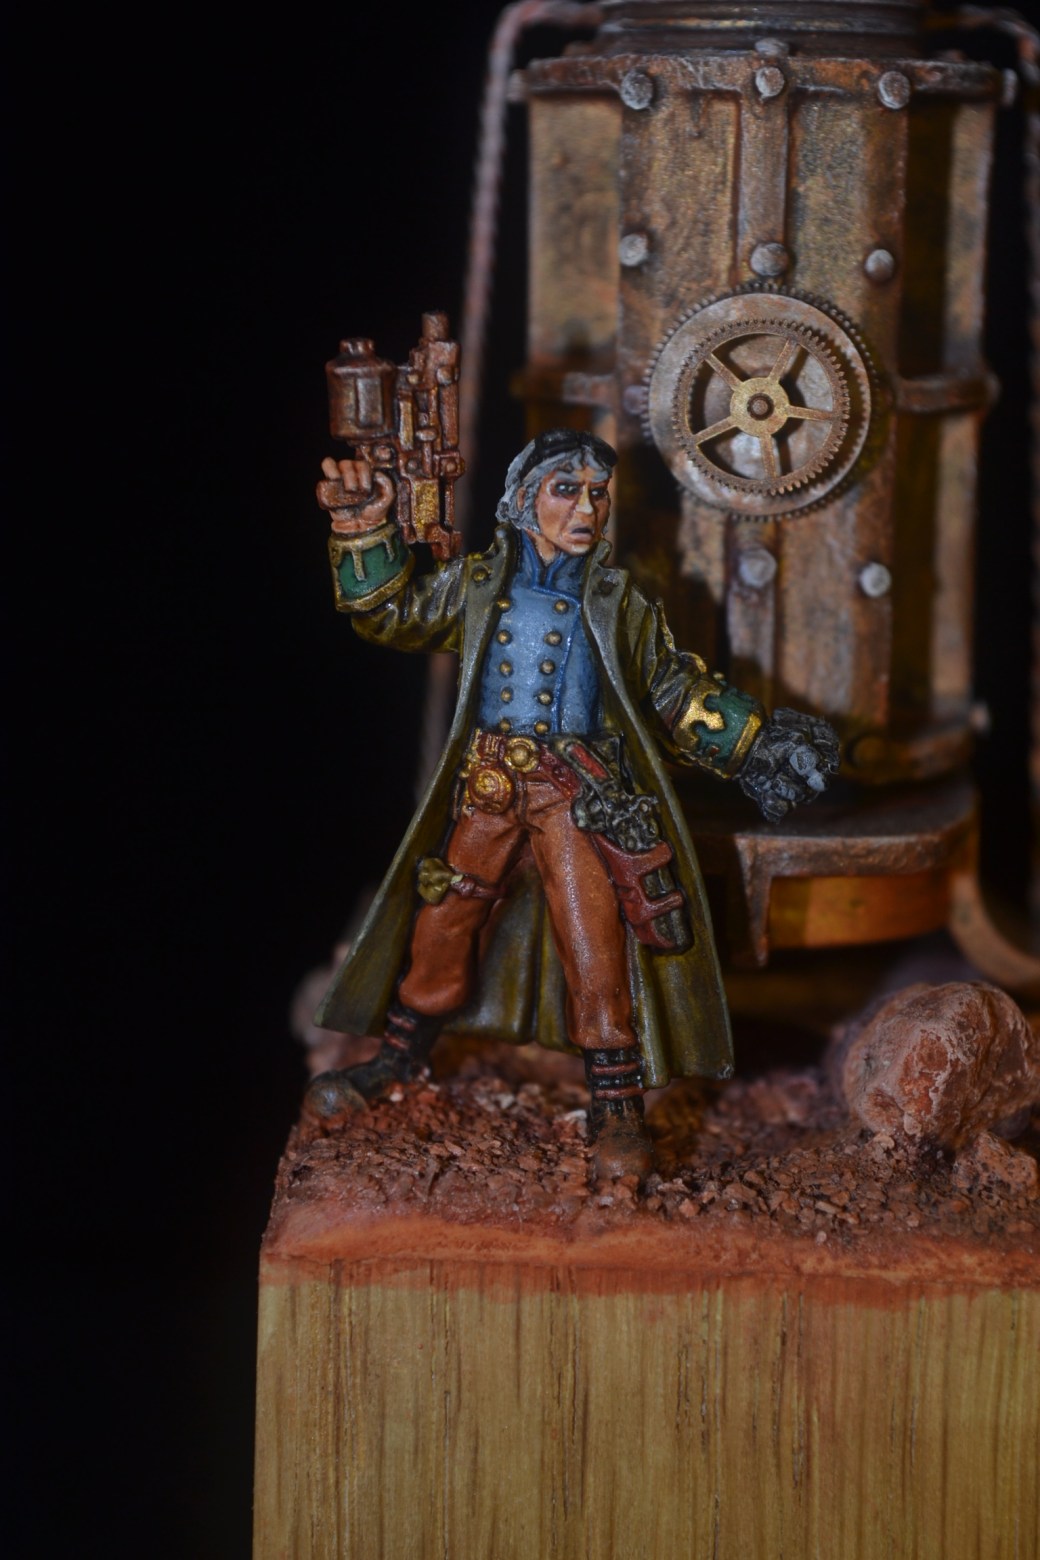
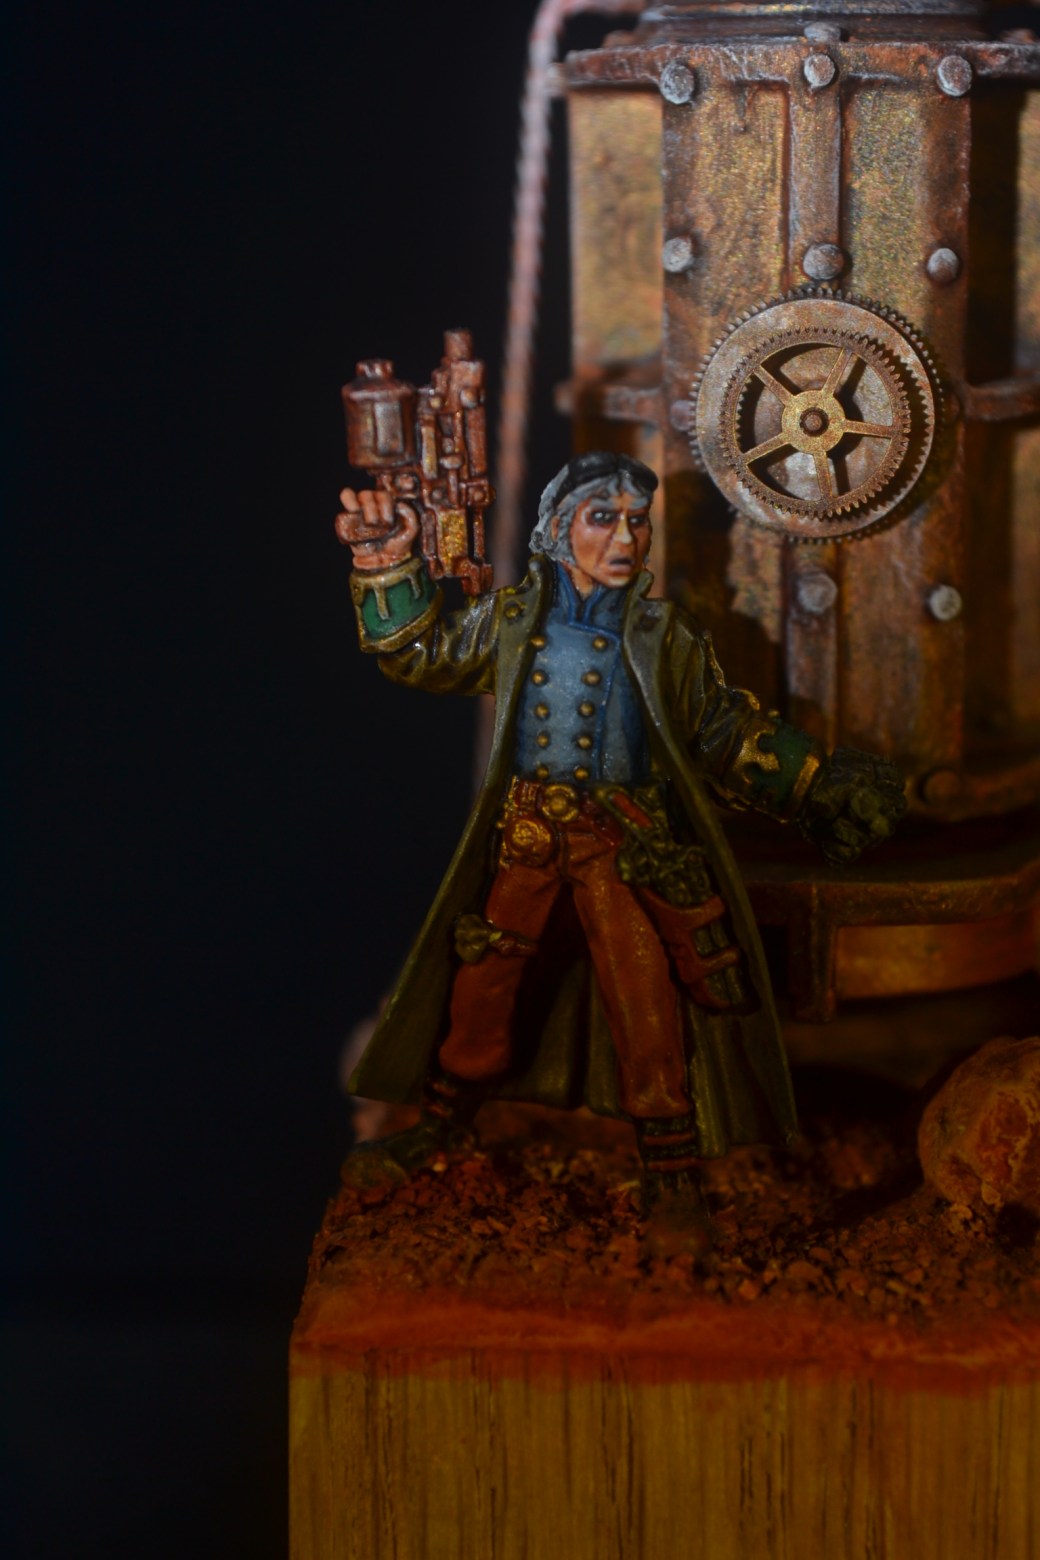
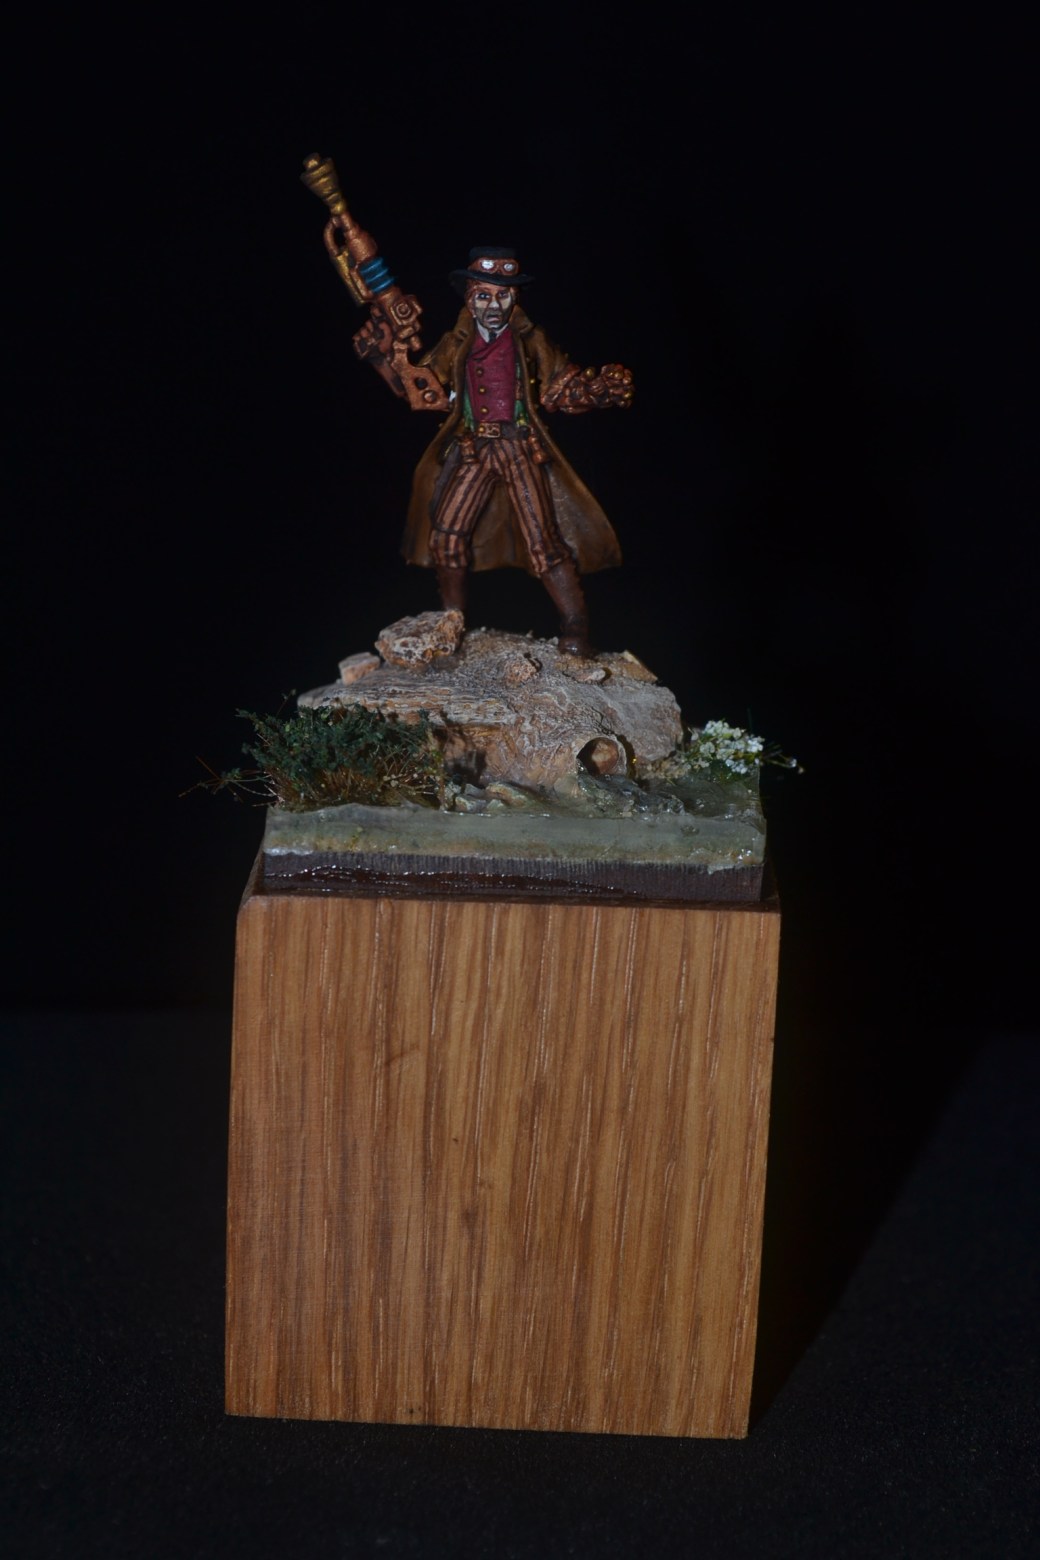
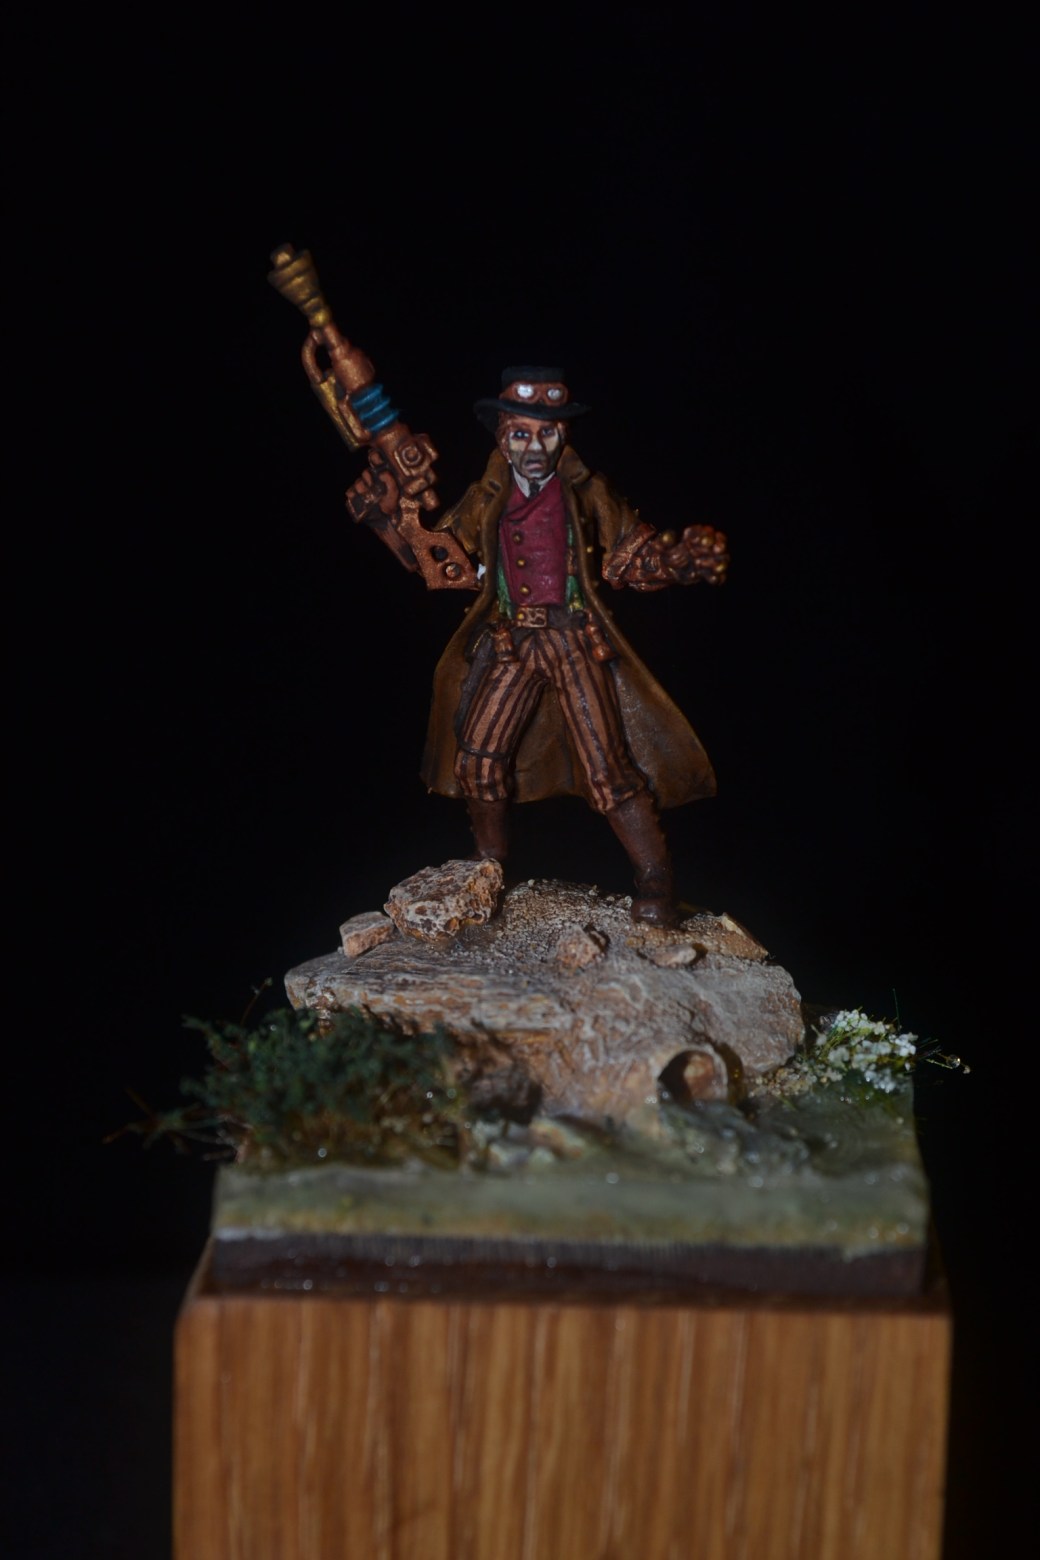
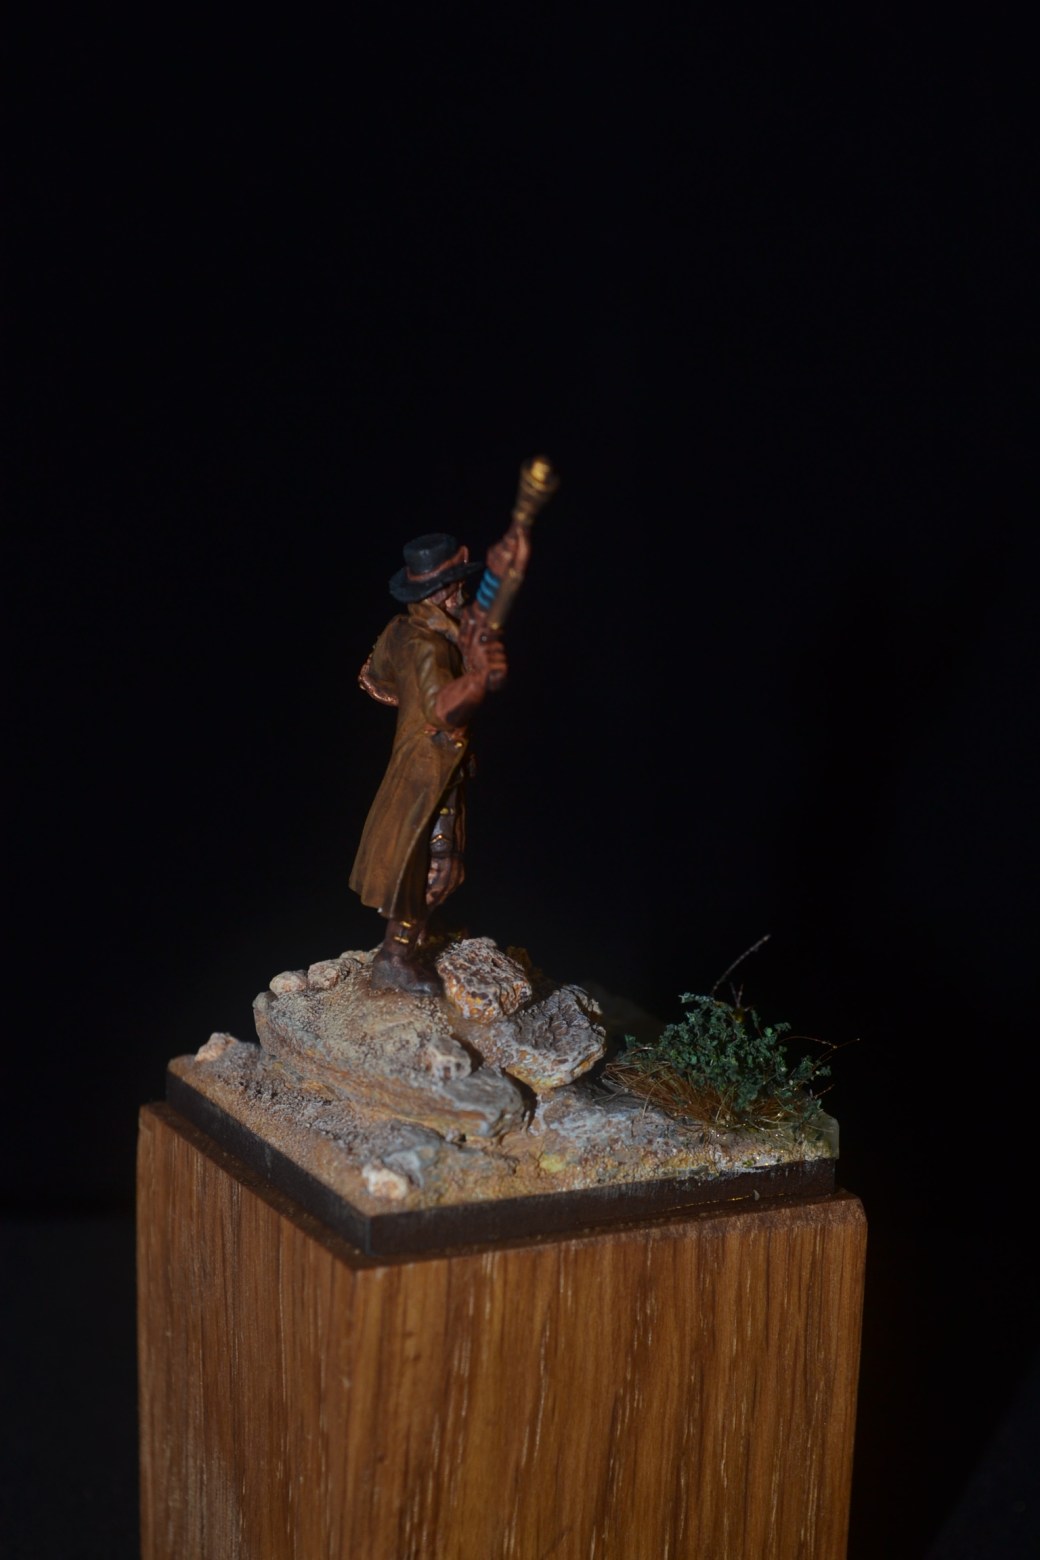
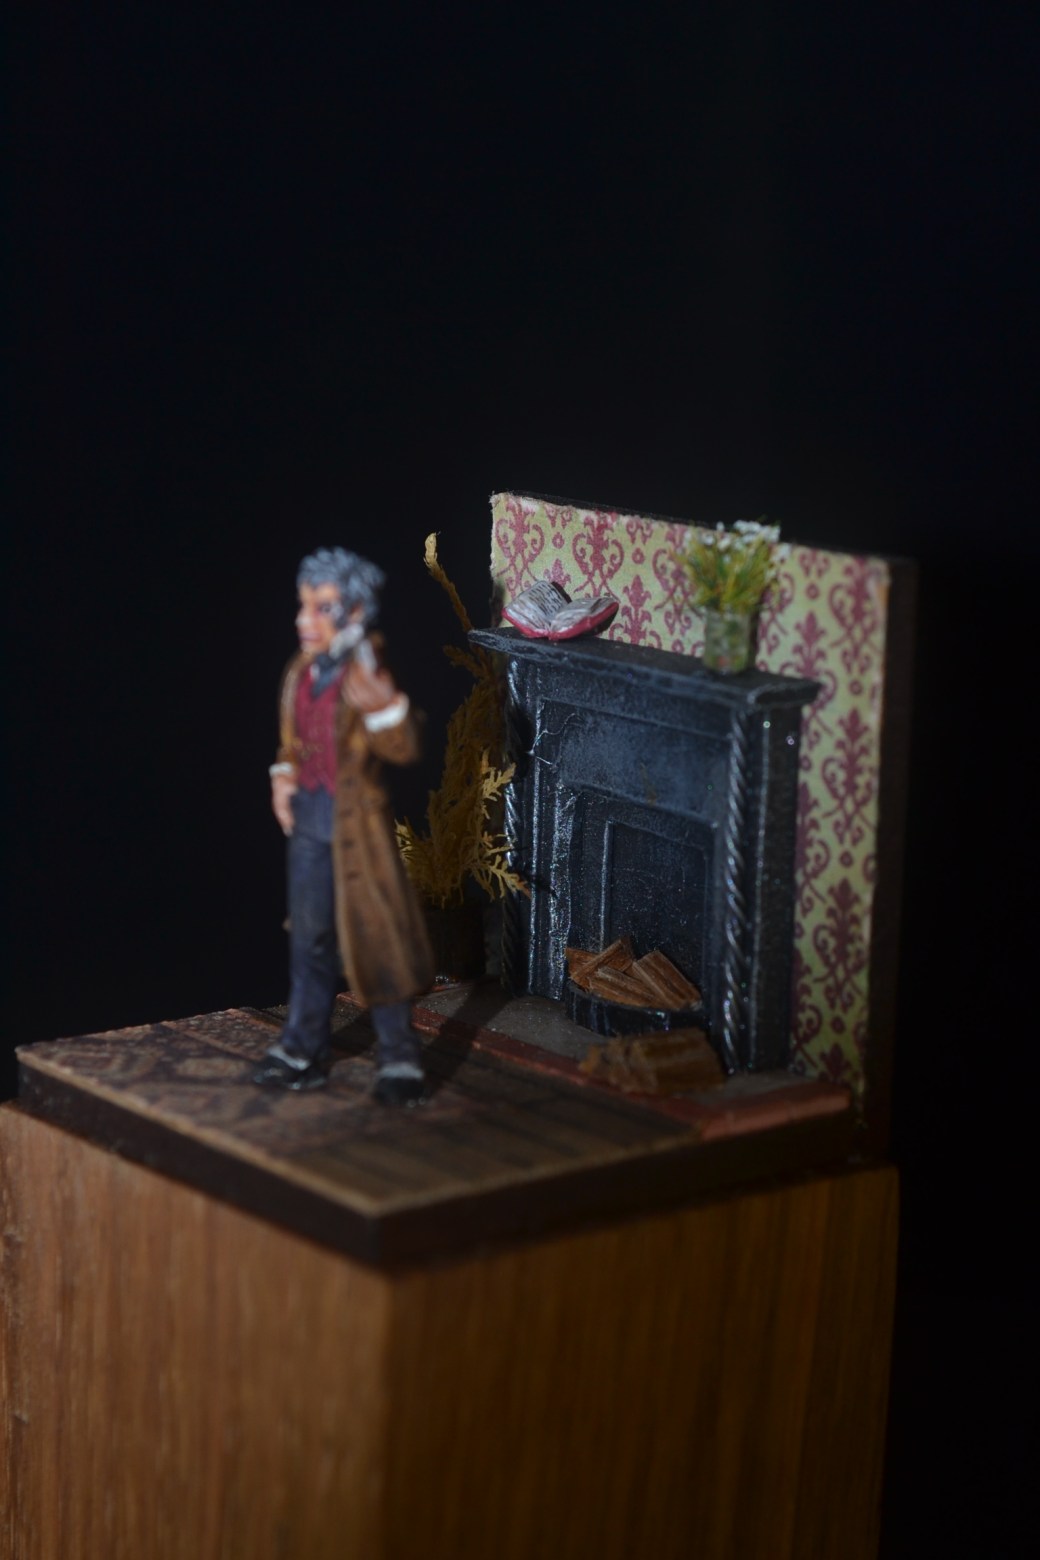
Twisted Miniatures do a couple of Steampunk figures based on the Disney movie Mary Poppins.  One figure goes by the name of “Mary Poppets”, the other is simply called “Albert”.  Now don’t ask me why I was drawn to these two figures because in all honesty I haven’t a clue.  I cannot even claim to have wonderful childhood memories of the film and claim points for nostalgia.  The best I can offer is that I had an instant and simplistic idea on how to base them, thought the figures looked colourful to paint and decided to throw caution to the wind and buy them.

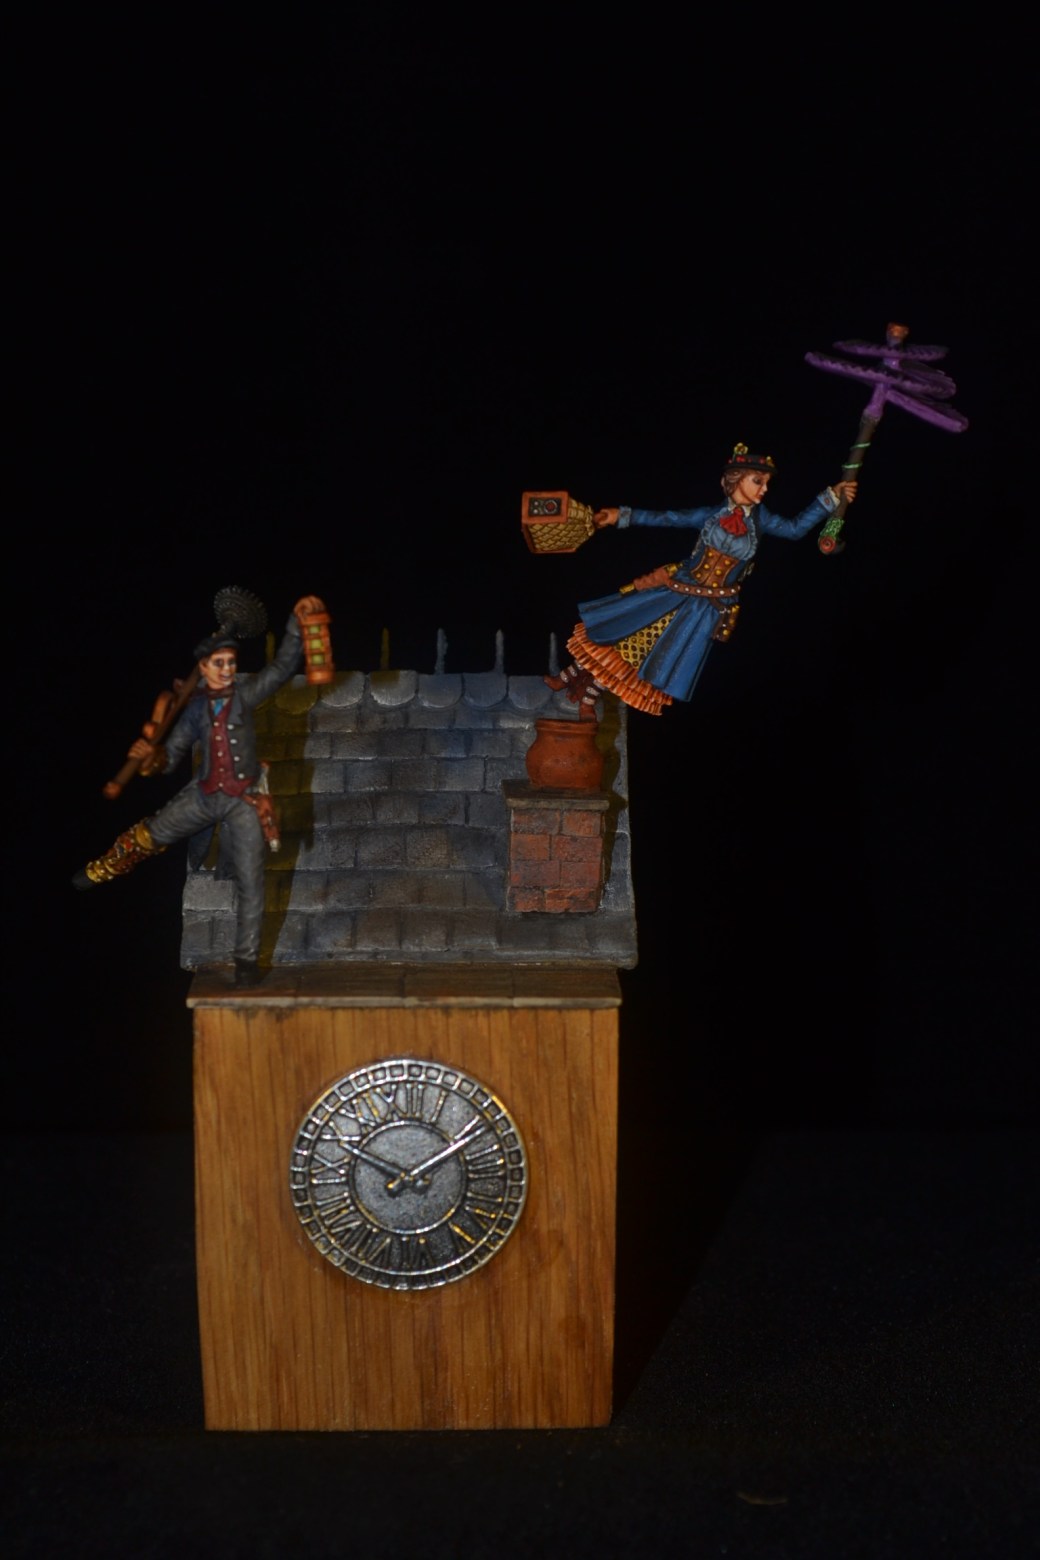
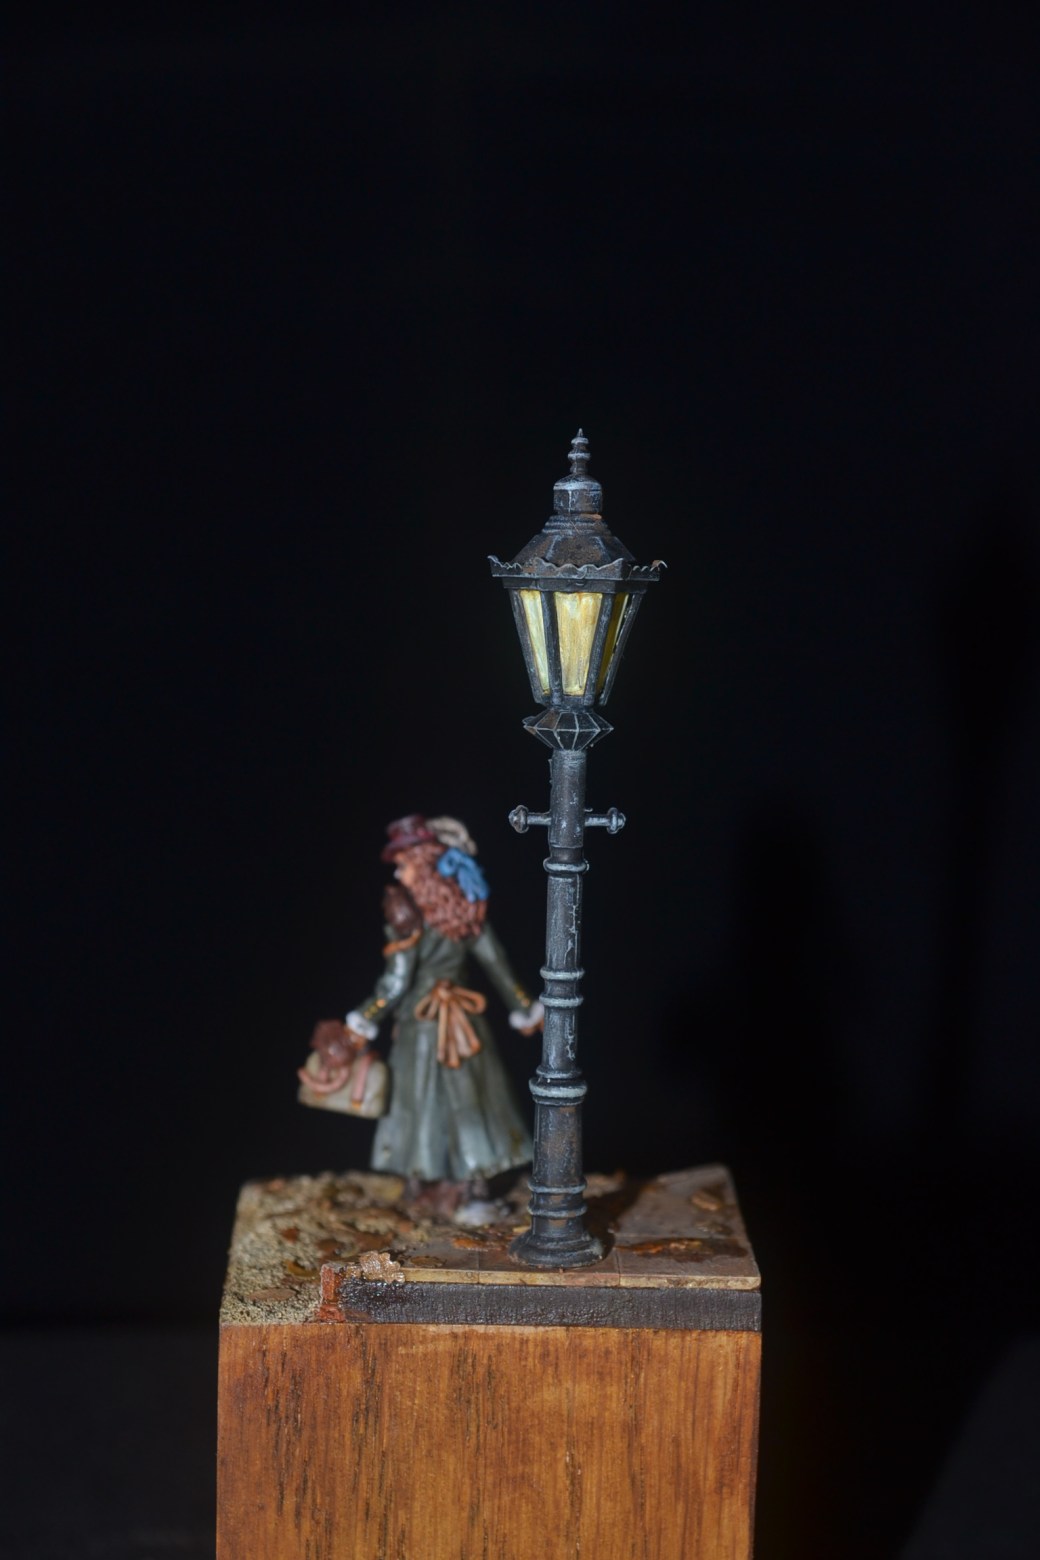
Now as mentioned I am no fan of the film, in truth I don’t think I have even watched it from start to finish.  However, given the film was released in 1964 I have, like most people I would think, seen countless clips on TV (Disney Time at Christmas springs to mind) and am familiar with several of the films songs.  This little diorama was inspired by the song “Chim Chiminey/Step In Time”, specifically the film sequence where they are dancing on the roof.  Don’t pretend you don’t know what I am talking about!

OK, time for some pictures and to talk a little about the build.

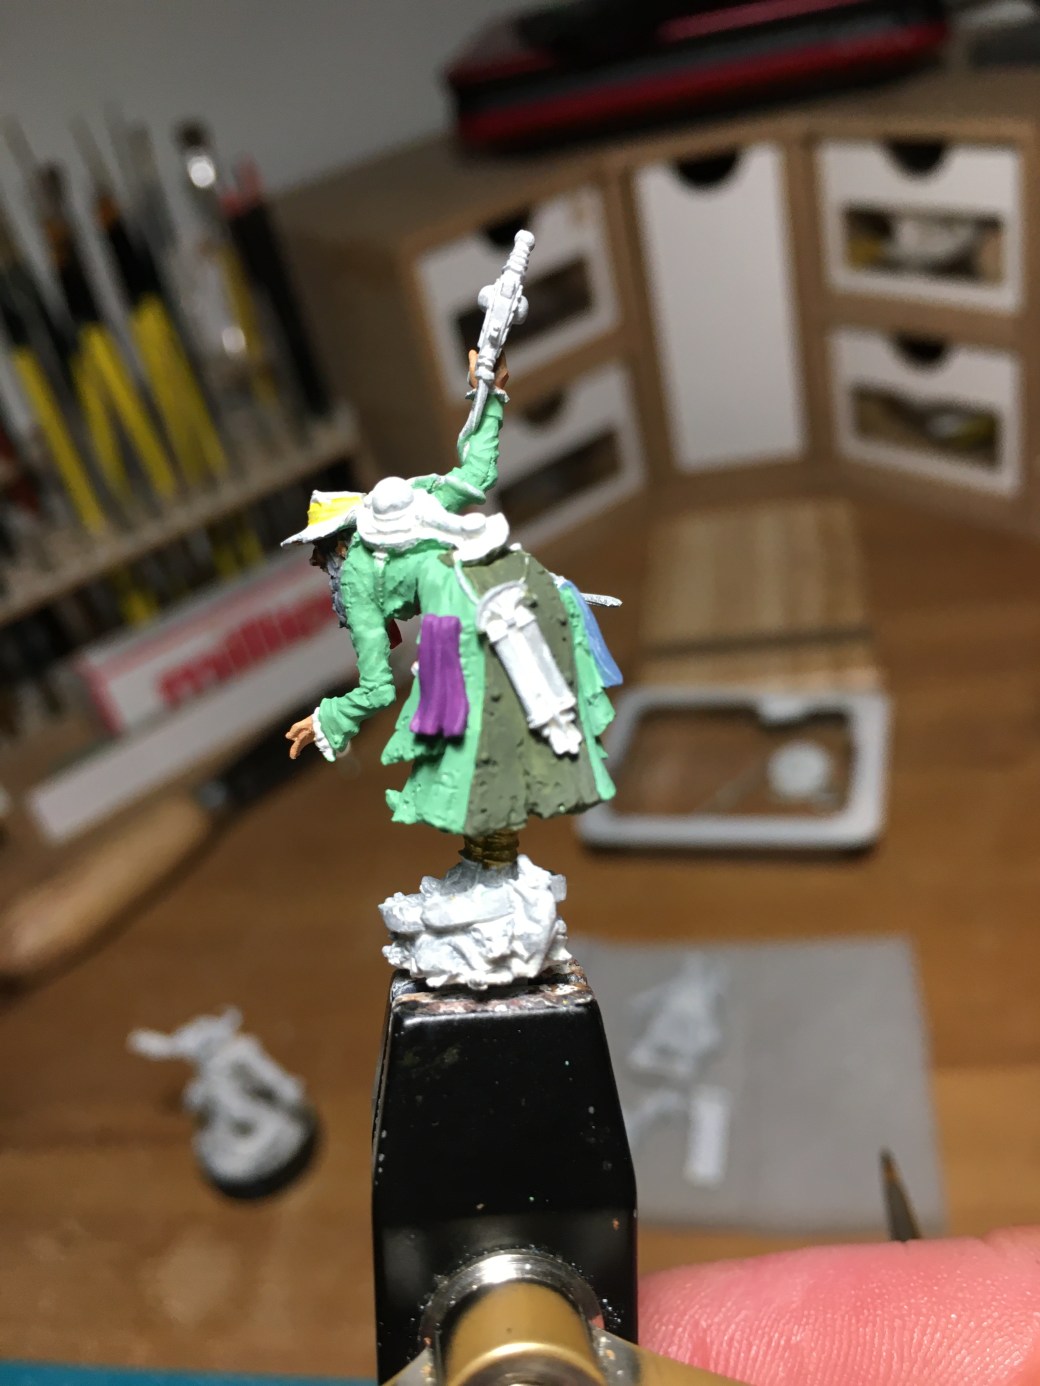
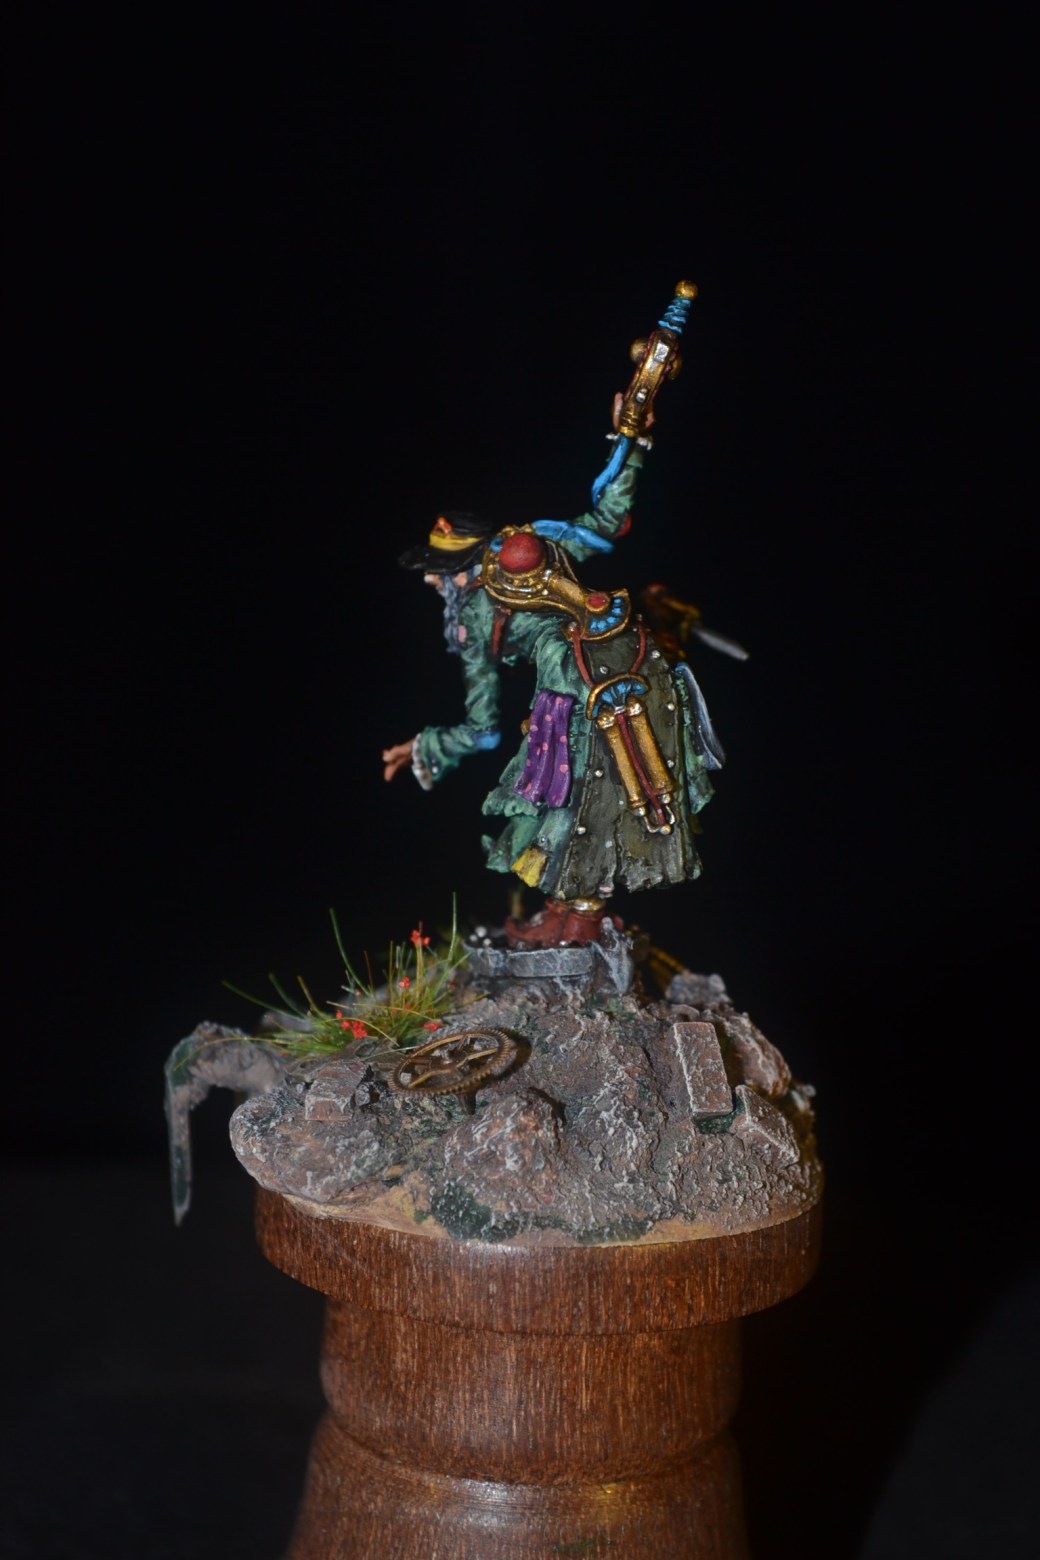
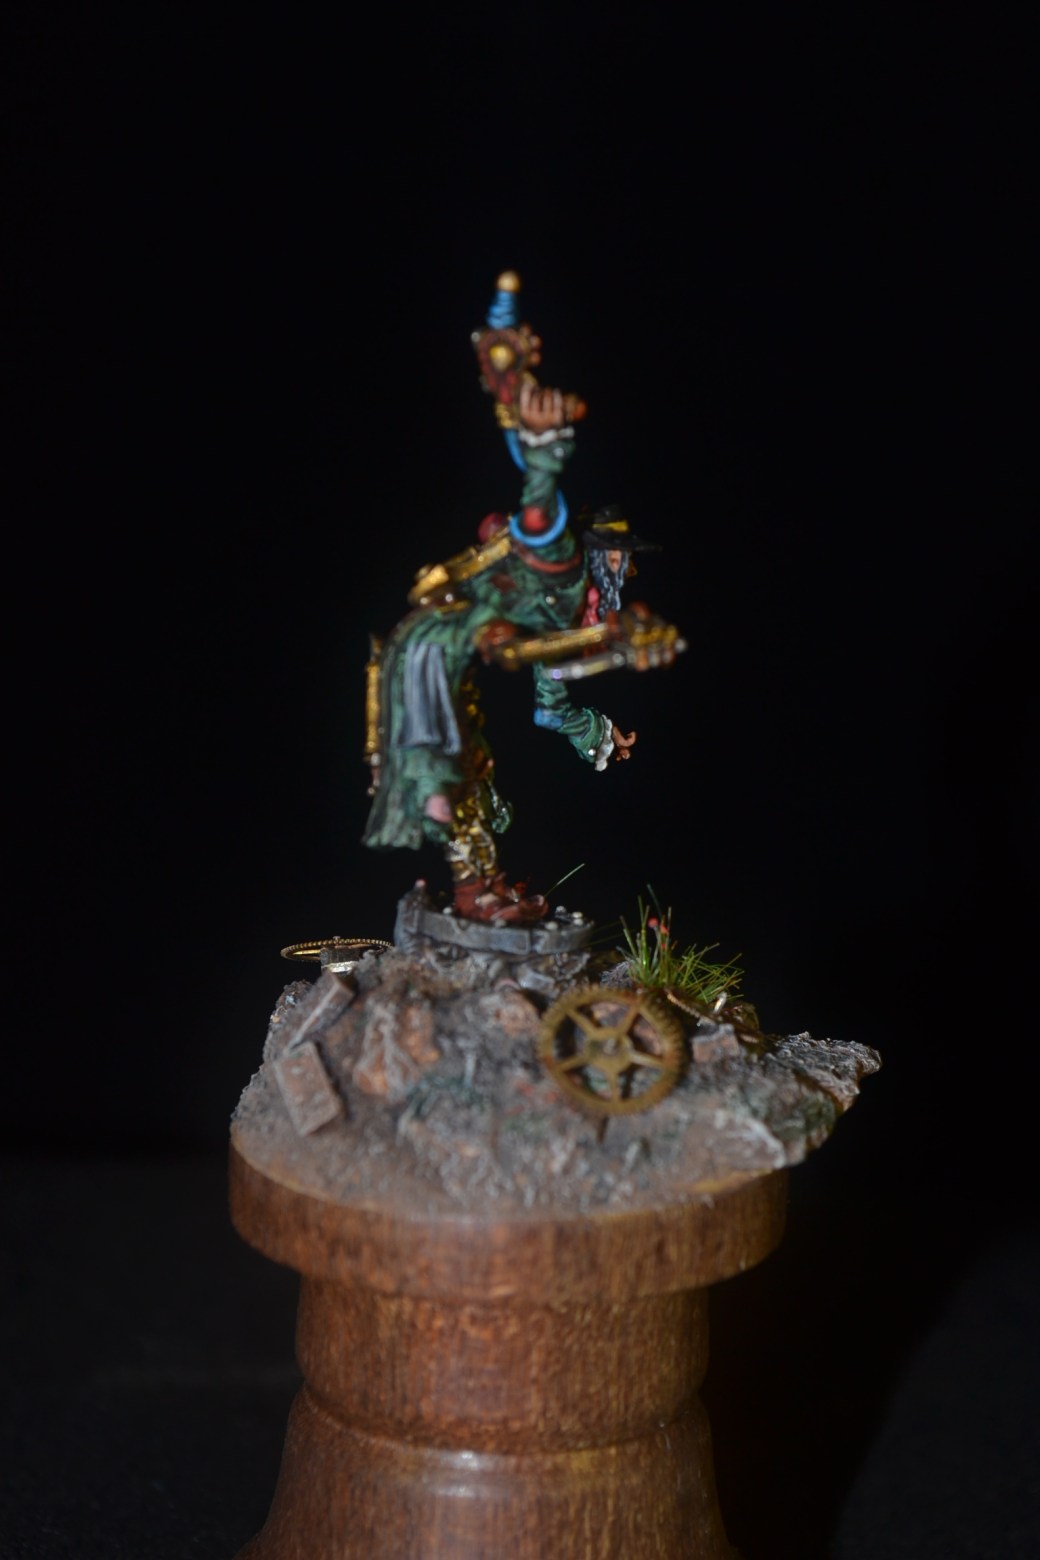
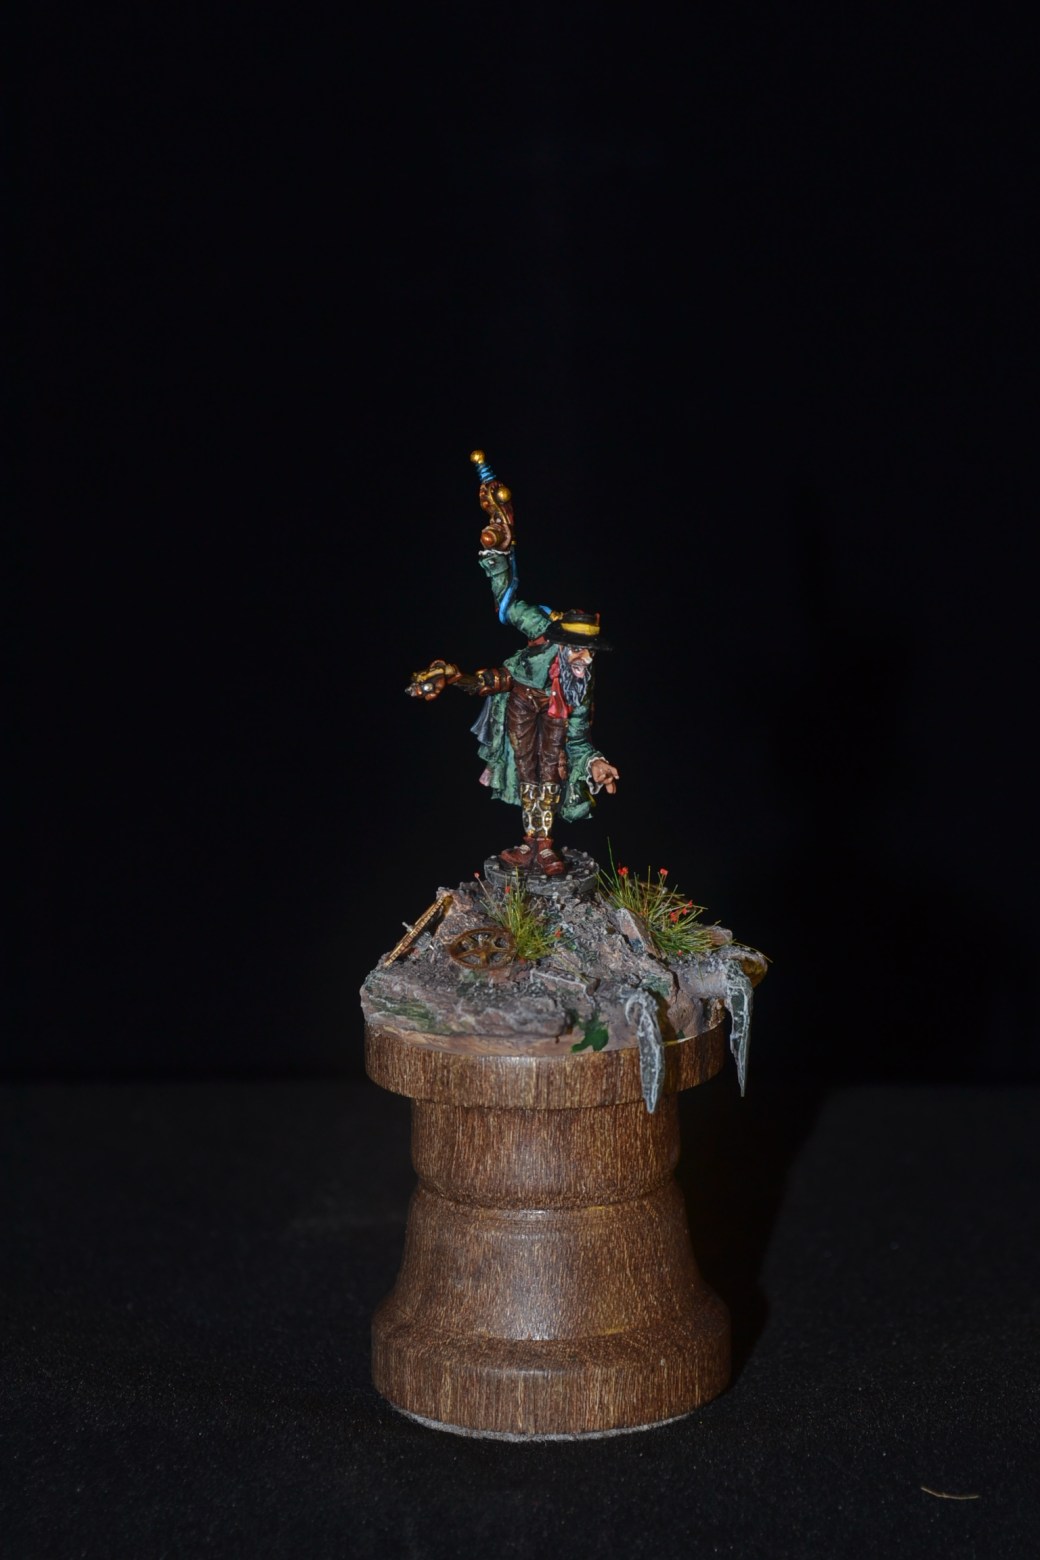
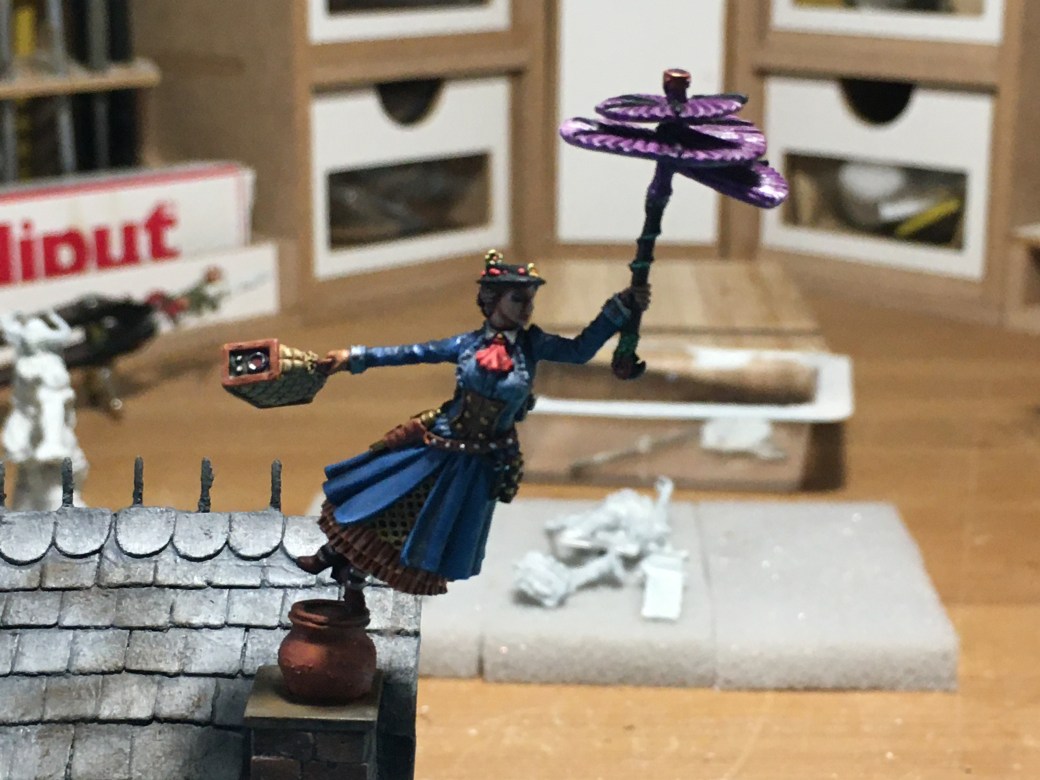
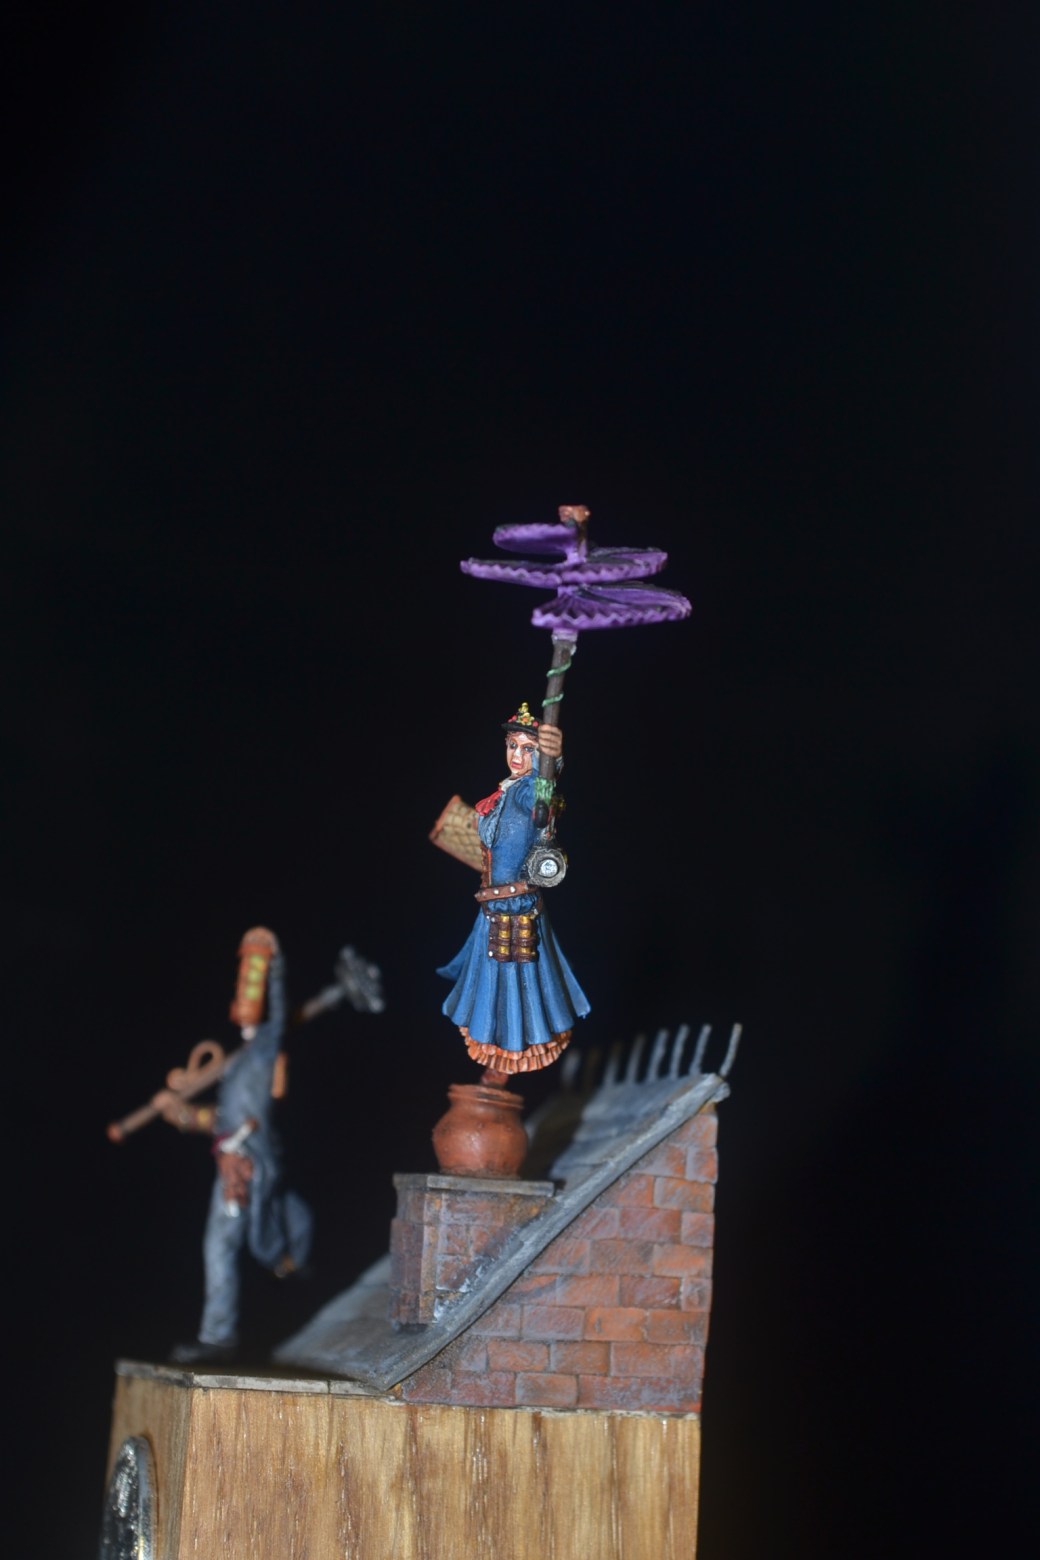
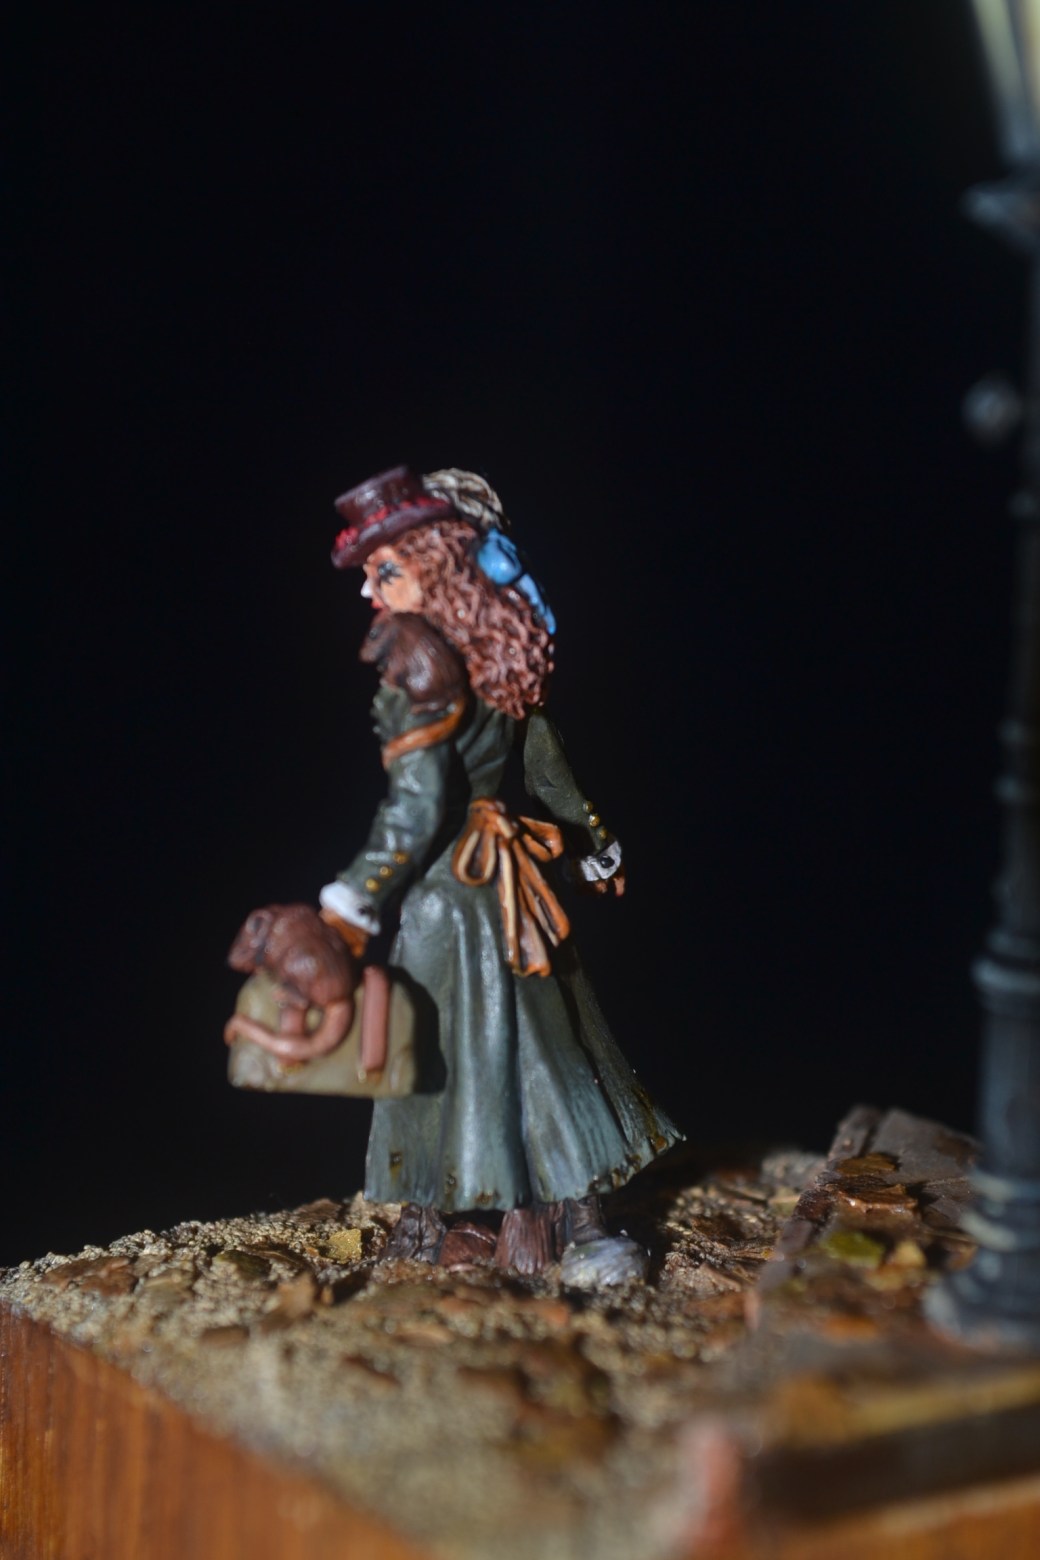
First up I decided to make a start on painting Mary.  Totally arse about face as I always start with the base first but hey ho somes times it’s good to live life on the edge!  She isn’t complete yet.  Block colouring done but highlighting to start and complete plus she has an umbrella which needs to be attached and painted.

51207F17-6698-4A7B-A4A2-3A909BC09338

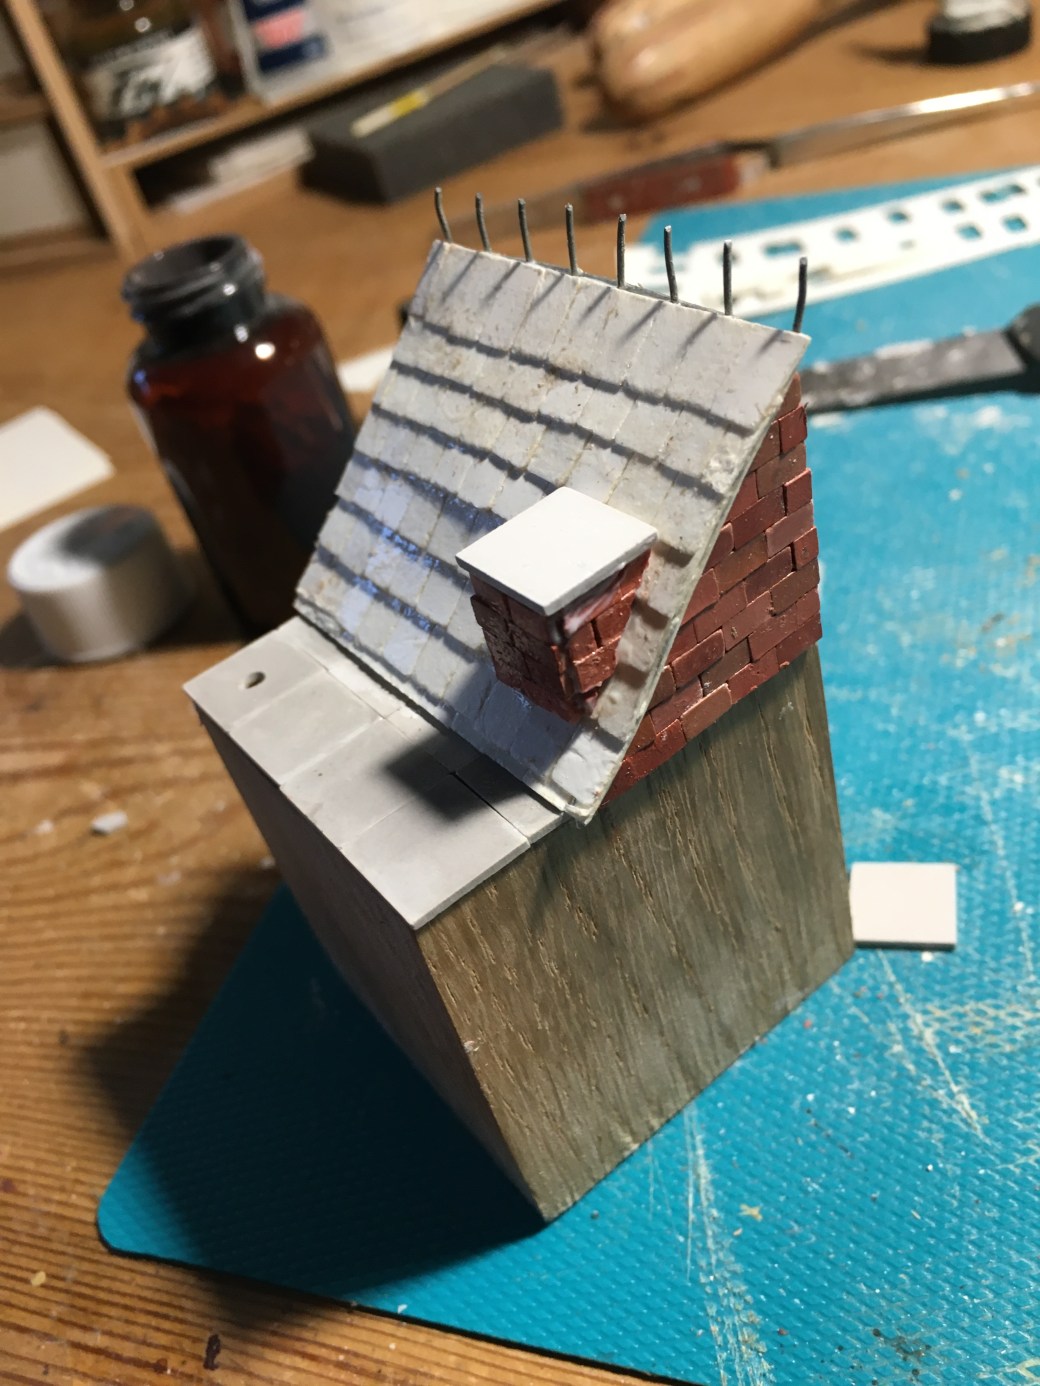
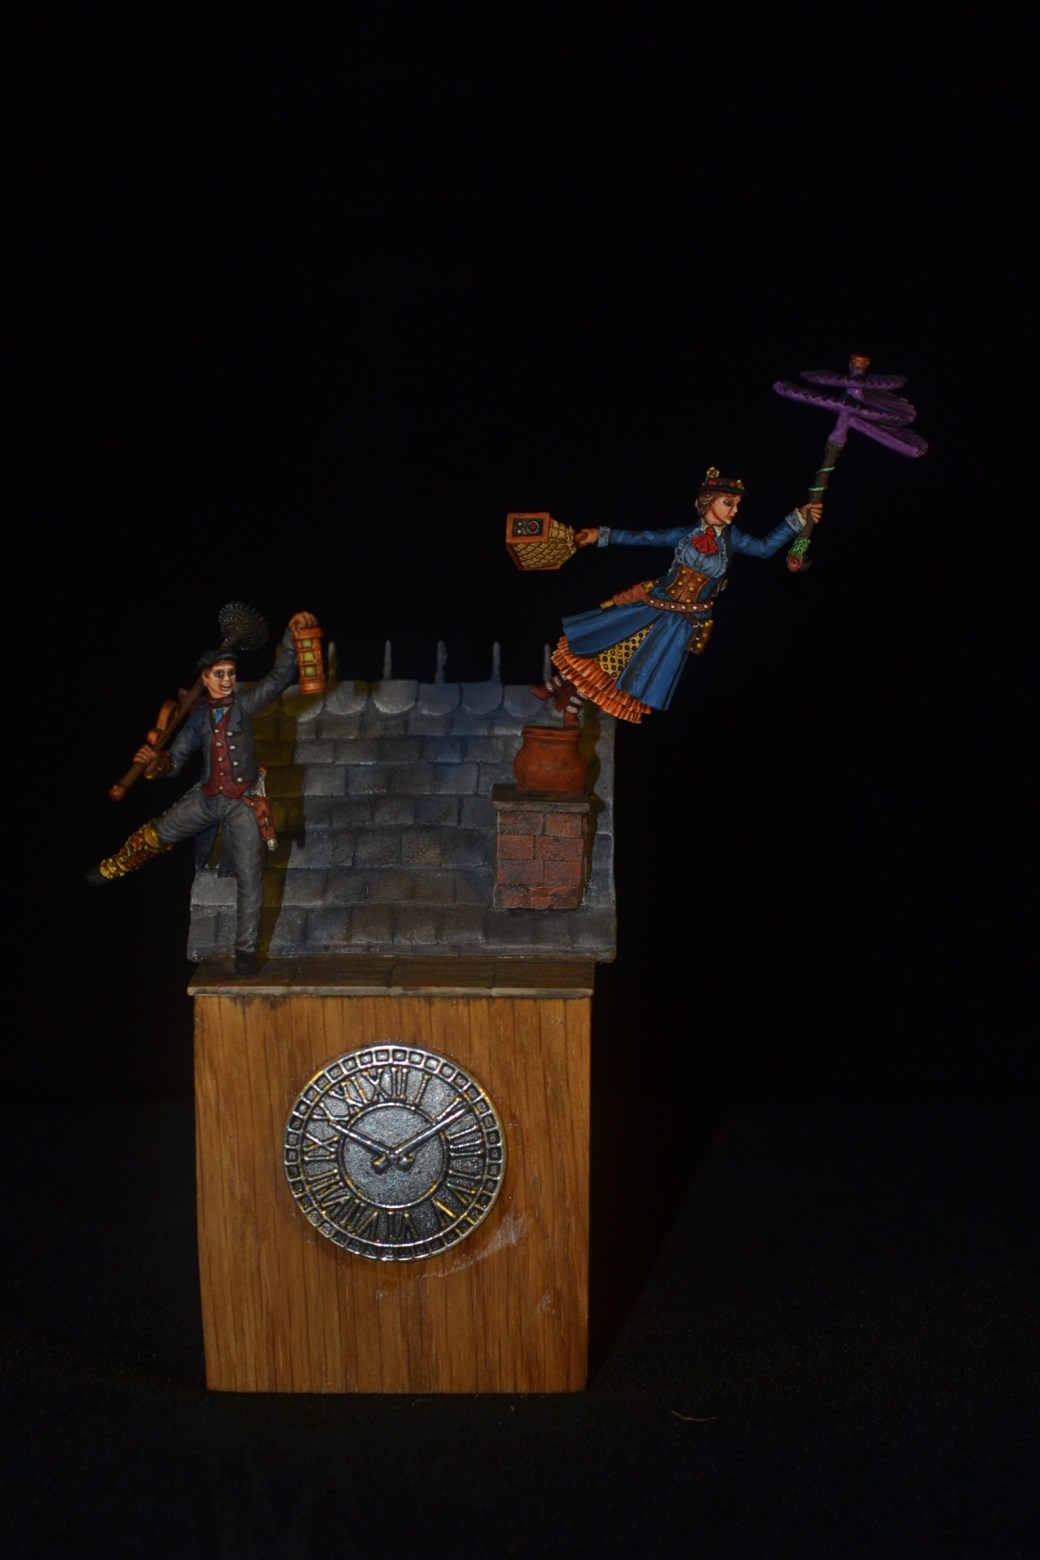
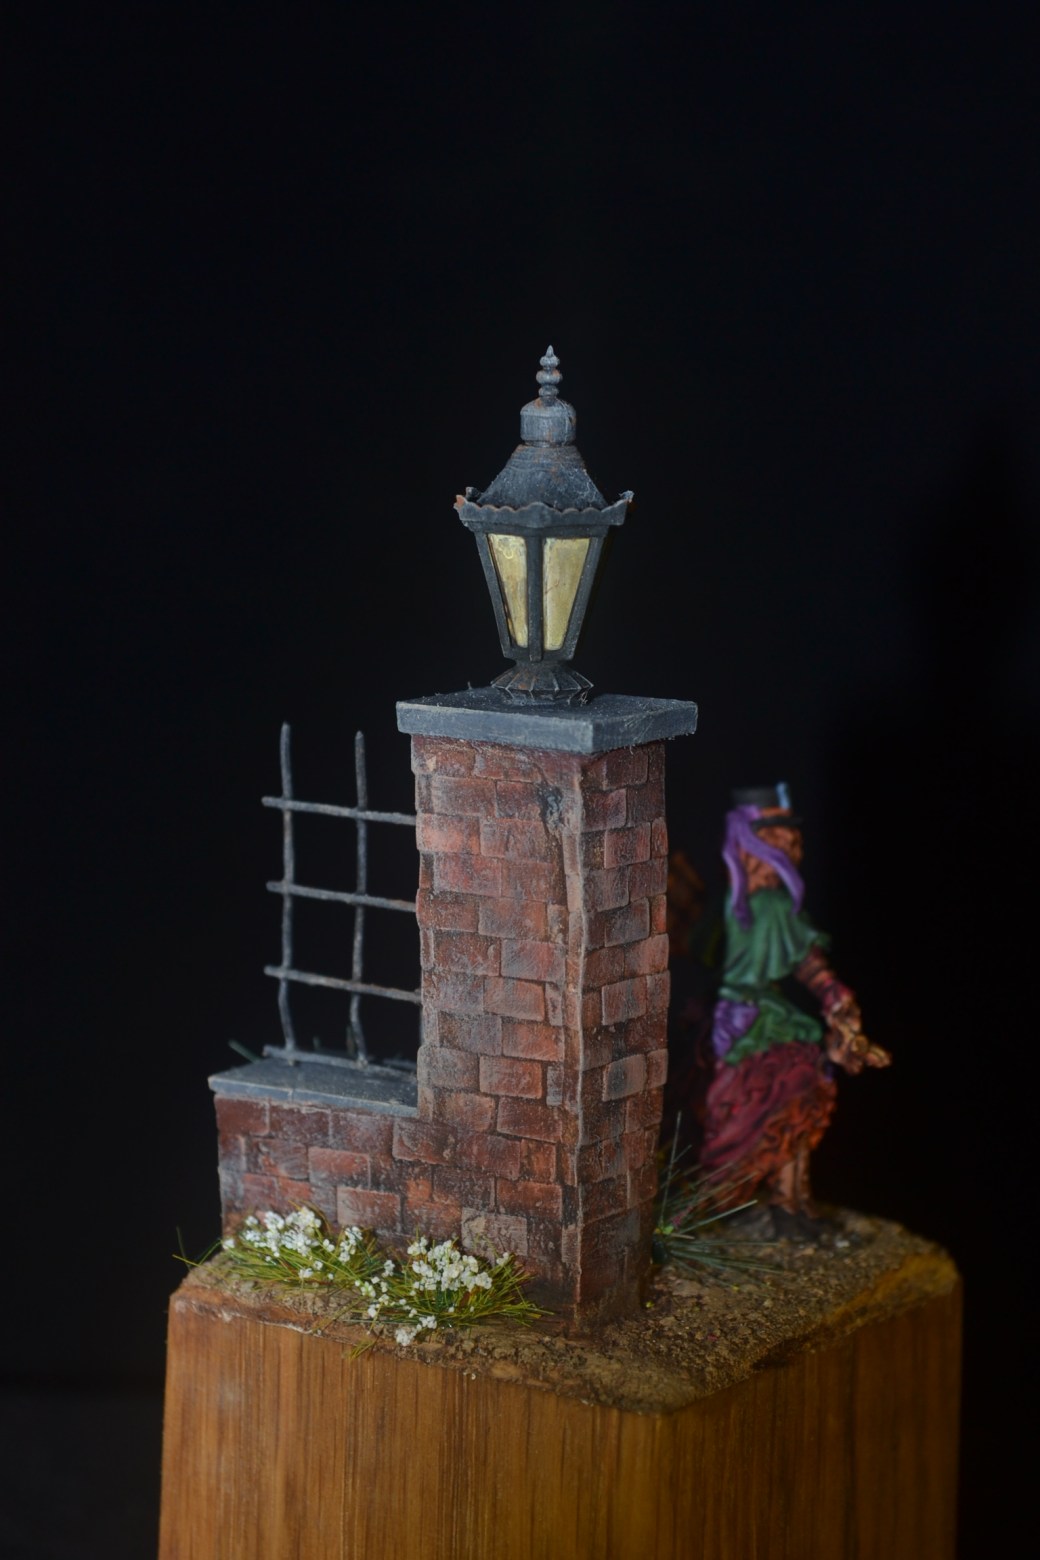
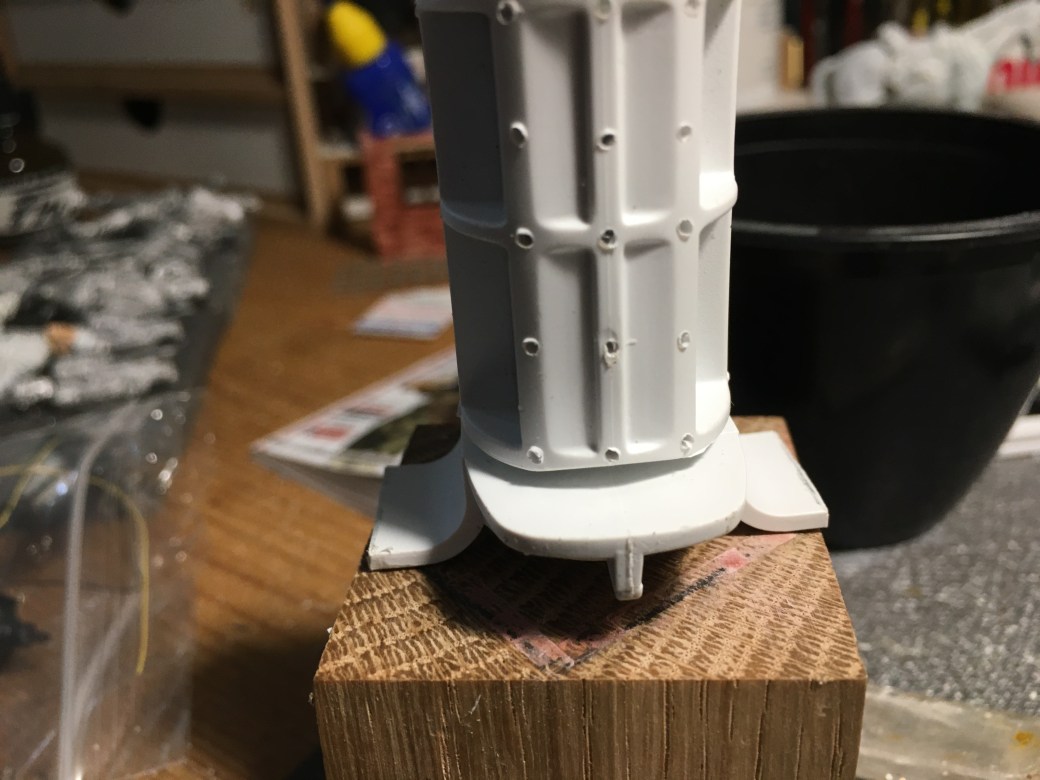
Attention now on the base.  Nothing overly complicated,  just a roof section.  To begin with I needed two sides and a back, MDF and card.

CF9F91C7-B296-421E-966D-1D5FFD7206C0

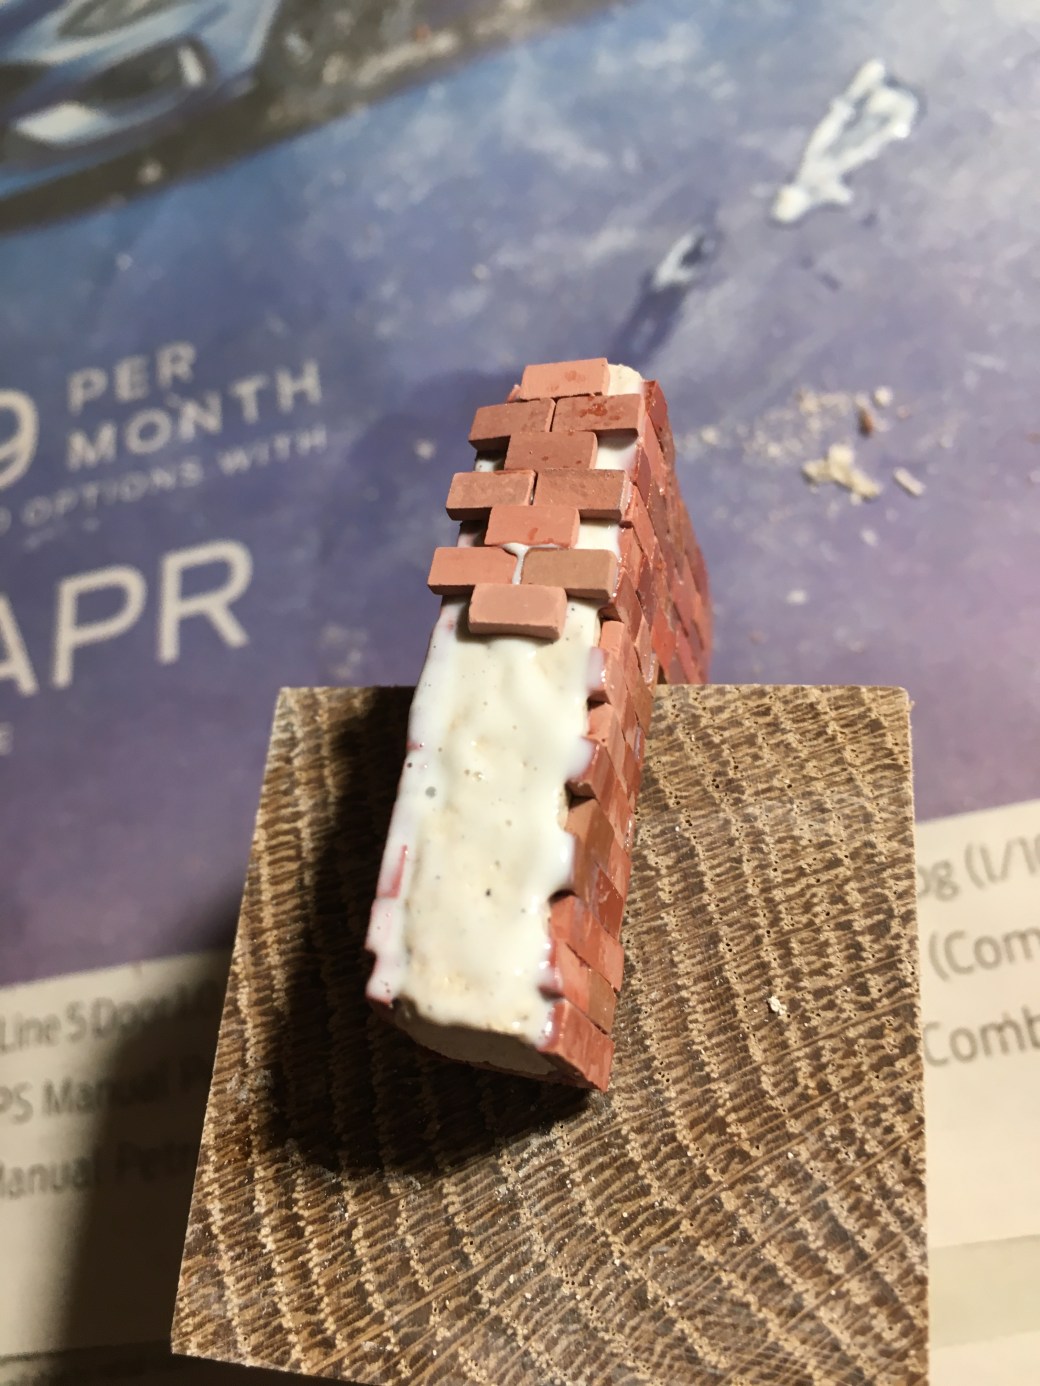
Then both the sides needed to be bricked.

09252E85-A13C-4178-968D-A6116F26CB347DF79514-B3C5-4B4F-85F6-503769B4710F

I also needed to construct a chimney stack.

418084EE-548D-4ABF-B7A3-6DEED3D7DB94

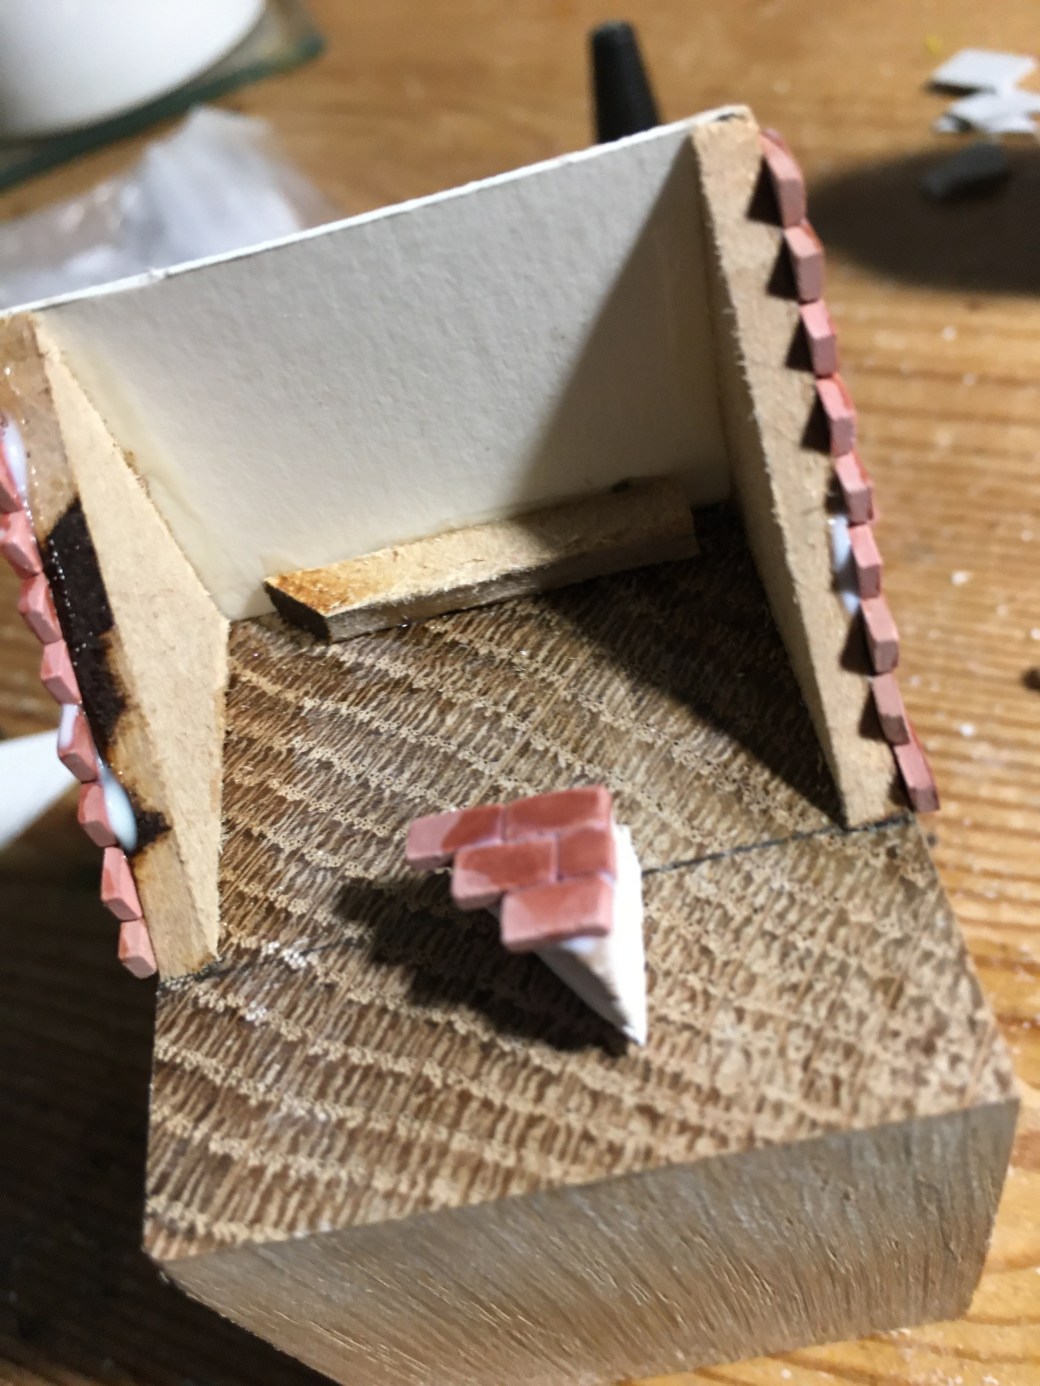
The space between the sides and back then needed to be filled which was done with quick drying clay.  I also needed to put down some roof slabs to cover the base in front of the roof and trim and grout the bricks using filler.  The whole in the slab is for positioning Albert in due course.

B8CD1A4A-95C5-408D-88D4-7F61546A43BF

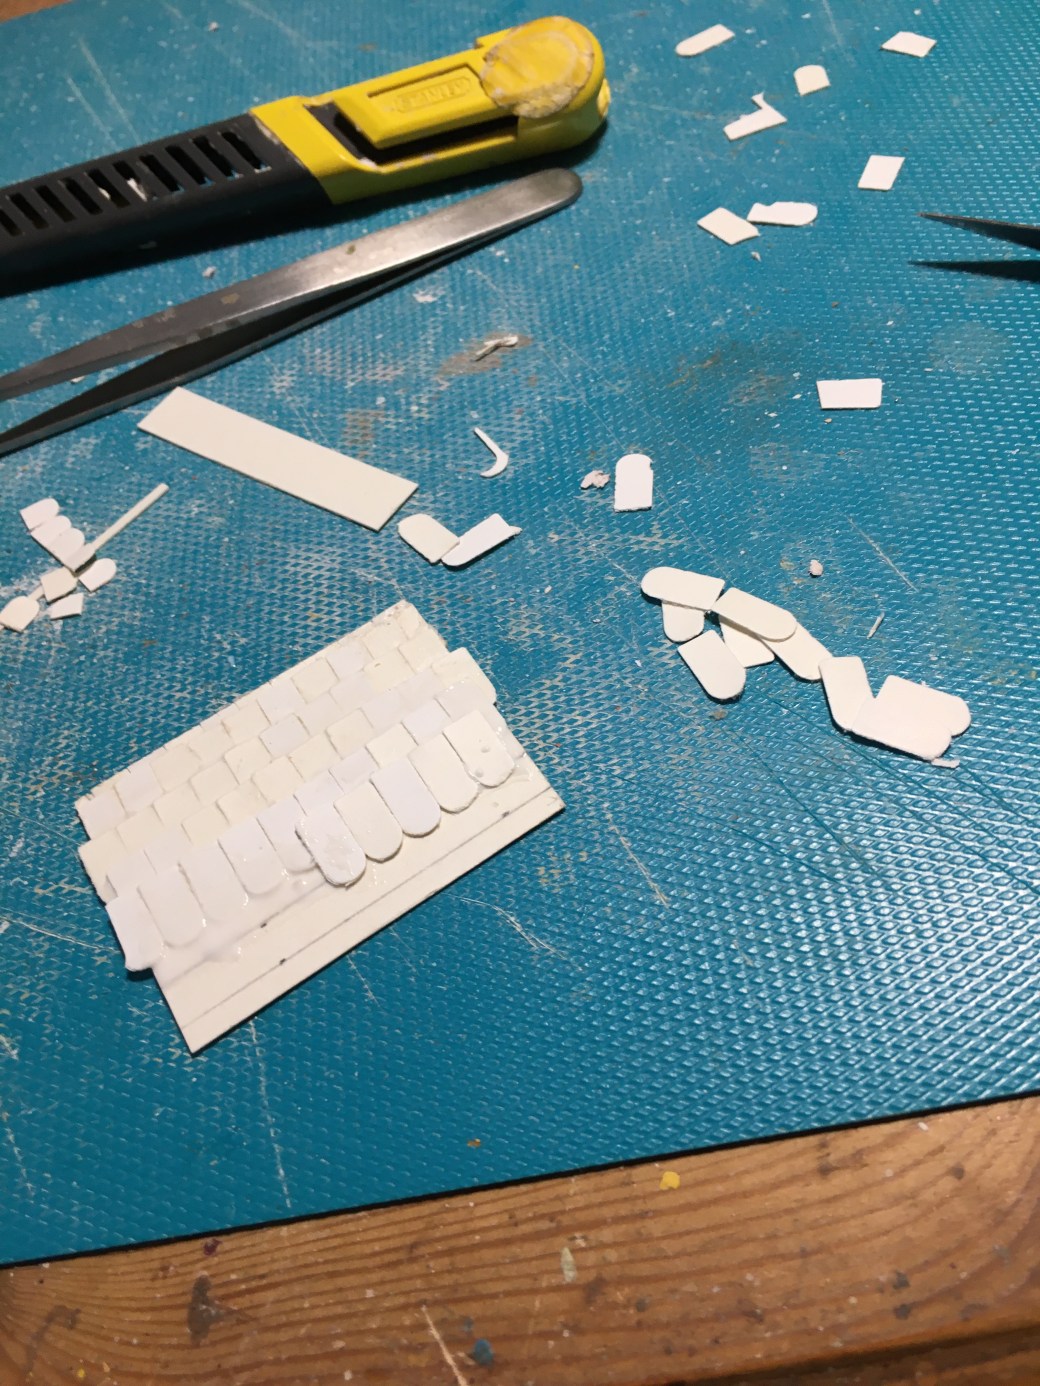
The next step was to start working on the roof tiled section which when complete will be placed on top of the clay and span the two sides.  The tiles are made from card using a Green Stuff World hole punch.

3B3AD0D4-D887-4708-8736-38F8A2258A50

If the weather proves to be as bad as what is being predicted then there is a good chance this model will be finished next week.

TIM


Rowena Von Graaf – 28mm Reaper Chronoscope (Part 2)

I’m not sure that I needed to but following on from my previous Miniatures & Musings post …

https://theimperfectmodeller.wordpress.com/2020/02/12/tims-miniatures-musings-no-36/

… I thought I should complete this young lady if only to show that I am happy to paint female figures which aren’t scantily clad.  So this week I made sure to get Rowena painted up and based (see below).

In comparison with “Shayda Diovol”, Rowena, on the one hand, is well dressed and nowhere near as sexy which means she ticks the box of not being sexualised and exploited I guess.  On the other hand, to me at least, she looks a little timid, less in control and likely to do whatever the man in her life tells her to do which for the Victorian era would be about right for most women of that period.  When I compare the two figures I think Shayda is the more confident, self assured and intimidating female and yet she is virtually naked.  Significant?  Relevant?  For me sexual exploitation is an open can of worms.  The simple truth is sex sells, always has and always will.  Men know it and so do women.  In general terms it is hard at times to know who is exploiting who.  While you are thinking about that and making of it what you will I will start work on my next female which will provide further food for thought!

As for Rowena the figure itself was straight forward to paint and enjoyable on account of the level of detail on the sculpture.  One of the things I like about female figures is they can offer much more colour opportunity as they are often far less uniform based.  Pending the period and fashion there is a lot of scope particularly in the Victorian era.

Fortunately most of the work on this model was making the base which I did last week.  Just as well that I did as I had very little time to spend modelling this week.  Some brief periods of decent weather for the time of the year meant I could get out in the garden and make a start on my lengthy jobs list.  The good news is more rain is on the way so hopefully I will be able to hit the modelling desk once again!

Photos below.

TIM

DSC_0634DSC_0626DSC_0624DSC_0632DSC_0628DSC_0627

DSC_0588DSC_0593DSC_0591DSC_0589DSC_0592

Rowena Von Graaf – 28mm Reaper Chronoscope (Part 1)

This week I started on another Reaper Chronoscope Steampunk figure, Rowena Von Graaf.  You will have to wait until next week to see her painted as my time thus far has been spent working on the base.  I have downloaded an online unpainted image of her so you can at least see what the figure looks like.

post-8239-0-56101700-1462036400

As I say this week has been spent working on the base.  I decided I wanted to create a small wall, a pillar and some railings.  I also wanted to add a lamp to the top of the pillar.  First up was the need to make an “L” shape using a couple of pieces of plaster board.  This stuff is so versatile and easy to cut and use.

90EA9110-3145-4325-9F18-B0D2A2AEAC39

Once dried the next step was to clad the “L” in bricks.

AA884532-5F28-4EE8-994B-10D90FC2760D

If you follow my blog you will know I bought some Victorian lamps off of Ebay which I used in a previous model a couple of weeks ago.  I used another one here, or to be more precise the top of one.  For the railings I used some galvanised metal mesh.  I also used a couple of small tiles which I bought from the same place I purchased the bricks.  These needed to be drilled to take the mesh.  Some Milliput was used for the rest of the base and holes positioned to take Rowena once she is painted and ready for adding to the base.

E029B0CF-343E-4DDF-9442-AF5B88F7D573FE6AF3B9-002A-490B-B73A-2AF0921B8767

Finally some grit was added and once the PVA had dried it was time to start the painting and whethering.  As a final touch some flowers were added to provide a little more colour and interest.

A141F68C-9557-4B8F-823D-154664D3FCB8B6CA466C-FE67-4AE1-AE3D-4F78E02981CD

All simple enough but time consuming, particulalry in terms of allowing tbings to dry.  Time now to paint the lady herself.

TIM

Andre Durand, Time Chaser – 28mm Reaper Chronoscope (Part 2)

This week saw the completion of Andrea Durand, Time chaser and his “Krups Machine”.

What does the machine do?

Ideally it is for time travel but I am more inclined to go with John’s (of Just Needs Varnish) idea that it is a coffee maker.  Either way it hopefully looks better now it has been painted up.  Andre himself has been finished as well and the two items are now assembled and based.

Images below.

TIM

DSC_0635DSC_0645DSC_0644DSC_0640DSC_0639DSC_0636DSC_0642DSC_0637DSC_0641DSC_0638

Andre Durand, Time Chaser – 28mm Reaper Chronoscope (Part 1)

Now I did warn you in a previous post that it would not always be possible to churn out a completed model every week and that a Work In Progress post would be required from time to time and so it has proved.  Next week I hope to post images of the completed model but for this week this is all I have to offer by way of progress.

The completed model will comprise of a single figure, in this case a Reaper figure which goes by the name of Andre Durand, Time Chaser.  The figure has been primed and work on the face has begun.  I always start with the face first because for me it is the most crucial part of any figure.  Get the face right and all being well the rest follows.  More to do but so far so good.

0E7232B7-E838-40C4-A241-7634CF647291

Now given that good old Andre is billed as a time chaser I figured he needed some form of transport.  At this point I should point out that I am working outside of my comfort zone.  Scratch built Steampunk machines couldn’t be further away from anything I have done in the past.  How to go about it?

A trip into the garage and a rummage through my bit drawers produced a few interesting finds.  The obvious question at this point is “why have you been hording this shit TIM?”  You might well ask.  Personally I am laying the blame squarely on the shoulders of She Who Must Be Obeyed.  Is that fair?  Yep.

After some experimentation the build begun to take shape.  Holes were drilled to insert pin heads.  If there is one thing I know about Steampunk the machines have rivets, lots or rivets.  Will it look decent once it has been painted up?  Good question but hopefully next week we will know the answer one way or another.

Some build progress images below.

TIM

170ACFB7-2D35-42E1-8027-D5D238B9125E

0869144D-C304-4800-91FD-D8539C84D135

A1709E10-7433-424C-A28D-948B1C145458

891F6B55-8547-4E74-9E14-2D7BE63F1F83

5A1CCB9E-E449-40A4-A9E7-7978966B4EDB

35736C63-6BEC-4BC8-AF9E-681513976F97

AD05286C-5763-414E-A2D3-7DD7D8AADD12

475B67DC-6B90-43AF-B544-1F41339ECEF5

“Vermina” – 28mm Reaper Miniature

My next Steampunk offering.  Another figure from Reaper which goes by the name of “Vermina” on account of the fact that she likes vermin and rats in particular.  I really loved painting this figure.  So much detail and no paint colour restrictions.

Managed to find some rather nice victorian style lamps on Ebay which befitted the period and provide a little more interest in the base.  With hindsite I ought to have done a lighter colour on the base so that the rats at her feet stand out better although the photos do make it a little darker than it actually appears up close and personal.  Something to revist at some point perhaps.

Images below.

TIM

DSC_0611DSC_0613 (1)DSC_0617DSC_0612 (1)DSC_0614DSC_0616DSC_0618DSC_0615

Dr Charles Bennet – 28mm Reaper Chronoscope

This week, despite various forms of domestic chaos,  I managed to get another of my Reaper Chronoscope steampunk figures done.  This one goes by the name of Dr Charles Bennet, billed by Reaper as a Steampunk Hero.

I wasn’t entirely sure how to base him but decided to give my recently acquired Green Stuff World UV acrylic water effect a go.  The result looks better in the flesh than in the photos and overall I was pleased with how the stuff worked.  Using the UV torch the acrylic set in under a minute!  A small piece of a plastic straw was used for the water pipe.

The figure itself was a straight forward paint job but looking at the photos the stubble I added to his face appears much darker.  Not sure I am happy with that so will take a closer look at the figure again and if necessary tone it down a little.

Photo’s below.

TIM


DSC_0604DSC_0606DSC_0605DSC_0607DSC_0608DSC_0610DSC_0609

Benedict Baker – 28mm Reaper Chronoscope

I thought I would kick start the New Year with my growing interest in a new genre for me – Victorian Steampunk.  Now before anyone gets carried away, myself included, the emphasis is likely to be more on figures and small scenes rather than large dioramas featuring Jules Verne type machines.  That may come at some point in the future but not before I get my head around the genre far more and not until I have completed lots of other bits and pieces (like others I am determined to try to clear my backlog!).  In next weeks TIM’s Miniatures and Musings I will reflect upon 2019 and in the one after that I’ll do a little feature on my aims for 2020 and where Steampunk fits in.  For now though back to this post.

This figure goes by the name of Benedict Baker, a victorian genteleman produced by Reaper under their Chronoscope range.  The figure reminded me of the Paul Whitehouse charachter which featured in the Fast Show …

Paul-Whitehouse

… and so I decided to buy him.

The figure looks to me like he wants to tell a story and I thought this seemed like a pretty good place to start a new genre.

The figure itself is a straight forward paint job but the base is entirely scratch built.  As with the Paul Whitehouse chap I thought a fireside scene was appropriate so I made a fireplace using MDF, cardboard, a coffee stirrer and some twisted wire.  The pot plant was made from Milliput and some fern moss dipped in PVA.  I managed to find a small book to place on the mantlepiece and the small vase was made from the plastic protection pieces which come on the ends of paint brushes.  Match sticks were used for logs.  The wooden floor was made of coffee stirrers and the wallpaper and rug were prints from online images.

Welcome to Steampunk TIM!

Pictures of the completed model below.

TIM

DSC_0598DSC_0599DSC_0600DSC_0603DSC_0601DSC_0602DSC_0597