Dio-Bolical Monday No: 11 – “The Wizard’s Tower” – Part 2

At the end of last week I managed to make a tiny start on the top section of the tower so I thought I would stick with that and see how much more I could get done.

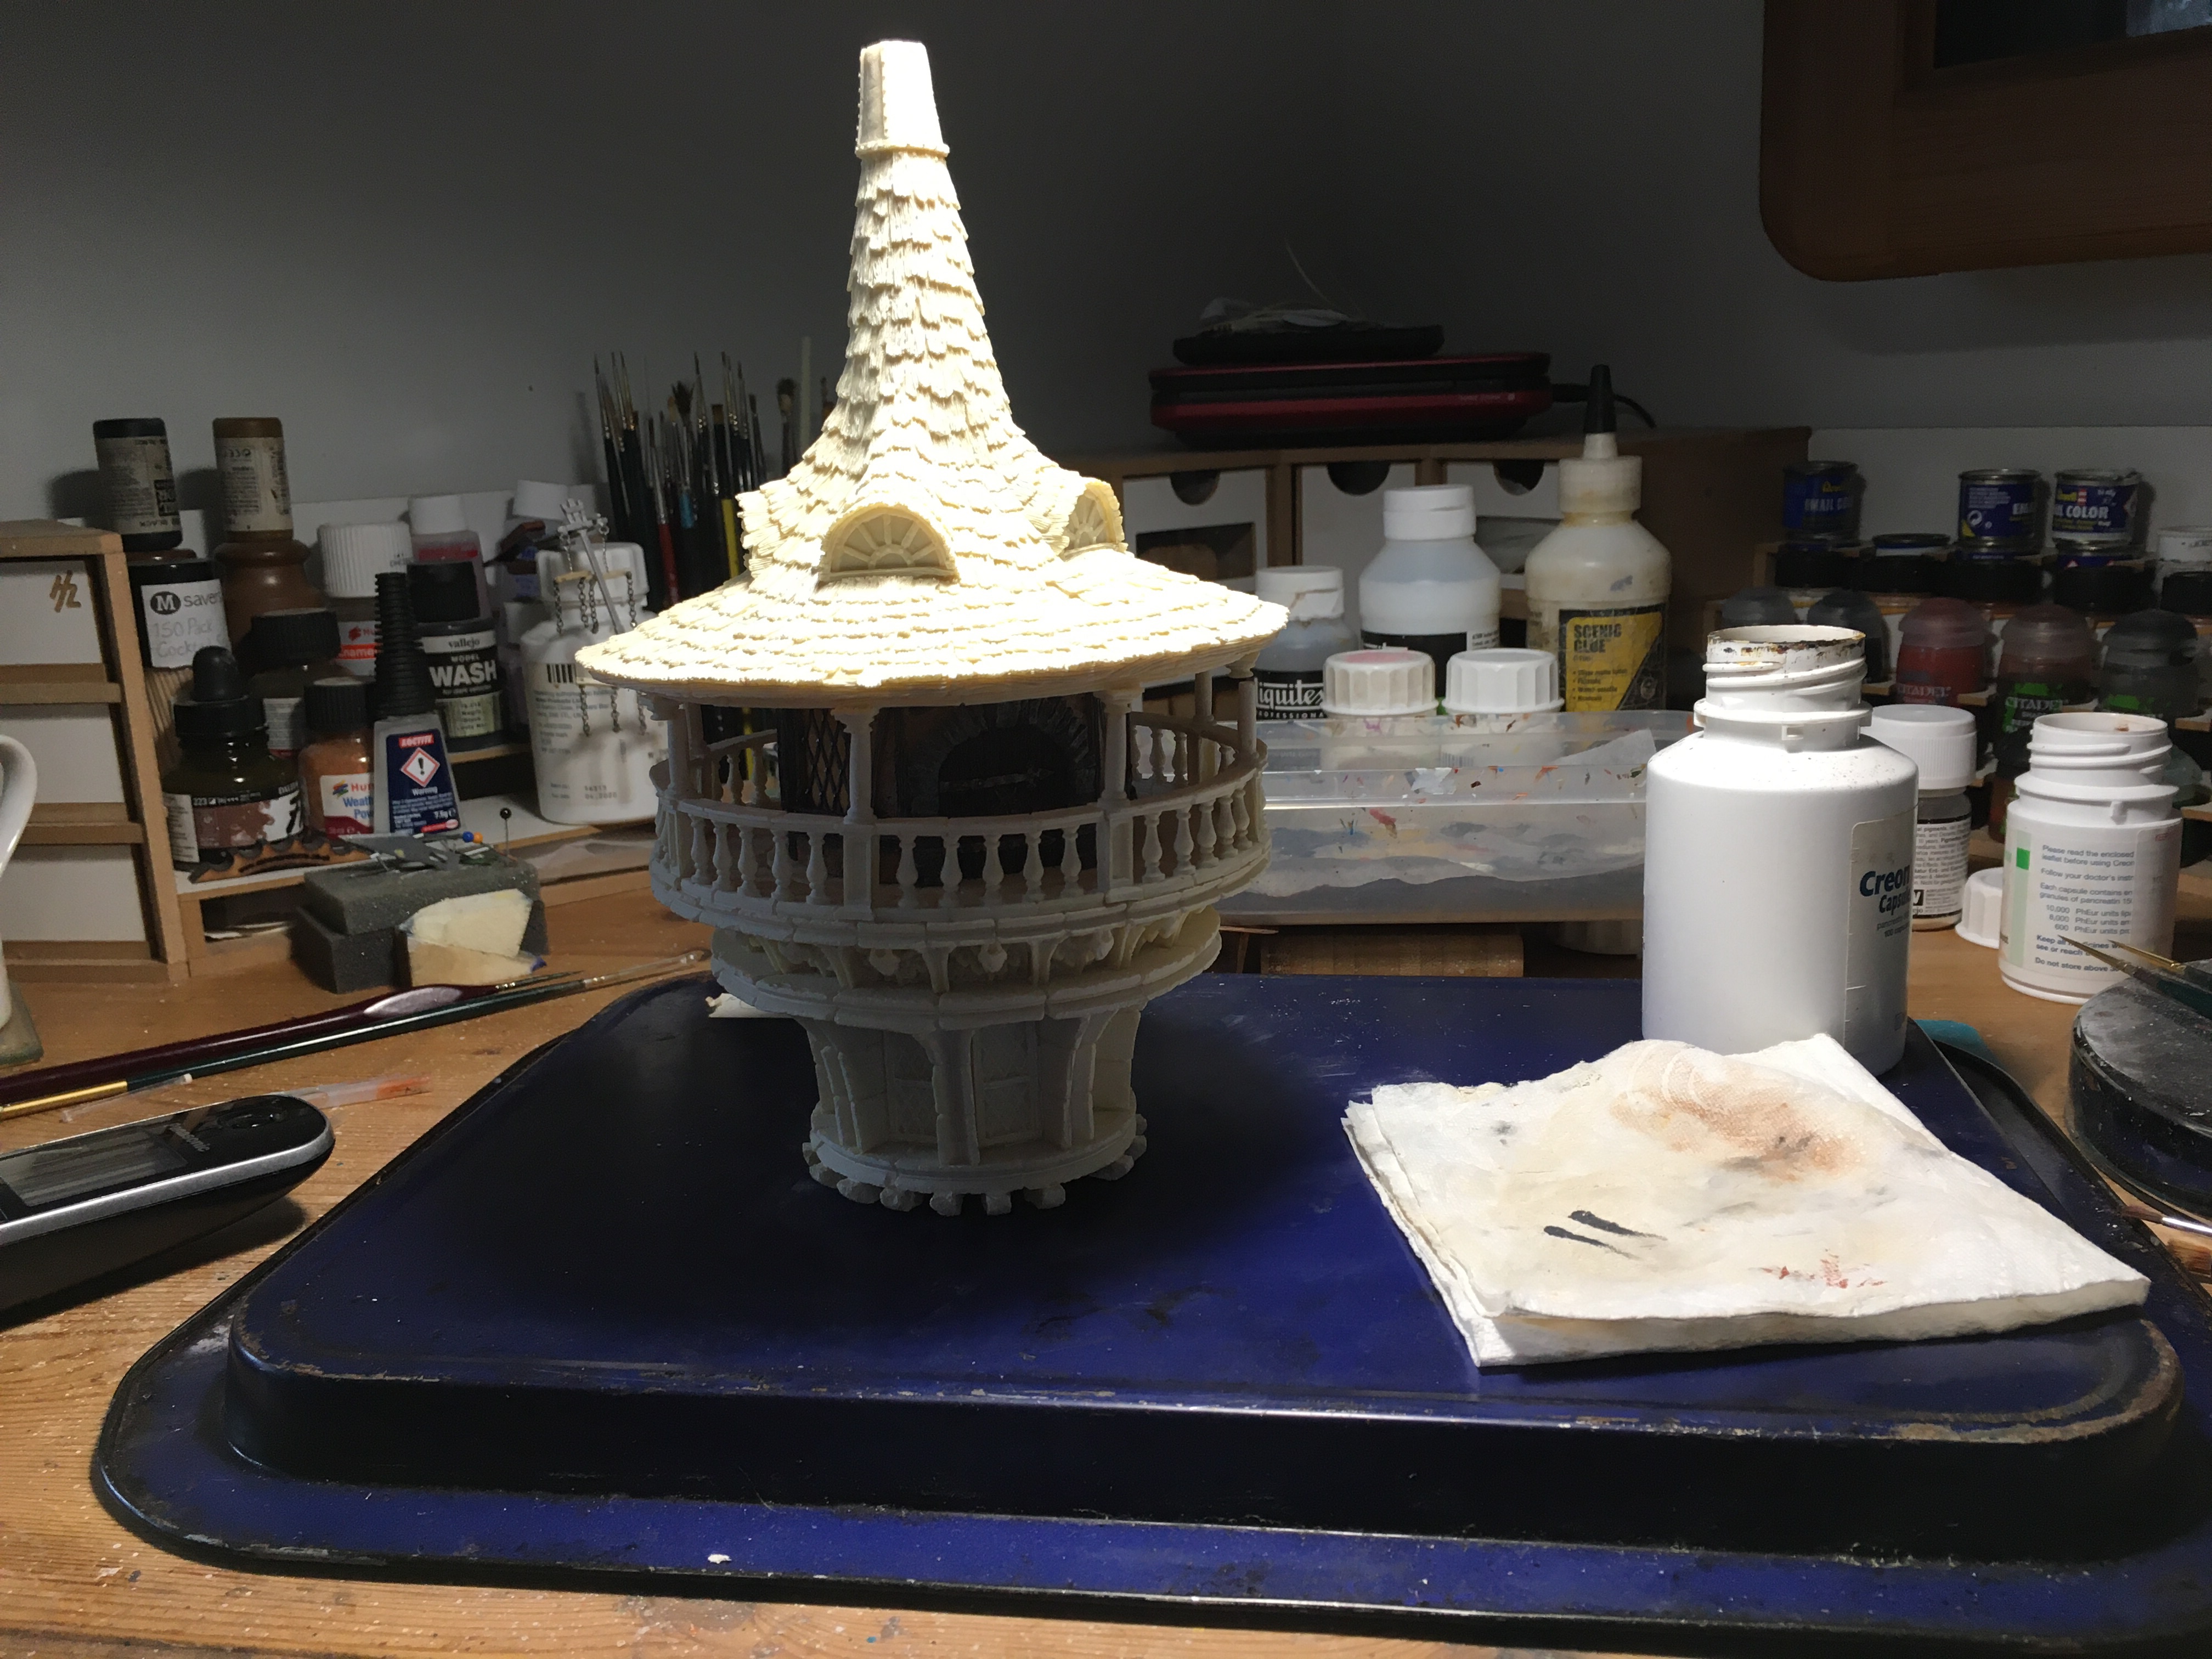
The top piece comprises essentially of a circular room and the turret.  As with the rest of the model it is highly detailed both inside and out.  Unpainted but assembled the three main parts look like this.

img_0719

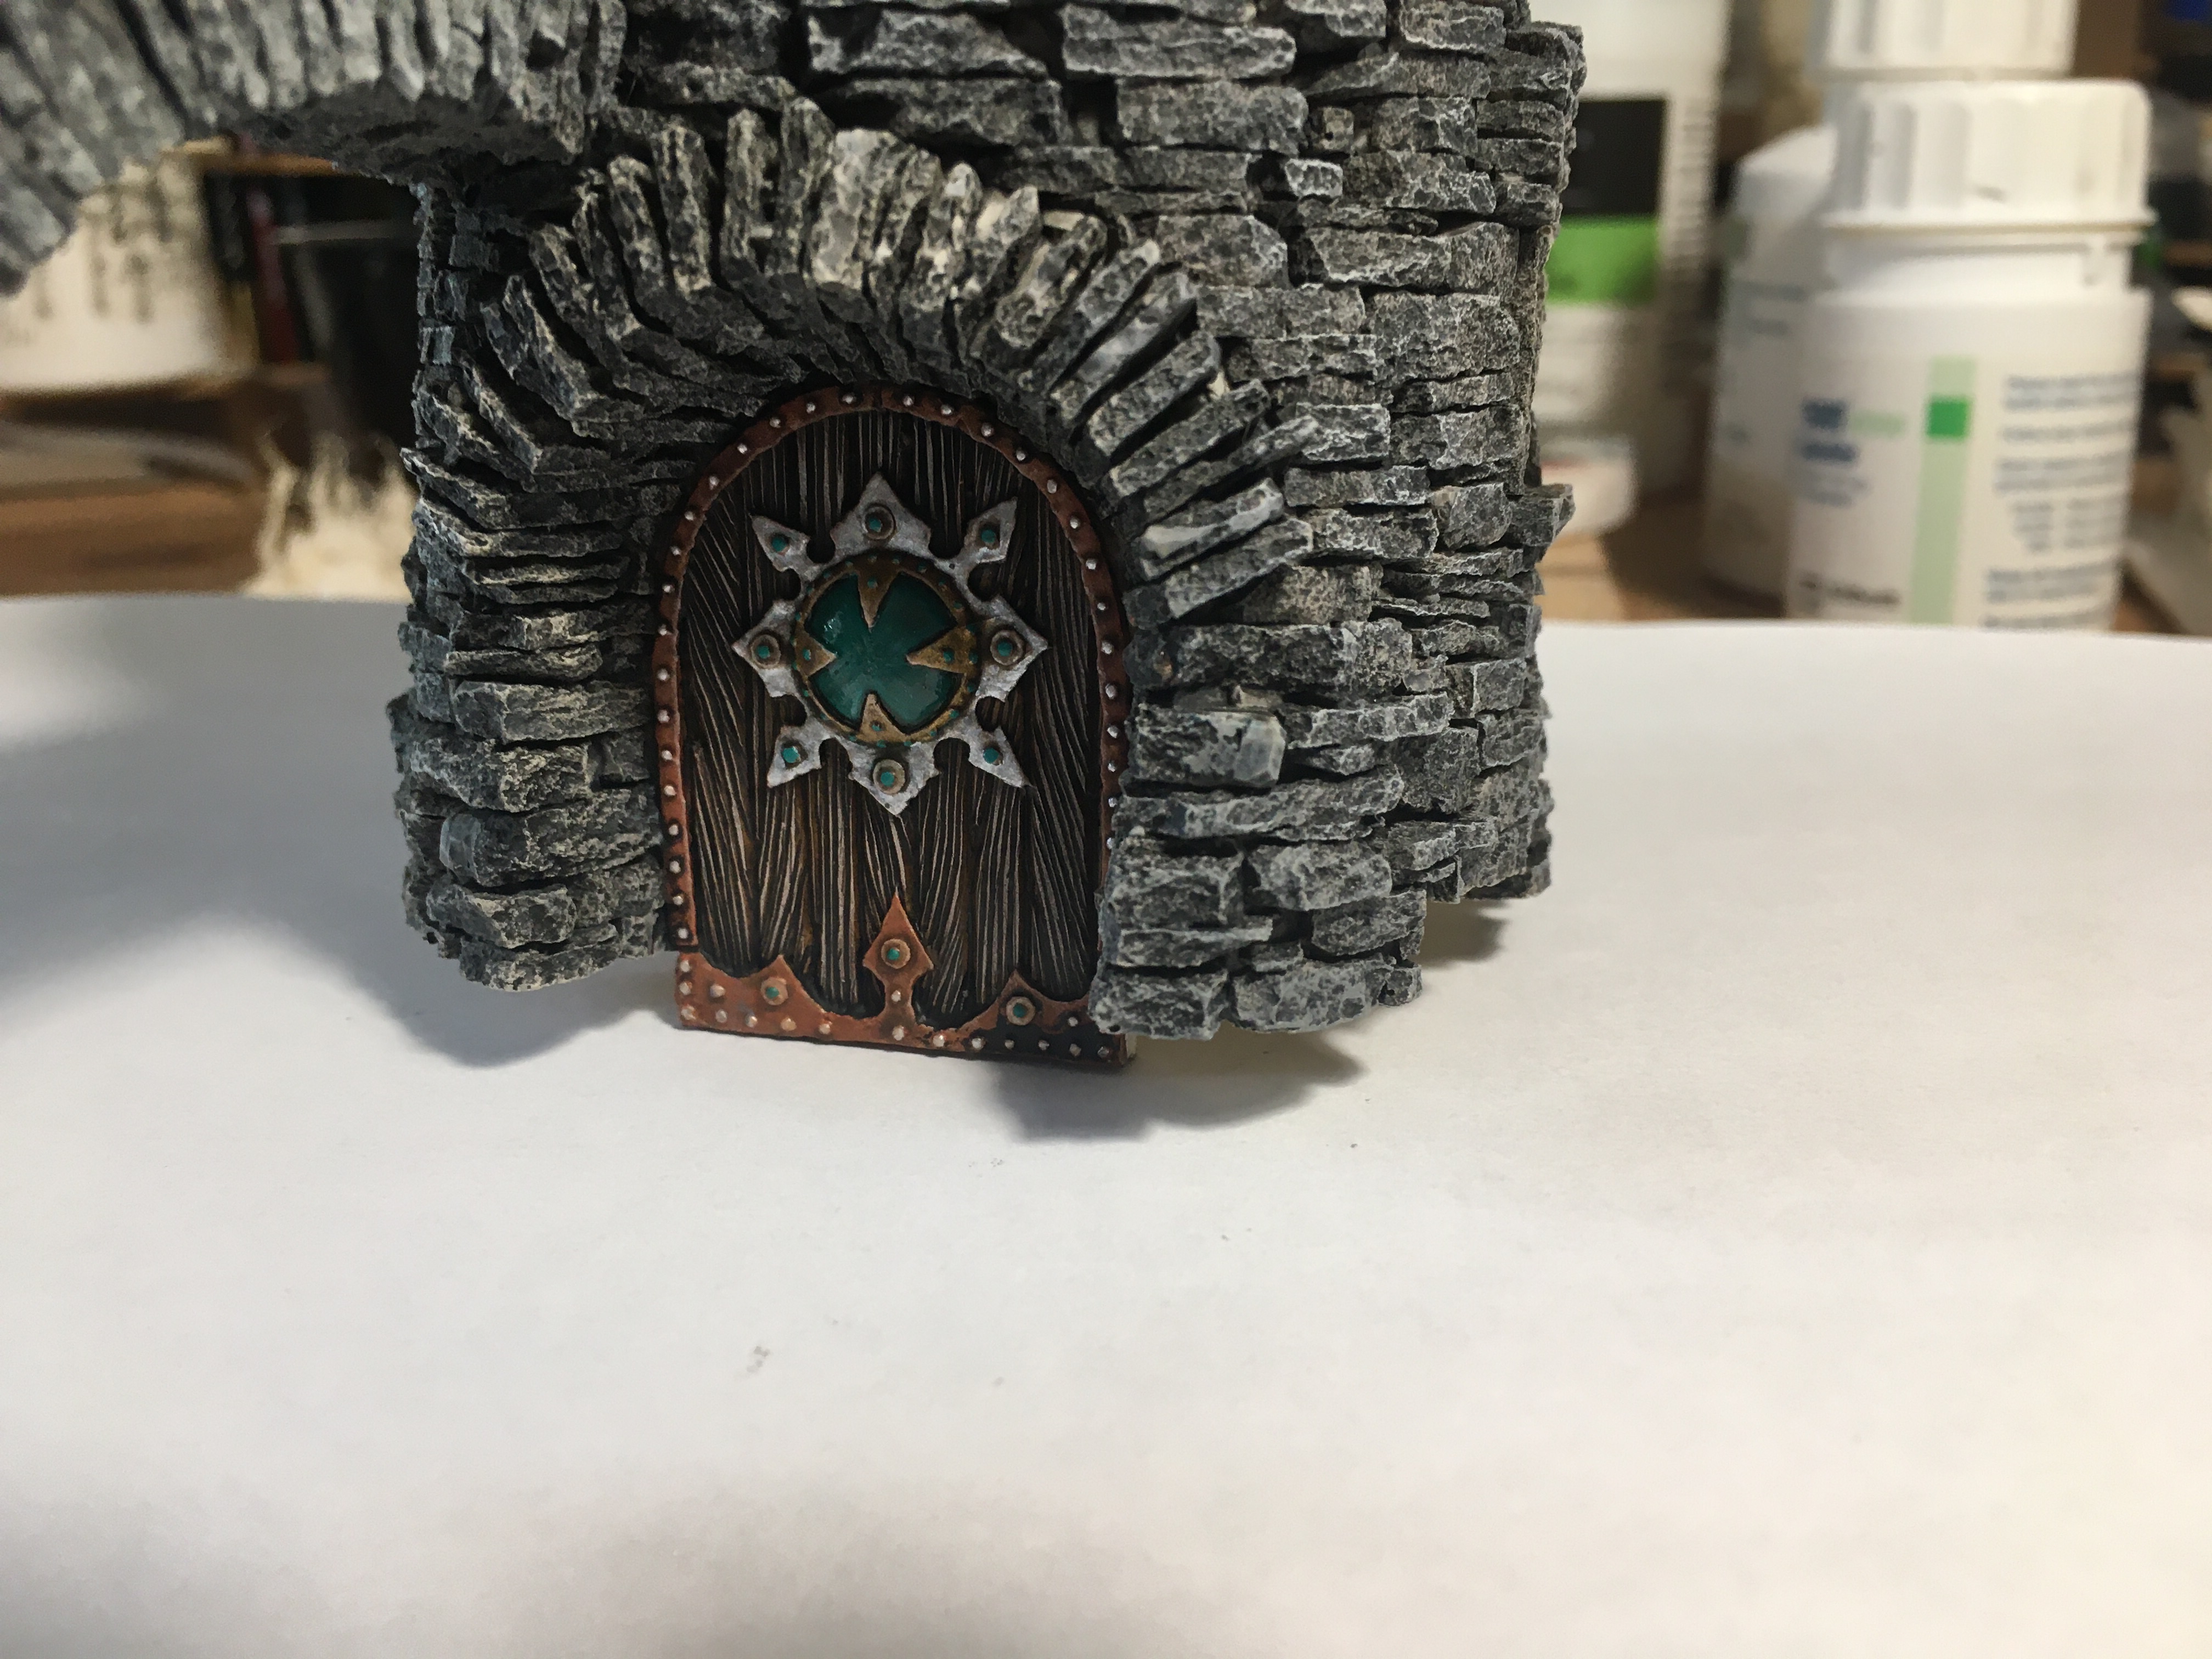
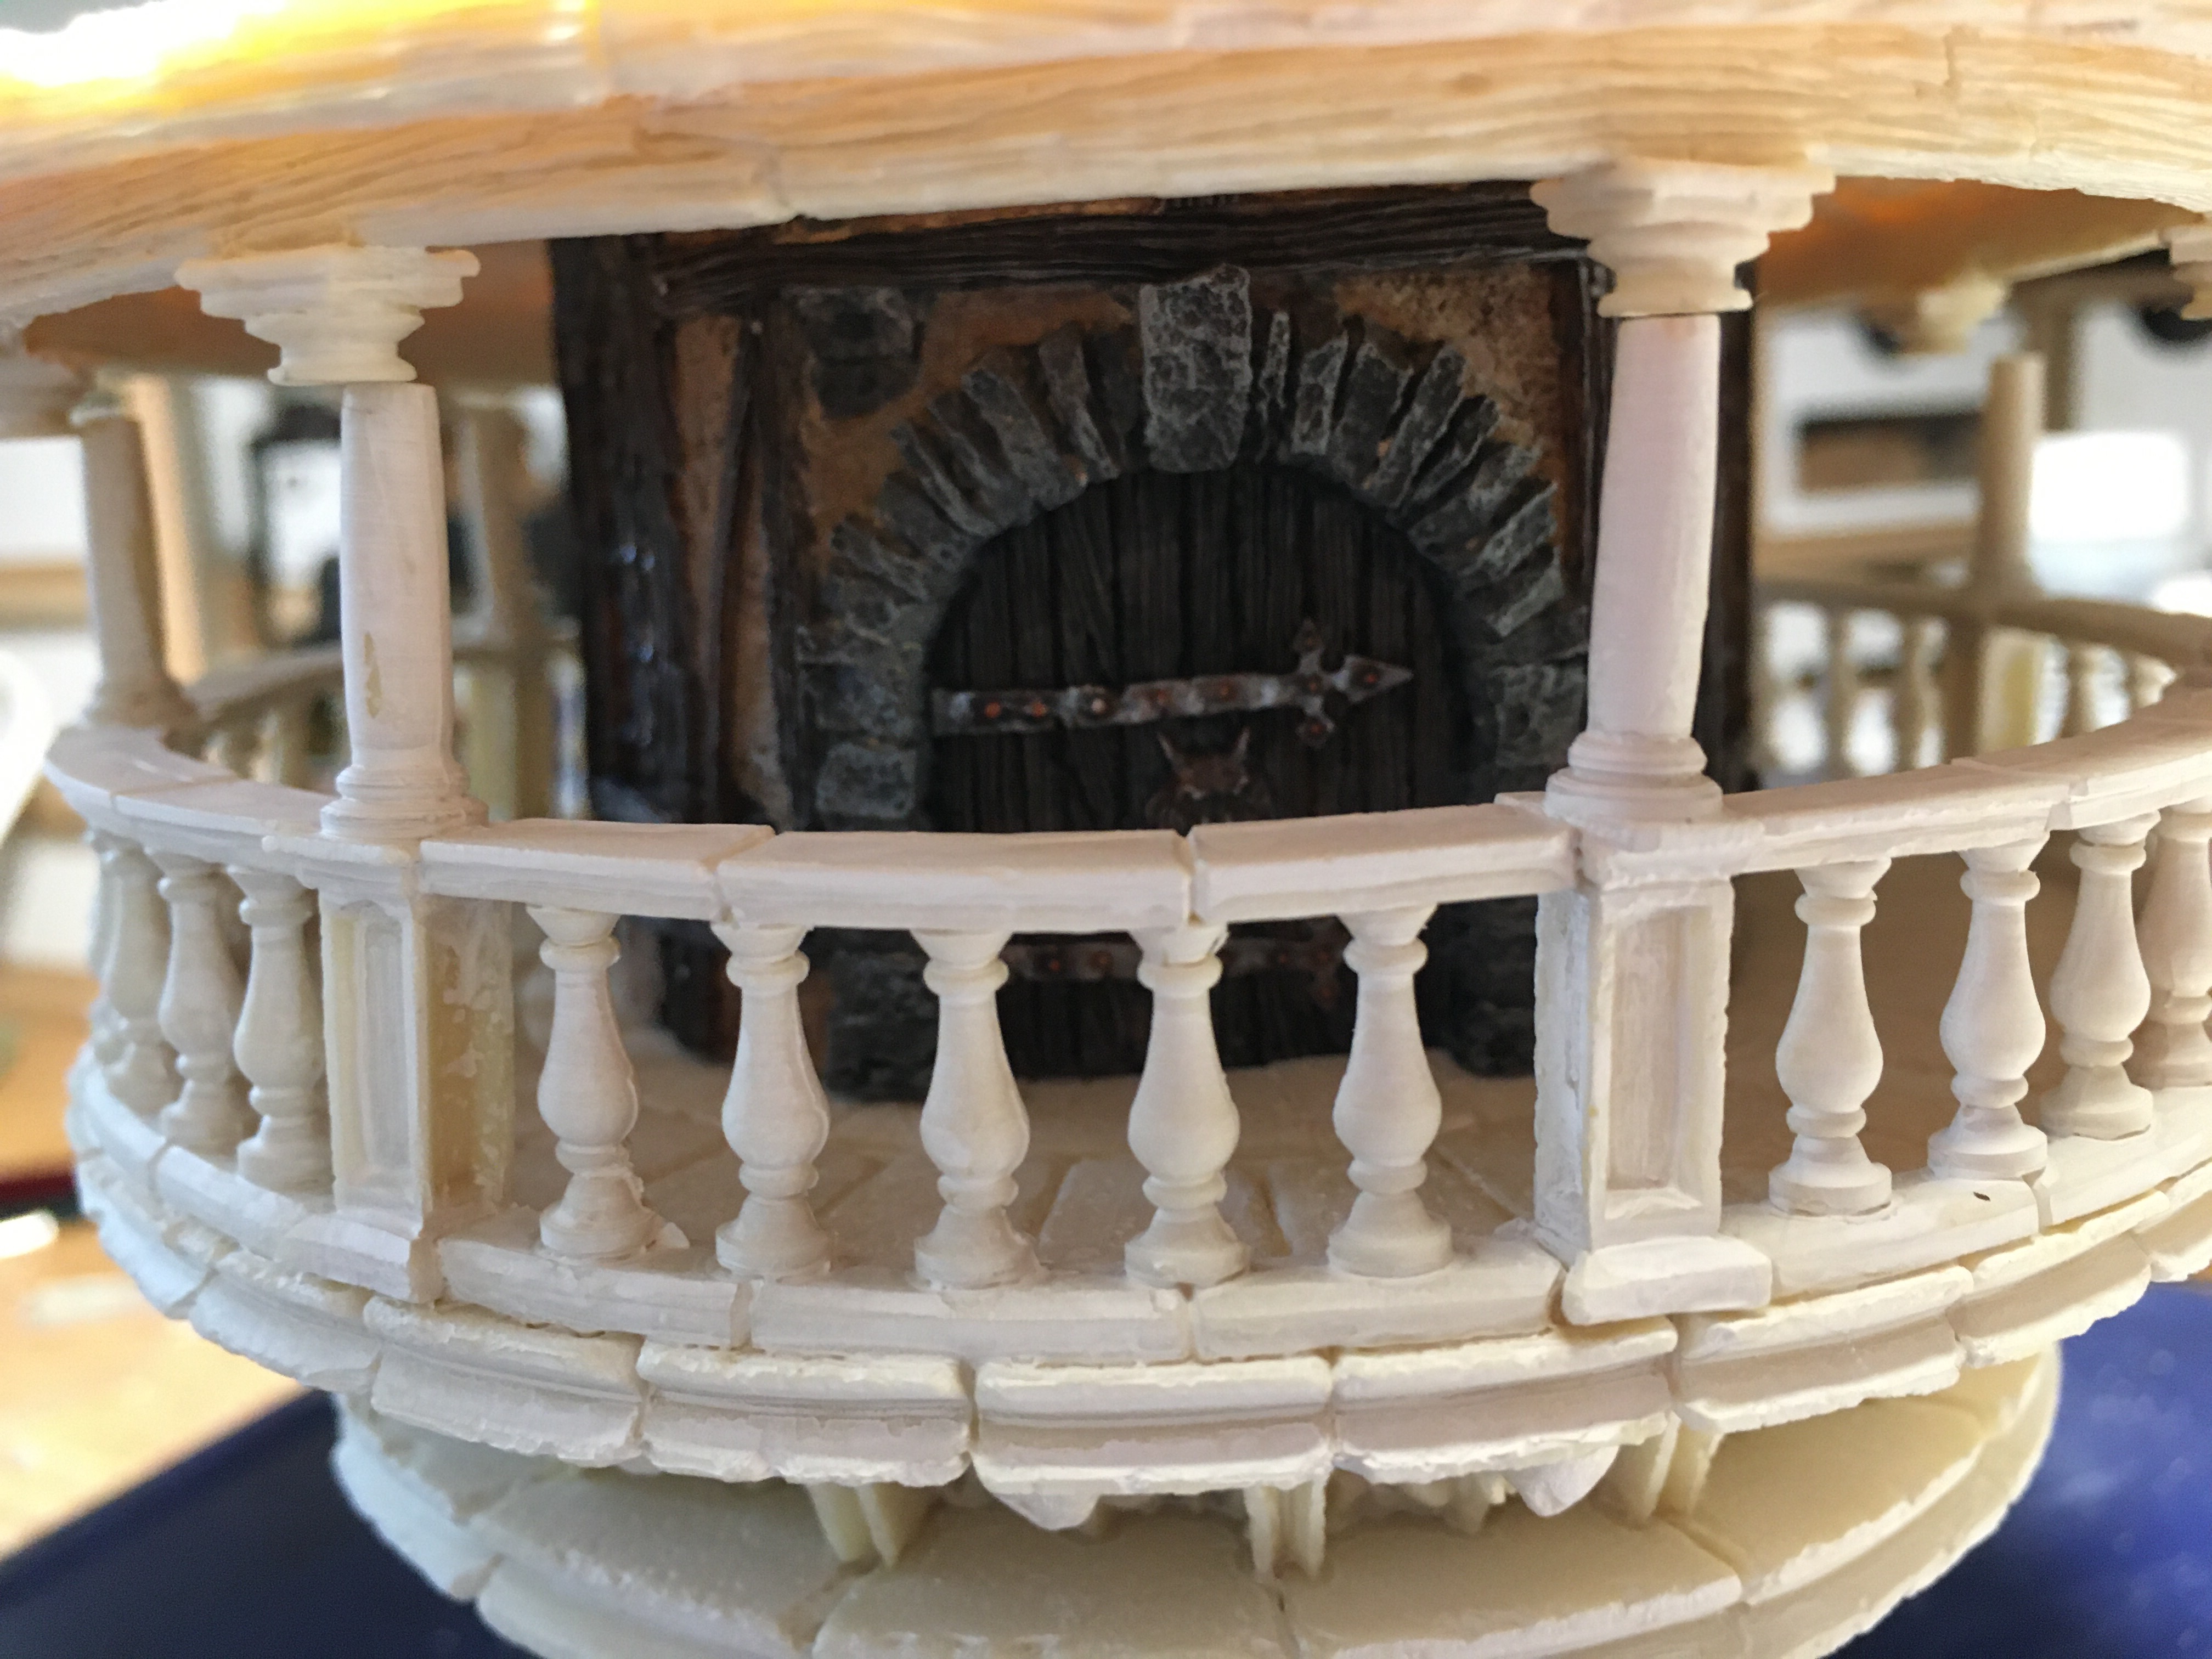
I started on the inner piece last week and managed to get both the inside and outside of it finished this week.  As you can see from the two photos below there is a lot of detail, particularly on the windows.  The leaded framework on the windows simply took an age to paint on the five windows inside and out and then there was the door to do and the walls as well.  It was painted mainly using acrylics and oil washed for the walls.  The windows were painted in the same way as referenced in part 1 last week.

img_0739img_0716

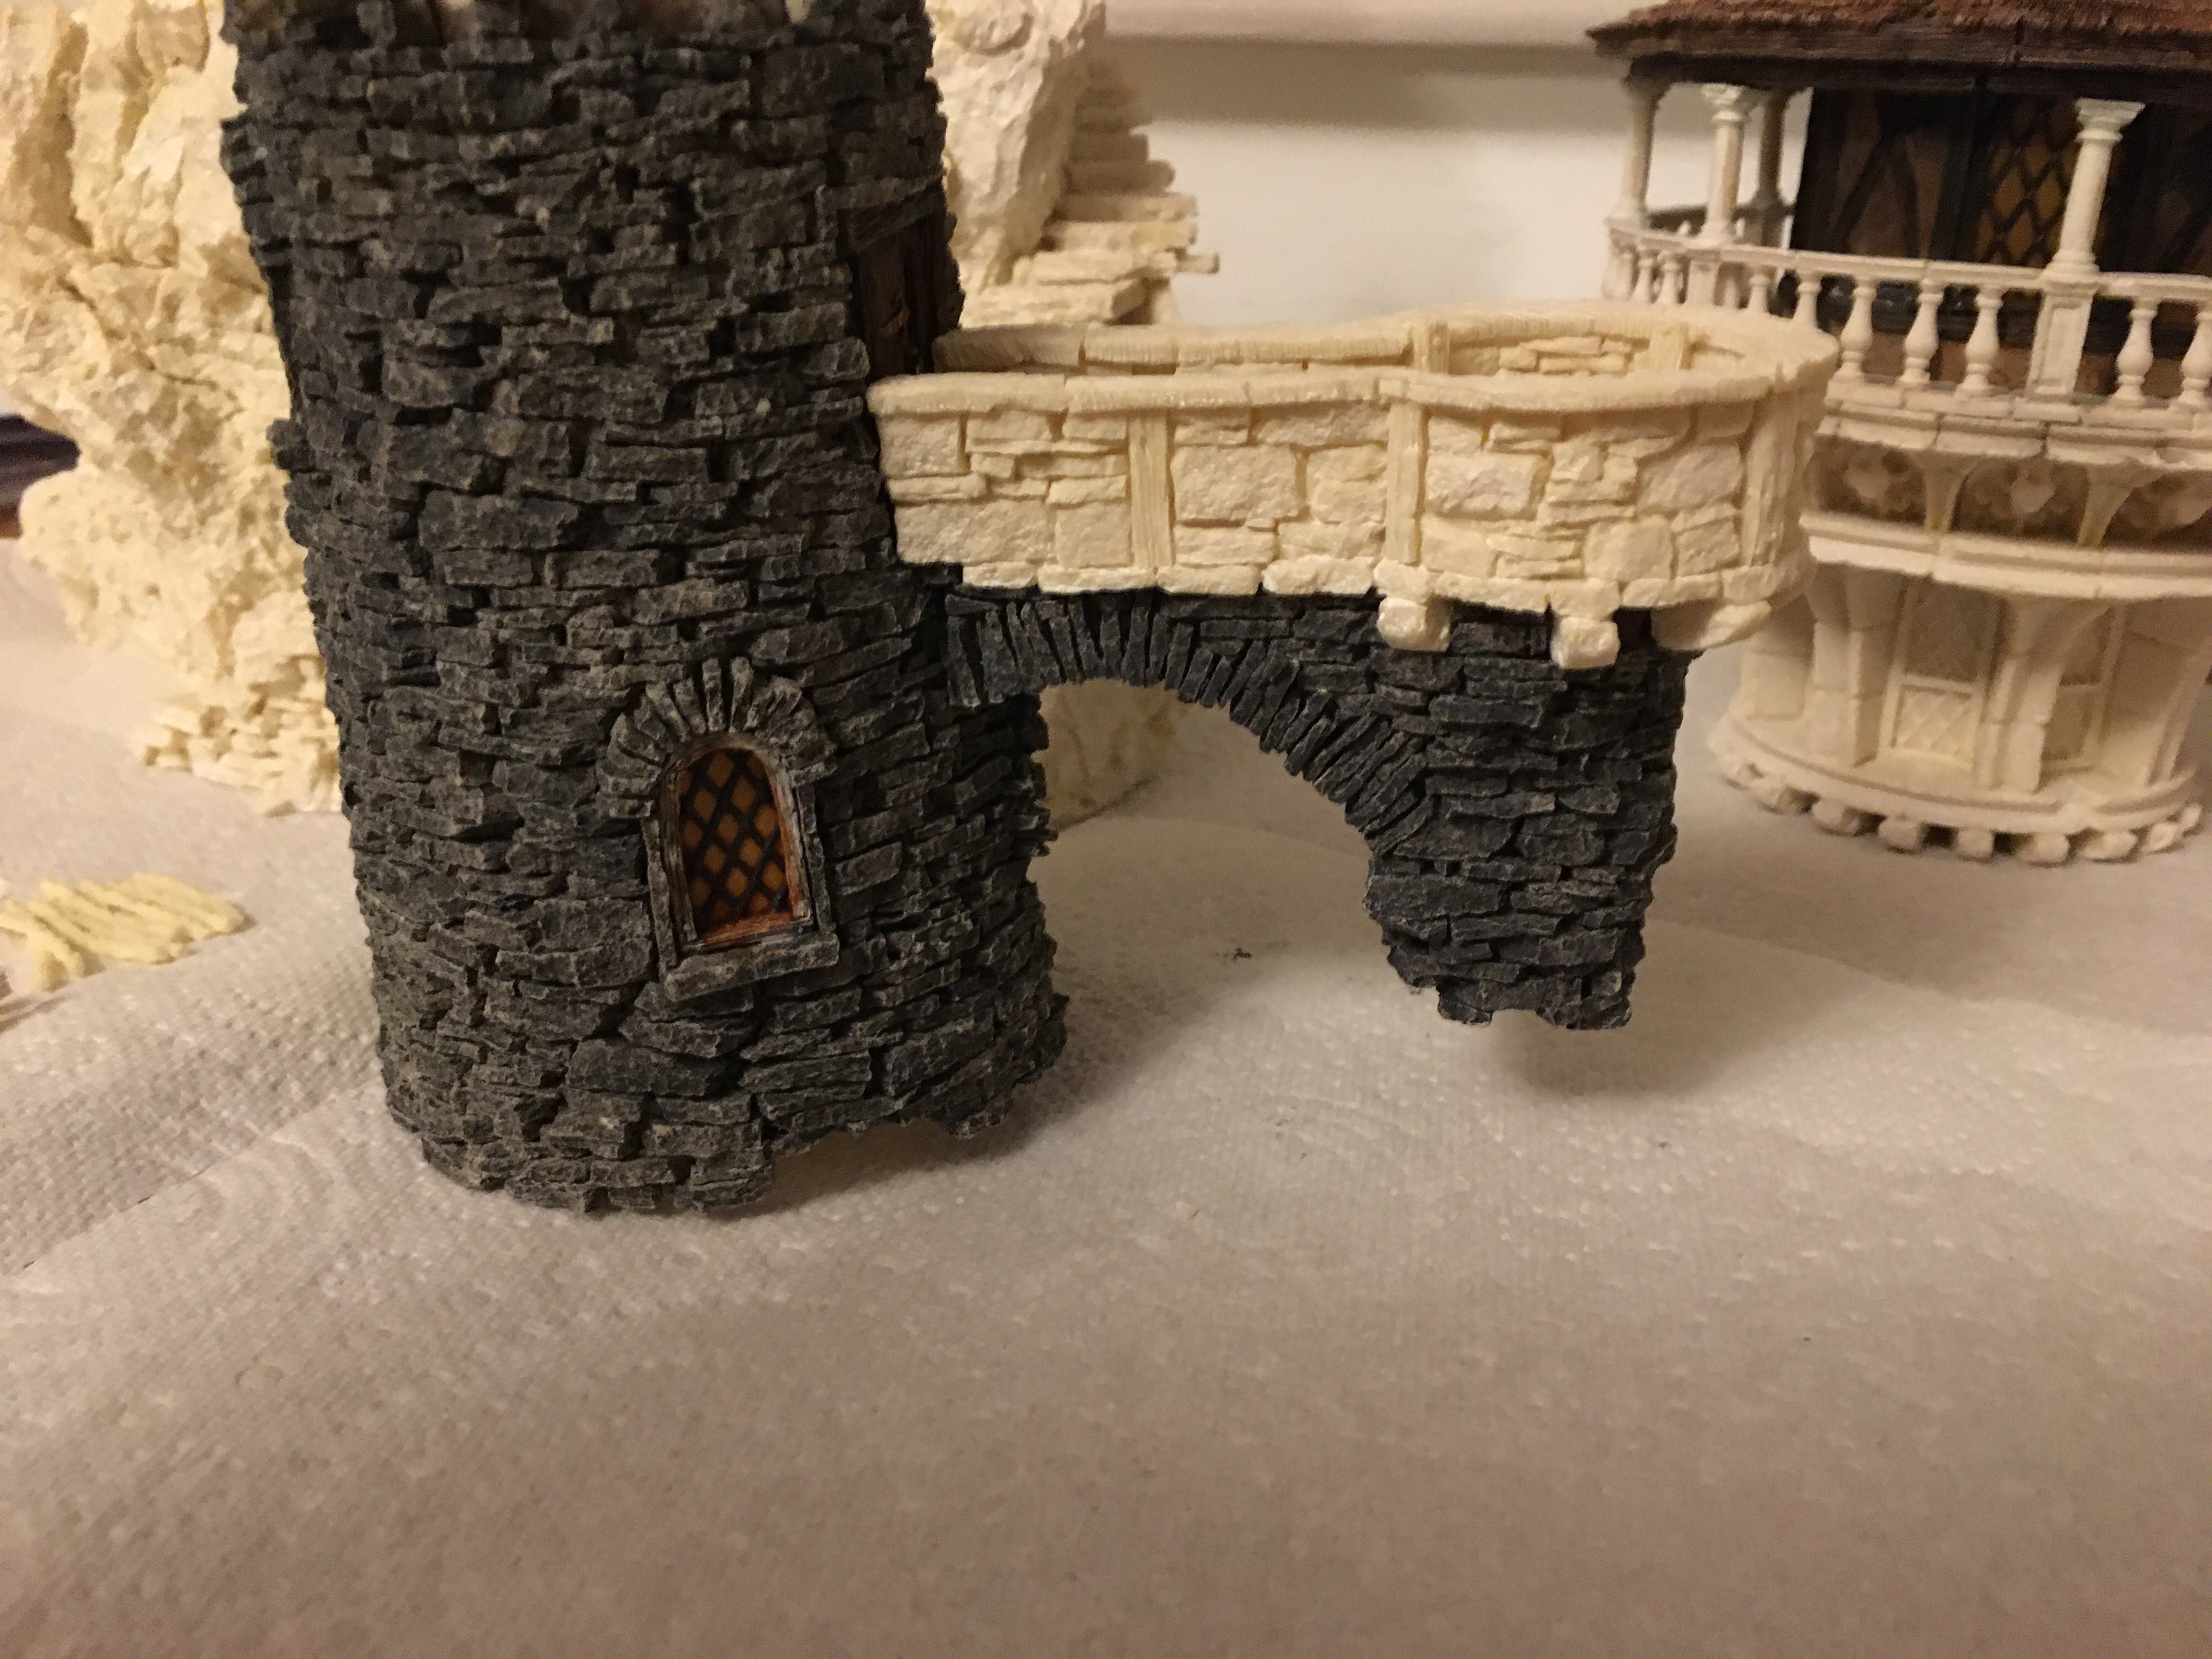
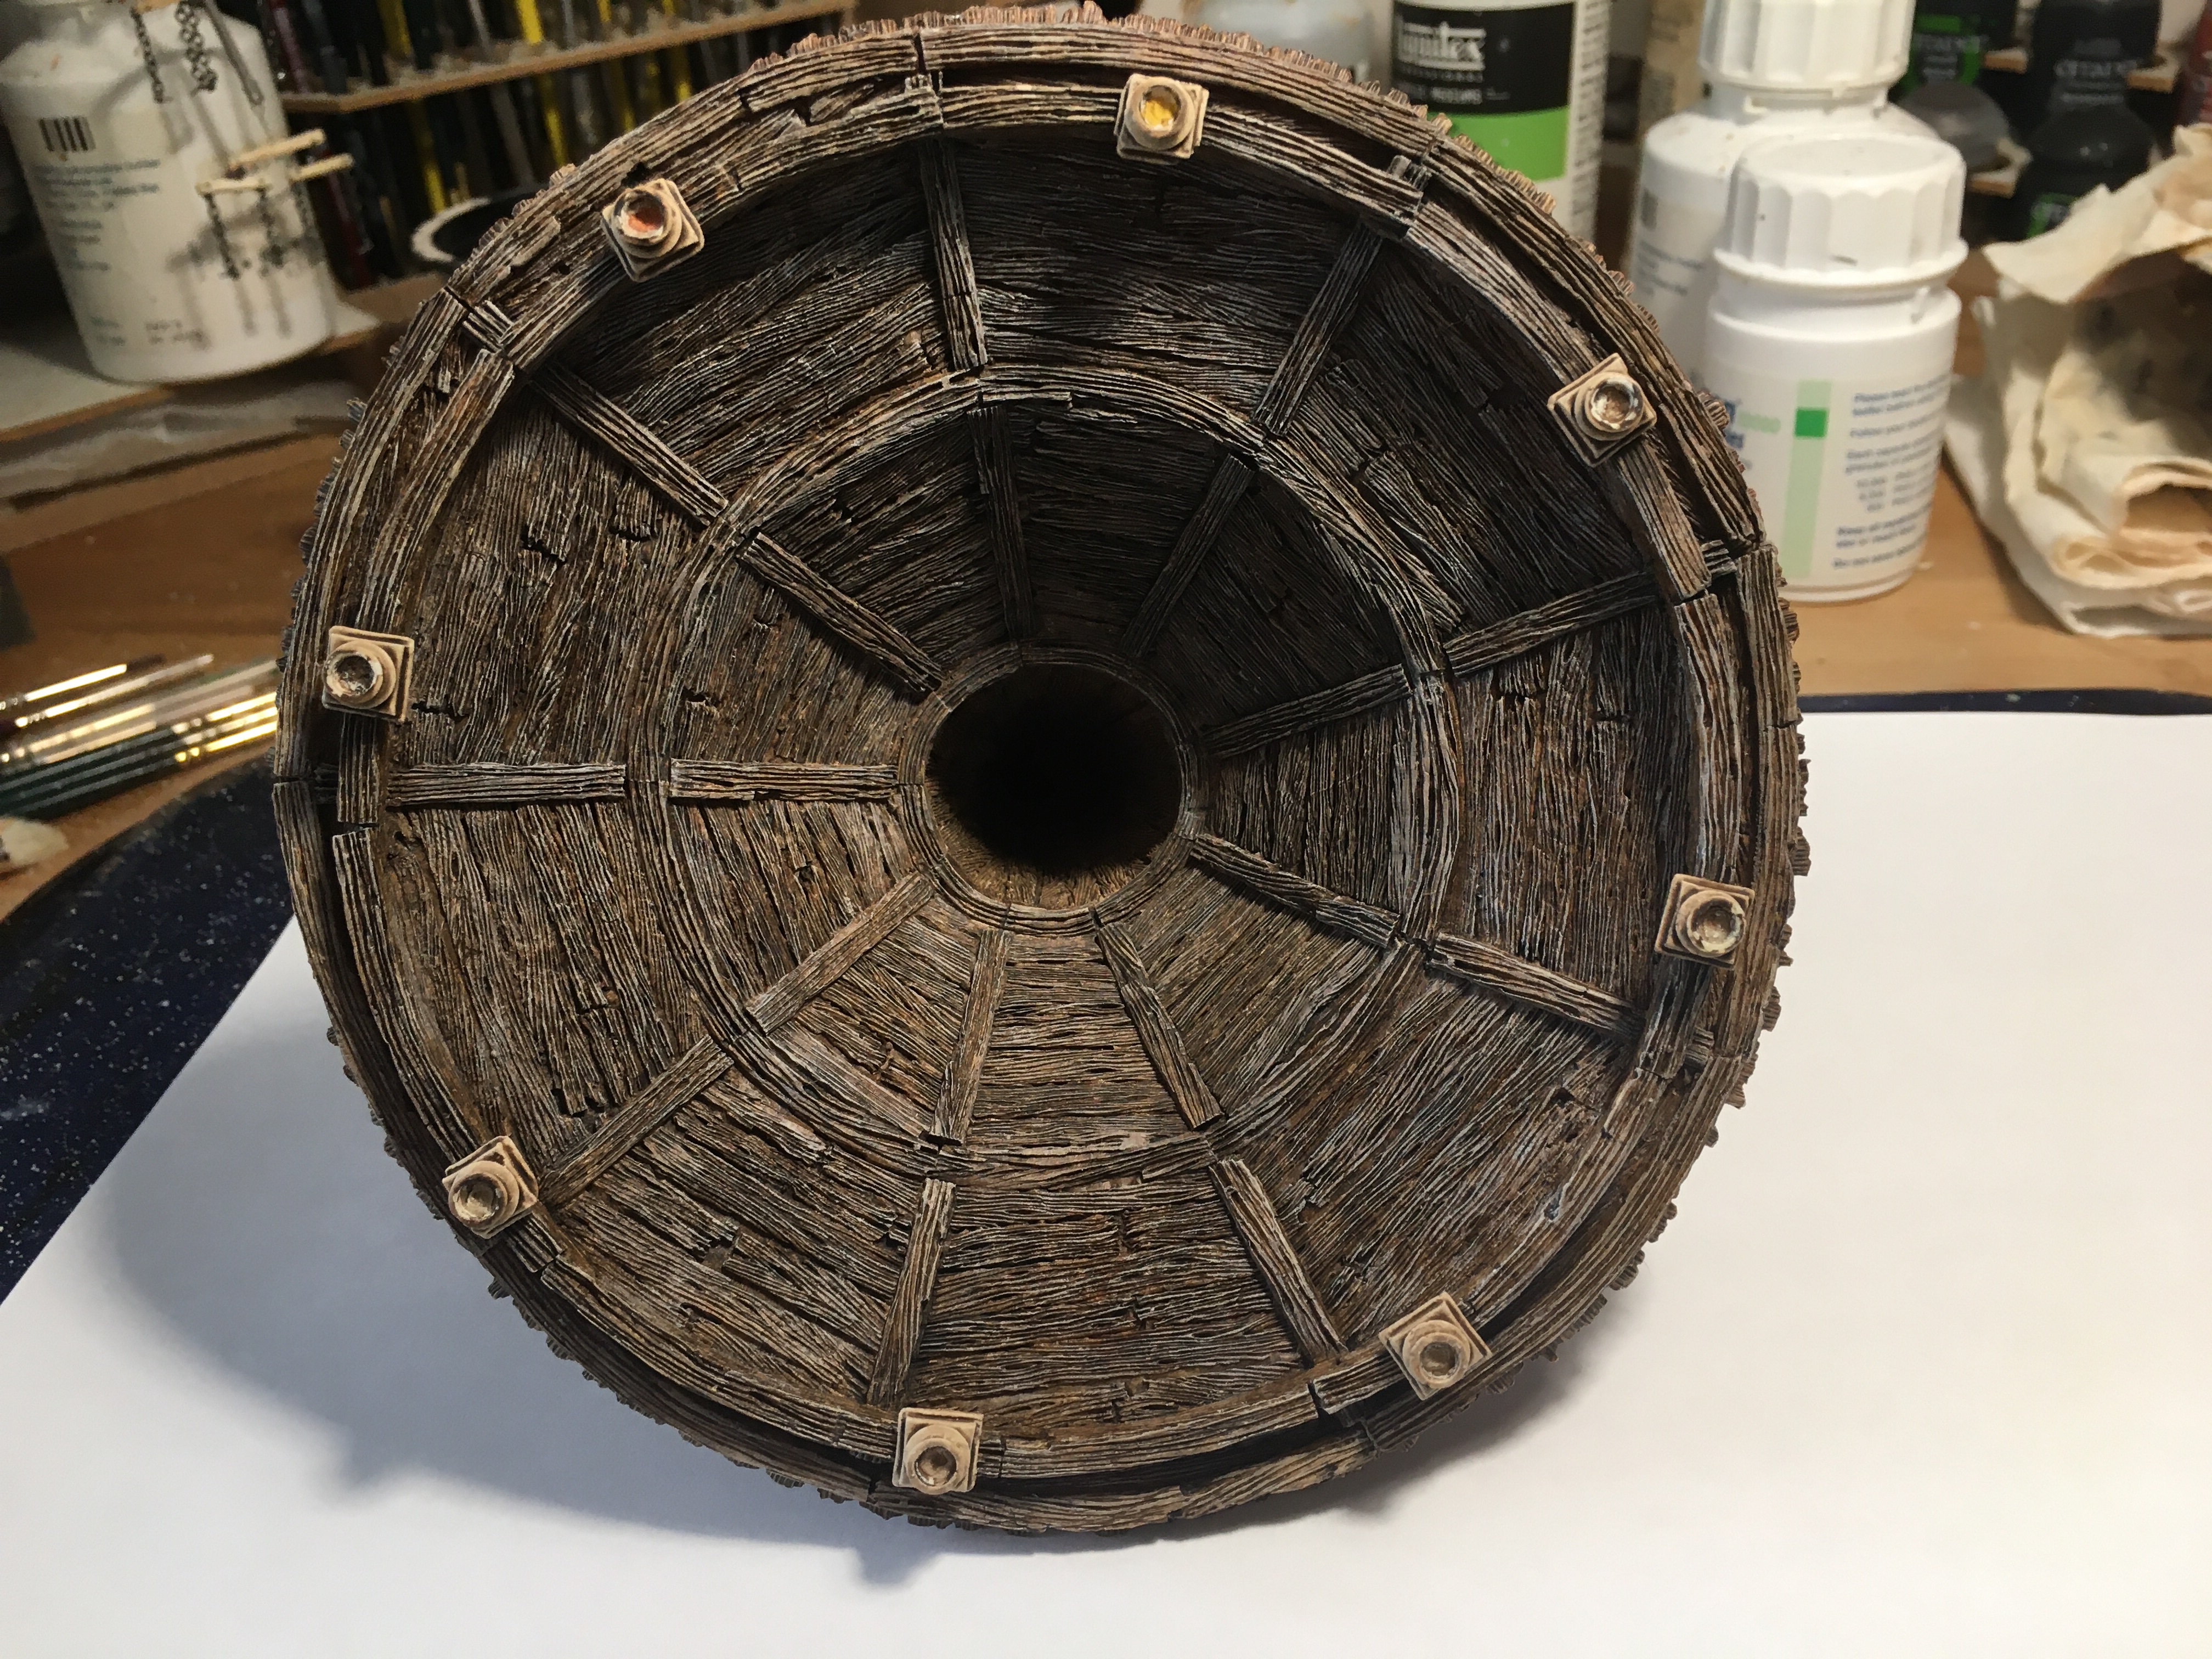
In situ this piece looks like this.  A lot of work for a piece that as you can see will be pretty concealed.  That said I will probably not glue the turret in place.  It fits perfectly and doesn’t need any filler of any sort and by leaving it that way it will be possible to then look inside.  It will also make transportation easier as well.

img_0717img_0718

I decided my next step would be to start on the turret.  So far I have managed to get some paint on the inside.  The thing with this model is it is huge and it takes a fair bit of time to paint each piece.  I should also mention I am a brush guy.  An airbrush would have speeded the process up but I don’t own one and for now at least have no plans to buy and use one.  

img_0745

That’s as much as I got done this week.  The aim for the next one is to get the turret finished and then make a start on the lower piece.  If I manage to get that done I might assemble the tower and get a rough idea of exactly where I am at that point.

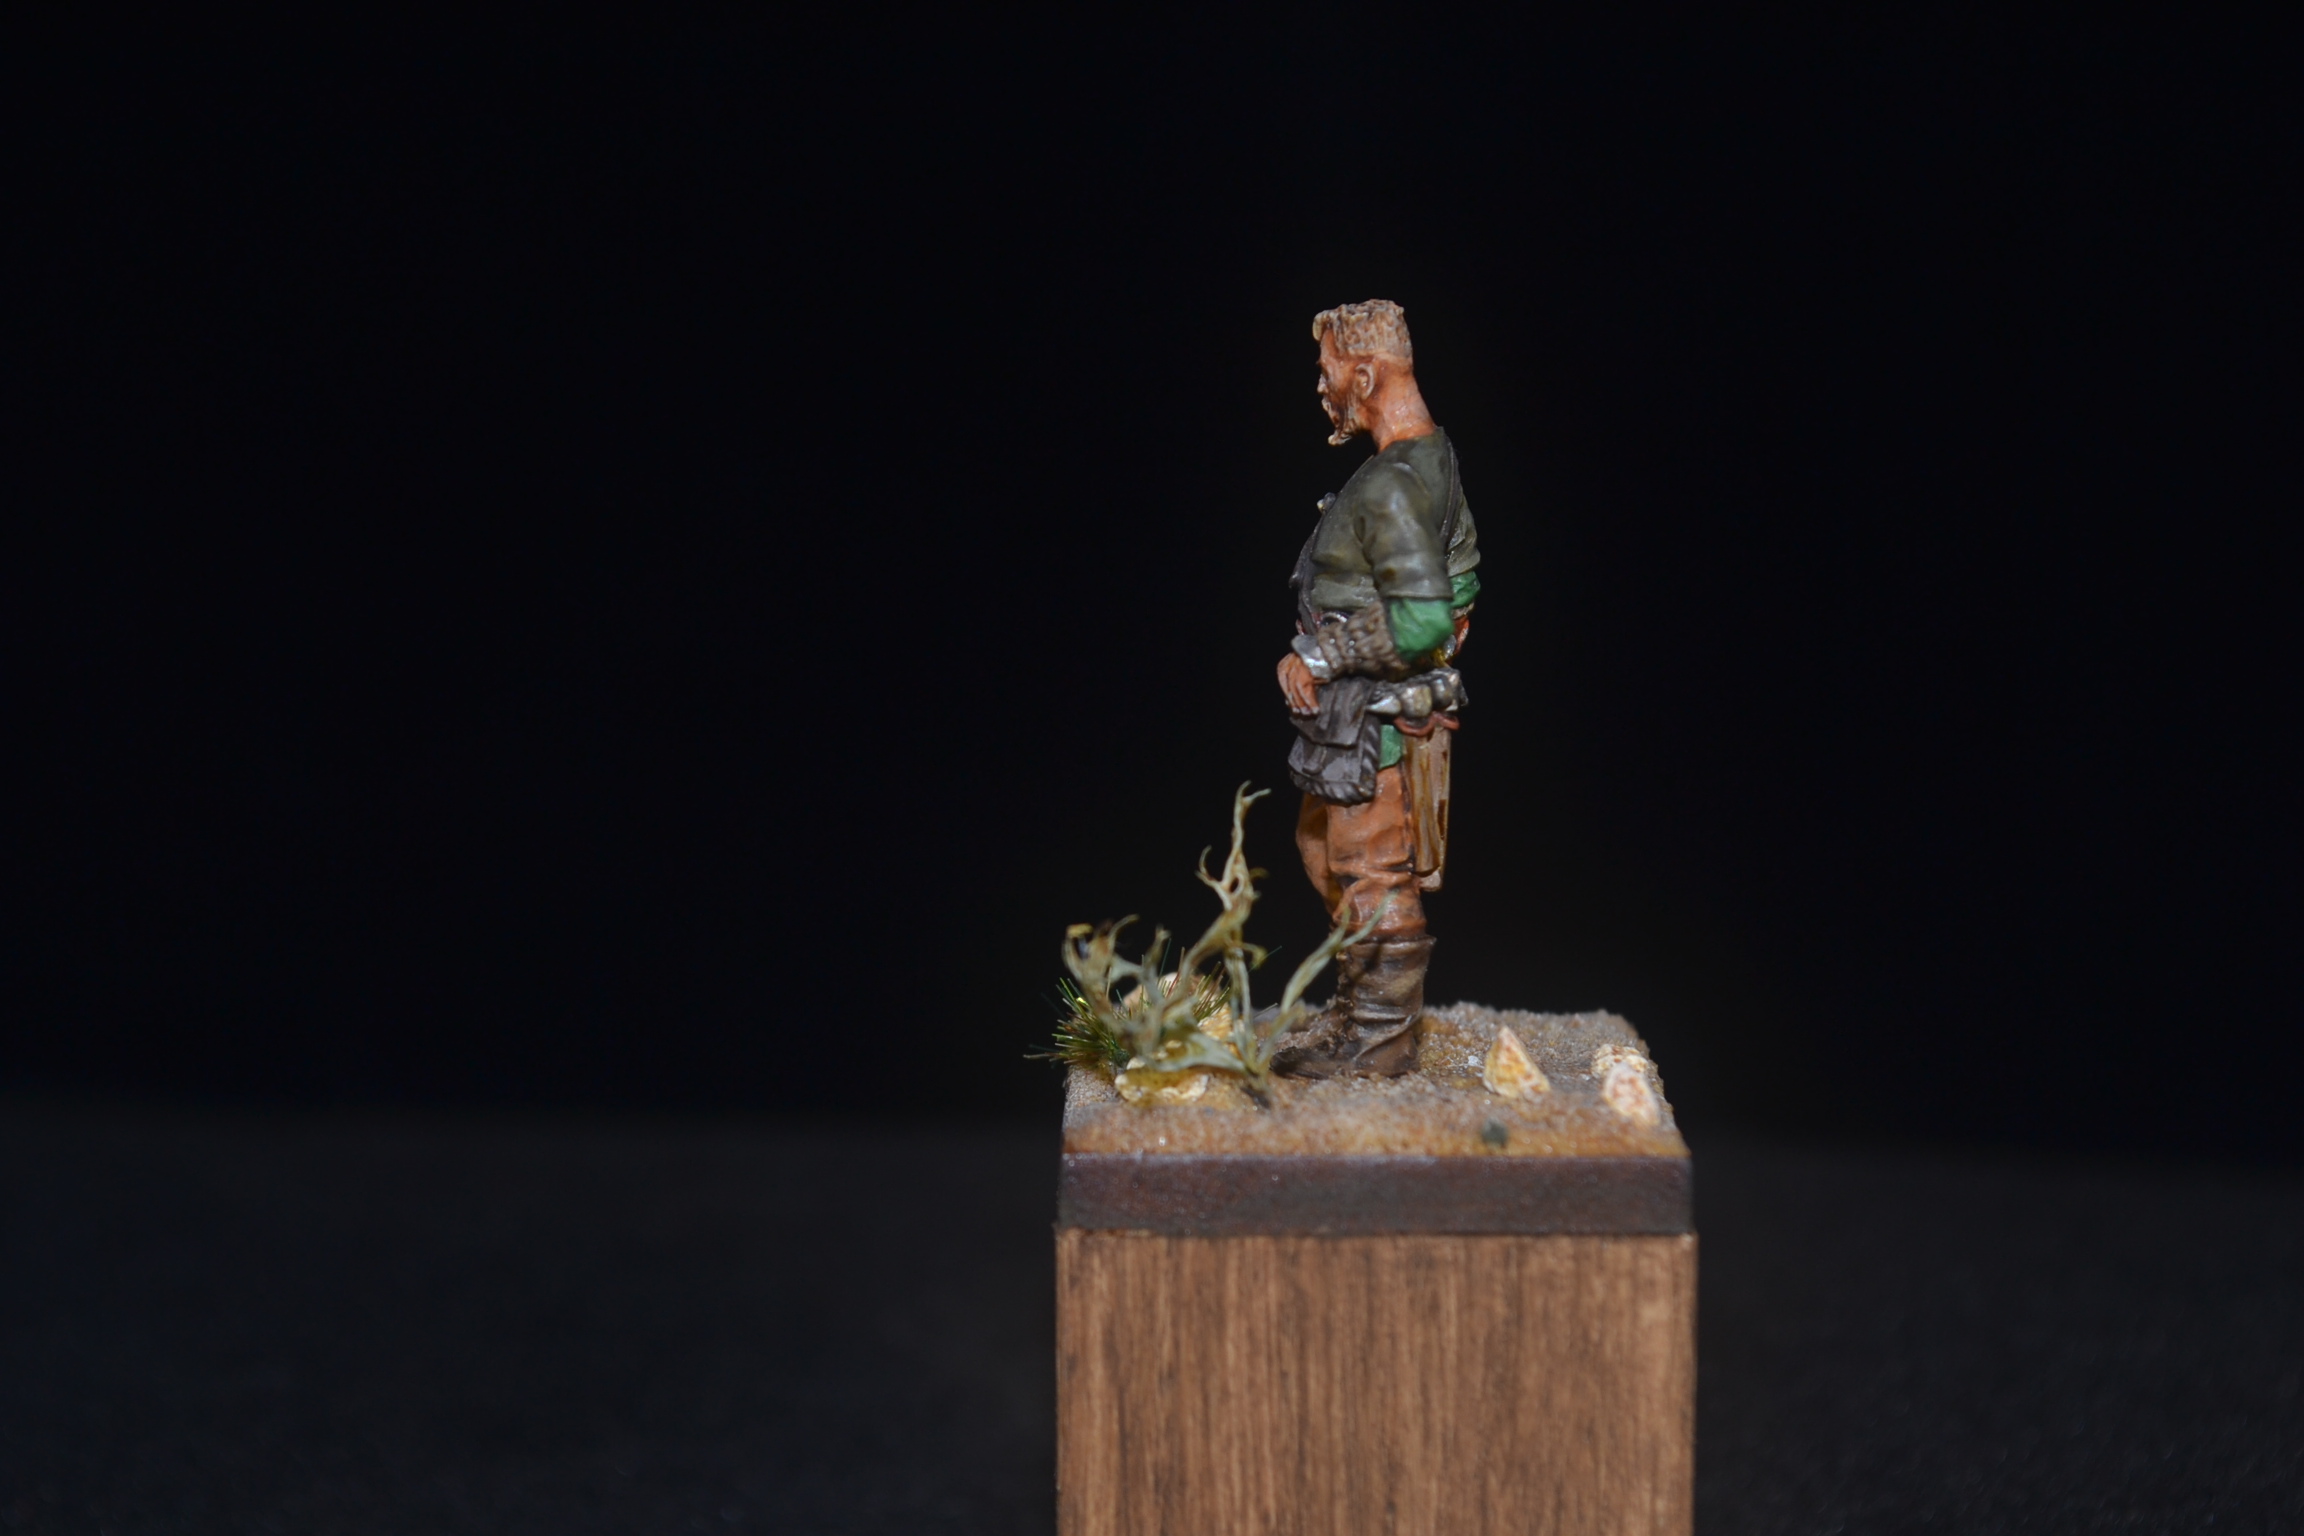
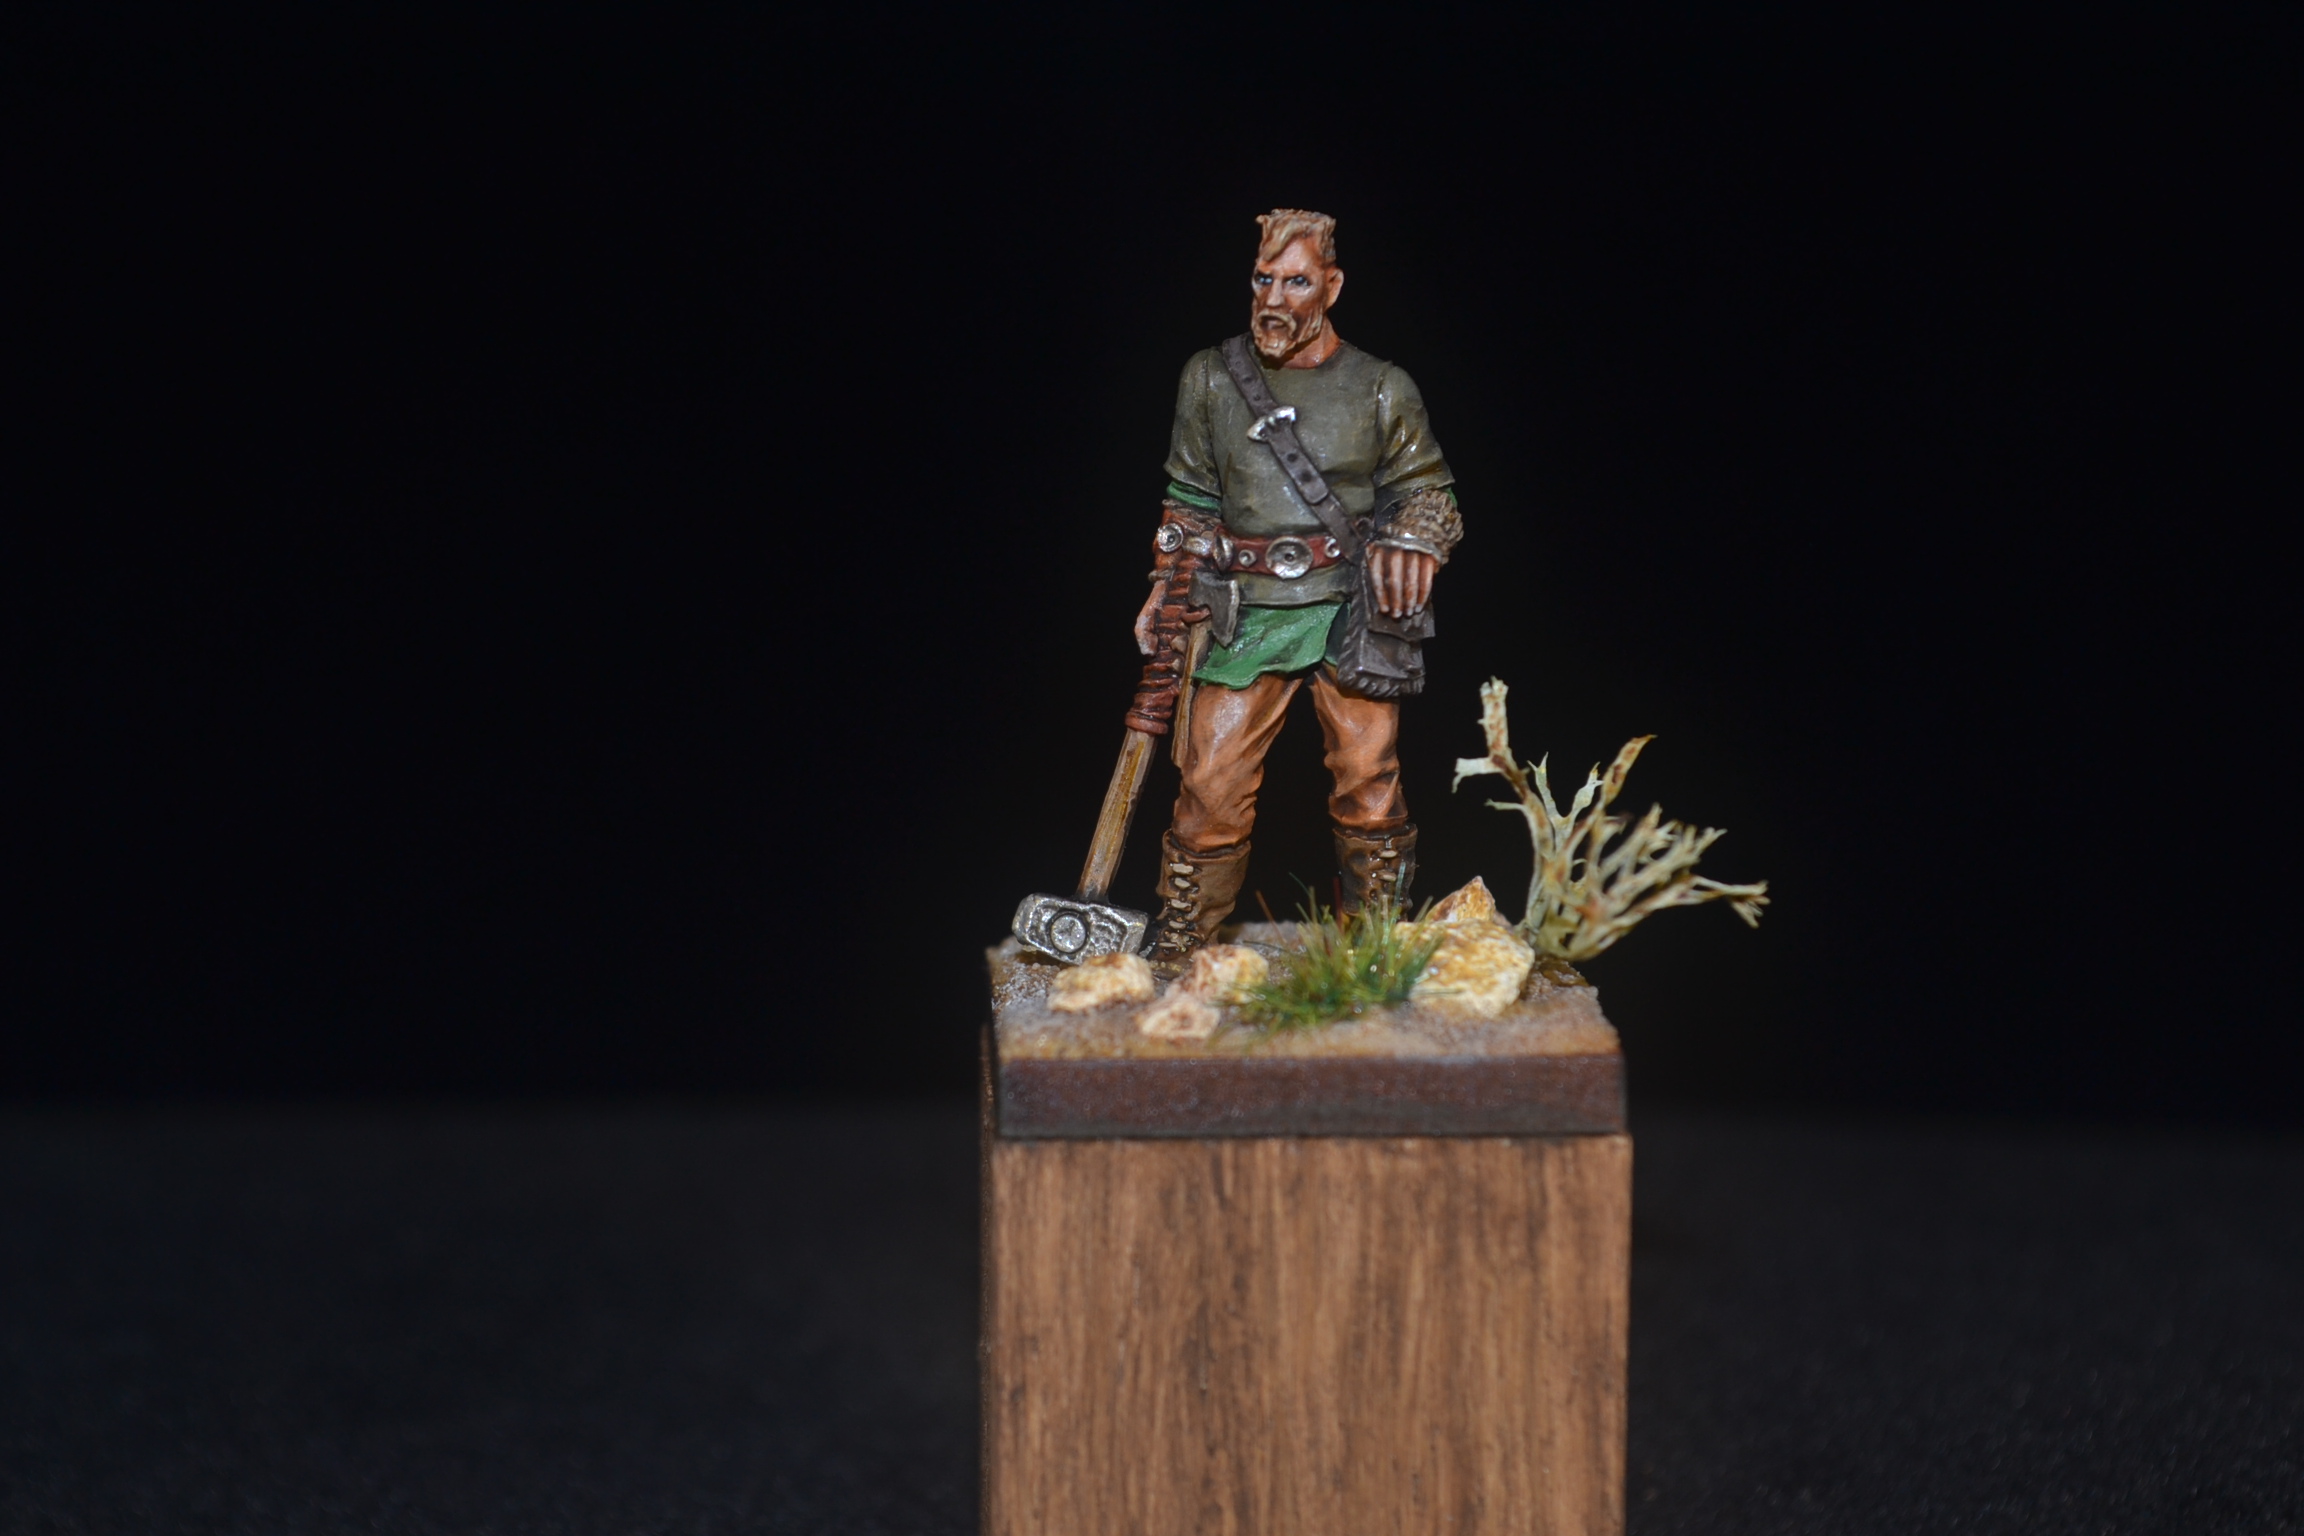
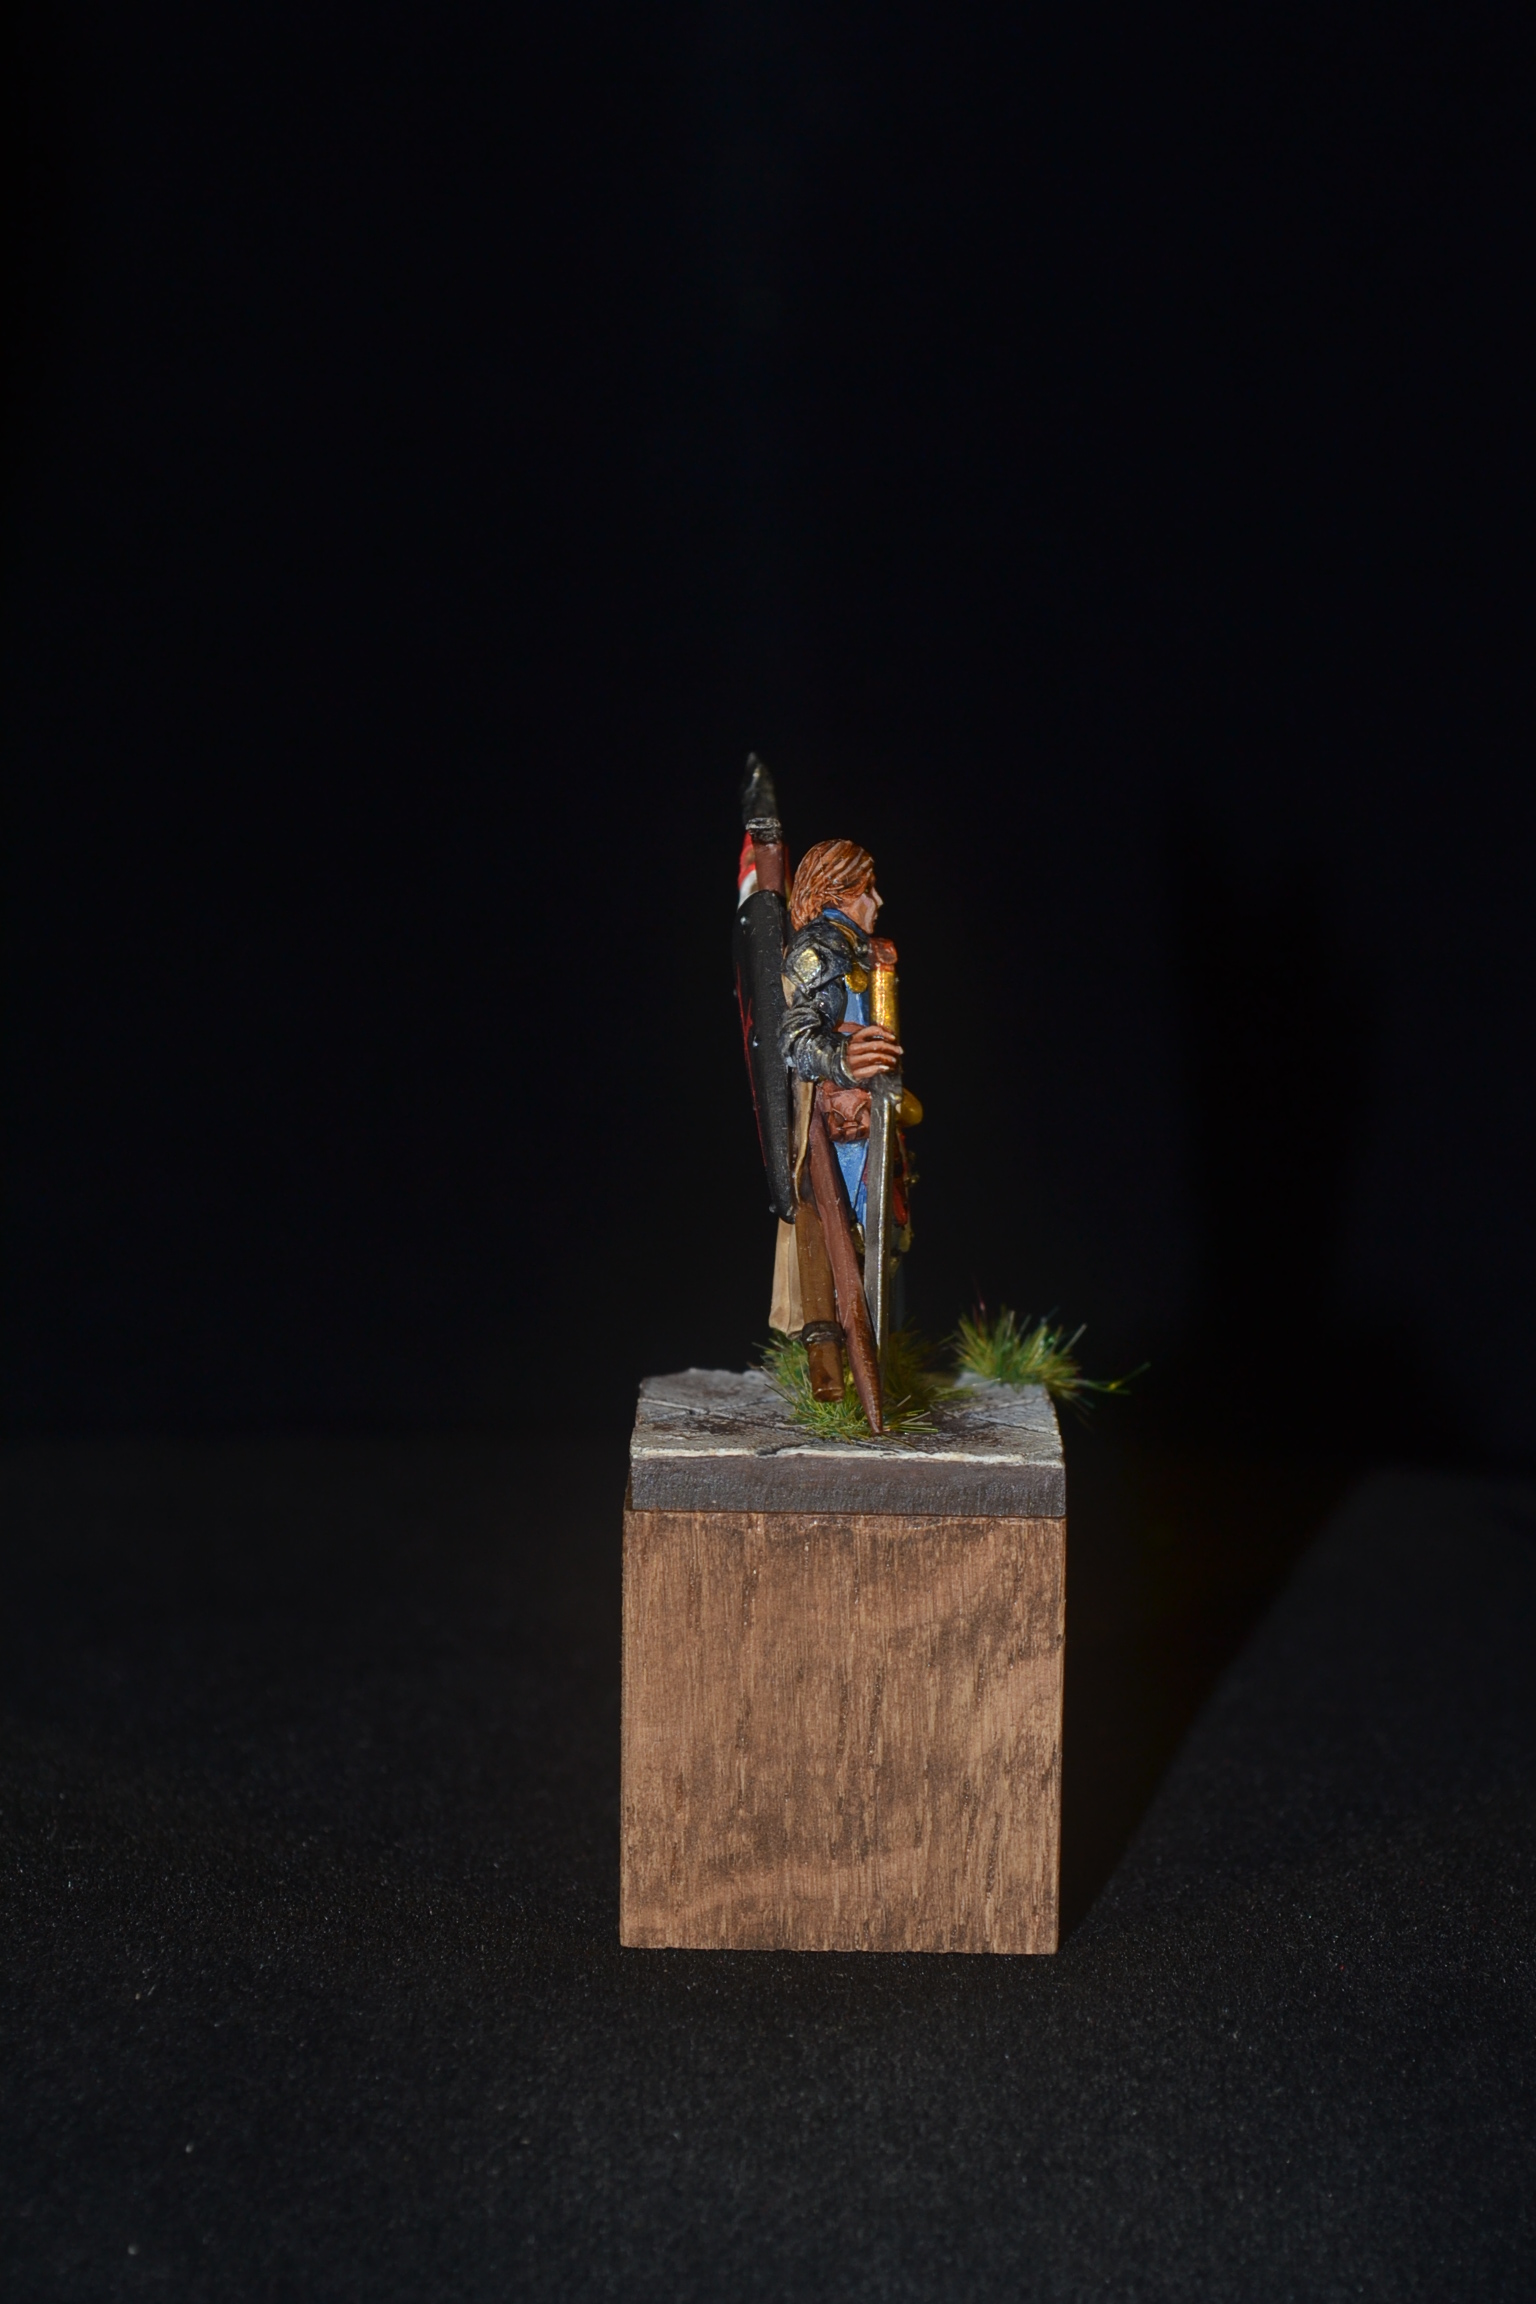
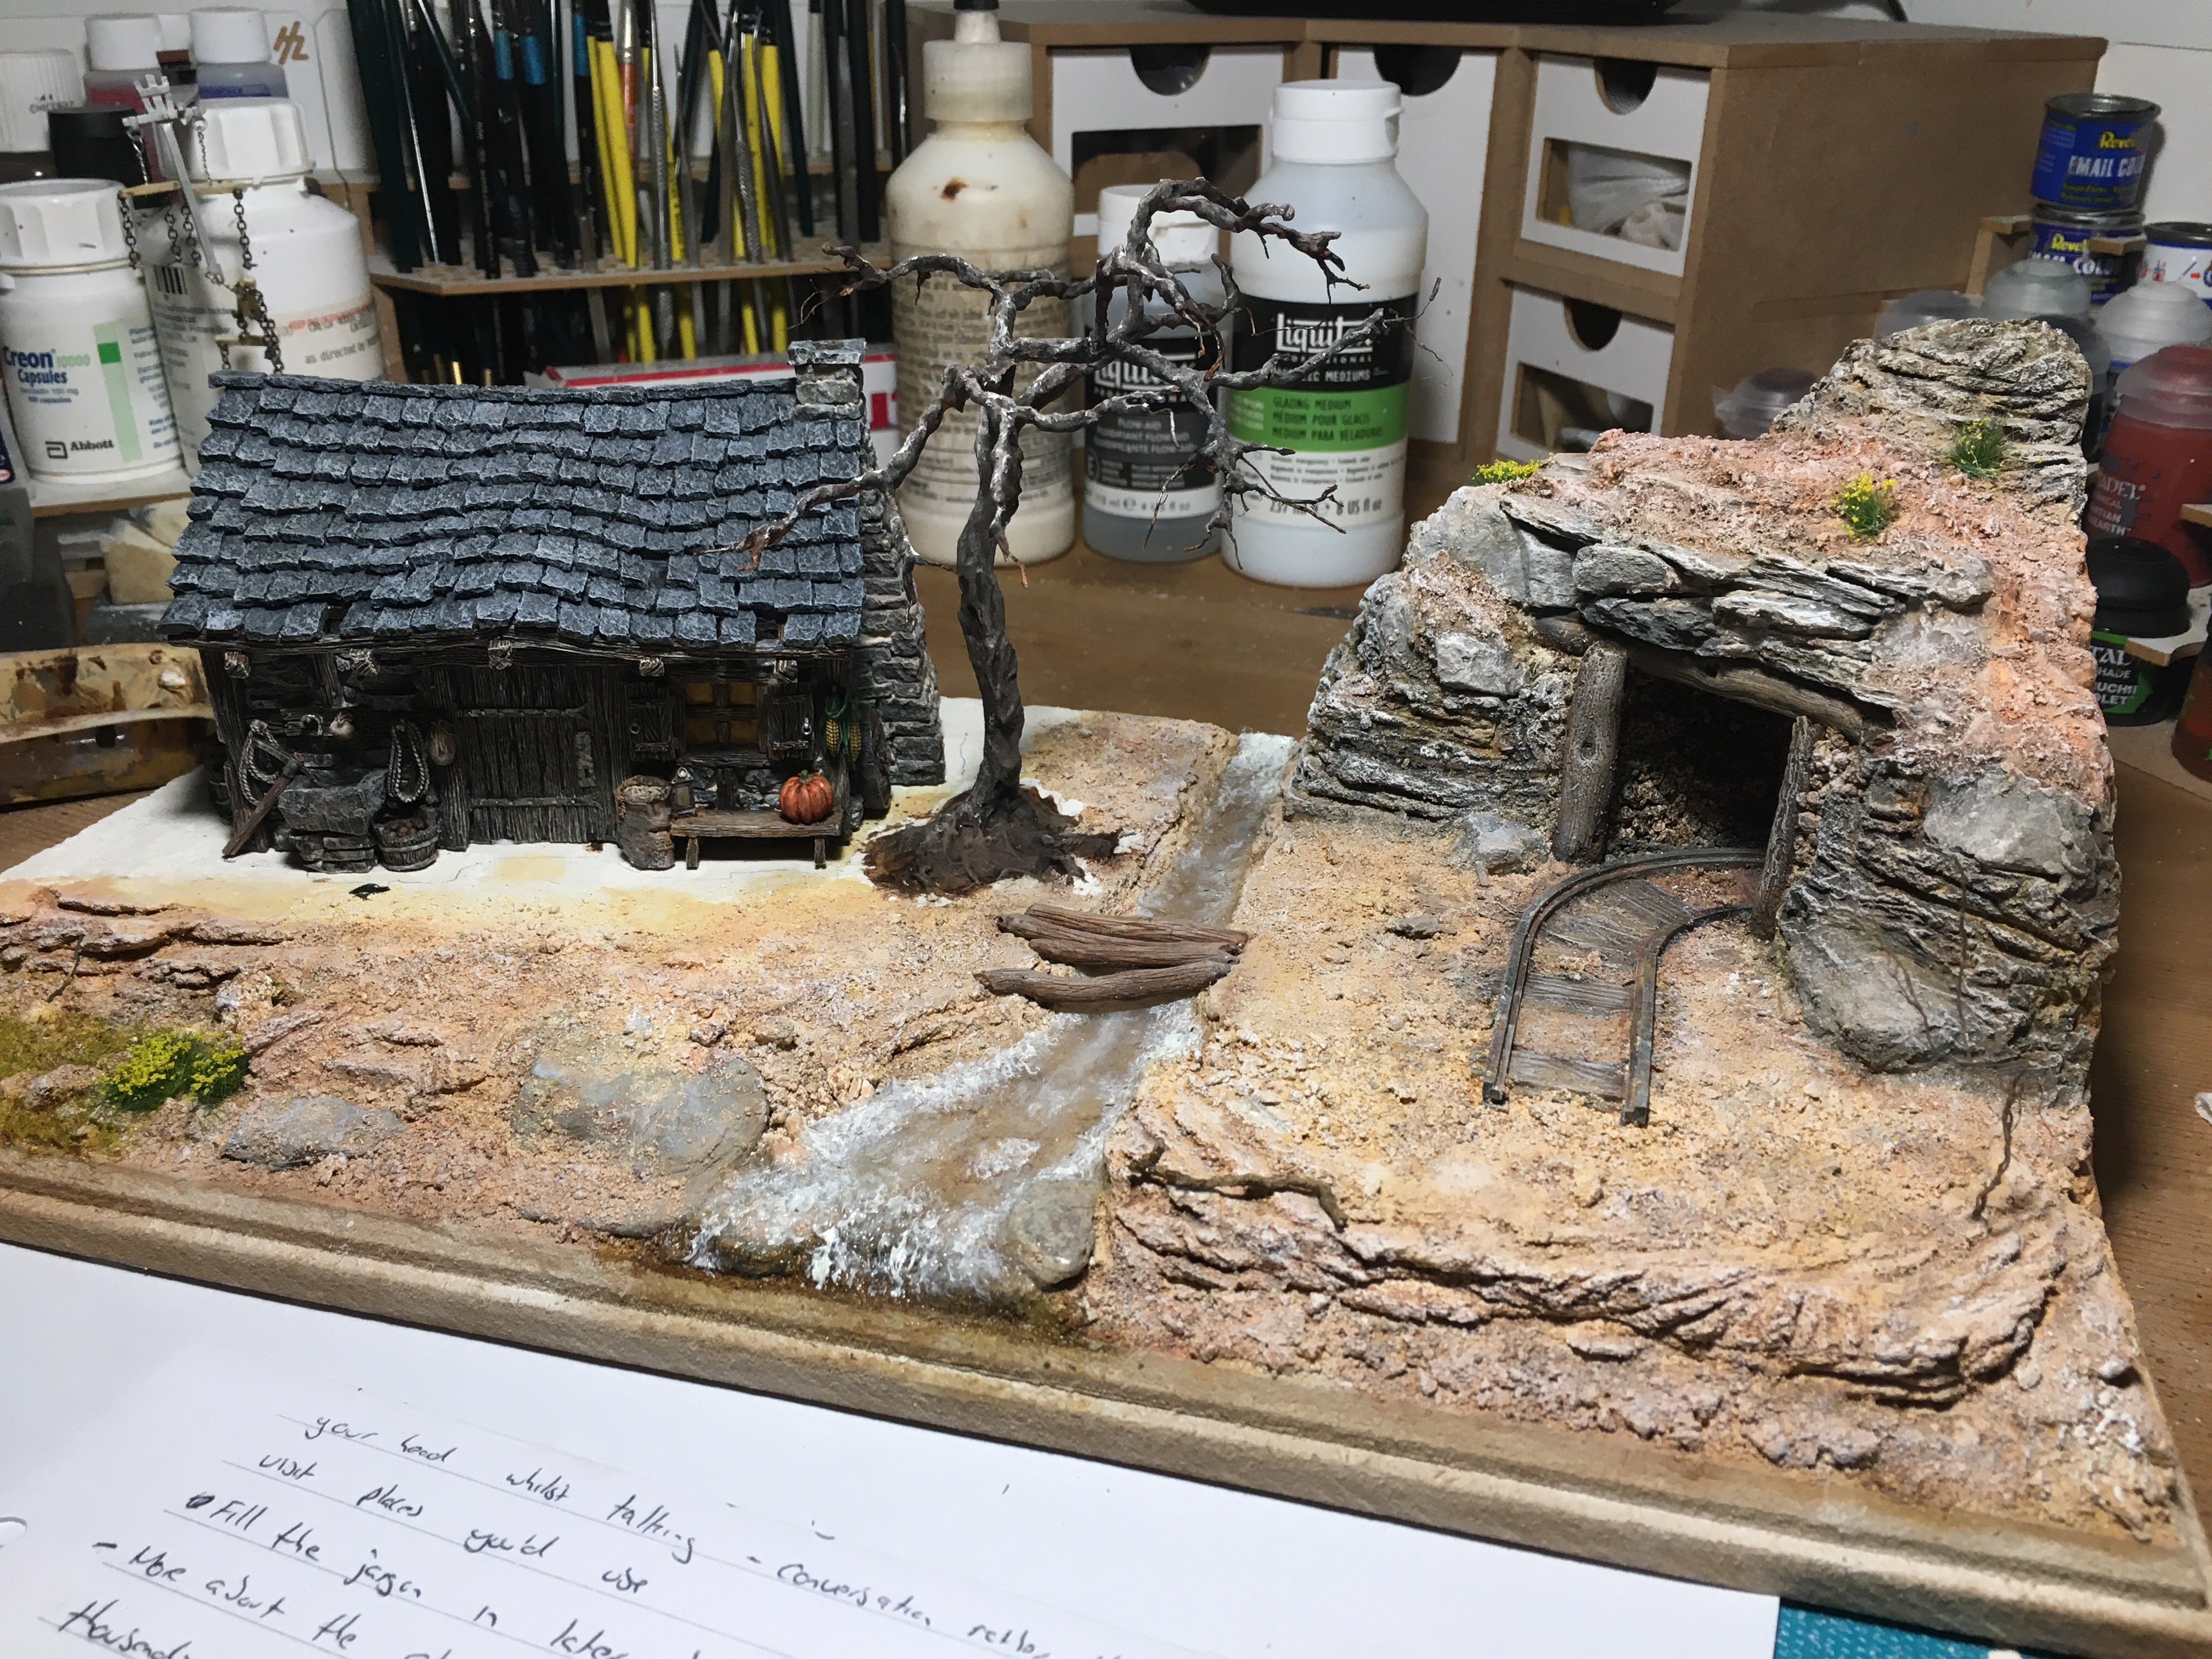
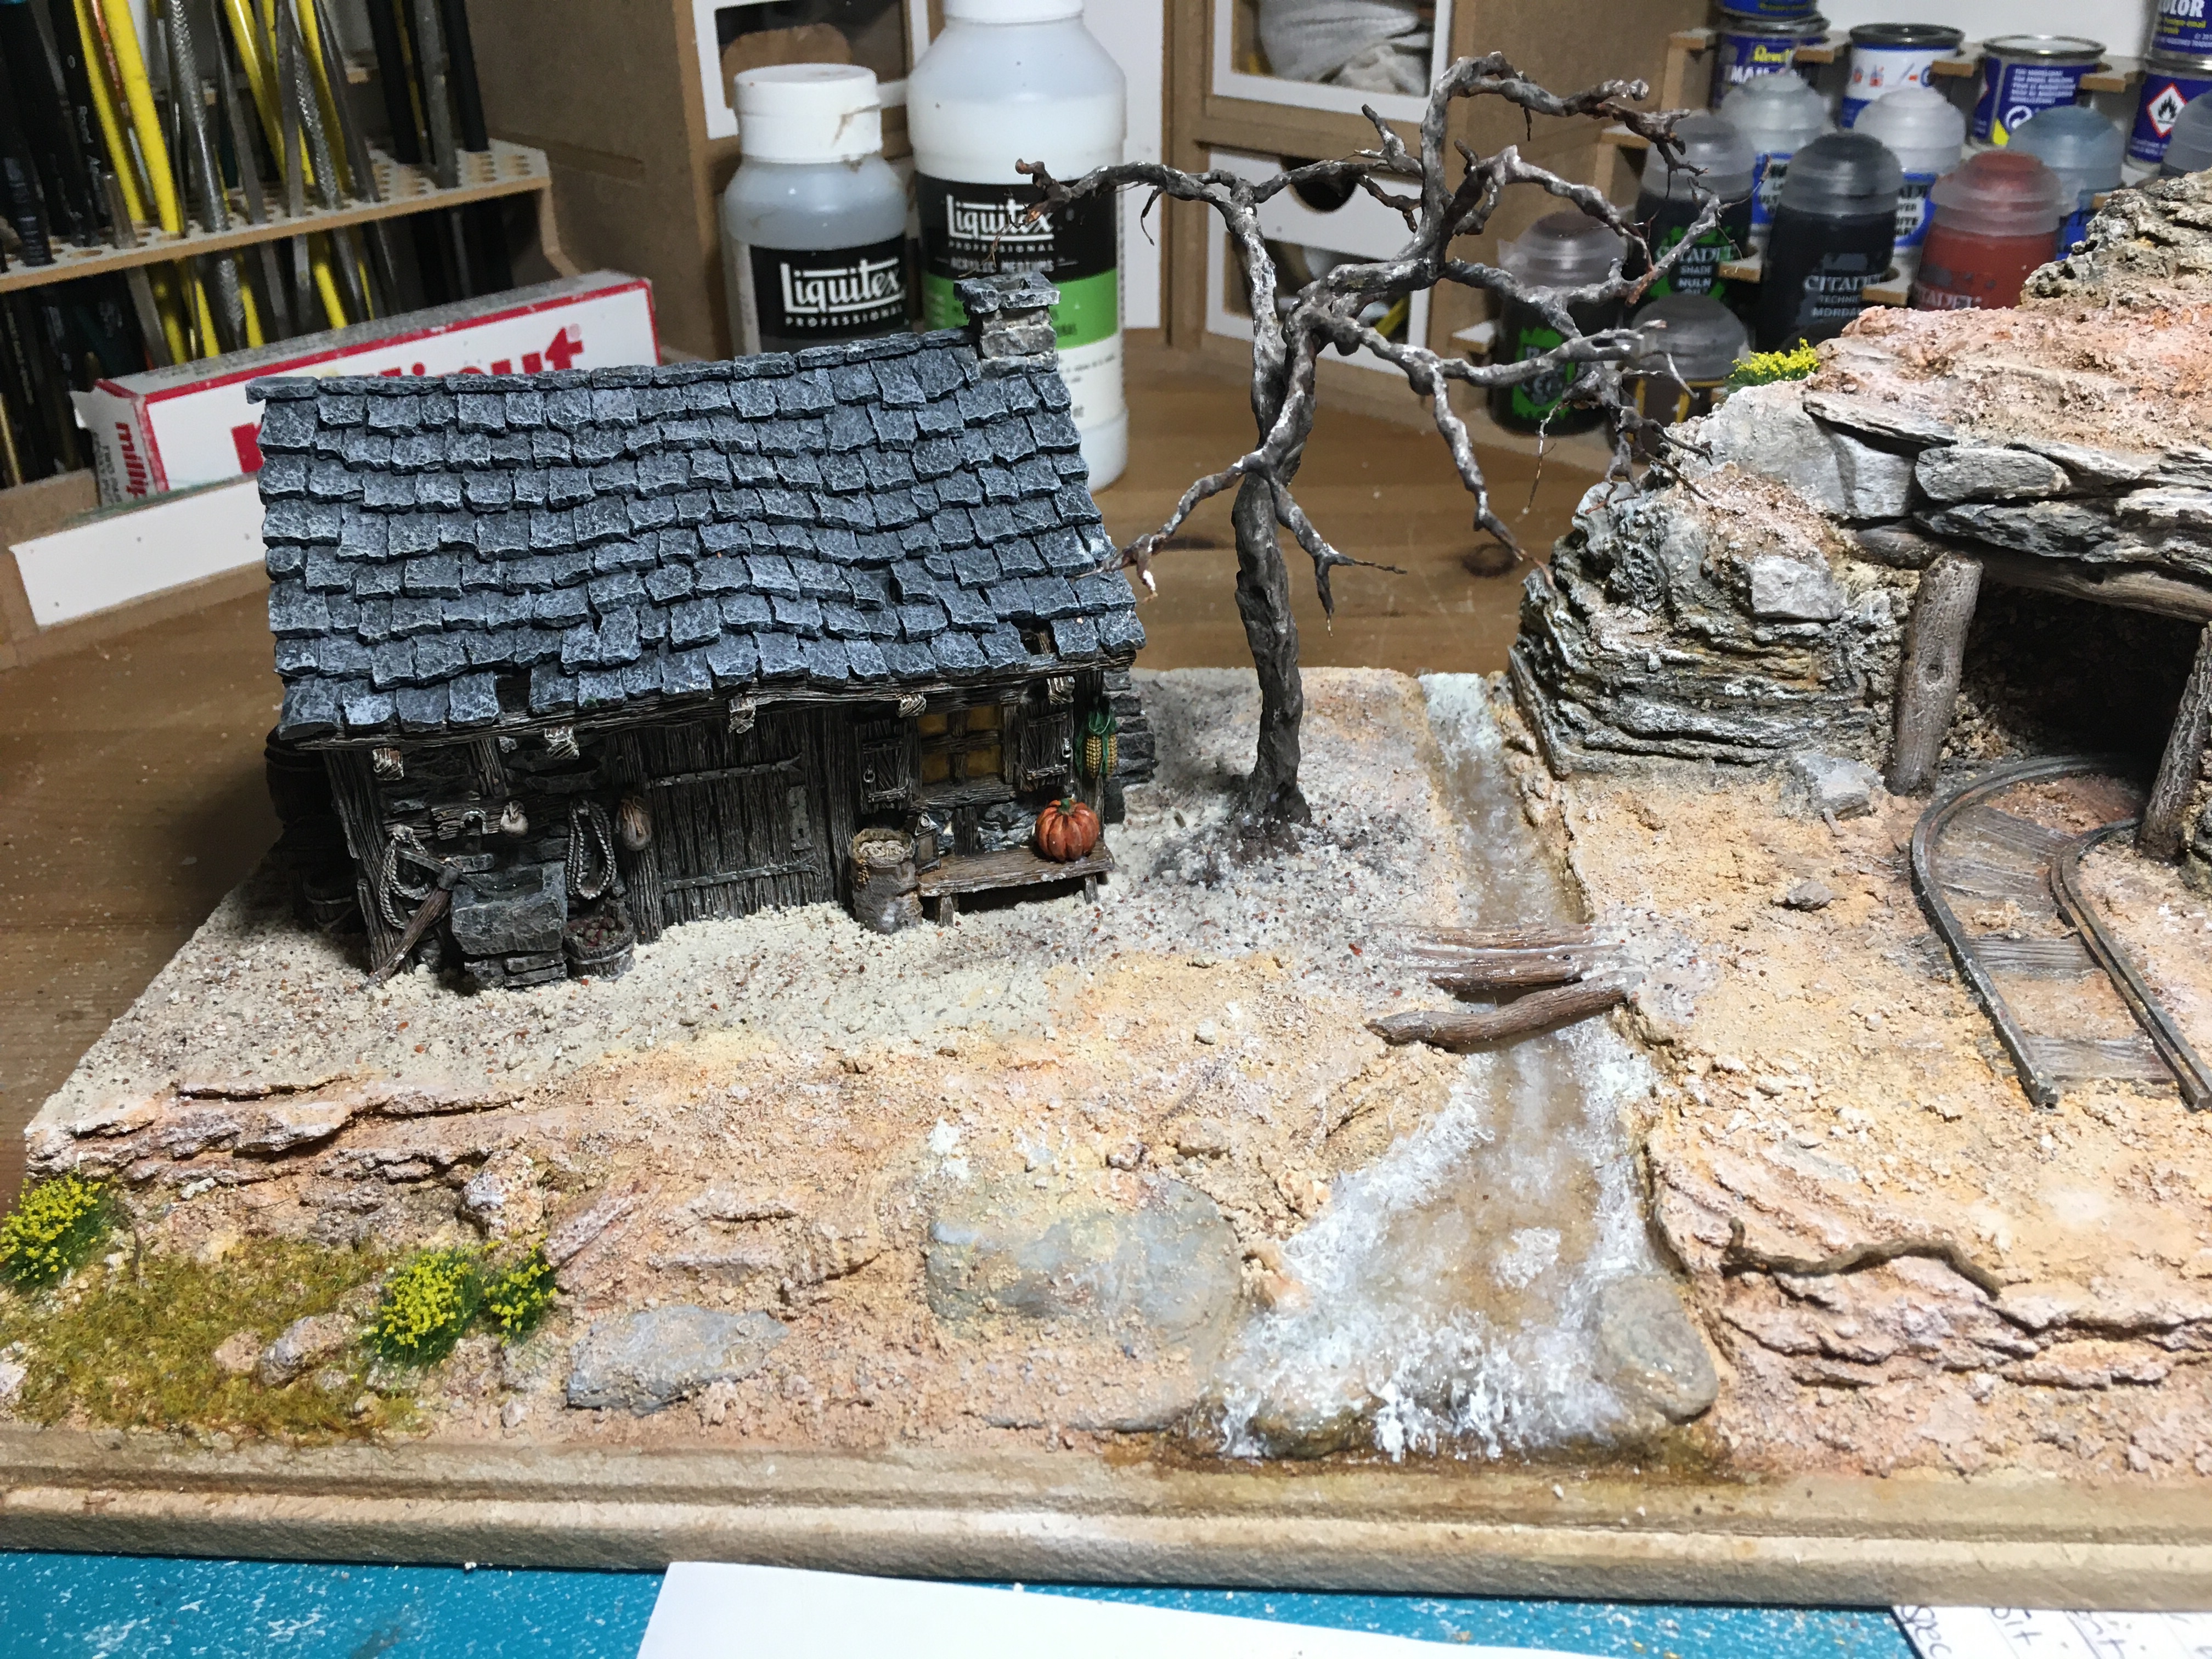
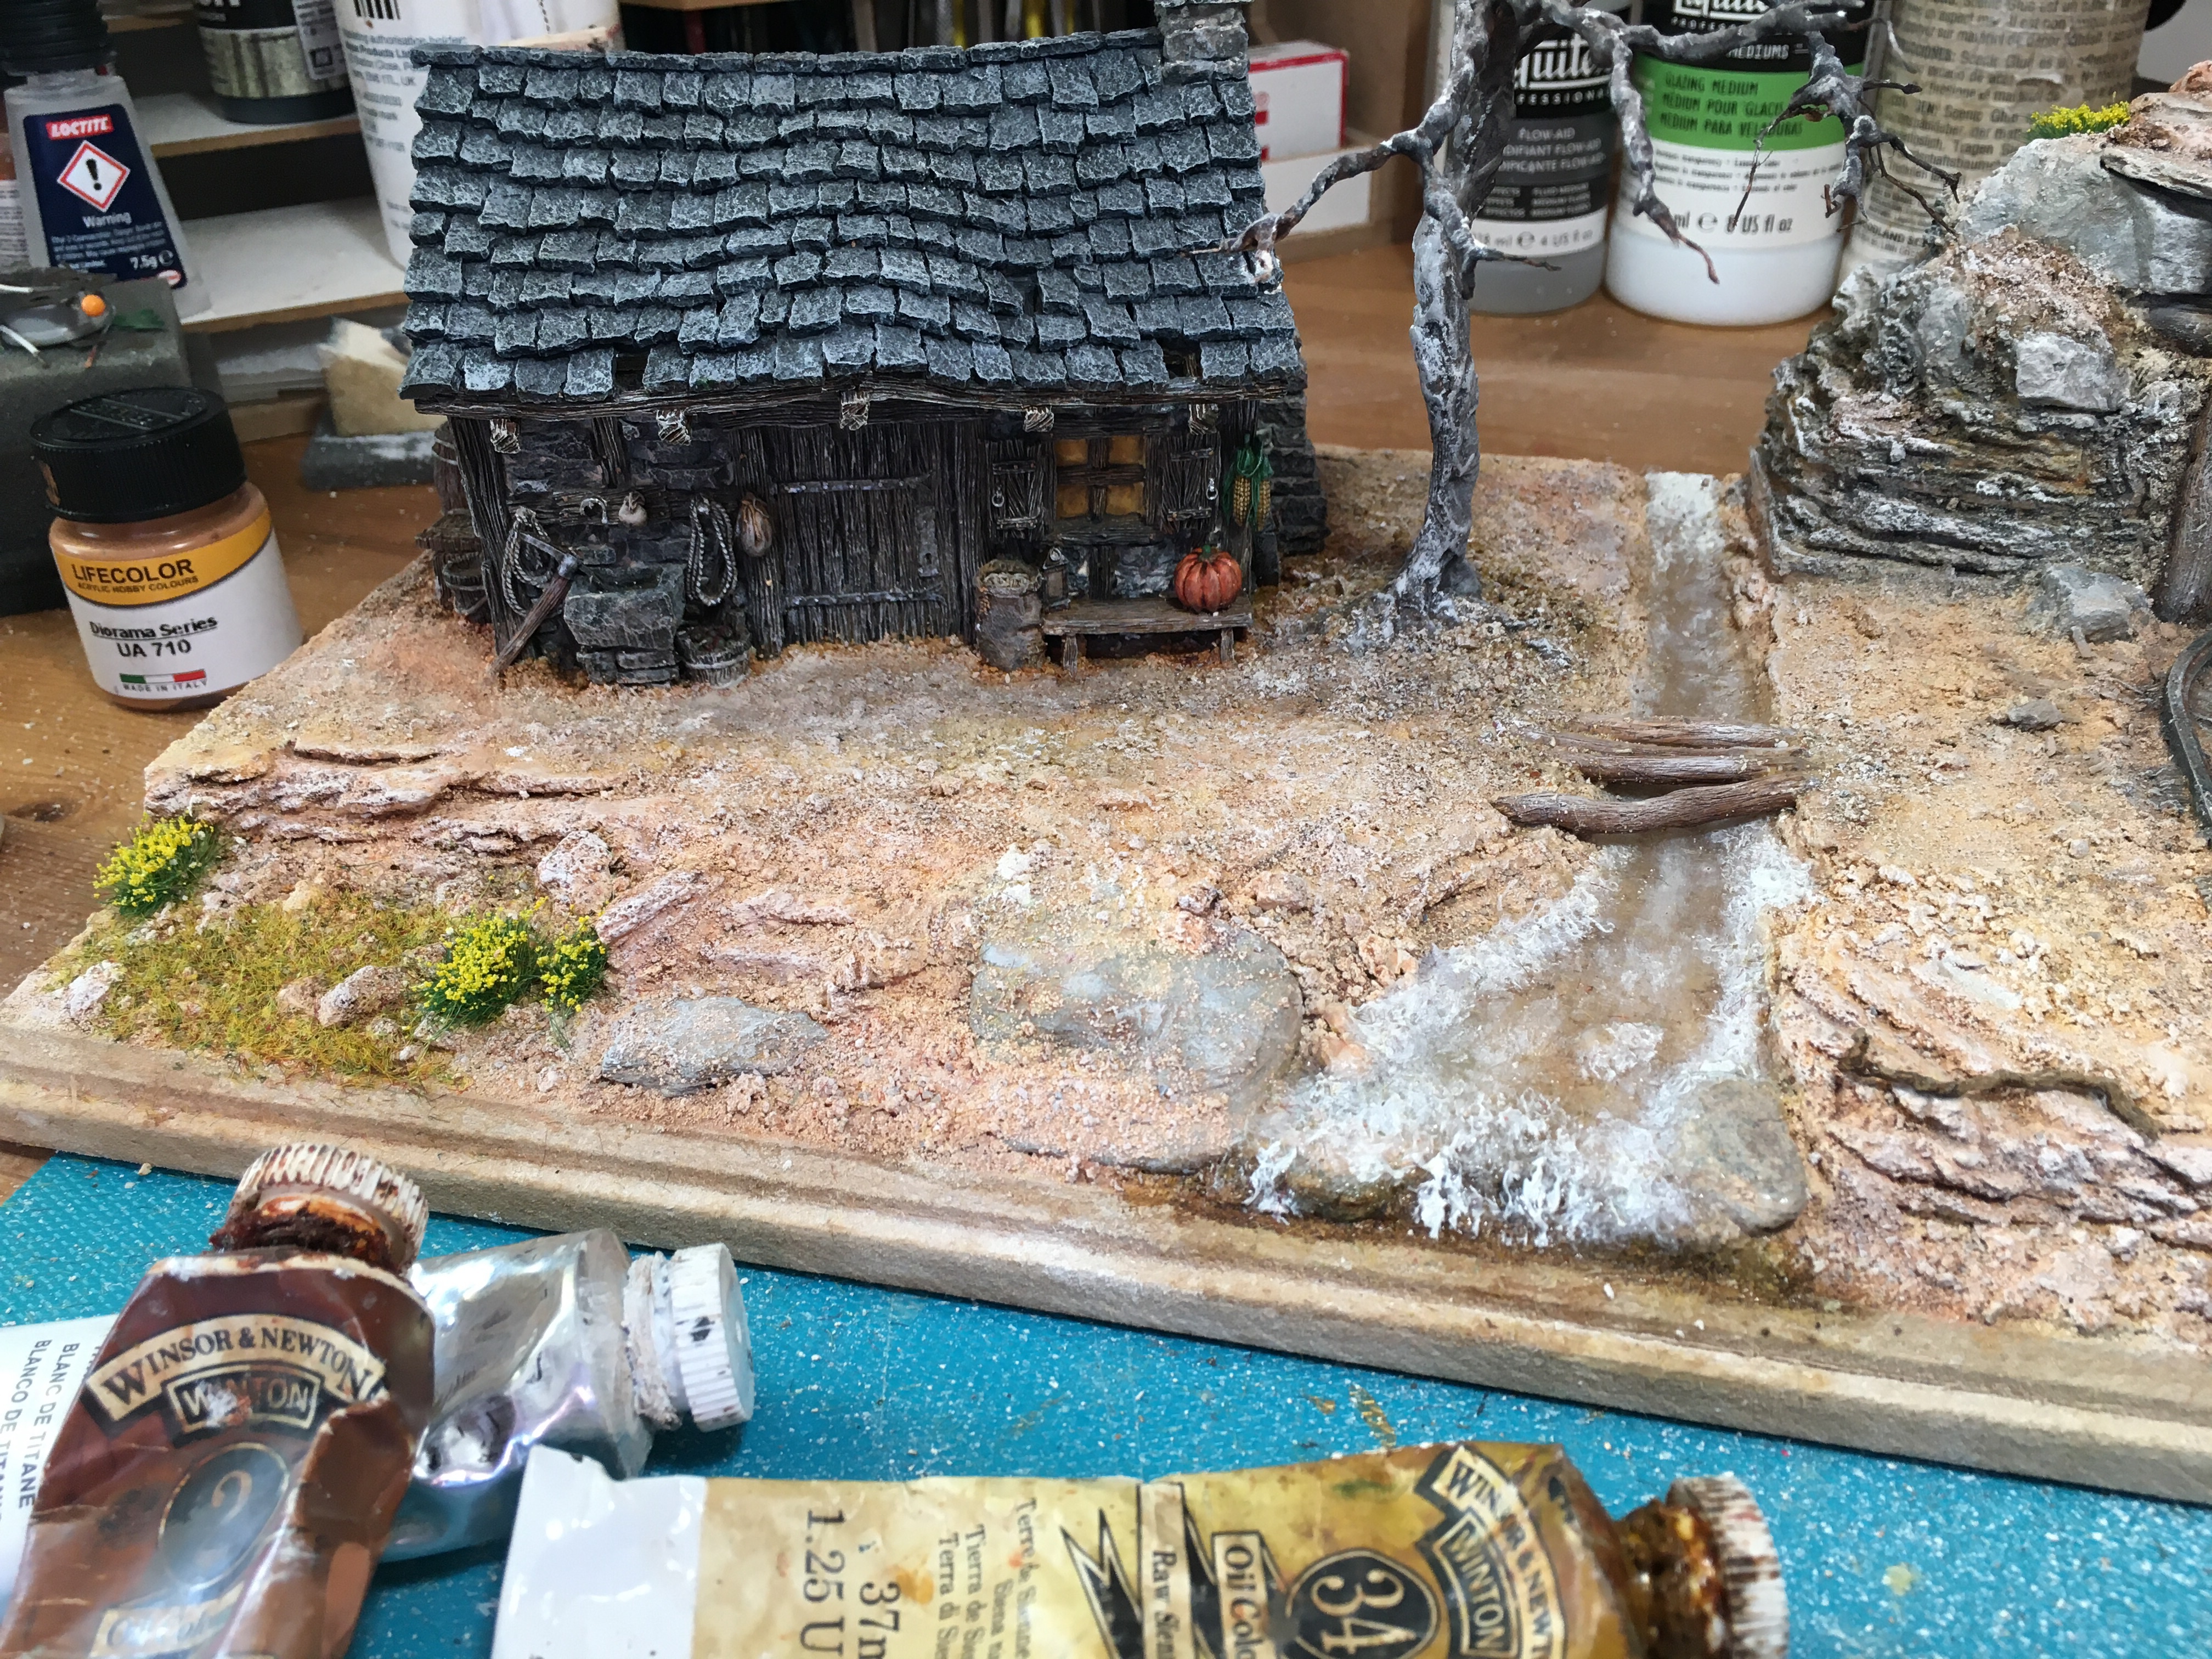
As impressive as this tower is I am hoping the base work when I get to it will be the making of this diorama along with the couple of figures I have planned.  Before I get started on them though there is a great deal more to do on the tower.

TIM

“Halvdan” – A 28mm Hasslefree Figure

Lockdown in the UK continues and will do so for some considerable time, weeks if not months.  As with the previous ones I am reliant on the hobby to help see me through the dark days.  The blog and the miniatures will hopefully keep me busy enough to pass the time until it is my turn to receive a vaccination and the prospect thereafter of a new world.  So far this strategy is proving to be successful and this week saw me pick up another Hasslefree figure to sink my teeth into.  

This little chap is from the Hasslefree fantasy human range and goes by the name of Halvdan.  When it comes to figures I do like a nice simple standing pose and the key feature of this one for me is the angle of the head.  The tilt might be minor but is makes such a big difference in my opinion.  To me the guy looks like he is tired, either from walking, fighting or working and is in a reflective mood.  A great sculpt I think and a joy to paint.

As for the painting and the base work I don’t have a great deal to say.  I went for muted colours and simply chose green because I had done a lot of blue lately!  That’s about as deep as my thinking goes at times.

Images below.

TIM

DSC_0783DSC_0785DSC_0786DSC_0787DSC_0784


Dio-Bolical Monday No: 10 – “The Wizard’s Tower” – Part 1

This week sees the start of a whole new diorama.  Where I will be going after this one is something I need to give a lot of consideration to.  I love doing dioramas but space really is an issue now so I need to get my head around the problem in the weeks ahead.  A return to much smaller models will probably be the solution but will they warrant a Monday Dio-Bolical post?  Maybe, maybe not.  My blog needs a review so perhaps this will be something I need to consider changing at some point in the future.  In any event there is no rush for a good few weeks yet.  Anyway I digress, back to the Wizard’s Tower.

For those of you who did not catch the very first Dio-Bolical Monday post back on the 23rd November 2019 this is the Table Top World model I’ve just started on.

Screenshot_20200923-084519

This is a big tower and will stand at over two feet tall once I get the base work done further down the line.  The kit itself compromises of about 30 pieces, 6 large bits and several little bits which make up the roped hand rail going up the steps.  Essentially when assembled the tower has three very specific parts – a base, a middle section and a top piece.

The good news is I have a clear idea of how I want this diorama to end up looking, the bad news is I still have to decide how best to approach doing the base work.  With so much painting to be done on the tower there is plenty of time to work things out though.  It is with this in mind that I decided I would begin by starting to paint the base and middle section.  However, the first hing I had to do was prime everything!  As is my way this was done using matt white enamel diluted with white spirit and brushed on.  Yes, yes I know a spray primer would have been quicker but it’s not my way and I besides I didn’t have any, added to which I was to impatient to wait for a delayed lockdown delivery to arrive.  Put simply I just wanted to get started now. 

Once everything was primed and left to dry I began to paint the base and middle section.  I needed to work on both these pieces at roughly the same time to ensure I got the colour matching across them both, particularly where they join. 

The image I am looking for is a dark one.  I want the tower to look imposing and dramatic, not something which looks like it featured in a Disney animation.  This determined my base colour of a dark grey.  Given the size of this beast using Vallejo bottled paints was never going to happen.  From the moment the model arrived and was unpacked I knew this was going to be a job for oils.  The level of detail on the kit, along with all its nooks and crannies, meant I needed paint that could really flow into these areas and oils diluted with white spirit has always worked for me.  Having adopted the same approach on the Table Top World cottage in my Fools Gold diorama I was confident this would work out OK. 

After priming and laying down the base colour it was all about different shades of grey, a little brown, some white and a fair bit of dry brushing.  All of which got me to this point.  The image below shows the base section brick work well on the way.

img_0760

Now strictly speaking there are three parts to the middle section.  The main two can be clearly seen in the first of the images below.  The third if you scroll up to the black and white picture above shows that at the end of the elevated walkway there is a second but much smaller little round roof turret.  Unfortunately the one of the four resin wooden struts which supports the roof was broken when the kit arrived.  In fairness it could have been fixed very easily but after a great deal of inner debate where I lost an argument with myself I decided I preferred the look of the tower without out it.  A bit of a gamble but by carefully removing the three remaining struts I can always add it back later if I decide to change my mind.

You will also notice from the images below that the middle section also has two doors, an upper and a lower one, and windows.  The windows were painted the same way I painted the windows on the cottage in Fools Gold – Part 4 using yellow with a wash applied over them.  This idea came from a YouTube video presented by “Real Terrian Hobbies and Goobertown Hobbies” the link to which can be found back in my Fools Gold post.  In due course I will use their render technique between the bricks again too.  I’ve managed to make a start on the wood and both the doors are more or less finished as well.

The last two pictures show the middle section mounted on the base.  It hasn’t been glued yet and most likely wont be because if I decide I like the end result enough and think it is good enough for a show it will be easier to transport.  The fit as you can see is perfect too.

img_0721img_0722img_0754img_0755img_0756img_0757img_0762img_0763

That’s it for this week.  A lot of work for one week, well for me at least but thoroughly enjoyed it.  I can’t promise to make that much progress every week.  That’s the thing with dioramas they don’t just happen over night and at some point I know I will end up going backwards rather than forwards.  Nevertheless a new journey has begun.

Now I need to think where I go from here.  I’ll probably continue with the top piece as I have already made a very small start on that as you can just see in one of the images above..  The brick work needs more attention too as well as weathering.

TIM

Shalelu, Elf Ranger – Reaper

This last week has seen my mood lifted for no reason whatsoever that I can put my finger on.  I would like to report that the weather in blighty has been fantastic, that I have had a Covid-19 vacine and that naked women have thrown themselves at me (again!) demanding that I make them with child.  Alas however none of this is true, well except the last bit, there is a bit of truth in that.  OK there isn’t, I’m lying.  In any event my spirits have lifted somewhat and for that I am grateful.

Reinvigorated for reasons unknown I settled down and painted this little female elf ranger from Reaper, a 28mm figure who goes by the name of Shalelu.  I rather liked painting this one and decided there was a bit of an opportunity for some freehand work on the back of her cloak.  Just a few squiggles really but I felt they provided a bit of interest.

Images below.

TIM

DSC_0676DSC_0677DSC_0678DSC_0679DSC_0680DSC_0681

Dio-Bolical Monday No: 9 – “Fools Gold” – Part 8 – Final

This week was mainly about getting the figure painted before making some very small and final additions (such as a few twigs and a skull) before taking photos of the finished diorama.  I do find it very satisfying that you can take a few bits of old crap and turn them into something else entirely.  I must give another shout out to Table Top World, the cottage truly is a stunning kit and I can’t wait to get started now on the Wizard Tower.

The central character to this diorama is a Reaper Chronoscope figure which goes by the name of Crazy Pete.  It’s a figure I have had an eye on for a while but hadn’t decided exactly what to do with him.  Then as things do an idea started to form and then as they say the rest is history.

image

Holding a nugget and doing a jig gave rise to the title of the diorama.  Did Pete discover pure gold or fools gold?  Did he die a wealthy man in luxury or is he buried up in them there hills a broken sole?  Well I will leave that for you to decide.  Meanwhile images of the completed diorama, taken mostly outside for some natural light, appear below.

Thank you for your perseverance I hope you have enjoyed following the build.

Next week I will get started on the Wizard Tower.

TIM

img_0896img_0901img_0902img_0888img_0914img_0913img_0908img_0916img_0904img_0917img_0903img_0919img_0918img_0905img_0906img_0912img_0911

“Alain” – A 28mm Iconic Cavalier by Reaper (Final)

Welcome to this weeks Miniatures & Musings!

—000—

This week I managed to finish “Alain”, the 28mm Iconic Cavalier by Reaper which I had started painting the face on last week.  This represents my first figure for 2021 and therefore my entry into Ann’s challenge.

The figure provided an opportunity for a little free hand work on the shield, front and back, in the form of a couple of crosses.  As the figure had quite a lot going on and a fair bit of detail I decided to keep the base work simple.

Images below.

TIM

DSC_0755DSC_0756DSC_0759DSC_0757DSC_0758

Dio-Bolical Monday No: 8 – “Fools Gold” – Part 7

This week I fixed the cabin in place and set about getting the groundwork done around it and the tree.

img_0879img_0880

That was followed once it was dry by getting the groundwork painted and making sure it blended  in with what I had done already.

img_0884

A few more plants and leaves were added for colour and visual effect.  The pumpkin on the bench outside the cottage dictated autumn and so I went with leaves on the ground rather than just a few on my deadish looking tree.  I also started to paint the edge of the base to tidy things up a bit.

img_0888img_0885

The final touch for this week was adding a barrel, some rubble and planks.  Some more rubble needs to be painted and I have a couple of boxes to add on as well as a steers skull but these will be finishing touches for next week.

img_0887img_0886

All being well I will get the figure painted up for next week and that will complete the diorama.

TIM

“Alain” – A 28mm Iconic Cavalier by Reaper (WIP Post)

Before, during and after Christmas, as well as after the New Year, I have barely picked up a brush.  My routine such as I had one went out of the window and I simply got lazier and lazier.  I managed to maintain a slight grip on my “Fools Gold” diorama and to some extent the blog but that is as far as it went.  When I finally picked up a brush I realised I had ran out of time to get a figure done for this Saturday’s post.  Accordingly, and for the first time in I don’t know how long, I was confronted with a blog dilemma, do I not post at all or do I try and make a post out of what I have done to date? 

I decided against no post at all.  I could hear the cries of “thank goodness TIM hasn’t posted, we will get a few days respite!” and concluded that annoying you all was more important to me than I realised!

So, what I have I got for you?  Well let me start by saying this is not a tutorial, it is however a brief guide on how I paint faces.  As you will know I am sure, there a great many ways to paint faces and painters far better than I am have tutorials on YouTube that you can follow and replicate.    If this post is of any use then all well an good but other wise it is just a work in progress.  Next week I will hopefully have the figure completed.

As I have mentioned before I prime using White Matt Enamel paint, Humbrol or Revel, diluted a little using white spirit.  The face paints I use are from “Lifecolor” and the set of six I bought comprise of Flesh Base 1 & 2, Flesh Shadow 1 & 2 and Flesh Light 1 & 2.  The first image below shows Flesh Base 2 having been applied.  Please allow for the fact these images appear at 6 times or more bigger than the head of the real figure.

img_0920

Next using Black, Vallejo in this case, I block out the eyes and apply a thin line to the mouth.  I don’t concern myself if I have gone outside of the lines as that will be tidied up in due course.

img_0922

Next I paint the whites of the eyes.  Any white will do, I don’t get excited about an exact colour, perhaps I should but I don’t.  This white was again a Vallejo colour.

img_0924

Pupils come next and again I use black.  I try to take account of where the figure is looking and position the pupil accordingly.

img_0926

Time now to tidy up the black around the eyes using the base colour again and then, using the darker of the two shadow colours, outline the areas which need to be darker – around the eyes, hair line, neck, chin and nose.

img_0930

The next image is a little blurred but at this point I am using the lighter base colour to start the highlights – forehead, chin and cheeks.

img_0934

The next level of highlight is added to the same areas above.  

img_0936

Finally some near white to the nose, corner of the eyes and chin plus a little Old Rose Vallejo paint to the bottom lip.  

img_0938

Now the images on my Samsung Tablet show the head way larger than in reality (as mentioned above already), accordingly the end result looks far from great but in normal eyesight mode the exaggerated lines provide good definition.  Hopefully the finished model will demonstrate that next week but if not then I will go back and touch a couple of bits up.  That forehead is looking a bit to white as things currently stand.

Meanwhile I need to get my act together as this is not a great start to the New Year.  I have lots to paint and do and shrugging off the festivities and establishing some sort of routine is a must.  There are challenges on the horizon and my arse is not in gear for anything right now.

TIM 

Dio-Bolical Monday No: 7 – “Fools Gold” – Part 6

This week work began on the stream.

I have done water effects before several times but have always used products from Woodland Scenics.  This time I decided to try something different.  Thinking ahead to when I do the Wizard’s Tower I know the Woodland Scenics materials won’t work for what I am thinking of doing so after scrolling through YouTube I settled on using the materials demonstrated by Luke at Geek Gaming.

For this diorama I kept things simple.  I didn’t want a dramatic look so to some extent the effect is a little lost.  The important thing is the material works and I can tell already that this will be the stuff I use on the Wizard’s Tower base.  The white you see in the image below is Woodland Scenics water effects added on top to add a few ripples and to see if the products could be combined and work.  They do.

img_0869

Once the water effects dried it was time for a little white dry brush to bring out the ripples.  Once that was done I painted up the logs and fixed them in position.  Later they would get a dry brush too.

img_0871

Time now to think ground work and tree.  It always amazes me how much difference even a small amount of grass and a shrubs make.  Introducing some Green to all the shades of brown works nicely for me.

The wire aperture for the tree was put in place and bedded into some Milliput and then left to harden.

img_0873

Next step was to get the wire aperture covered in a PVA and filler mix.  This was then left to dry before painting.  Oils were used for painting the tree and further dry brushing will be applied in due course.  I’m not looking to add more in the way of branches to the tree.  A dead-ish looking appearance is what I am after and besides I want it to complement the mine and the cabin and not dominate the scene.

img_0876img_0877

That’s it for this week.  Too much else going on right now but for the next post I hope to have the Cabin in situ, ground work and debris added and some miscellaneous bits and bobs such as barrels, planks, boxes and rubble added.

TIM

TIM’s Review of 2020

As I welcome in the New Year of 2021 and the optimism of a vaccination and a return to some normality I thought it appropriate to reflect on the year that will forever be known to me (and others?) as “Fucking 2020”.  In summary, the best thing about the year 2020 by far is it is fucking over and I didn’t die.

DSC_0608

And so it’s goodbye to 2020! 

What else didn’t I do in 2020?  Well I didn’t go to any modelling shows, including Salute in April and Telford in November, both of which were inked in my diary as major events I was looking forward to enormously.   I didn’t go to France and I didn’t go to Norway on holiday.  My two trips to London were cancelled so I didn’t get to take my daughter to the Tutankhamen exhibition at the Satchi museum or to see a West End show and countless other things we had arranged.  In fact everything I had planned didn’t happen.

I did get to spend most of my time at home.  I did get to experience home delivery grocery shopping, queuing up, social distancing and pretending to be Batman while wearing a mask.  I did manage to spend lots of time claiming financial refunds for things I was looking forward to doing but which had to be cancelled and I did get a lot of jobs done around the house until I ran out of materials.

Unfortunately the pandemic is set to role into 2021 but with talk of vaccines in the pipe line there is at least some light at the end of the tunnel.  The New Year is a separate topic though so back to 2020 and the year that was or should that be wasn’t?

On the positive side of things there was never a better time to be a figure painter and modeller (once things settled down and the supply chains were properly working again).  Stuck in doors with nowhere to go the hobby took on whole new meaning, not just for me but for a great many others who got back into it for something to do.  I enjoyed the quiet roads and the greater freedom that provided for walking the dog and having the kids at home from work and school made for some great family time, particularly during the summer when we enjoyed some fantastic weather.

My biggest disappointed was learning that I shared this world with a far higher percentage of morons than I ever realised but the one big thing I will take from 2020 is “perspective”.  Life is far to short to worry about the trivial shit and in the blink of an eye you are old before you know it.  If you don’t relate to that yet then it is because you are to young but trust me when I say you will come to learn it is a truism in due course.  The point is I now have a different outlook on life and once things settle down again, as I am sure they inevitably will, then as long as I survive then the time for even greater life changes will have arrived.

Reflecting specifically on the hobby what do I consider my personal highlights to have been?  Well there haven’t been many to be honest but let’s start with a few of the things I did which provided the most pleasure.

First up is “Viharis Tenspire” a wizard that I painted for Ann’s Challenge back in March followed by a diorama I called “OMG!” which was intended for shows and Telford in particular but alas wasn’t meant to be.  In May I put together the ever topical “Covid-19: Lockdown Breakout” and during July I got into doing some knights, something I hadn’t done in a long time, concluding with a little vignette called “Knights Hospitaller“.  An odd choice I suspect in the eyes of many but my personal favourite was Zonkers: Killer Klown which I posted in November purely for the time it took me and the amount of freehand work I put into it.  There were plenty of other figures of course and aside from a few I wasn’t happy with I would have to say that in the main I enjoyed what I painted.  It could be argued that 2020 wasn’t a bad year in that respect.

Moving on from the painting side of things the Blog continued to be fun and not long ago I went down the route of acquiring my own domain.  As ever some of the banter was excellent and it remains the most important part of blogging for me and others too from what I have read and seen.  It was great to expand that group with some new followers and am delighted to be in contact with Roger, Dave Stone, Deturnation and Kuribo in addition to all the long standing reprobates from around the world.

Statistically this has been my best year since starting the blog although I do wonder how much that has been influenced by the Covid-19 imposed lockdown.  I don’t put to much store by them but I wont pretend seeing the views go up and gaining a few more followers isn’t rewarding.  My personal statistical favorite is when my blog gets viewed by someone in a country where I haven’t had a view before.  Currently my blog has been seen in 74 countries and of all the statistics available this one blows me away.

Finally I cannot conclude this post without making reference to my Hobby son, IRO.  My podcast interview with him whilst doubtless dull and boring to those who listened was a highlight of the year and one which can only be improved upon by a physical meet and copious amounts of alcohol.  Here’s to that day.

Happy New Year everyone and I will leave you with a few images of the models referenced above.

TIM


DSC_0603 (2)DSC_0584 (2)DSC_0660DSC_0646DSC_0659DSC_0652